
- SAP Community
- Products and Technology
- Technology
- Technology Blogs by SAP
- How to create CDS entities in SAP Business Applica...
Technology Blogs by SAP
Learn how to extend and personalize SAP applications. Follow the SAP technology blog for insights into SAP BTP, ABAP, SAP Analytics Cloud, SAP HANA, and more.
Turn on suggestions
Auto-suggest helps you quickly narrow down your search results by suggesting possible matches as you type.
Showing results for
Product and Topic Expert
Options
- Subscribe to RSS Feed
- Mark as New
- Mark as Read
- Bookmark
- Subscribe
- Printer Friendly Page
- Report Inappropriate Content
09-24-2020
4:19 PM
Introduction
This blog is continuation of my previous blog https://blogs.sap.com/2020/08/21/how-to-connect-to-sap-business-application-studio/ wherein I showed how to launch SAP Business Application Studio from SAP HANA Cloud and how to create a dev space to work in SAP Business Application Studio.
In this blog I’ll show you how to create CDS entities in SAP Business Application Studio. In SAP HANA a CDS entity is a table that is organized into columns and rows with predefined data types for each column.
Steps to create CDS Entities
First step is to create a new application in a Workspace.
2. You see a User $ prompt appears in the bottom section of the screen as shown below.
3. Type the command cd projects to go to projects $ prompt.
4. Now let us create a application test1. The command to create a application is cds init test1. Syntax is cds init <application_name>
5. Go to File menu and select the option Open Workspace.
6. You see that the application test1 that you created in step 4 above appears here. Select it and click on Open.
7. The below screen shows that you are in the workspace for the application Test1.
8. Again go to Terminal menu and select the option New Terminal. You do this every time you want to launch a terminal in SAP Business Application Studio.
9. Now the command prompt in the terminal changes to test1 $ as shown in the screen below.
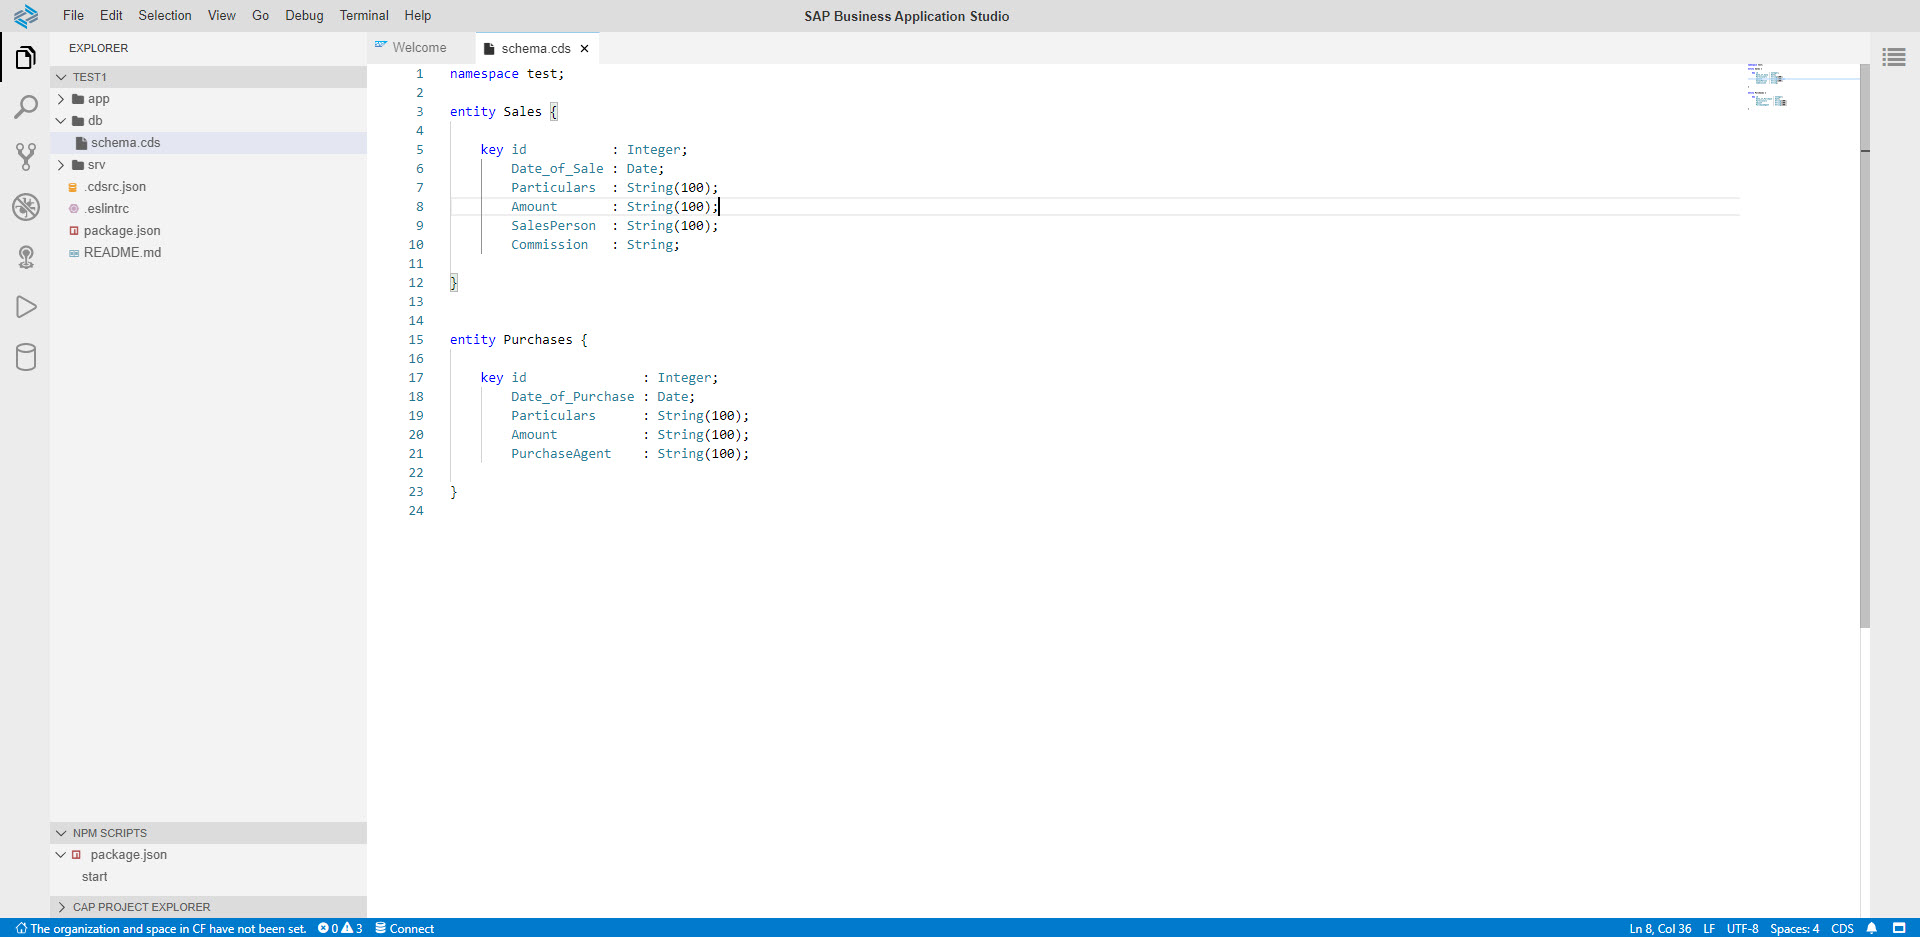
10. Let us now see how to create a CDS entity. Now on the left pane under Explorer menu, right click on the db folder and select the option New File to create a new file named schema.cds.
11. The file schema.cds is created by right clicking on db folder and selecting the option New File.
Give the name as schema.cds. In schema.cds window you create and define the actual CDS entities. In this example I’ve created two CDS entities Sales and Purchases. Following is the syntax to create a CDS entity.
namespace <namespace_name>;
entity <entity_name> {
Key id : Integer; ------ One of the fields in the entity has to be defined as a Key. Here I've used the field id as my key field.
Field1: field1 data type;
Field2: field 2 data type;
Field n: field n data type;
}
Code for the CDS entities I created in this blog
namespace test;
entity Sales {
key id : Integer;
Date_of_Sale : Date; ---------------- Date should be entered in the format YYYY-MM-DD
Particulars : String(100);
Amount : String(100);
SalesPerson: String(100);
Commission: String;
}
entity Purchases {
key id : Integer;
Date_of_Purchase : Date; ---------------- Date should be entered in the format YYYY-MM-DD
Particulars : String(100);
Amount : String(100);
PurchaseAgent: String(100);
}
To arrange code in a legible manner, right click on the white space and select the option "Format document".
The code appears as shown in the below screen after selecting the option Format document.
12. Save the code. In terminal window enter the command cds watch and hit enter key. A popup appears with the message “ A service is listening to port 4004” with the button Open in New Tab. Hit on the button Open in New Tab.
13. After typing the cds watch command having defined the cds entities, the message appears as shown in the screen below, saying No service definitions found in loaded models. This means that the loaded models which are the CDS entities do not have a service layer defined with which they can connect to. Hence our next step is to define a service layer.
14. Now let us create a service layer. Right click on the srv folder on the left pane and select the option New File to create a new file called project.cds. Service layer is created under srv folder. This will expose the CDS entities as an odata service.
I need to add a service layer to talk to the entities that I’ve created in db layer. Add the following code to the service layer. To create a service layer, right click on srv folder and choose the option New File. In this case I’ve named the file as project.cds. Enter the following code in the project.cds window.
Code for Service layer - project.cds file
using {test} from '../db/schema';
service project { [service is the keyword project is the name of the service. Here I am using the two entities that I created in schema.cds.]
Code for service layer should appear as shown in the screen below.
Code for service layer - project.cds file
using {test} from '../db/schema';
service project {
entity Sales as select from test.Sales;
entity Purchases as select from test.Purchases;
}
[syntax for the above two lines is entity entity_name as select from namespace.entityname;]
15. On hitting the Open in New Tab button the screen shown below appears showing Purchases and Sales tables/entities that we created above. Click on Purchases and Sales link shown below to see the tables. At this point of time it is blank as we have not entered yet any records into these tables.
16. The code in project.cds window should appear as shown in the below screen. Save this code and you should see the messages as shown in the lower section of the terminal window that the model has been loaded from 2 files db/schema.cds and srv/project.cds and that they have been deployed to sqlite in-memory database. By default, the entities that you create are stored in sql lite database. You can change it to SAP Hana database. This is shown in the steps later in this blog below.
16. Now let us see how to load data into these two tables that we created above.
17. The syntax for the .csv file names is namespace.entityname.csv. So if my namespace is test and entity name is Sales then the .CSV file name will be test.Sales.csv. These .csv files will be created in data folder.
18. Below screen showing creation of Purchases.csv file. Always your .csv file should be prefixed with namespace. In this case name of the namespace is test hence I've prefixed it with test and the file name is test.Purchases.csv.
19. Here is the data I've used in my Sales and Purchases CDS entities. Copy and paste this data in Sales and Purchases entities respectively. Then save it.
Data for Sales.csv file
id;Date_of_Sale;Particulars;Amount;SalesPerson;Commission
100;2020-04-15;Book;Rs. 550;Ajay;Rs. 55
200;2020-04-18;Pencil box;Rs. 110;Vijay;Rs. 10
300;2020-04-25;Pens;Rs. 200;Ramesh;Rs. 60
400;2020-05-15;Erasers;Rs. 75;Suresh;Rs. 5
Data for Purchase.csv file
id;Date_of_Purchase;Particulars;Amount;PurchaseAgent
100;2020-02-02;LEDBulbs;Rs650;Raghupati
110;2020-03-15;Tubelightsx;Rs110;Raghava
120;2020-04-09;Cables;Rs00;Raja
130;2020-05-16;Fans;Rs75;Ram
20. Now type the cds watch command again and then click on the "Open in New Tab" button on the popup "A service is listening to port 4004” that appears on the lower right corner.
You should now see the CDS entities that you created above, as shown in the screen below.

21. On clicking Purchases and sales links the data loaded in the two entities appears as shown in the below two screens.
22. Now return to SAP Business Application Studio and in the terminal type the command cds add hana. You should see a message that says "adding feature(s) to project in current folder and adding feature 'hana'.... as shown in the screen below. This command changes your database type from sqlite to hana database.
Conclusion
These are the steps to create CDS entities in SAP Business Application Studio and change the database type from sqlite to HANA database.
Additional Information
For more information on how to work with SAP Business Application Studio you may also refer to the videos published in this link.
https://www.youtube.com/watch?v=vI1c7ZHvMec&list=PLKSPsENL3CxyZk37Jrv1Ve40_n8_gPier
https://github.com/SAP-samples/sap-devtoberfest-2020/tree/master/topics/cap
https://www.youtube.com/user/sapdevs
https://github.com/SAP-samples/cloud-cap-samples
Free Open Course : https://open.sap.com/courses/cp7/
Please share your feedback about this blog.
This blog is continuation of my previous blog https://blogs.sap.com/2020/08/21/how-to-connect-to-sap-business-application-studio/ wherein I showed how to launch SAP Business Application Studio from SAP HANA Cloud and how to create a dev space to work in SAP Business Application Studio.
In this blog I’ll show you how to create CDS entities in SAP Business Application Studio. In SAP HANA a CDS entity is a table that is organized into columns and rows with predefined data types for each column.
Steps to create CDS Entities
First step is to create a new application in a Workspace.
- Go to Terminal menu and select the option New Terminal

2. You see a User $ prompt appears in the bottom section of the screen as shown below.

user$ prompt
3. Type the command cd projects to go to projects $ prompt.
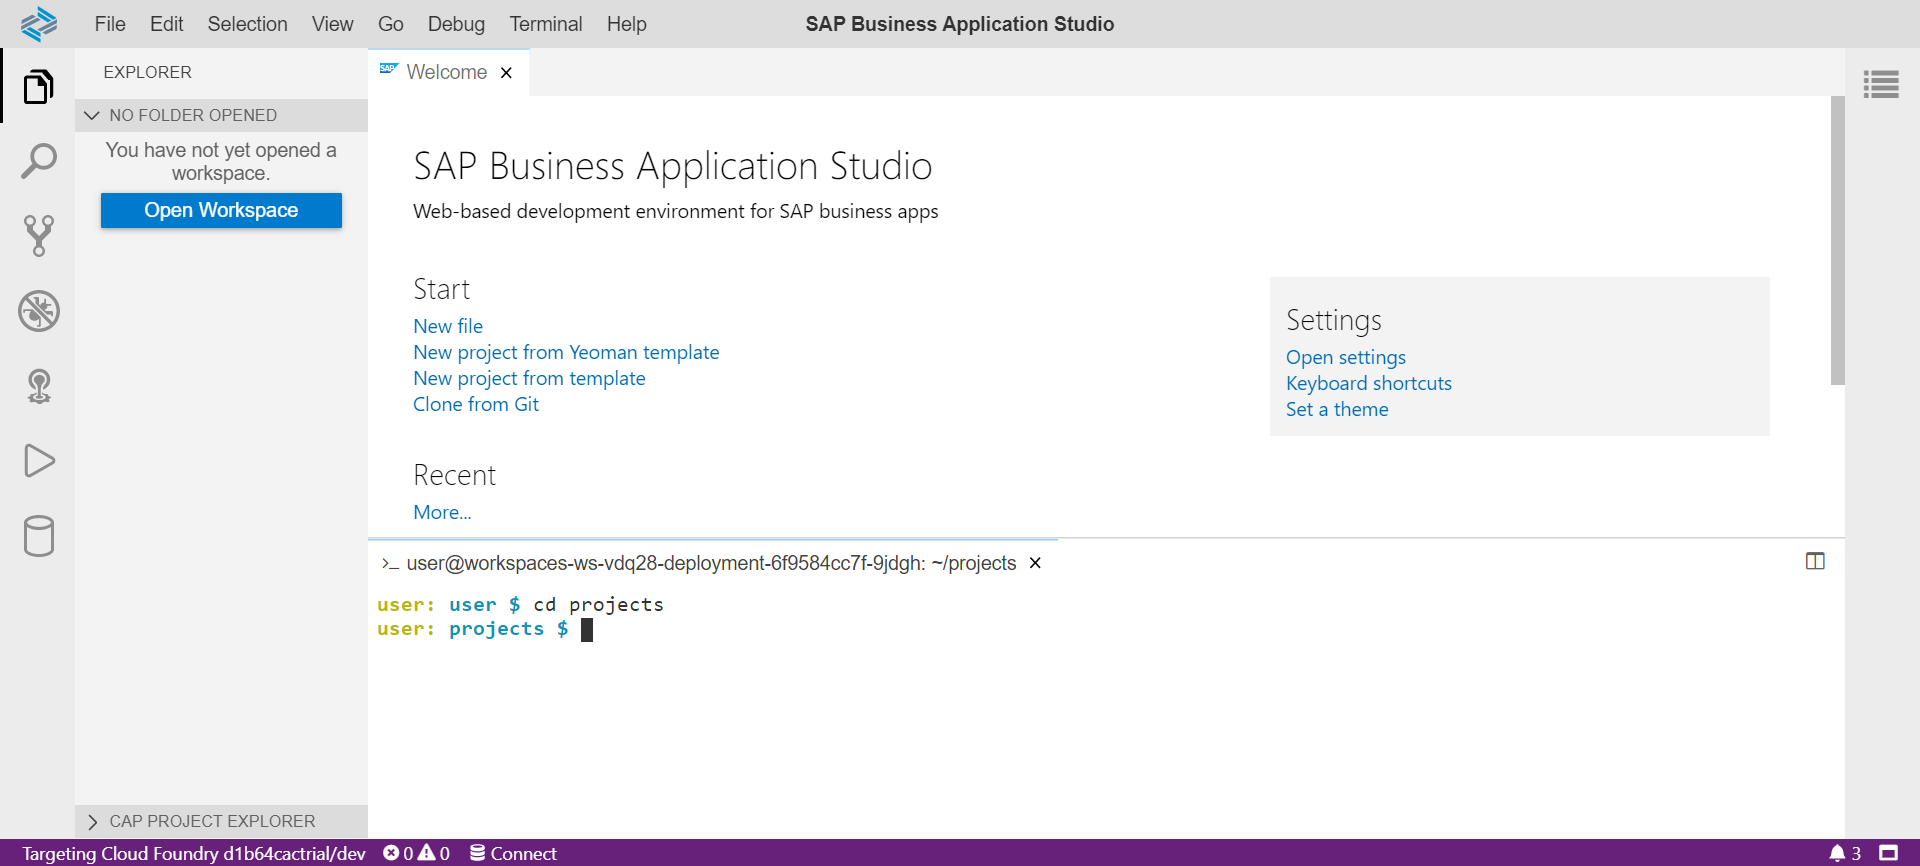
cd projects
4. Now let us create a application test1. The command to create a application is cds init test1. Syntax is cds init <application_name>

create a workspace
5. Go to File menu and select the option Open Workspace.

6. You see that the application test1 that you created in step 4 above appears here. Select it and click on Open.

select your workspace
7. The below screen shows that you are in the workspace for the application Test1.

8. Again go to Terminal menu and select the option New Terminal. You do this every time you want to launch a terminal in SAP Business Application Studio.

Go to Terminal menu
9. Now the command prompt in the terminal changes to test1 $ as shown in the screen below.

10. Let us now see how to create a CDS entity. Now on the left pane under Explorer menu, right click on the db folder and select the option New File to create a new file named schema.cds.

11. The file schema.cds is created by right clicking on db folder and selecting the option New File.
Give the name as schema.cds. In schema.cds window you create and define the actual CDS entities. In this example I’ve created two CDS entities Sales and Purchases. Following is the syntax to create a CDS entity.
namespace <namespace_name>;
entity <entity_name> {
Key id : Integer; ------ One of the fields in the entity has to be defined as a Key. Here I've used the field id as my key field.
Field1: field1 data type;
Field2: field 2 data type;
Field n: field n data type;
}
Code for the CDS entities I created in this blog
namespace test;
entity Sales {
key id : Integer;
Date_of_Sale : Date; ---------------- Date should be entered in the format YYYY-MM-DD
Particulars : String(100);
Amount : String(100);
SalesPerson: String(100);
Commission: String;
}
entity Purchases {
key id : Integer;
Date_of_Purchase : Date; ---------------- Date should be entered in the format YYYY-MM-DD
Particulars : String(100);
Amount : String(100);
PurchaseAgent: String(100);
}
To arrange code in a legible manner, right click on the white space and select the option "Format document".

The code appears as shown in the below screen after selecting the option Format document.
Format Document
12. Save the code. In terminal window enter the command cds watch and hit enter key. A popup appears with the message “ A service is listening to port 4004” with the button Open in New Tab. Hit on the button Open in New Tab.

13. After typing the cds watch command having defined the cds entities, the message appears as shown in the screen below, saying No service definitions found in loaded models. This means that the loaded models which are the CDS entities do not have a service layer defined with which they can connect to. Hence our next step is to define a service layer.

14. Now let us create a service layer. Right click on the srv folder on the left pane and select the option New File to create a new file called project.cds. Service layer is created under srv folder. This will expose the CDS entities as an odata service.

I need to add a service layer to talk to the entities that I’ve created in db layer. Add the following code to the service layer. To create a service layer, right click on srv folder and choose the option New File. In this case I’ve named the file as project.cds. Enter the following code in the project.cds window.
Code for Service layer - project.cds file
using {test} from '../db/schema';
- using is the key word that I used here to refer to the test namespace that is located in schema file in db
- I am using test namespace that I created in schema.cds. This schema.cds is located under db folder.
- After the from keyword give space and type ‘.. and the system will automatically pickup the path where the test namespace was created. So the path /db/schema will popup after typing ‘.. and select it by pressing the tab key.]
- In case you have more than one schema created then you have to select the schema where this namespace and entities is created.
service project { [service is the keyword project is the name of the service. Here I am using the two entities that I created in schema.cds.]
Code for service layer should appear as shown in the screen below.

Code for service layer - project.cds file
using {test} from '../db/schema';
service project {
entity Sales as select from test.Sales;
entity Purchases as select from test.Purchases;
}
[syntax for the above two lines is entity entity_name as select from namespace.entityname;]
15. On hitting the Open in New Tab button the screen shown below appears showing Purchases and Sales tables/entities that we created above. Click on Purchases and Sales link shown below to see the tables. At this point of time it is blank as we have not entered yet any records into these tables.

16. The code in project.cds window should appear as shown in the below screen. Save this code and you should see the messages as shown in the lower section of the terminal window that the model has been loaded from 2 files db/schema.cds and srv/project.cds and that they have been deployed to sqlite in-memory database. By default, the entities that you create are stored in sql lite database. You can change it to SAP Hana database. This is shown in the steps later in this blog below.
Having created schema.cds file under db folder and project.cds file under srv folder with the respective code, our next step is to load the CDS entities with actual data from .csv files.
16. Now let us see how to load data into these two tables that we created above.
- Create a new folder named data under db folder by right clicking on the db folder In data folder I will create the actual .csv files that will hold the data.

17. The syntax for the .csv file names is namespace.entityname.csv. So if my namespace is test and entity name is Sales then the .CSV file name will be test.Sales.csv. These .csv files will be created in data folder.
- Right click on data folder and select the option New File. Here I’ve named the .csv file as test-Sales.csv.

18. Below screen showing creation of Purchases.csv file. Always your .csv file should be prefixed with namespace. In this case name of the namespace is test hence I've prefixed it with test and the file name is test.Purchases.csv.

19. Here is the data I've used in my Sales and Purchases CDS entities. Copy and paste this data in Sales and Purchases entities respectively. Then save it.
Data for Sales.csv file
id;Date_of_Sale;Particulars;Amount;SalesPerson;Commission
100;2020-04-15;Book;Rs. 550;Ajay;Rs. 55
200;2020-04-18;Pencil box;Rs. 110;Vijay;Rs. 10
300;2020-04-25;Pens;Rs. 200;Ramesh;Rs. 60
400;2020-05-15;Erasers;Rs. 75;Suresh;Rs. 5
Data for Purchase.csv file
id;Date_of_Purchase;Particulars;Amount;PurchaseAgent
100;2020-02-02;LEDBulbs;Rs650;Raghupati
110;2020-03-15;Tubelightsx;Rs110;Raghava
120;2020-04-09;Cables;Rs00;Raja
130;2020-05-16;Fans;Rs75;Ram
20. Now type the cds watch command again and then click on the "Open in New Tab" button on the popup "A service is listening to port 4004” that appears on the lower right corner.
You should now see the CDS entities that you created above, as shown in the screen below.
21. On clicking Purchases and sales links the data loaded in the two entities appears as shown in the below two screens.

Data from Sales.cds

Data from Purchases.cds
22. Now return to SAP Business Application Studio and in the terminal type the command cds add hana. You should see a message that says "adding feature(s) to project in current folder and adding feature 'hana'.... as shown in the screen below. This command changes your database type from sqlite to hana database.
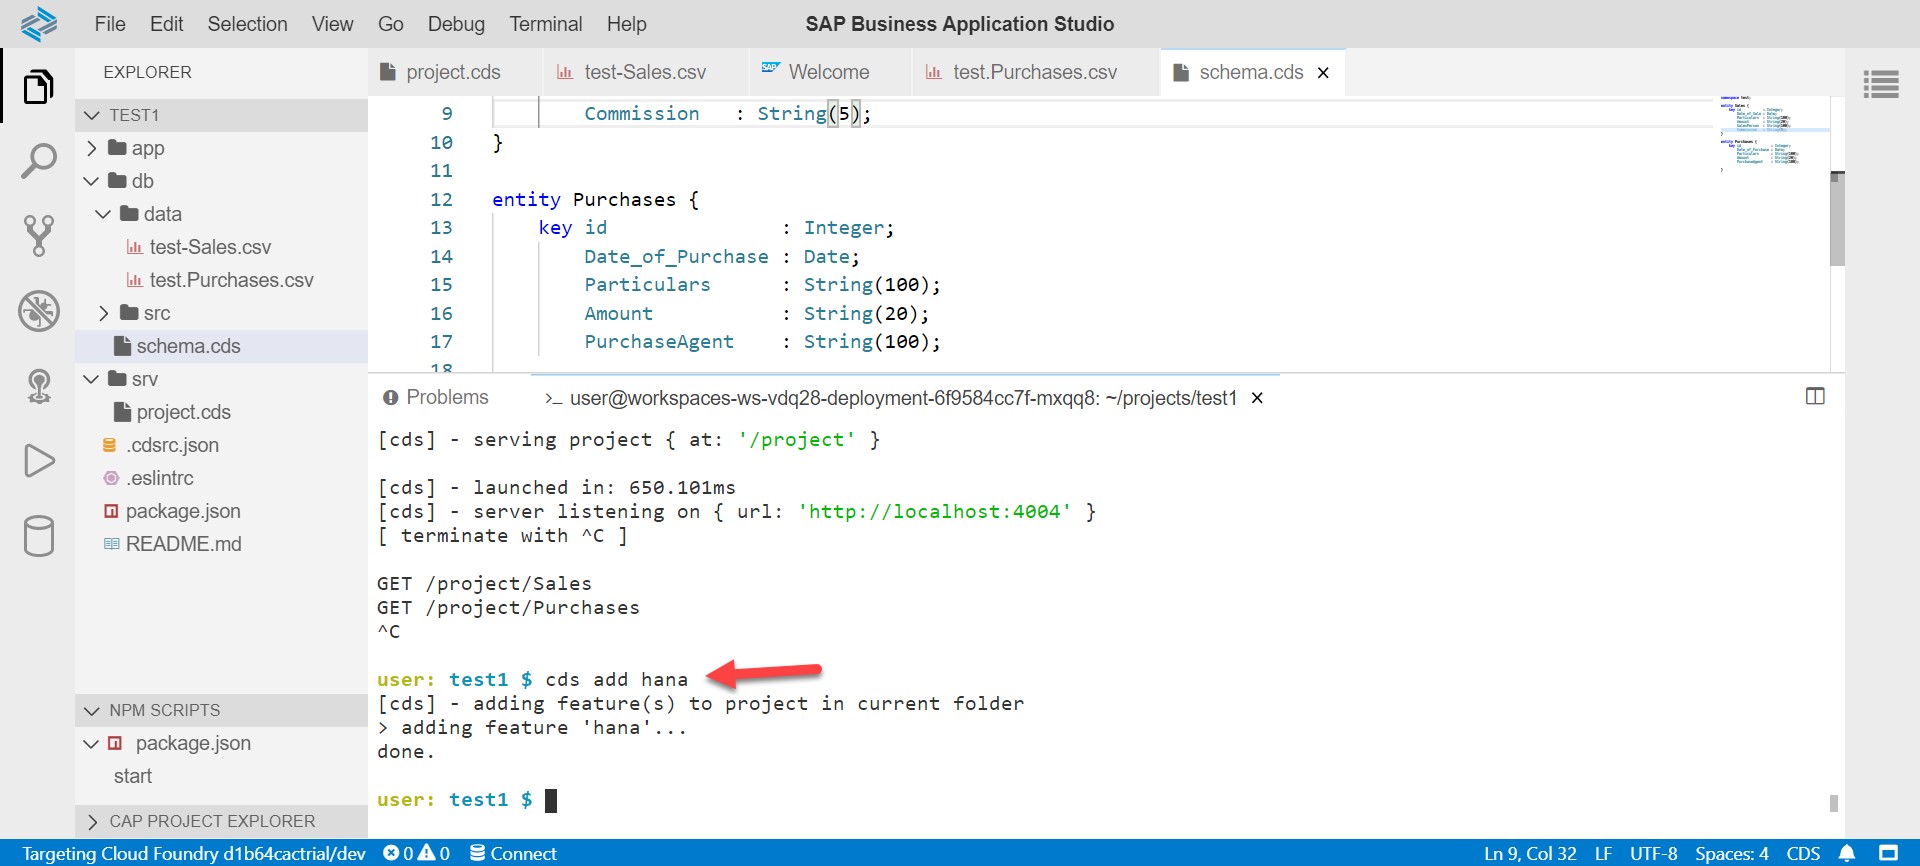
change database type from sqlite to hana
Conclusion
These are the steps to create CDS entities in SAP Business Application Studio and change the database type from sqlite to HANA database.
Additional Information
For more information on how to work with SAP Business Application Studio you may also refer to the videos published in this link.
https://www.youtube.com/watch?v=vI1c7ZHvMec&list=PLKSPsENL3CxyZk37Jrv1Ve40_n8_gPier
https://github.com/SAP-samples/sap-devtoberfest-2020/tree/master/topics/cap
https://www.youtube.com/user/sapdevs
https://github.com/SAP-samples/cloud-cap-samples
Free Open Course : https://open.sap.com/courses/cp7/
Please share your feedback about this blog.
- SAP Managed Tags:
- SAP Business Application Studio,
- SAP Cloud Application Programming Model
Labels:
5 Comments
You must be a registered user to add a comment. If you've already registered, sign in. Otherwise, register and sign in.
Labels in this area
-
ABAP CDS Views - CDC (Change Data Capture)
2 -
AI
1 -
Analyze Workload Data
1 -
BTP
1 -
Business and IT Integration
2 -
Business application stu
1 -
Business Technology Platform
1 -
Business Trends
1,658 -
Business Trends
93 -
CAP
1 -
cf
1 -
Cloud Foundry
1 -
Confluent
1 -
Customer COE Basics and Fundamentals
1 -
Customer COE Latest and Greatest
3 -
Customer Data Browser app
1 -
Data Analysis Tool
1 -
data migration
1 -
data transfer
1 -
Datasphere
2 -
Event Information
1,400 -
Event Information
66 -
Expert
1 -
Expert Insights
177 -
Expert Insights
299 -
General
1 -
Google cloud
1 -
Google Next'24
1 -
Kafka
1 -
Life at SAP
780 -
Life at SAP
13 -
Migrate your Data App
1 -
MTA
1 -
Network Performance Analysis
1 -
NodeJS
1 -
PDF
1 -
POC
1 -
Product Updates
4,577 -
Product Updates
345 -
Replication Flow
1 -
RisewithSAP
1 -
SAP BTP
1 -
SAP BTP Cloud Foundry
1 -
SAP Cloud ALM
1 -
SAP Cloud Application Programming Model
1 -
SAP Datasphere
2 -
SAP S4HANA Cloud
1 -
SAP S4HANA Migration Cockpit
1 -
Technology Updates
6,873 -
Technology Updates
427 -
Workload Fluctuations
1
Related Content
- Supporting Multiple API Gateways with SAP API Management – using Azure API Management as example in Technology Blogs by SAP
- SAP Build Process Automation Pre-built content for Finance Use cases in Technology Blogs by SAP
- Consuming SAP with SAP Build Apps - Mobile Apps for iOS and Android in Technology Blogs by SAP
- Support for API Business Hub Enterprise in Actions Project in Technology Blogs by SAP
- Demystifying the Common Super Domain for SAP Mobile Start in Technology Blogs by SAP
Top kudoed authors
| User | Count |
|---|---|
| 40 | |
| 25 | |
| 17 | |
| 14 | |
| 8 | |
| 7 | |
| 7 | |
| 7 | |
| 6 | |
| 6 |