

- SAP Community
- Products and Technology
- Technology
- Technology Blogs by SAP
- Styling Fiori iOS Components Using NUI and SwiftUI
Technology Blogs by SAP
Learn how to extend and personalize SAP applications. Follow the SAP technology blog for insights into SAP BTP, ABAP, SAP Analytics Cloud, SAP HANA, and more.
Turn on suggestions
Auto-suggest helps you quickly narrow down your search results by suggesting possible matches as you type.
Showing results for
ganesh_dhumale
Explorer
Options
- Subscribe to RSS Feed
- Mark as New
- Mark as Read
- Bookmark
- Subscribe
- Printer Friendly Page
- Report Inappropriate Content
09-09-2020
10:02 PM
Table of Contents
Introduction
Prerequisites
Let's Start
Integrate FUIFilterFormCell with SwiftUI
Integrate NUI
Result
Introduction
SAP has provided multiple components called SAP Fiori for iOS. We can easily customize these compnents using the API's provided by the SAPFiori SDK.
But in a few scenarios, there are no default API's available to customize these controls.
In this blog post, I will explain how to use FUIFilterFormCell with SwiftUI and customize it using a CSS-like stylesheet with .nss.
Prerequisites
- XCode 11 and above (For this demo I have used XCode 11.5)
- SAP iOS SDK Frameworks
Let's Start
Integrate FUIFilterFormCell with SwiftUI
Create a new SwiftUI project called NSSStyleDemo. (You can give any project name as you wish.?)

For this demo, we will require the following SAP frameworks.
- SAPFoundation.xcframework
- SAPFiori.xcframework
- SAPCommon.xcframework
Create a new SwiftUI file FilterTableView.swift.

Once the file has been created, copy-paste the below code.
import SwiftUI

import SAPFiori


struct FilterTableView {


    // MARK: - Properties


    typealias UIViewType = UITableView

    let tableView = UITableView(frame: .zero, style: .plain)


}


// MARK: - UIViewRepresentable


extension FilterTableView: UIViewRepresentable {


    func makeUIView(context: Context) -> UITableView {

        setupDatasourceDelegate(context)

        setupTable()


        return tableView

    }


    func updateUIView(_ uiView: UITableView, context: Context) { }


    func makeCoordinator() -> FilterTableViewCoordinator {

        FilterTableViewCoordinator(self)

    }


}


// MARK: - Private


private extension FilterTableView {


    func setupTable() {

        tableView.estimatedRowHeight = 80

        tableView.rowHeight = UITableView.automaticDimension

        tableView.register(FUIFilterFormCell.self, forCellReuseIdentifier: FUIFilterFormCell.reuseIdentifier)

        tableView.separatorStyle = .none

    }


    func setupDatasourceDelegate(_ context: Context) {

        tableView.dataSource = context.coordinator

        tableView.delegate = context.coordinator

    }


}


// MARK: - Coordinator


class FilterTableViewCoordinator: NSObject {


    // MARK: - Properties


    var parent: FilterTableView

    var selectedValues = [1]


    // MARK: - Initialization


    init(_ parent: FilterTableView) {

        self.parent = parent

    }


}


// MARK: - UITableViewDataSource, UITableViewDelegate


extension FilterTableViewCoordinator: UITableViewDataSource, UITableViewDelegate {


    func tableView(_ tableView: UITableView, numberOfRowsInSection section: Int) -> Int {

        return 1 // return number of rows of data source

    }


    func tableView(_ tableView: UITableView, cellForRowAt indexPath: IndexPath) -> UITableViewCell {

        let filterFormCell = tableView.dequeueReusableCell(withIdentifier: FUIFilterFormCell.reuseIdentifier, for: indexPath) as! FUIFilterFormCell

        filterFormCell.valueOptions = ["Option 1", "Option 2", "Option 3", "Option 4"]

        filterFormCell.keyName = "Filter Options"

        filterFormCell.allowsMultipleSelection = true

        filterFormCell.value = selectedValues

        filterFormCell.allowsEmptySelection = true


        filterFormCell.onChangeHandler = { newValue in

            self.selectedValues = newValue

            filterFormCell.setSelected(true, animated: true)

        }

        return filterFormCell

    }


}
In the above, we have used UIViewRepresentable which is a wrapper for a UIKit view -- allowing you to integrate that UIView into your SwiftUI view hierarchy. Also, we have used Coordinator to coordinate with the view.
Now it’s time to render the component to the UI. Just copy-paste the below code and you are done!
import SwiftUI


struct ContentView: View {


    // MARK: - Body


    var body: some View {

        NavigationView {

            FilterTableView()

                .navigationBarTitle("NSS Stylesheet Demo", displayMode: .inline)

        }

        .navigationViewStyle(StackNavigationViewStyle())

    }


}


struct ContentView_Previews: PreviewProvider {

    static var previews: some View {

        ContentView()

    }

}
Now if you run the app it will use the default blue theme and it will look like below.

Integrate NUI
We can change the FUIFilterFormCell tint color by using SAPFiori SDK API as below.
filterFormCell.setTintColor(UIColor.orange, for: .normal)But this API is no longer supported and XCode will prompt the below warning.
'setTintColor(_:for:)' is deprecated: No longer supported.
SAPFiori provides an embedded NUI library for the styling of UI controls, using a CSS-like stylesheet with .nss file and using Theming Supported style classes.
Let's add the new empty file with a .nss extension. E.g. Theme.nss
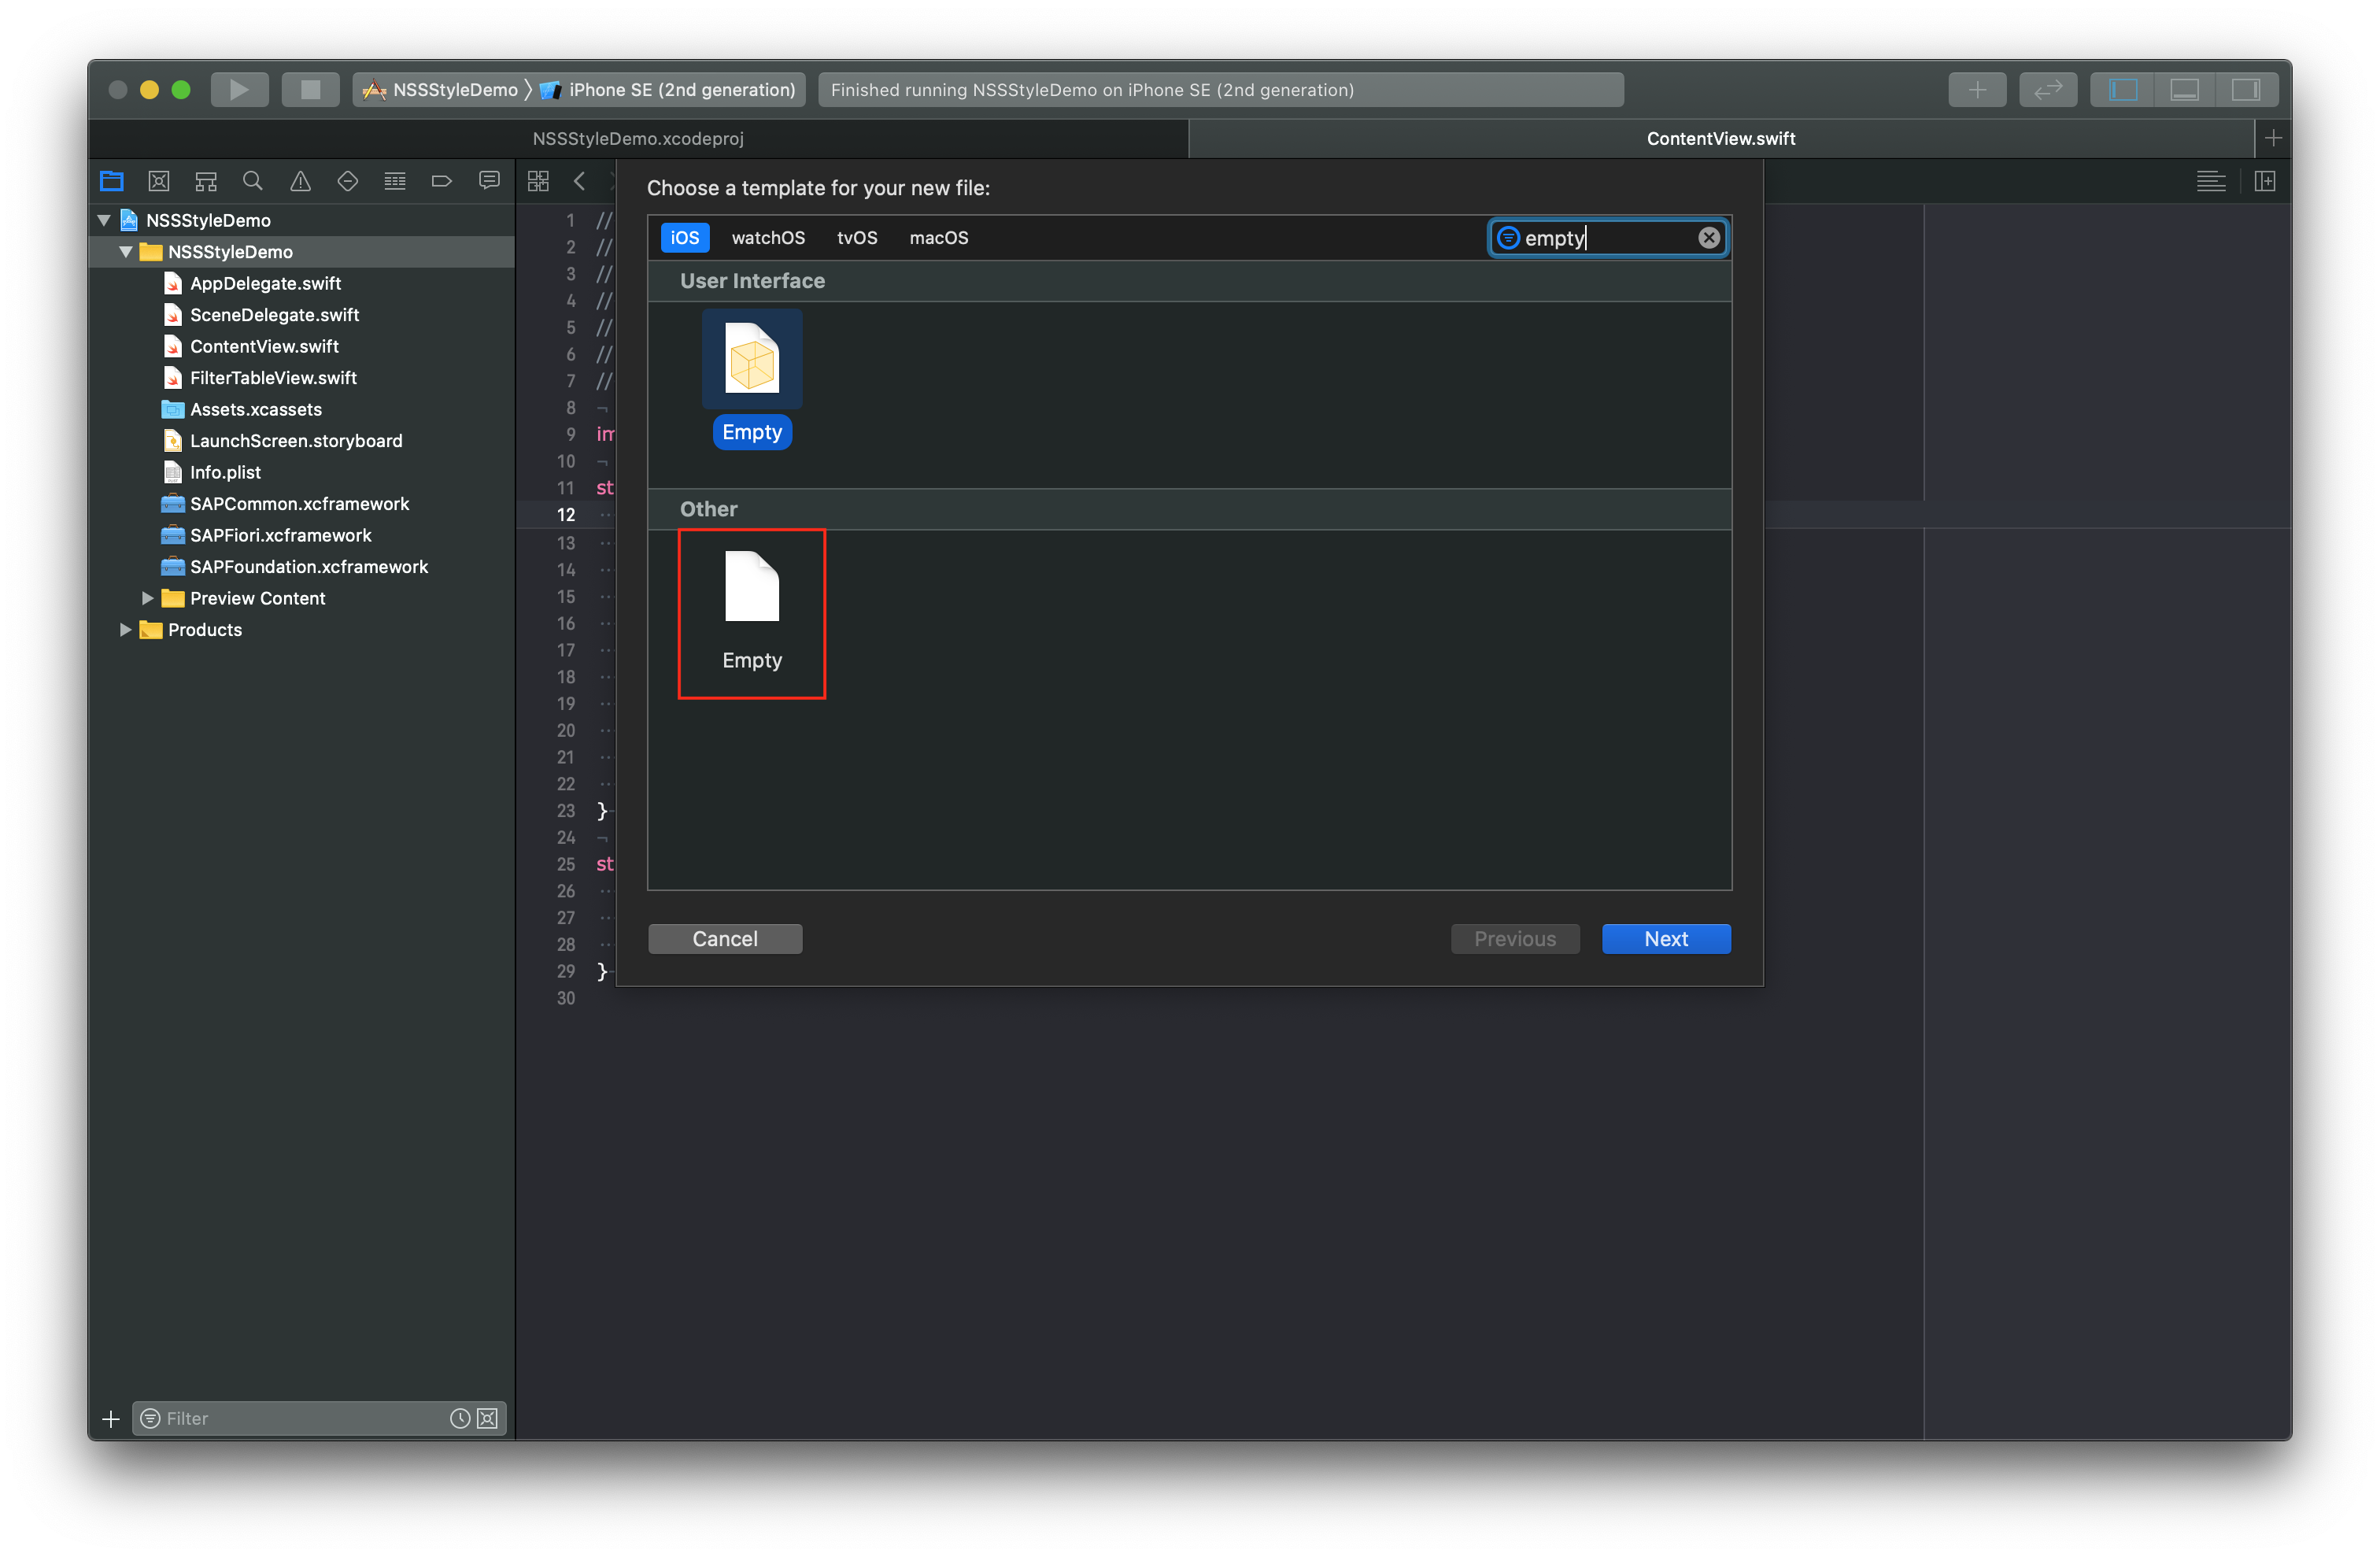
Once the file has been created, copy-paste the below code.
fdlFUIFilterFormCell_item_titleLabel {

    font-color: #BB0000;

}


fdlFUIFilterFormCell_item_titleLabel_selected {

    font-color: #2B7D2B;

}
Copy-paste the below code in didFinishLaunchingWithOptions in AppDelegate.swift file.
func application(_ application: UIApplication, didFinishLaunchingWithOptions launchOptions: [UIApplication.LaunchOptionsKey: Any]?) -> Bool {

    NUISettings.initWithStylesheet(name: "Theme")

    return true

}
We are done.
Result
With this blog post, you have learned,
- Integration of FUIFilterFormCell with SwiftUI
- Customize the component with .nss stylesheet.
Hope this helps!
Your thoughts matter! ?
GD
Labels:
1 Comment
You must be a registered user to add a comment. If you've already registered, sign in. Otherwise, register and sign in.
Labels in this area
-
ABAP CDS Views - CDC (Change Data Capture)
2 -
AI
1 -
Analyze Workload Data
1 -
BTP
1 -
Business and IT Integration
2 -
Business application stu
1 -
Business Technology Platform
1 -
Business Trends
1,661 -
Business Trends
88 -
CAP
1 -
cf
1 -
Cloud Foundry
1 -
Confluent
1 -
Customer COE Basics and Fundamentals
1 -
Customer COE Latest and Greatest
3 -
Customer Data Browser app
1 -
Data Analysis Tool
1 -
data migration
1 -
data transfer
1 -
Datasphere
2 -
Event Information
1,400 -
Event Information
65 -
Expert
1 -
Expert Insights
178 -
Expert Insights
280 -
General
1 -
Google cloud
1 -
Google Next'24
1 -
Kafka
1 -
Life at SAP
784 -
Life at SAP
11 -
Migrate your Data App
1 -
MTA
1 -
Network Performance Analysis
1 -
NodeJS
1 -
PDF
1 -
POC
1 -
Product Updates
4,577 -
Product Updates
330 -
Replication Flow
1 -
RisewithSAP
1 -
SAP BTP
1 -
SAP BTP Cloud Foundry
1 -
SAP Cloud ALM
1 -
SAP Cloud Application Programming Model
1 -
SAP Datasphere
2 -
SAP S4HANA Cloud
1 -
SAP S4HANA Migration Cockpit
1 -
Technology Updates
6,886 -
Technology Updates
408 -
Workload Fluctuations
1
Related Content
- SAP Fiori for Android 7.1 and iOS 10.0 – Introducing New Components and Mobile Card System in Technology Blogs by SAP
- SAP Builders Spotlight: Photo sharing, AI & creative community with Toast Photography in Technology Blogs by SAP
- Announcing the new SAP Analytics Cloud feature: Widget Add-on in Technology Blogs by SAP
- Designing with Code (Part 3) – SAP Web Components in Technology Blogs by SAP
- New Features in SAP Fiori for Android 7.0 and iOS 9.2 and the First Release of SAP Fiori for Wear OS and SAP Fiori for watchOS in Technology Blogs by SAP
Top kudoed authors
| User | Count |
|---|---|
| 13 | |
| 10 | |
| 10 | |
| 9 | |
| 7 | |
| 6 | |
| 5 | |
| 5 | |
| 5 | |
| 4 |