
- SAP Community
- Products and Technology
- Human Capital Management
- HCM Blogs by Members
- Manual Steps to Enable SSO between SF and IAS tena...
Human Capital Management Blogs by Members
Gain valuable knowledge and tips on SAP SuccessFactors and human capital management from member blog posts. Share your HCM insights with a post of your own.
Turn on suggestions
Auto-suggest helps you quickly narrow down your search results by suggesting possible matches as you type.
Showing results for
prodyut
Participant
Options
- Subscribe to RSS Feed
- Mark as New
- Mark as Read
- Bookmark
- Subscribe
- Printer Friendly Page
- Report Inappropriate Content
06-23-2020
6:43 AM
INTRODUCTION
There are blogs and SAP notes available on how to enable IAS authentication for Success Factor (SF) tenant using Upgrade Center available under SF -> Admin Center.
In order to perform SSO enablement using this SF upgrade center process, your SF tenant must be a productive one and IAS tenant needs to be in the same region (where the SF tenant is residing). Or, in most of the cases, SAP enables required configuration in both SF and IAS instance while provisioning the same.
But if your SF tenant is a DEMO one (you can create demo SF tenant for practice using your S-id), in order to enable SSO between SF and IAS, you need to manually perform the trust configuration between this two systems.
This blog is to give the manual steps for enabling SSO between IAS and SF system. In this blog, for the SF instance I’ve taken my DEMO SF instance and IAS is a DEV IAS instance (productive one).
Note: My IAS instance is not in same region where SF instance resides, and SF instance is a DEMO one which SF offers using any S-id. IAS used by me, is a non-prod IAS instance (Europe Rot) and SF instance is DEMO SF from DC8 https://pmsalesdemo8.successfactors.com/login?company=#########
Prerequisite: You have an SF instance, SF provisioning instance & IAS instance. You SF account should be already configured in your provisioning account.
TECHNICAL STEPS FOR CONFIGURATION
STEP 1: Initial configuration inside SF tenant for enabling SSO to SF roles
Follow SAP note for 2569087 initial configuration inside SF tenant. Screenshots for the same given below.
Go to admin center-> manage permission rules -> select any role (I’ve selected Sandbox-Employee Self Service)

Select the role -> click on ‘permission’ button as shown below

Go to administrator permissions option -> click on ‘manage security’ as shown below

Check ‘manage SAML SSO settings’ checkbox and click on done.

STEP 2: Download the METADATA file from IAS tenant
Go to IAS admin page -> Application & Resources -> Tenant Settings -> Click on ‘SAML2 Configuration’ -> click on download metadata file

Keep the metadata file open using notepad/notepad++
Login into SF provisioning account. Make sure you are able to see your company name in the list. Select the company name.

Go inside by selecting the company name -> click on ‘Single Sign-On (SSO) Settings’ available under edit company settings option

Go to section ‘For SAML based SSO’ -> choose radio button option SAML v2 SSO -> In SAML Asserting parties (IdP) option, choose ‘Add a SAML Asserting Party’

Parameter to provide as below –
SAML Asserting Party Name: Provide a name (without blankspace. You can use ‘_’ if needed)
SAML Issuer: Copy ENTITYID from the IAS metadata file & paste here
Require mandatory signature: select ‘Assertion’
Enable SAML Flag: select ‘Enabled’
Login Request Signature: select ‘No’
SAML Profile: select ‘Browser/Post Profile’
Enforce Certificate Valid Period: select ‘No’
SAML Verifying Certificate: This one is little tricky. Type ‘-----BEGIN CERTIFICATE-----’ and ‘-----END CERTIFICATE-----' in 2 line. ‘-‘ symbol is 5 times in all the place. Copy X509Certificate value from the IAS metadata file and paste in the middle. (Go to IAS metadata file -> copy any value as shown in red correct sign below.


Go to SAML v2: SP -initiated logout section. Make changes as shown below.

For the logout service URL, copy the ‘SingleLogoutService’ URL from IAS metadata file

For the single sign on redirect url, copy the ‘SingleSignOnService’ URL from IAS metadata file
Click on ‘Add an asserting party’ button. You now should be able to see the newly added SAML asserting party. Select the same from the dropdown. Click on ‘Save’ at top right section of screen.

Scroll to top of the screen on the same page. Put any number in ‘Reset Token’ field under Single Sign-on Features section (this is to enable SSO). Click on ‘Save Token’.
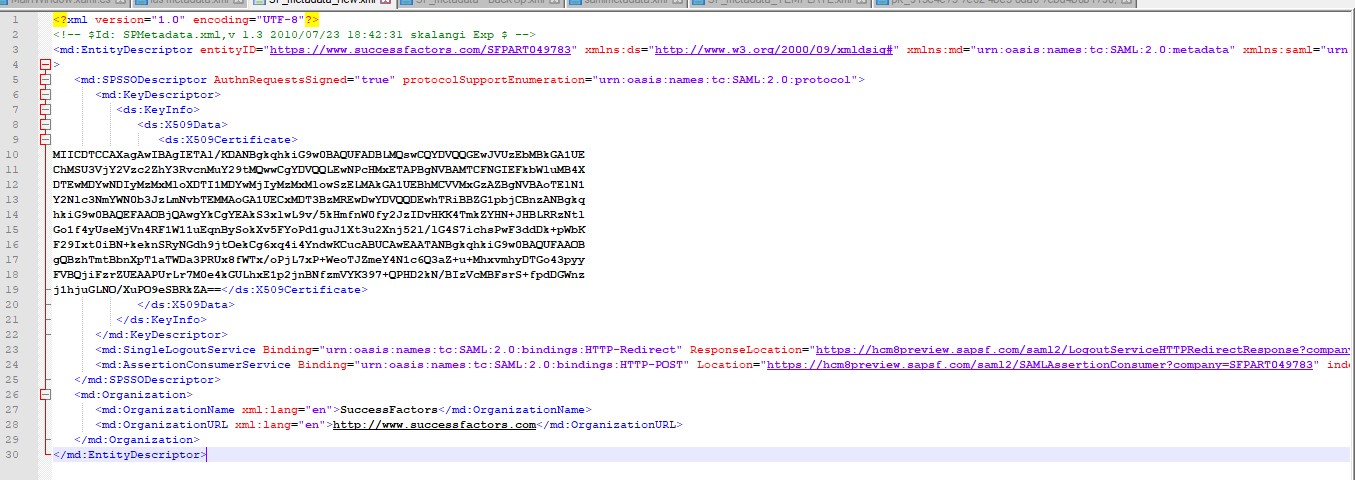
STEP 3: Create METADATA file for SF tenant
Check SAP note – 2707993 for guidance on how to generate the metadata. I’ve used scenario 1 (mostly used). My SF demo tenant in from DC8. Below is the metadata screenshot (as reference) which I generated.
STEP 4: Import SF metadata into IAS tenant
Login into IAS -> Go to applications & resources -> applications -> click on ‘Add’ and create a new application (provide any name). I had given - 'SuccessFactors BizX'

Go to SAML 2.0 Configuration -> upload the SF metadata which you’ve created in previous step.


Few points here. Make sure, in the assertion consumer service endpoint section, ‘Default’ check button is selected. Make a small change in this URL by changing the host name of your SF tenant here (copy the link from your SF tenant URL, as shown below. Rest part of the URL remains same)

Same is done with HTTP-POST URL under Single Logout Endpoint section (as shown below)

Change the ‘Subject name Identifier’ to Login Name (as shown below)

Change ‘Default Name ID Format’ to Unspecified (as shown below)

Make sure Login Name attribute is added in the ‘Assertion Attributes’ section

Go to Home -> Applications & Resources -> Tenant Settings -> Logon Identifier & User Attributes -> make sure Login Name is showing ‘ON’ (as shown below)

STEP 5: User Profile setting in IAS and SF tenant
Generally, all SF users needs to be imported into IAS using IPS (which is done in productive use case) so that SF user’s can login into SF using their existing SF credentials.
Since I’m working with demo SF instance here, I’ve single SF user which is ‘SFADMIN’. ‘SFADMIN’ is the user id required for login into SF URL. To enable this thru IAS, below setting needs to be done –
Go to home -> Users & Authorizations -> User Management – Select any P user in IAS (or create a new one) which you want to map with ‘SFADMIN’. In my case I’ve used my user id in IAS (which was created using my S-id).
Select the user. Update login name attribute as ‘SFADMIN’ (as shown below).
Note: If you have multiple SF user, need to map all of them in IAS manually. (This is why IPS is used in productive use case)

Login into SF tenant using 'SFADMIN' (before login, ensure you've turned off SSO enabled by going into SF provisioning account)
Login into SF provisioning -> select your company name -> Click on ‘Single Sign-On Settings’ -> delete content from ‘Reset Token’ field and click on ‘Save Token’

Login into SF tenant (using SFADMIN) -> on search field on top left, search for ‘SFADMIN’ and open the profile (profile of 'Aanya Singh' would be opened) -> Click on ‘ME’ tab (this would be selected by default) -> go to Contact Information section -> click on edit -> update business email to the IAS user’s mail id (in my case I’ve updated with my company mail id which is associated with my S-id and the same is there in IAS)

And with that, all the configurations are done. You should be able to go ahead with testing now.
STEP 6: Check SF Login
Open browser -> put SF url on the browser and hit. You should get below screen (IAS login screen)

For the above E-Mail and Password fields, provide ‘SFADMIN’ in E-Mail and provide IAS password for this P-user. In my case, I’ve used SFADMIN and my IAS password (as I edited my P-id with ‘SFADMIN’ as Login Name).

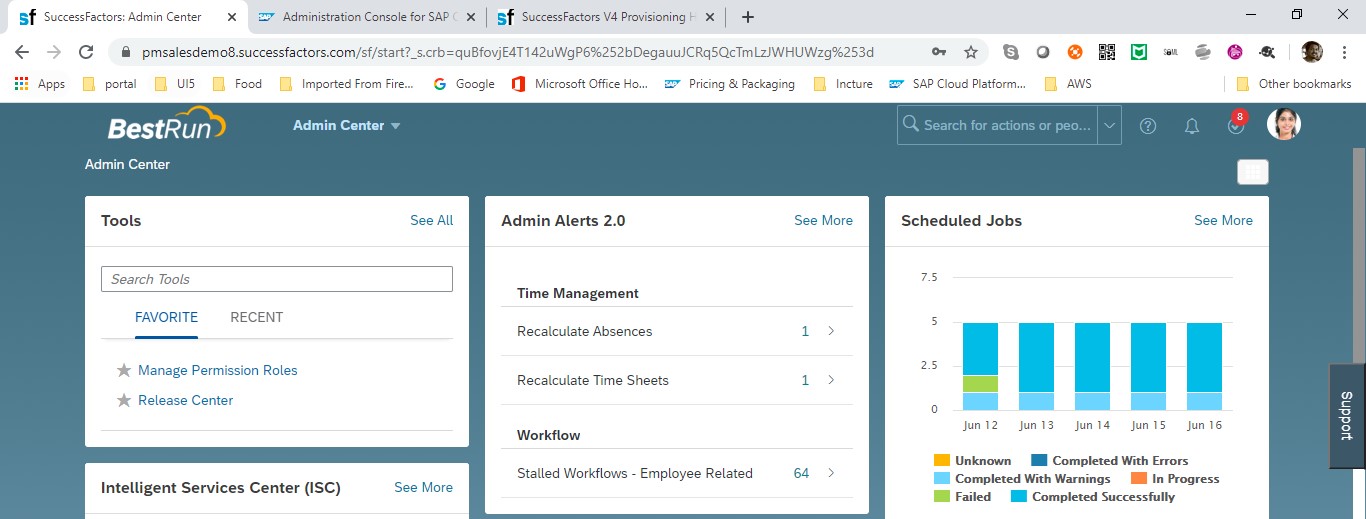
Once you provide those credentials & hit log on, you should be redirected to SF landing page (as shown below)
CONCLUSION
You should be able to customize your SF login screen to IAS login screen or any other Corporate Identity Provider login screen using this process.
Note: Here, we have not used IPS service which you'll find in most of the Notes/Blog. because, as I said earlier, IPS is just to pull minimum details of all users from SF into IAS so that you don't need to manually create all SF user's into IAS tenant.
In case of you have any other identity provider, i.e., ADFS/Azure AD, etc., you need to configure the same inside IAS. In that case IAS becomes proxy between your IdP and SF. There are blogs/notes available on how to perform this part.
- SAP Managed Tags:
- SAP Cloud Identity Services,
- SAP SuccessFactors platform
4 Comments
You must be a registered user to add a comment. If you've already registered, sign in. Otherwise, register and sign in.
Labels in this area
-
1H 2024 Product Release
5 -
2H 2023 Product Release
1 -
ACCRUAL TRANSFER
1 -
Advanced Workflow
1 -
Anonymization
1 -
BTP
1 -
Business Rules
1 -
Canvas Report
1 -
Career Development
1 -
Certificate-Based Authentication
1 -
Cloud Platform Integration
1 -
Compensation
1 -
Compensation Information Management
1 -
Compensation Management
1 -
Compliance
2 -
Content
1 -
Conversational AI
2 -
Custom Data Collection
1 -
custom portlet
1 -
Data & Analytics
1 -
Data Integration
1 -
Dayforce
1 -
deep link
1 -
deeplink
1 -
Delimiting Pay Components
1 -
Deprecation
1 -
Employee Central
1 -
Employee Central Global Benefits
1 -
Employee Central Payroll
1 -
employee profile
1 -
Employee Rehires
1 -
external terminal
1 -
external time events
1 -
Generative AI
2 -
Getting Started
1 -
Global Benefits
1 -
Guidelines
1 -
H2 2023
1 -
HR
2 -
HR Data Management
1 -
HR Transformation
1 -
ilx
1 -
Incentive Management Setup (Configuration)
1 -
Integration Center
2 -
Integration Suite
1 -
internal mobility
1 -
Introduction
1 -
learning
3 -
LMS
2 -
LXP
1 -
Massively MDF attachments download
1 -
Mentoring
1 -
Metadata Framework
1 -
Middleware Solutions
1 -
OCN
1 -
OData APIs
1 -
ONB USA Compliance
1 -
Onboarding
2 -
Opportunity Marketplace
1 -
Pay Component Management
1 -
Platform
1 -
portlet
1 -
POSTMAN
1 -
Predictive AI
2 -
Recruiting
1 -
recurring payments
1 -
Role Based Permissions (RBP)
2 -
SAP CPI (Cloud Platform Integration)
1 -
SAP HCM (Human Capital Management)
2 -
SAP HR Solutions
2 -
SAP Integrations
1 -
SAP release
1 -
SAP successfactors
5 -
SAP SuccessFactors Customer Community
1 -
SAP SuccessFactors OData API
1 -
SAP Workzone
1 -
SAP-PAYROLL
1 -
skills
1 -
Skills Management
1 -
sso deeplink
1 -
Stories in People Analytics
3 -
Story Report
1 -
SuccessFactors
2 -
SuccessFactors Employee central home page customization.
1 -
SuccessFactors Onboarding
1 -
successfactors onboarding i9
1 -
Table Report
1 -
talent
1 -
Talent Intelligence Hub
2 -
talents
1 -
Tax
1 -
Tax Integration
1 -
Time Accounts
1 -
Workflows
1 -
XML Rules
1
Related Content
- ISSUE to Disable Latest Goal Management 1H2024 Preview Release in Human Capital Management Q&A
- Latest Updates to the Reimagined Applicant Management Tool in SAP SuccessFactors Recruiting in Human Capital Management Blogs by SAP
- New 1H 2024 SAP Successfactors Time (Tracking) Features in Human Capital Management Blogs by SAP
- 1H 2024 - Release highlights of SuccessFactors Career Development Planning in Human Capital Management Blogs by Members
- 1H 2024 - Release highlights of SuccessFactors Succession Planning in Human Capital Management Blogs by Members
Top kudoed authors
| User | Count |
|---|---|
| 14 | |
| 11 | |
| 5 | |
| 3 | |
| 3 | |
| 1 | |
| 1 | |
| 1 | |
| 1 | |
| 1 |