This blog will detail how a Kyma runtime serverless function can be triggered to run when an event is published into the Kyma environment. To eliminate any barriers, we will utilize the Commerce mock application to send events, but the process flow would be the same if using SAP Commerce. This blog continues from the setup of the SAP Commerce mock application detailed in this
blog.
Creating a Service Instances of the Commerce mock application
In the Kyma home workspace choose Integration -> Applications
Choose the mp-commerce-mock application
Bind the application to the namespace mocks by choosing Create Binding selecting the mocks namespace and choosing Create. This will make the application APIs and events available in the mocks namespace Service Catalog.

Open the mocks namespace and choose Service Management -> Catalog. Under Services choose mp-commerce-mock.

Within the listing you will see all of the APIs and events that are available. To enable usage of the events, choose the Service Class Plan - SAP Commerce Cloud - Events

Choose Add and then choose Create, which will create a Service Instance that can then be used by a Function or microservice existing within the mocks namespace.

The Commerce mock application has two mocked APIs that can be called which include
- /{baseSiteId}/orders/{code}
- /{baseSiteId}/users/{userId}/orders
They only returned a small set of data, but can be useful for evaluation. You can find their definition within the
app.js.
For this scenario we will call the API to retrieve the order information. Perform the same steps noted to enable the Events but choose the
SAP Commerce Cloud - Commerce Webservices. This should result is two
Service Instances being created.

Creating a Function to consume an Event
In the mocks namespace choose Development -> Functions. Choose Create Function and provide the name orderdetails and choose Create.
Within the function definition, choose the Configuration tab and then choose Add Event Trigger
Select the Event order.created and choose Add

Next choose the option
Create Service Binding, choose the service instance for the mock commerce webservices and finally choose
Create.

Switch back to the Code tab and choose Dependencies and add a dependency for axios which will be used to perform an asynchronous call to the order API.
{

  "name": "orderdetails",

  "version": "1.0.0",

  "dependencies": {

      "axios": "^0.18.0"

  }

}

Next switch to the Source tab and change the code to the following. Making sure to replace the value of the commerceUrl by finding the gateway url in the listing of Environment Variables. This code will read the value of the orderCode provided by the event and then call the order API. The result of this will then be outputted to the logs.
const axios = require("axios");

const commerceUrl = process.env['<Your Service Instance Gateway URL>'];


module.exports = {

  main: async function (event, context) {

    const orderCode = event.data.orderCode;

    var orderResult = await getOrderDetails(orderCode);

    console.log("----------orderResult----------");

    console.log(orderResult);

  }

}


async function getOrderDetails(orderCode) {

  const ordersUrl = commerceUrl + "/electronics/orders/" + orderCode;

  const response = await axios.get(ordersUrl);

  return response.data;

}

Finally Save the changes.
Triggering the Function
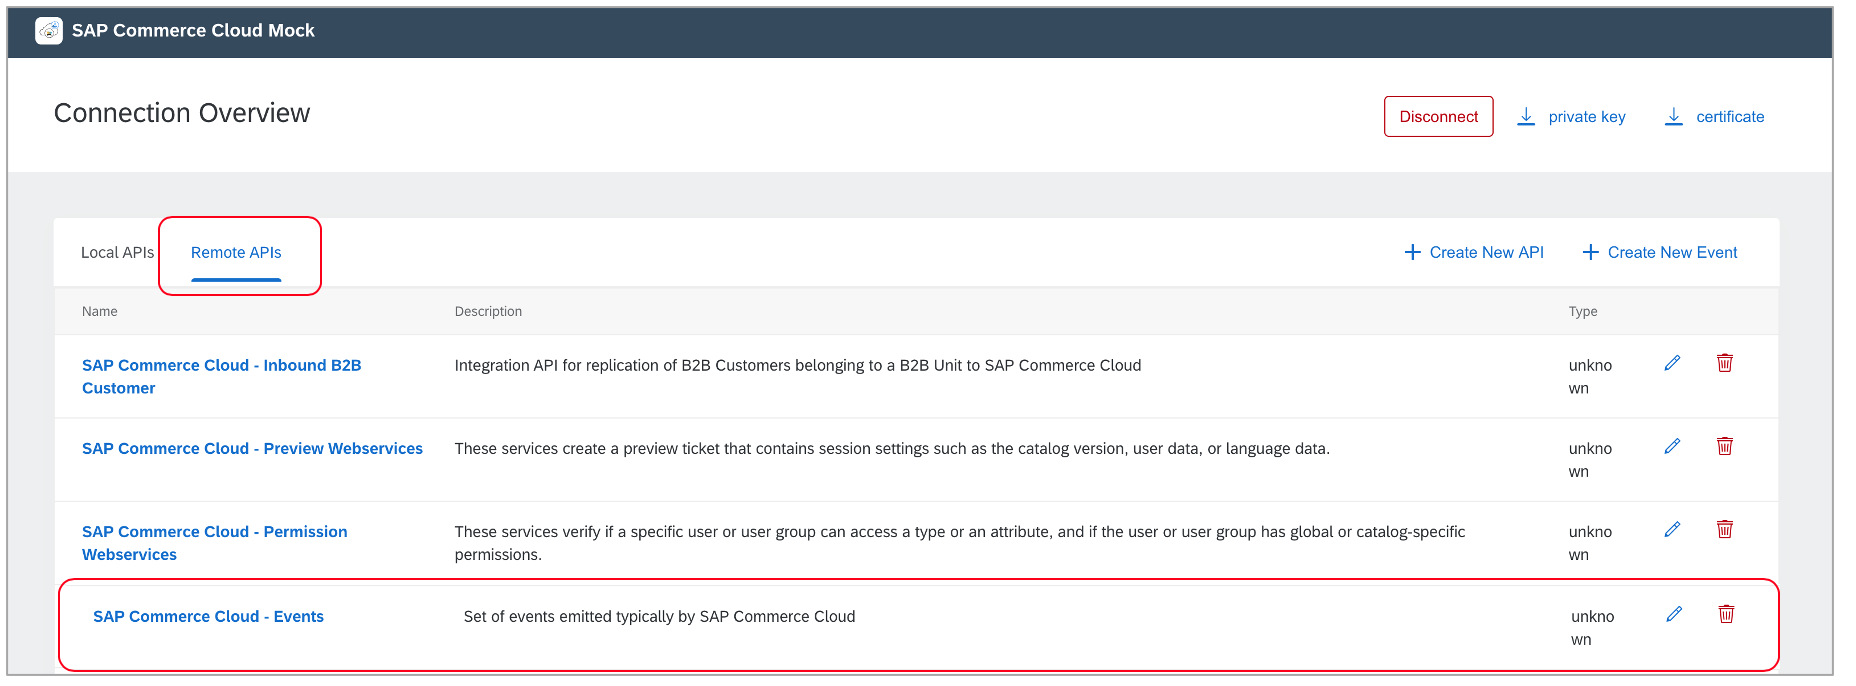
With the function fully defined we can test it by navigating back to the commerce mock application, choosing the option
Remote APIs and then choose S
AP Commerce Cloud - Events
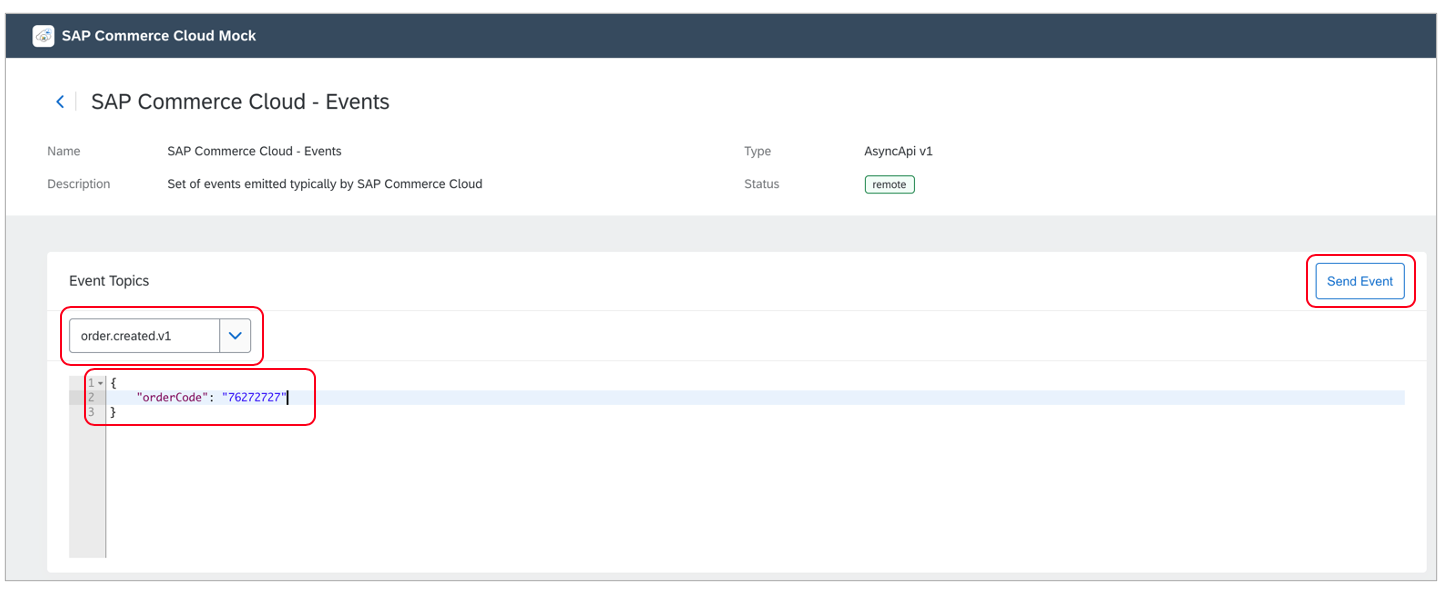
Sent the Event Topic to the
order.created.v1, edit the value of the orderCode if desired and finally choose
Send Event.
To view the result of the event, open the orderdetails function in Kyma runtime. At the bottom of the function definition you will find the Logs in an expandable window. The result should be similar to following.

