First
It's a small tips.
When using SAP Cloud Platform Internet of things for the Cloud Foundry environment , there are times when you want to write sensor data to the HANA Database like you did with Neo version. On CF , we often uses HDI container HANA database (hdi-shared) for access from your application , so I will explain the one method.
Environment
See here for sample IoT Service settings. In this post, I will explain the settings for writing the sensor data sent by MQTT above to your HDI-shared HANA database.
1. Note your HANA-database information
Open your HDI-container on Cockpit , then see Service key information.
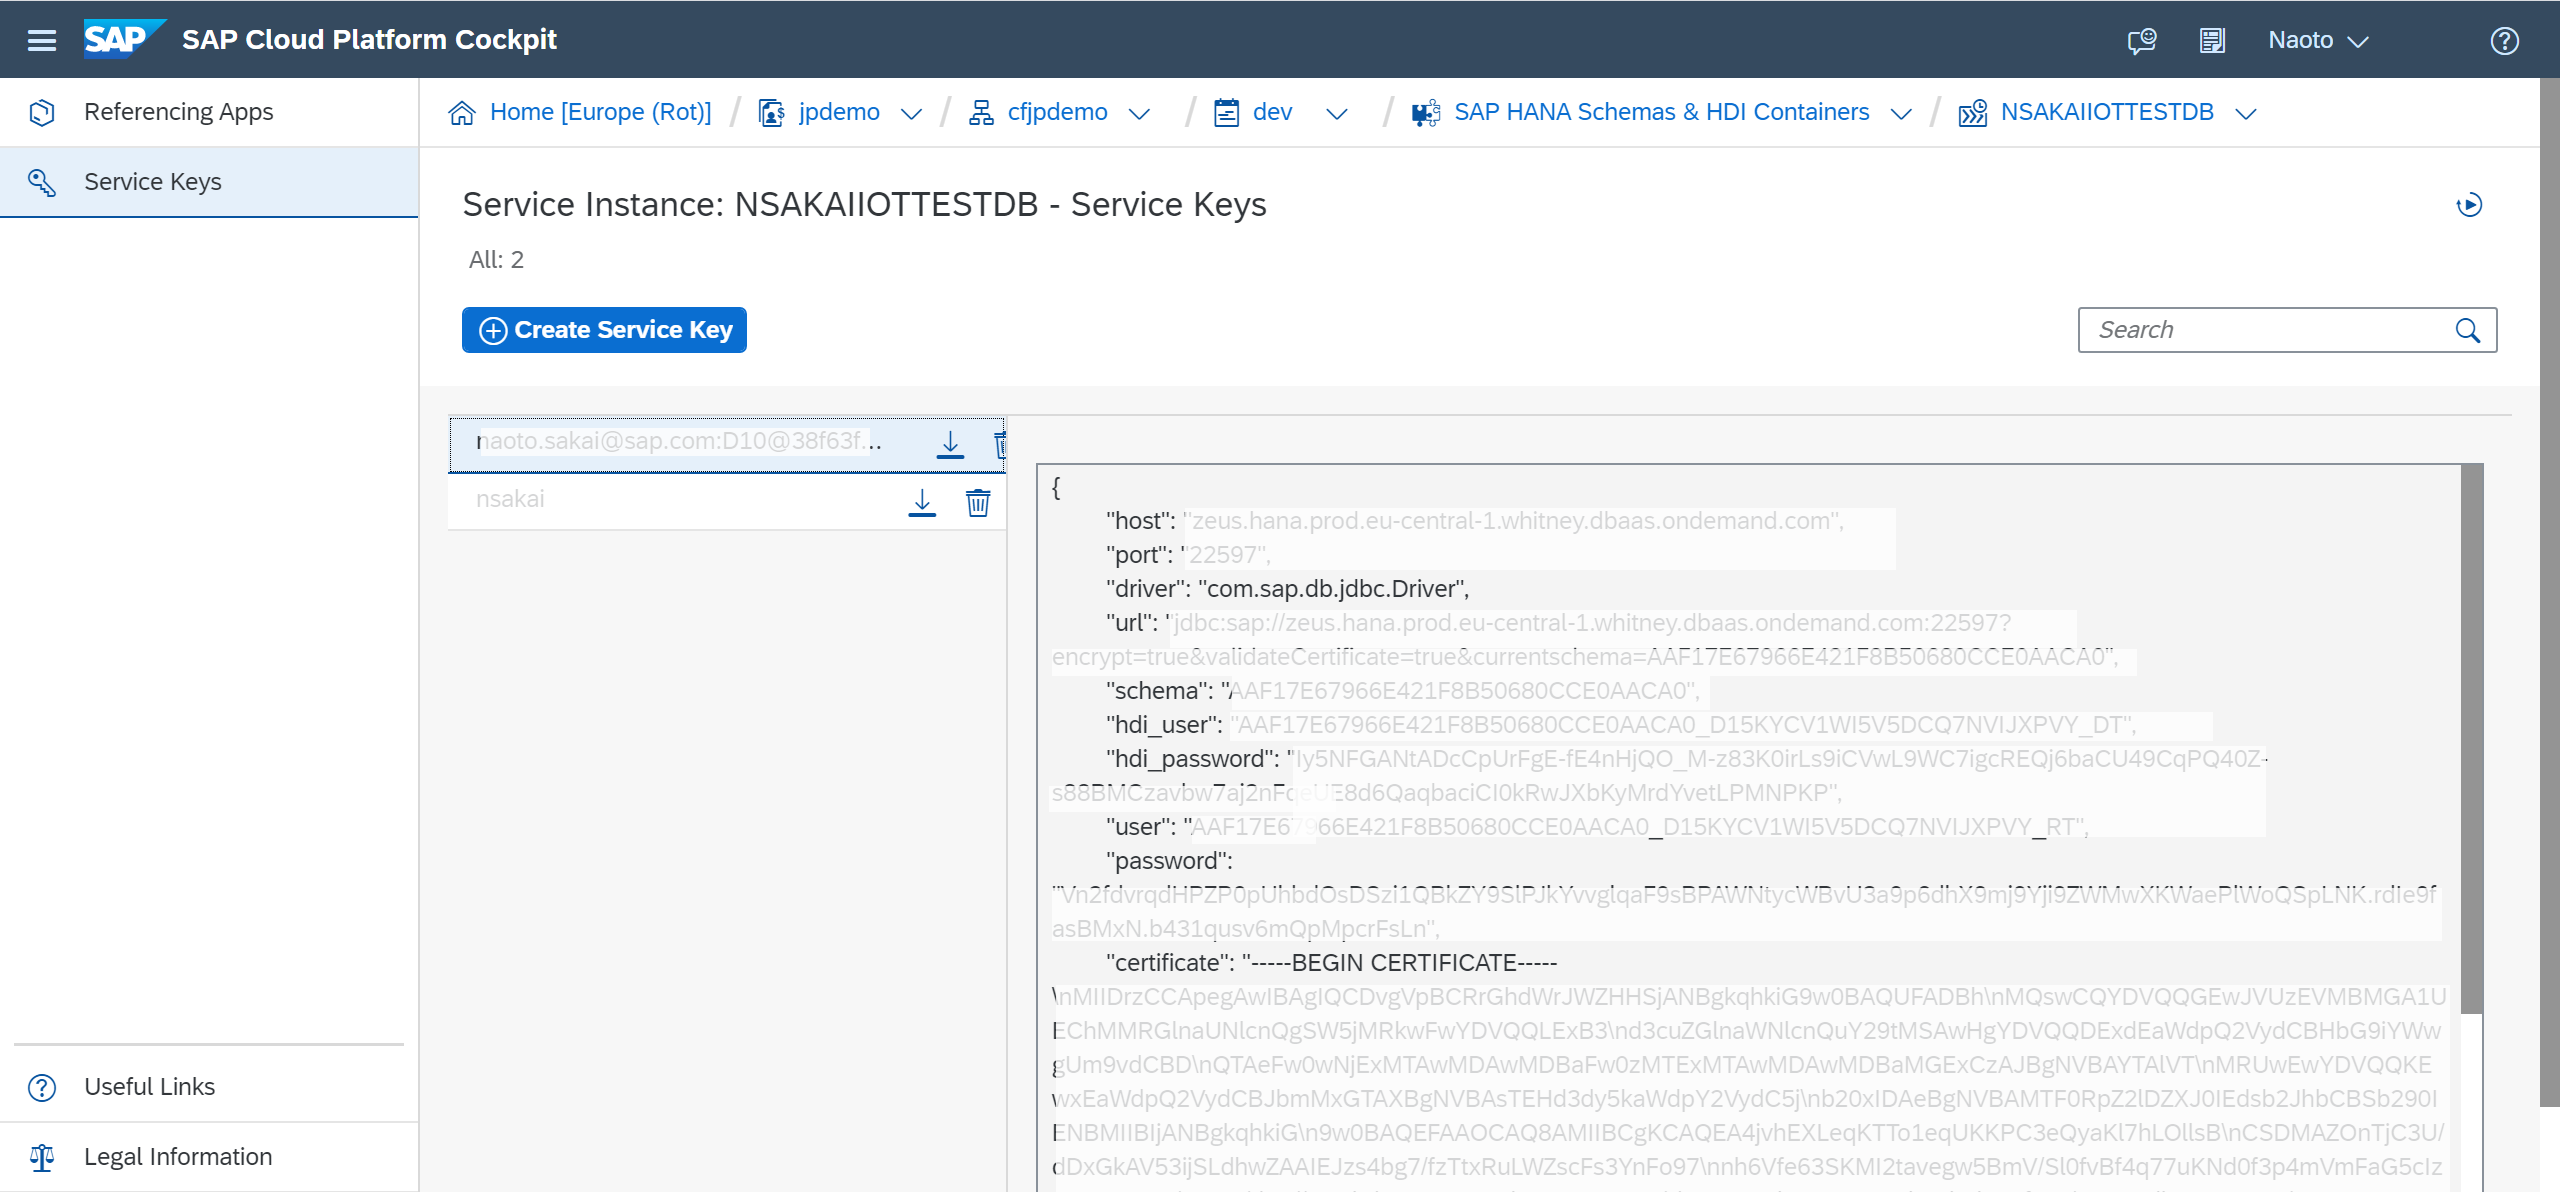
Make a note of the "url" (jdbcurl) and "schema" information.
By the way, what's troublesome is that the user and password displayed here cannot be set with too many characters on the IoT Service setting screen.
2. Create HANA user (If you need)
Open the "HANA Cockpit" from SAP HANA Service - Instances (on Cloud platform cockpit) ,


Then create new HANA user for database access if you need.

3. Add privileges
Open the Web IDE , connect to your hdi hana database. Then Open the "Admin" SQL Console.

Then execute following script .
set schema "<schema>";

create local temporary column table "#PRIVILEGES" like "_SYS_DI"."TT_SCHEMA_PRIVILEGES";

insert into "#PRIVILEGES" ("PRIVILEGE_NAME", "PRINCIPAL_SCHEMA_NAME", "PRINCIPAL_NAME") values ('SELECT', '', '<created dbusername>');

insert into "#PRIVILEGES" ("PRIVILEGE_NAME", "PRINCIPAL_SCHEMA_NAME", "PRINCIPAL_NAME") values ('INSERT', '', '<created dbusername>');

insert into "#PRIVILEGES" ("PRIVILEGE_NAME", "PRINCIPAL_SCHEMA_NAME", "PRINCIPAL_NAME") values ('UPDATE', '', '<created dbusername>');

insert into "#PRIVILEGES" ("PRIVILEGE_NAME", "PRINCIPAL_SCHEMA_NAME", "PRINCIPAL_NAME") values ('DELETE', '', '<created dbusername>');

insert into "#PRIVILEGES" ("PRIVILEGE_NAME", "PRINCIPAL_SCHEMA_NAME", "PRINCIPAL_NAME") values ('CREATE ANY', '', '<created dbusername>');

call "<schema>"."GRANT_CONTAINER_SCHEMA_PRIVILEGES"("#PRIVILEGES", "_SYS_DI"."T_NO_PARAMETERS", ?, ?, ?);

drop table "#PRIVILEGES";
You need replace ....
<Schema> : your schema name which noted at 1. NEED "#DI" like a "YOURSCHEMA#DI".
<created dbusername> : HANA user name which created 2.
It is a good to check if the table can be created in the <Schema> specified by the user who granted the privilege.
4. Create configuration
Open the IoT Service Cockpit . move your tenant , then create new Configuration. You must input some parameters to displayed dialog.
 Name : this configuration name
Description : if you need.
Service/Shema : SQL / Version 1
Connection String : jdbcurl which noted by 1. , You must contain "?encrypt=true&validateCertificate=true¤tschema=<your schema>" .
User Name : privilege's grated user name (at 3.)
Password : password of above user
Then push 'Create' button.
5.Create Selector
Create a new Selector with your tenant->Selecter on IoT Cockpit. The selector is a role that sends the sent IoT data to the configuration (it can be filtered).

You must input some parameters to displayed dialog.

Name : This selecter's name
Configration : your configuration which you created at 5.
Type : Measure
The Filters is for applying filters. That said, SAP CP Internet of things CF can only filter at the device or sensor level, so if you set it to Any as above, all data will be sent to the "Configuration". Finer filters are the role of Leonardo IoT.
Press Create to save & apply.
6. Try & confirm
If you've made it possible to send a message by MQTT according to here, let's send a message.
Then , Access your HDI HANA database via WebIDE etc. Check the table list.
 If you find MEASURES_XXXXXX table , it's sensor data table.
(Correctly , name format is MEASURES_<your capability id> .)
Let's see the content of this table.
 Ok. your sensor data was insert to table.
Summary
The sensor data can be written to the database used by your app. You can do some things with this. For more than this you should consider Leonardo IoT.
