
- SAP Community
- Products and Technology
- Technology
- Technology Blogs by Members
- SAP on AZURE: HIGH AVAILIABILITY setup for SAP Bus...
- Subscribe to RSS Feed
- Mark as New
- Mark as Read
- Bookmark
- Subscribe
- Printer Friendly Page
- Report Inappropriate Content
Introduction
This blog describes the High Availability (HA) setup of SAP BusinessObjects Business Intelligence 4.2 SP8 with MS SQL Server on Windows in MS Azure Cloud. It uses SQL DB AlwaysOn Windows Cluster to provide the HA for database layer and SAP CMS Servers cluster & loadbalanced Tomcat Web Servers for HA in application & web layer. FRS component is in SOFS Clsuter.
Purpose
By setting up HA solution, we can protect SAP BO/BI & DB (on SQL Server) against Infrastructure & VM failure and removes all the Single Point of Failure (SPOF) for the environment. This document can be used as reference for deployment of HA environment for the SAP BO/BI workloads on Azure and not intended to cover other aspects of system design like infra, network, security, and performance.
System Design
Following diagram is a reference architecture for SAP BO/BI 4.2 SP8 & SQL DB HA on Windows Server in Microsoft Azure .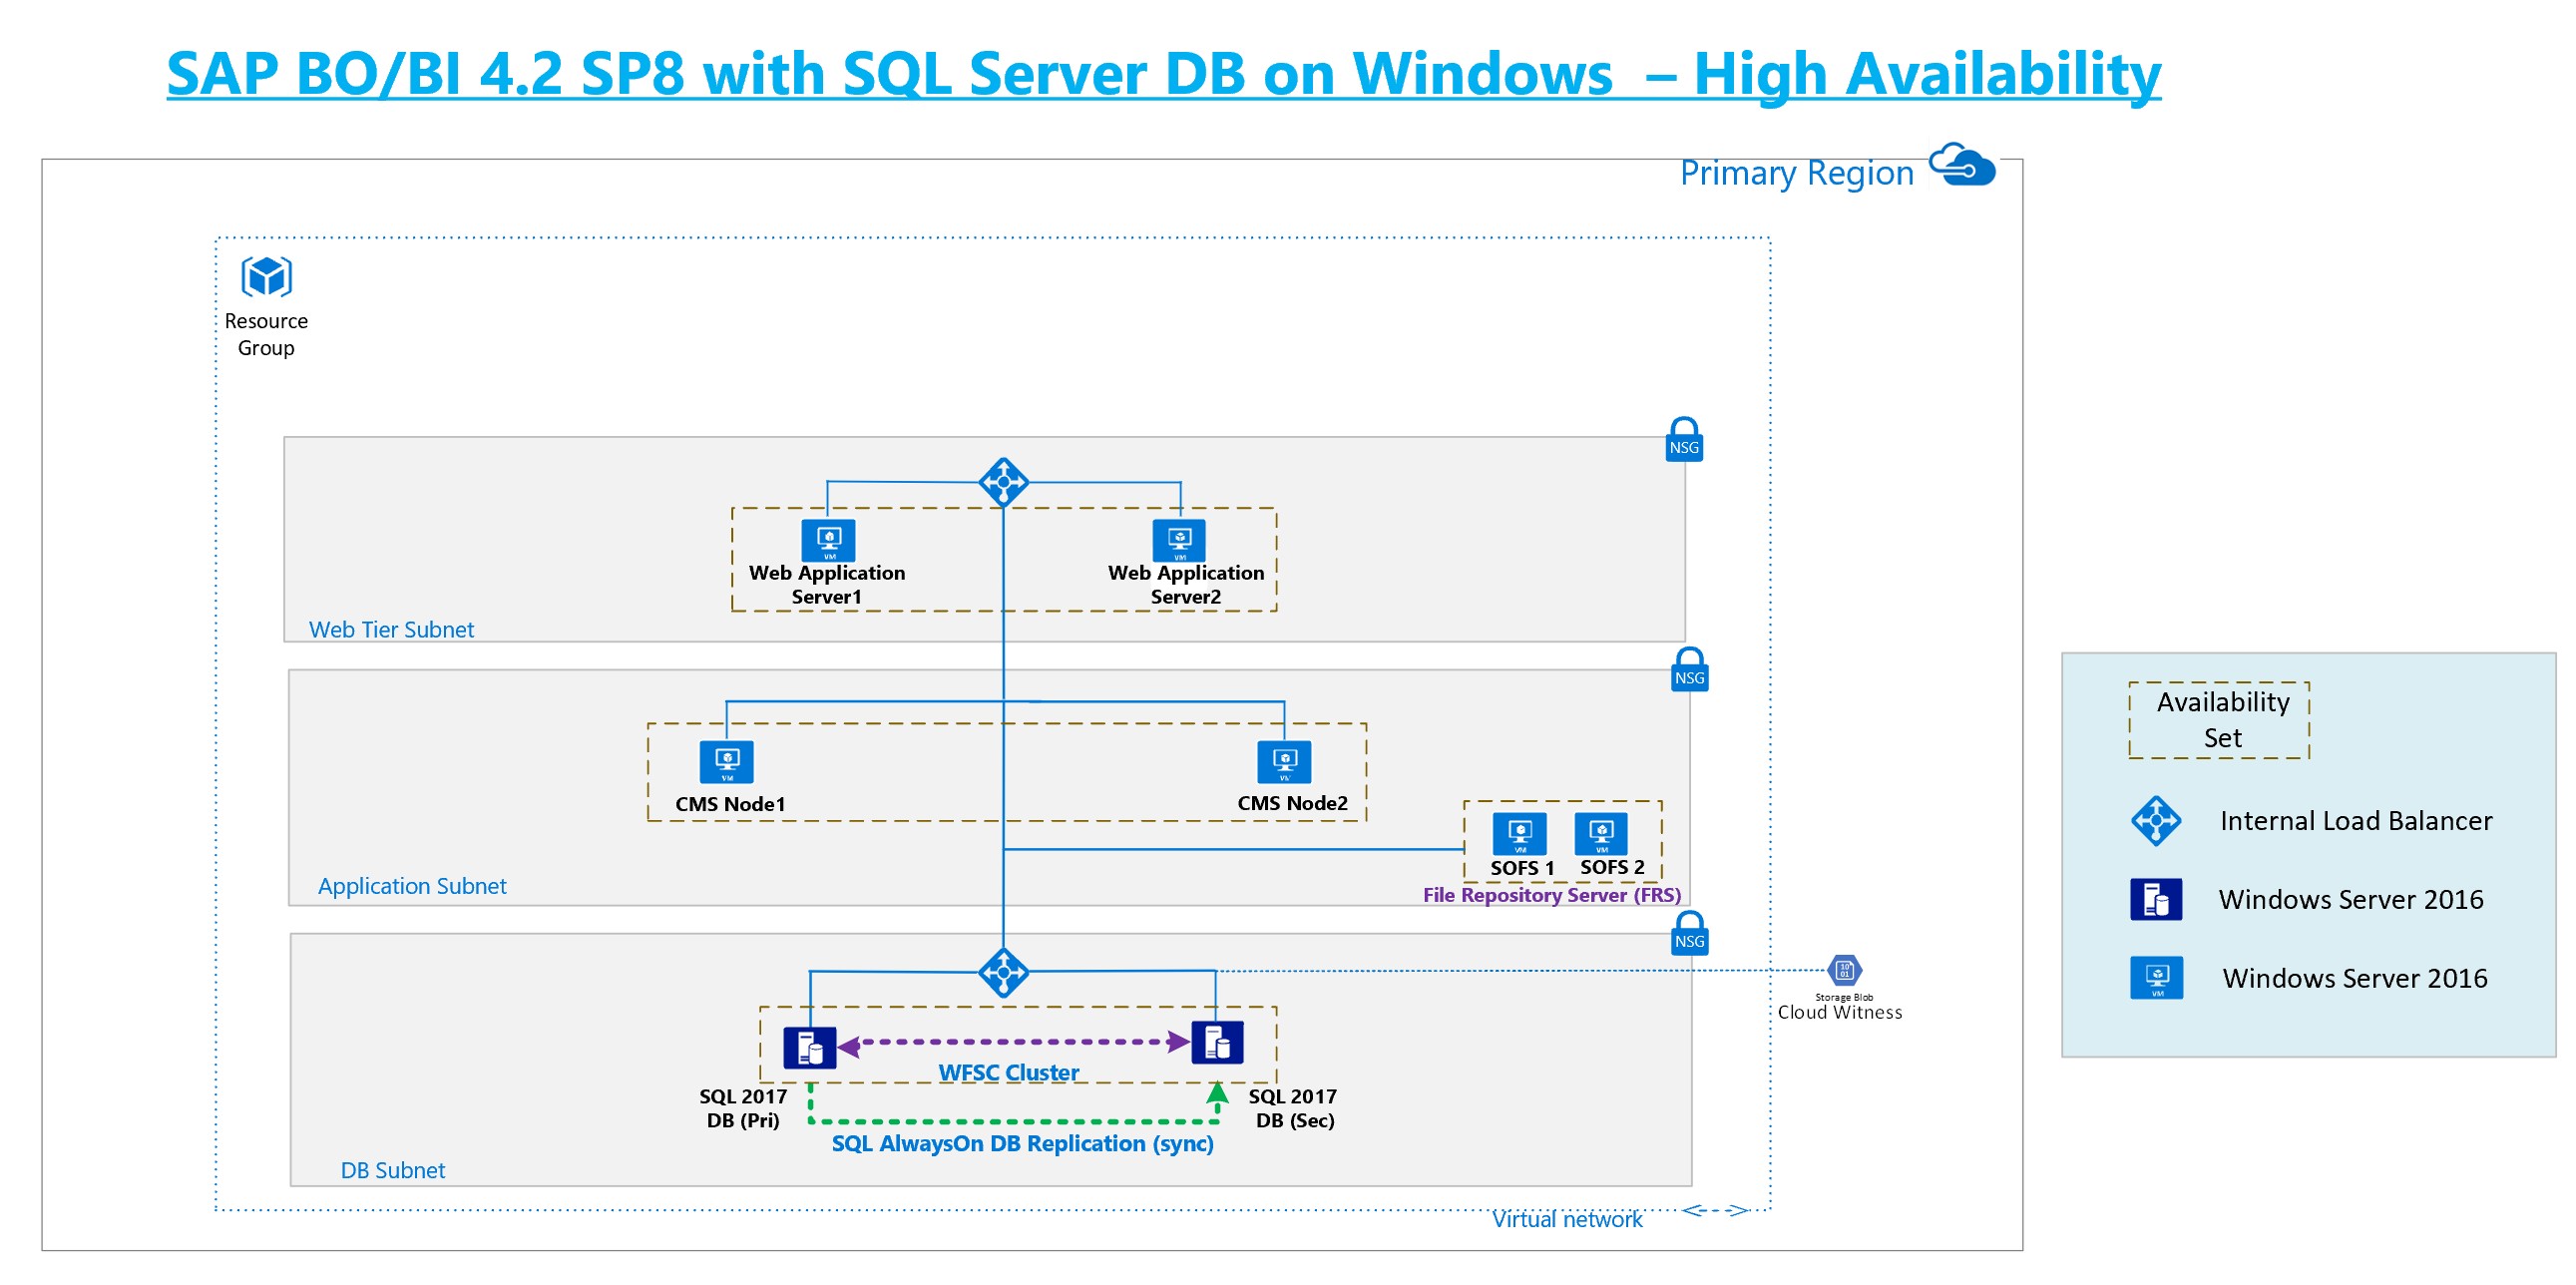
Following are the major components of the setup.
SQL SERVER DB Cluster – MS SQL Server is one of the supported database for SAP BO/BI. To achieve the HA of DB, used SQL AlwaysOn WSFC Cluster. Internal Load Balancer(ILB) is used to define the Virtual IP of Listener. Virtual name/IP of AlwaysOn Listener will be used in ODBC Connection setup of CMS Cluster server so that Application connection are redirected to Primary DB after DB failover/failback.
CMS Cluster – Redundancy is achieved by setting up two CMS servers in active-active mode. CMS cluster is defined at Server Intelligence Agent(SIA) configuration in Central Configuration Manager.
Web Application Server – A set of Tomcat Web Application server needs to be deployed in active-active mode for HA setup of Web tier. Load balancing and HA will be achieved by setting up virtual IP in ILB and mapping the virtual IP to hostname in DNS. Tomcat Webservers have config files in which CMS Cluster name and multiple server hostnames are defined.
In cost-conscious approach, we can combine CMS servers and Tomcat Web Server in same pair of VMs and have one virtual IP for both the components.
File Repository Server(FRS) – FRS location needs to be common for both of the CMS cluster servers. This can be achieved by creating a highly available SMB/NFS share. In this setup, already existing SOFS cluster (for SAP Netweaver Deployment) is reused. We can also use Azure File Share or Azure Netapp Files(ANF) available for the SAP landscape in Azure.
Following are the details of the reference setup which are described in this blog:
| Hostname | Description | OS Version | DB Version |
| azwinbo42sv1 | CMS Node1 | Windows 2016 | - |
| azwinbo42sv2 | CMS Node2 | Windows 2016 | - |
| azwinboweb1 | Tomcat WebServer 1 | Windows 2016 | - |
| azwinboweb2 | Tomcat WebServer 2 | Windows 2016 | - |
| azwinbowebha | Virtual hostname for WebServer Cluster | - | - |
| azwinbosqdb1 | SQL Server DB Node1 | Windows 2016 | SQL Server 2017 |
| azwinbosqdb2 | SQL Server DB Node2 | Windows 2016 | SQL Server 2017 |
| azwinbosqllsnr | Virtual hostname for AlwaysOn Listener | - | - |
| sofssycl1 | FRS Share SOFS Node1 | Windows 2016 | - |
| sofssycl2 | FRS Share SOFS Node2 | Windows 2016 | - |
The setup has used Azure availability set features which provides 99.95% of VM availability. Same setup can be used for availability zone based deployment which provides 99.99% of availability apart from FRS share SOFS cluster. We need to use zone redundant FRS share option.
This deployment can be extended for Disaster Recovery (DR) in paired Azure region by setting up third SQL Server DB VM and setting up AlwaysOn replication (async method). CMS & Tomcat webserver can be replicated to DR region using Azure Site Recovery(ASR).
References
SAP Guide for SAP BO/BI 4.2 SP8 Installation for Windows
SAP Guide for BO/BI 4.2 SP8 Platform Administration
SAP on Azure: Planning and Deployment Checklist
SAP on Azure: Deployment for SAP Netweaver
SAP on Azure: SQL Server Deployment Guide
2576124 - Error "Logon failed for RESTful Web Services." while logging into Fiori BI Launchpad
SAP Note 1928533 - SAP Applications on Azure: Supported Products and Azure VM types
SAP Note 2764907 - Tomcat session failover using Azure ILB fails
Overview of Installation Steps
Following are the high-level installation steps for SAP BO/BI HA setup:
- Read the required Installation Guide, SAP Notes, SAP on Azure docs and download the installation media.
- Preform the Preparatory Steps.
- Define the ILB for SQL DB, CMS & Tomcat WebServer.
- Install the SQL DB and Create CMS & AUDIT databases.
- Install the first CMS server
- Install additional CMS server and configure cluster
- Setup the SQL AlwaysOn DB Clsuster
- Install the Tomcat Web Application Servers
- Reconfigure the File Repository Server (FRS) in SMB share
- Test the High Availability failover.
Preparations
- Deploy the VM in Availability Sets as per the system architecture and Choose Operating System as Windows Server.
- Include data and log disk on each of the DB VMs and disks for CMS & Web Tier VMs.
- Add disk to SOFS Nodes for File share cluster for FRS share.
- Join the VMs to the Domain.
- Define Page File in Temp Disk (D Drive).
- Check that necessary Ports are open in Windows firewall.
- Disable the Continuous Availability Feature in Windows using the instructions in this link.
Define the Internal Load Balancers (ILB)
- ILB for SQL DB
- Define the front end IP
- Define the backend pool of SQL DB servers : azwinbosqdb1 & azwinbosqdb2
- Define the health probe port

- Define the Load balancing rules

Make sure “session persistence” set to “None” and Floating IP is enabled.
- Create an A-record entry in the DNS server.
- ILB for Tomcat WebServer
- Define the front end IP
- Define the backend pool of SQL DB servers : azwinboweb1 & azwinboweb2
- Define the health probe port

- Define the Load balancing rules

Make sure “Session persistence” is set to “Client IP and protocol” and “Floating IP” is disabled.
- Create an A-record in the DNS server.
Install the SQL DB and create CMS & AUDIT Databases on DB VM1
- Login to Node1(azwinbosqdb1) of SQL DB VM as administrator.
- Start the SQL DB install on VM1 and select the features.

- Define the Instance Name

- Use domain DB users for SQL server agent and Database Engine

- SQL Server configuration

- Database Engine configuration. Select the data and log drives.


- Installation of SQL DB is successful.

- Enable TCP/IP configuration and define the TCP port.

- Create Database BOCMS & BOAUDIT for the CMS and Audit database


- Create a db user. In this deployment created db user ‘boadmin’.
- Set the default database for the Database User to the CMS database.

- Assign publicand sysadmin roles to user 'boadmin' under user properties -> Server Roles

- Only Assign the db_ownerand public roles for 'BOCMS' and 'BOAUDIT' databases under user properties -> User Mapping.

Install the First CMS Server
- Login the first VM (azwinbo42sv1) for CMS Server as administrator.
- Create ODBC Data source for CMS DB
- In Control Panel -> Administrative Tools -> ODBC Data source (64 bit) -> System DSN.

- In Control Panel -> Administrative Tools -> ODBC Data source (64 bit) -> System DSN.
- Enter the db username & password

- Click on Client Configuration to update the DB port.

- Select the DB Name


- Test the DB connection

- Repeat the above steps to create Data source for Audit DB. Make sure to choose the Audit DB BOAUDIT.

- Install the CMS Server
- Run the Setup.exe


- Run the Setup.exe
- Select the Language Package. Default is English.
- Select Custom to choose the application to be installed.

- Choose the location of the installation. Installing it on I drive.

- Uncheck the ‘Web Tier’ and ‘Sybase SQL Anywhere DB’


- Start the New SAP BO/BI platform deployment

- Select DB type for CMS Repository: SQL Server using ODBC

- Select DB type for Audit DB : SQL Server using ODBC
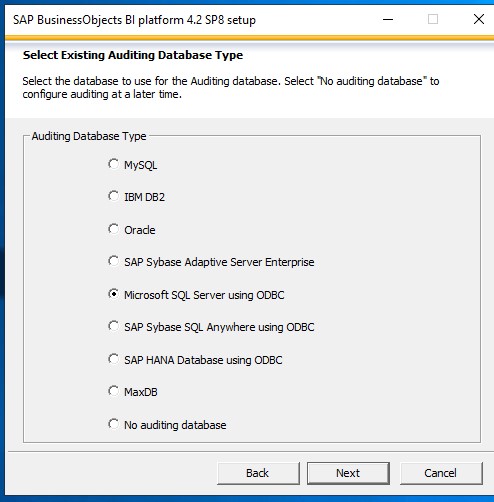
- Configuration Parameters


- Connection details for CMS & Audit DBs


- CMS configuration parameters


- Configure SMD agent & Introscope are optional and can be done later.


- Start the installation
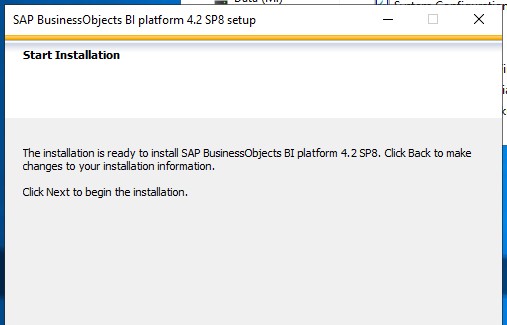

- Post Installation Steps

- Login to Central Management Console and complete the steps.


- Installation is completed
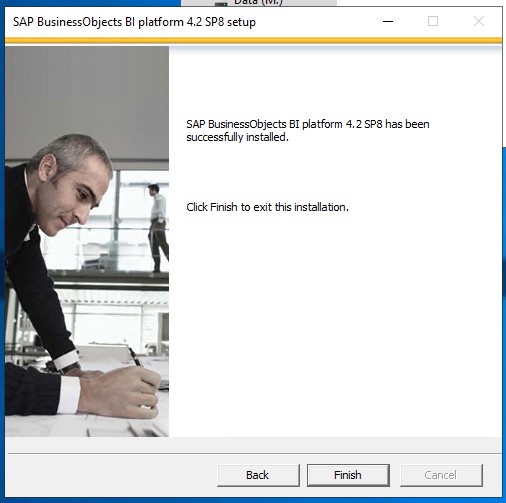
Install Additional CMS Server and configure cluster
- Login to second VM(azwinbo42sv2) for CMS Server as administrator
- Create ODBC Data source for CMS & Audit DB
- Install the additional CMS Server (Including only relevant screenshots)
- Run Setup.exe

- Select the Installation type as Custom / Expand.

- Choose the Installation location. Used I drive.
- Select Features. Uncheck WebTier and SQL Anywhere DB
- Select the Expand the existing SAP BO/BI deployment

- Select the SQL Server as DB type for CMS and Audit Repository.
- Local SIA Node name

- Existing CMS Server (node 1) details

- Cluster Key (Key created during CMS first node installation)

- Enter CMS port for additional server
- Connection details for CMS and Audit DB repository. Must create System DSN ODBC connection in advance from Control Panel.
- Select automatic Server start.
- Configure HTTP Listening Port
- Configure Subversion Repository.
- Choose configuration option for SMD agent and Introscope Manager.
- Start the Installation
- Finish the installation.
- Run Setup.exe
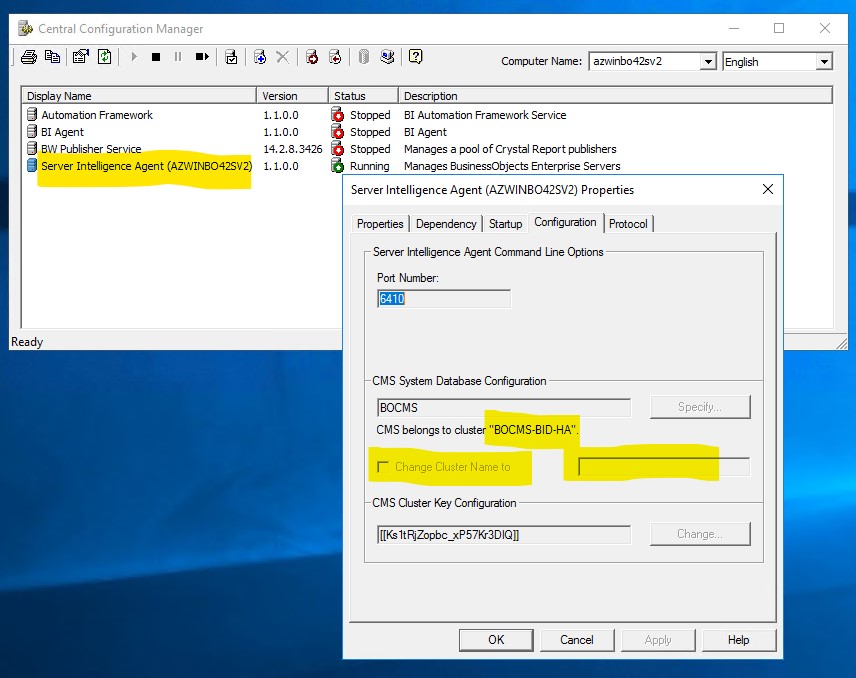
- Configure the CMS Cluster
- Open the Central the Central Configuration Manager in one of the CMS server.
- Stop SIA and right-click to select Properties.
- Go to configuration Tab
- Click on Change Cluster Name to and enter the Cluster Name
- Below screen shot shows cluster is already configured and its name is BOCMS-BID-HA
- Start SIA
- Login to Central Management Console and verify the cluster.

Setup SQL DB AlwaysOn Cluster
- SQL DB setup and configuration on Node2 (Refer to the steps in SQL DB setup on VM1)
- Install the SQL Server DB on second VM (azwinbosqdb2)
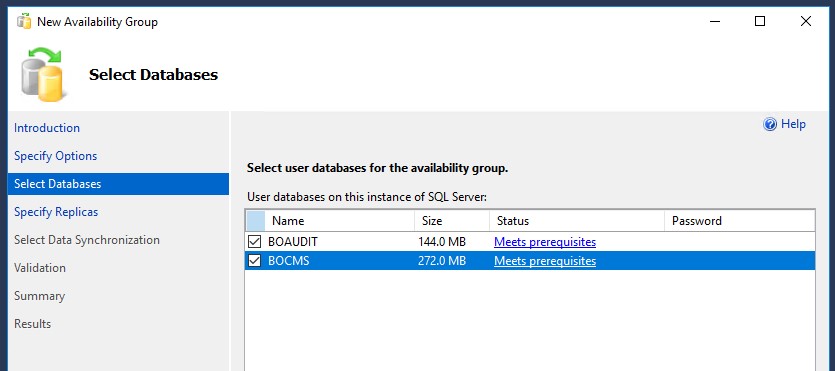
- Create Databases BOCMS and BOAUDIT.
- Define the same TCP port for connection.
- Create db user ‘boadmin’ and configure its access to the databases.
- Restore DB backup of BOCMS & BOAUDIT from Node1 with ‘Restore with Norecovery’ option.
- Setup WFSC AlwaysOn cluster for SQL DB.
- Install Failover Clustering and .Net Framework 3.5 features on both the cluster Nodes.
- Create cluster. Select the Node1 of cluster


- Define the cluster IP in DNS.

- Update the Cluster IP and start resources.

- Add second node to cluster


- Define the Cloud Witness to cluster in an Azure Storage account.
- Enable AlwaysOn High Availability on both nodes of SQL Servers from Config Manager

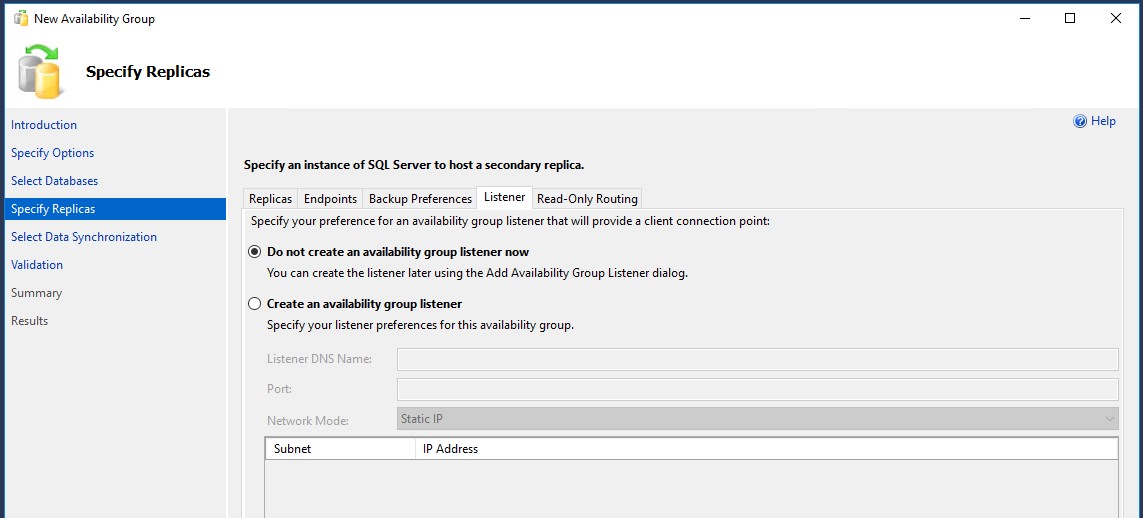
- Define AlwaysOn Availability group from SQL Studio.






- Define the SQL Listener
- Use the virtual IP defined in ILB and define the listener name in DNS.

- In the Windows Cluster Rolespane, right-click the availability group name, and then select Add Resource > Client Access Point
- In the Name box, create a name for this new listener.

- Click Next and Finish.
- Take the availability group cluster role offline. Stop the Role.
- Right click on IP Address and add dependency.


- Set the Cluster parameters using Powershell Commands.


- Check the SQL AlwaysOn Cluster.
- Use the virtual IP defined in ILB and define the listener name in DNS.
Download the “sap_syncronize_always_on” script from the below link.
Run the script in Node1 using powershell.
Resolve the errors and rerun the script to confirm the status of AlwaysOn Cluster.
- In both CMS Servers, Update the SQL Server ODBC connection for BOCMS & BOAUDIT to point to listener IP in place of SQL server hostname.

Install the Tomcat Web Application Servers
- Login to VM1 (azwinboweb1) as administrator.
- Setup the Webapp Server
- Run setup.exe
- Select Web Tier as installation type

- Choose the Installation Path

- Choose Features

- Define parameters

- CMS Server Details

- Select Introscope Manager config option
- Start the Install

- Post Install message and Finish the setup

- Check and update the cluster info properties file which defines the CMS cluster name and servers hostname and IP addresses.

- Repeat all the above steps to Install Tomcat Web Server 2 on VM2 (azwinboweb2).
- Update RESTful Webservice to point to virtual hostname/IP of Tomcat WebServer.
- Issue is described in SAP Note 2576124
- Open Applications tab in Central Management Console and select RESTful web service.
- Update the properties of RESTful webservice to virtual/logical hostname of Tomcat WebServer from actual CMS Node1 hostname and change the port number to Tomcat port(default 8080). If this is not changed then during CMS Server Node1 unavailability, Fiori based BI Launchpad will not work.

Reconfigure the File Repository Server (FRS) in SMB share
- Created an SMB share in SOFS cluster which is pre-existed for SAP Netweaver setup "\\sapglobalhost\sapmnt\BID\FRS"
- Open the Central Configuration Manager(CCM) and Stop the one of SIA.
- From CMS Server and copy the contents of FRS directory to SMB share.

- Start SIA from CCM.
- Login to Central Management Console and Disable the FRS.

- Update the property for all the highlighted services to point to the New Location for Input, Output and temporary FRS directories.


- Click Save and Close.
- Enable the Services in CMC.
Test the High Availability failover
Tolerance to Single Point of Failure needs to tested in four components of the SAP BO/BI HA deployment. Failure can happen individually for each component OR for all at the same time. Current Systems design is tested to be available to users in case of such failures.
Details of failure tolerance process for each component.
Database Tier – SQL DB AlwaysOn will keep synching the Primary and Secondary DB, in case of unavailability of Primary DB, will failover to secondary DB. Client connection to DB are using listener IP which is virtual & defined in ILB and get redirected to the active primary DB.
CMS Server Tier – Two servers on CMS are running in active-active mode in which both the nodes are available for connections from web tier. CMS cluster details are maintained in properties file in Web server. In case of failure of any one of the node, other node will still be available for existing and new connections.
Web Tier – A pair of web servers are running in active-active mode. Users are using virtual IP/hostname defined ILB and connections are redirected to either of the two Web Servers. In case of unavailability of one of the web servers, ILB will direct connection to the available web server.
FRS – It is part of highly available SOFS cluster and in case of any of the SOFS node is down, file share will still be available from another VM of the cluster.
There are mainly 2 kinds of HA testing needs to be performed:
- Planned – In case of planned unavailability of the one the node of the cluster pair. This can be tested by stopping the services on the node and verifying that SAP BO/BI is available to users.
- Unplanned – This can be tested by crashing the VMs and removing the storage from VMs. In windows environment, VM crashing can be achieved by the tool ‘notmyfault’.
Summary
This completes the Highly Available setup of SAP BO/BI 4.2 SP8 with SQL Server DB on Windows.
- SAP Managed Tags:
- Microsoft SQL Server,
- SAP BusinessObjects Business Intelligence platform
You must be a registered user to add a comment. If you've already registered, sign in. Otherwise, register and sign in.
-
"automatische backups"
1 -
"regelmäßige sicherung"
1 -
"TypeScript" "Development" "FeedBack"
1 -
505 Technology Updates 53
1 -
ABAP
14 -
ABAP API
1 -
ABAP CDS Views
2 -
ABAP CDS Views - BW Extraction
1 -
ABAP CDS Views - CDC (Change Data Capture)
1 -
ABAP class
2 -
ABAP Cloud
2 -
ABAP Development
5 -
ABAP in Eclipse
1 -
ABAP Platform Trial
1 -
ABAP Programming
2 -
abap technical
1 -
absl
2 -
access data from SAP Datasphere directly from Snowflake
1 -
Access data from SAP datasphere to Qliksense
1 -
Accrual
1 -
action
1 -
adapter modules
1 -
Addon
1 -
Adobe Document Services
1 -
ADS
1 -
ADS Config
1 -
ADS with ABAP
1 -
ADS with Java
1 -
ADT
2 -
Advance Shipping and Receiving
1 -
Advanced Event Mesh
3 -
AEM
1 -
AI
7 -
AI Launchpad
1 -
AI Projects
1 -
AIML
9 -
Alert in Sap analytical cloud
1 -
Amazon S3
1 -
Analytical Dataset
1 -
Analytical Model
1 -
Analytics
1 -
Analyze Workload Data
1 -
annotations
1 -
API
1 -
API and Integration
3 -
API Call
2 -
Application Architecture
1 -
Application Development
5 -
Application Development for SAP HANA Cloud
3 -
Applications and Business Processes (AP)
1 -
Artificial Intelligence
1 -
Artificial Intelligence (AI)
5 -
Artificial Intelligence (AI) 1 Business Trends 363 Business Trends 8 Digital Transformation with Cloud ERP (DT) 1 Event Information 462 Event Information 15 Expert Insights 114 Expert Insights 76 Life at SAP 418 Life at SAP 1 Product Updates 4
1 -
Artificial Intelligence (AI) blockchain Data & Analytics
1 -
Artificial Intelligence (AI) blockchain Data & Analytics Intelligent Enterprise
1 -
Artificial Intelligence (AI) blockchain Data & Analytics Intelligent Enterprise Oil Gas IoT Exploration Production
1 -
Artificial Intelligence (AI) blockchain Data & Analytics Intelligent Enterprise sustainability responsibility esg social compliance cybersecurity risk
1 -
ASE
1 -
ASR
2 -
ASUG
1 -
Attachments
1 -
Authorisations
1 -
Automating Processes
1 -
Automation
2 -
aws
2 -
Azure
1 -
Azure AI Studio
1 -
B2B Integration
1 -
Backorder Processing
1 -
Backup
1 -
Backup and Recovery
1 -
Backup schedule
1 -
BADI_MATERIAL_CHECK error message
1 -
Bank
1 -
BAS
1 -
basis
2 -
Basis Monitoring & Tcodes with Key notes
2 -
Batch Management
1 -
BDC
1 -
Best Practice
1 -
bitcoin
1 -
Blockchain
3 -
bodl
1 -
BOP in aATP
1 -
BOP Segments
1 -
BOP Strategies
1 -
BOP Variant
1 -
BPC
1 -
BPC LIVE
1 -
BTP
12 -
BTP Destination
2 -
Business AI
1 -
Business and IT Integration
1 -
Business application stu
1 -
Business Application Studio
1 -
Business Architecture
1 -
Business Communication Services
1 -
Business Continuity
1 -
Business Data Fabric
3 -
Business Partner
12 -
Business Partner Master Data
10 -
Business Technology Platform
2 -
Business Trends
4 -
CA
1 -
calculation view
1 -
CAP
3 -
Capgemini
1 -
CAPM
1 -
Catalyst for Efficiency: Revolutionizing SAP Integration Suite with Artificial Intelligence (AI) and
1 -
CCMS
2 -
CDQ
12 -
CDS
2 -
Cental Finance
1 -
Certificates
1 -
CFL
1 -
Change Management
1 -
chatbot
1 -
chatgpt
3 -
CL_SALV_TABLE
2 -
Class Runner
1 -
Classrunner
1 -
Cloud ALM Monitoring
1 -
Cloud ALM Operations
1 -
cloud connector
1 -
Cloud Extensibility
1 -
Cloud Foundry
4 -
Cloud Integration
6 -
Cloud Platform Integration
2 -
cloudalm
1 -
communication
1 -
Compensation Information Management
1 -
Compensation Management
1 -
Compliance
1 -
Compound Employee API
1 -
Configuration
1 -
Connectors
1 -
Consolidation Extension for SAP Analytics Cloud
2 -
Control Indicators.
1 -
Controller-Service-Repository pattern
1 -
Conversion
1 -
Cosine similarity
1 -
cryptocurrency
1 -
CSI
1 -
ctms
1 -
Custom chatbot
3 -
Custom Destination Service
1 -
custom fields
1 -
Customer Experience
1 -
Customer Journey
1 -
Customizing
1 -
cyber security
3 -
cybersecurity
1 -
Data
1 -
Data & Analytics
1 -
Data Aging
1 -
Data Analytics
2 -
Data and Analytics (DA)
1 -
Data Archiving
1 -
Data Back-up
1 -
Data Flow
1 -
Data Governance
5 -
Data Integration
2 -
Data Quality
12 -
Data Quality Management
12 -
Data Synchronization
1 -
data transfer
1 -
Data Unleashed
1 -
Data Value
8 -
database tables
1 -
Datasphere
3 -
datenbanksicherung
1 -
dba cockpit
1 -
dbacockpit
1 -
Debugging
2 -
Delimiting Pay Components
1 -
Delta Integrations
1 -
Destination
3 -
Destination Service
1 -
Developer extensibility
1 -
Developing with SAP Integration Suite
1 -
Devops
1 -
digital transformation
1 -
Documentation
1 -
Dot Product
1 -
DQM
1 -
dump database
1 -
dump transaction
1 -
e-Invoice
1 -
E4H Conversion
1 -
Eclipse ADT ABAP Development Tools
2 -
edoc
1 -
edocument
1 -
ELA
1 -
Embedded Consolidation
1 -
Embedding
1 -
Embeddings
1 -
Employee Central
1 -
Employee Central Payroll
1 -
Employee Central Time Off
1 -
Employee Information
1 -
Employee Rehires
1 -
Enable Now
1 -
Enable now manager
1 -
endpoint
1 -
Enhancement Request
1 -
Enterprise Architecture
1 -
ETL Business Analytics with SAP Signavio
1 -
Euclidean distance
1 -
Event Dates
1 -
Event Driven Architecture
1 -
Event Mesh
2 -
Event Reason
1 -
EventBasedIntegration
1 -
EWM
1 -
EWM Outbound configuration
1 -
EWM-TM-Integration
1 -
Existing Event Changes
1 -
Expand
1 -
Expert
2 -
Expert Insights
2 -
Exploits
1 -
Fiori
14 -
Fiori Elements
2 -
Fiori SAPUI5
12 -
Flask
1 -
Full Stack
8 -
Funds Management
1 -
General
1 -
General Splitter
1 -
Generative AI
1 -
Getting Started
1 -
GitHub
8 -
Grants Management
1 -
GraphQL
1 -
groovy
1 -
GTP
1 -
HANA
6 -
HANA Cloud
2 -
Hana Cloud Database Integration
2 -
HANA DB
2 -
HANA XS Advanced
1 -
Historical Events
1 -
home labs
1 -
HowTo
1 -
HR Data Management
1 -
html5
8 -
HTML5 Application
1 -
Identity cards validation
1 -
idm
1 -
Implementation
1 -
input parameter
1 -
instant payments
1 -
Integration
3 -
Integration Advisor
1 -
Integration Architecture
1 -
Integration Center
1 -
Integration Suite
1 -
intelligent enterprise
1 -
iot
1 -
Java
1 -
job
1 -
Job Information Changes
1 -
Job-Related Events
1 -
Job_Event_Information
1 -
joule
4 -
Journal Entries
1 -
Just Ask
1 -
Kerberos for ABAP
8 -
Kerberos for JAVA
8 -
KNN
1 -
Launch Wizard
1 -
Learning Content
2 -
Life at SAP
5 -
lightning
1 -
Linear Regression SAP HANA Cloud
1 -
Loading Indicator
1 -
local tax regulations
1 -
LP
1 -
Machine Learning
2 -
Marketing
1 -
Master Data
3 -
Master Data Management
14 -
Maxdb
2 -
MDG
1 -
MDGM
1 -
MDM
1 -
Message box.
1 -
Messages on RF Device
1 -
Microservices Architecture
1 -
Microsoft Universal Print
1 -
Middleware Solutions
1 -
Migration
5 -
ML Model Development
1 -
Modeling in SAP HANA Cloud
8 -
Monitoring
3 -
MTA
1 -
Multi-Record Scenarios
1 -
Multiple Event Triggers
1 -
Myself Transformation
1 -
Neo
1 -
New Event Creation
1 -
New Feature
1 -
Newcomer
1 -
NodeJS
2 -
ODATA
2 -
OData APIs
1 -
odatav2
1 -
ODATAV4
1 -
ODBC
1 -
ODBC Connection
1 -
Onpremise
1 -
open source
2 -
OpenAI API
1 -
Oracle
1 -
PaPM
1 -
PaPM Dynamic Data Copy through Writer function
1 -
PaPM Remote Call
1 -
PAS-C01
1 -
Pay Component Management
1 -
PGP
1 -
Pickle
1 -
PLANNING ARCHITECTURE
1 -
Popup in Sap analytical cloud
1 -
PostgrSQL
1 -
POSTMAN
1 -
Process Automation
2 -
Product Updates
4 -
PSM
1 -
Public Cloud
1 -
Python
4 -
Qlik
1 -
Qualtrics
1 -
RAP
3 -
RAP BO
2 -
Record Deletion
1 -
Recovery
1 -
recurring payments
1 -
redeply
1 -
Release
1 -
Remote Consumption Model
1 -
Replication Flows
1 -
research
1 -
Resilience
1 -
REST
1 -
REST API
2 -
Retagging Required
1 -
Risk
1 -
Rolling Kernel Switch
1 -
route
1 -
rules
1 -
S4 HANA
1 -
S4 HANA Cloud
1 -
S4 HANA On-Premise
1 -
S4HANA
3 -
S4HANA_OP_2023
2 -
SAC
10 -
SAC PLANNING
9 -
SAP
4 -
SAP ABAP
1 -
SAP Advanced Event Mesh
1 -
SAP AI Core
8 -
SAP AI Launchpad
8 -
SAP Analytic Cloud Compass
1 -
Sap Analytical Cloud
1 -
SAP Analytics Cloud
4 -
SAP Analytics Cloud for Consolidation
3 -
SAP Analytics Cloud Story
1 -
SAP analytics clouds
1 -
SAP BAS
1 -
SAP Basis
6 -
SAP BODS
1 -
SAP BODS certification.
1 -
SAP BTP
21 -
SAP BTP Build Work Zone
2 -
SAP BTP Cloud Foundry
6 -
SAP BTP Costing
1 -
SAP BTP CTMS
1 -
SAP BTP Innovation
1 -
SAP BTP Migration Tool
1 -
SAP BTP SDK IOS
1 -
SAP Build
11 -
SAP Build App
1 -
SAP Build apps
1 -
SAP Build CodeJam
1 -
SAP Build Process Automation
3 -
SAP Build work zone
10 -
SAP Business Objects Platform
1 -
SAP Business Technology
2 -
SAP Business Technology Platform (XP)
1 -
sap bw
1 -
SAP CAP
2 -
SAP CDC
1 -
SAP CDP
1 -
SAP CDS VIEW
1 -
SAP Certification
1 -
SAP Cloud ALM
4 -
SAP Cloud Application Programming Model
1 -
SAP Cloud Integration for Data Services
1 -
SAP cloud platform
8 -
SAP Companion
1 -
SAP CPI
3 -
SAP CPI (Cloud Platform Integration)
2 -
SAP CPI Discover tab
1 -
sap credential store
1 -
SAP Customer Data Cloud
1 -
SAP Customer Data Platform
1 -
SAP Data Intelligence
1 -
SAP Data Migration in Retail Industry
1 -
SAP Data Services
1 -
SAP DATABASE
1 -
SAP Dataspher to Non SAP BI tools
1 -
SAP Datasphere
9 -
SAP DRC
1 -
SAP EWM
1 -
SAP Fiori
3 -
SAP Fiori App Embedding
1 -
Sap Fiori Extension Project Using BAS
1 -
SAP GRC
1 -
SAP HANA
1 -
SAP HCM (Human Capital Management)
1 -
SAP HR Solutions
1 -
SAP IDM
1 -
SAP Integration Suite
9 -
SAP Integrations
4 -
SAP iRPA
2 -
SAP LAGGING AND SLOW
1 -
SAP Learning Class
1 -
SAP Learning Hub
1 -
SAP Odata
2 -
SAP on Azure
1 -
SAP PartnerEdge
1 -
sap partners
1 -
SAP Password Reset
1 -
SAP PO Migration
1 -
SAP Prepackaged Content
1 -
SAP Process Automation
2 -
SAP Process Integration
2 -
SAP Process Orchestration
1 -
SAP S4HANA
2 -
SAP S4HANA Cloud
1 -
SAP S4HANA Cloud for Finance
1 -
SAP S4HANA Cloud private edition
1 -
SAP Sandbox
1 -
SAP STMS
1 -
SAP successfactors
3 -
SAP SuccessFactors HXM Core
1 -
SAP Time
1 -
SAP TM
2 -
SAP Trading Partner Management
1 -
SAP UI5
1 -
SAP Upgrade
1 -
SAP Utilities
1 -
SAP-GUI
8 -
SAP_COM_0276
1 -
SAPBTP
1 -
SAPCPI
1 -
SAPEWM
1 -
sapmentors
1 -
saponaws
2 -
SAPS4HANA
1 -
SAPUI5
5 -
schedule
1 -
Script Operator
1 -
Secure Login Client Setup
8 -
security
9 -
Selenium Testing
1 -
Self Transformation
1 -
Self-Transformation
1 -
SEN
1 -
SEN Manager
1 -
service
1 -
SET_CELL_TYPE
1 -
SET_CELL_TYPE_COLUMN
1 -
SFTP scenario
2 -
Simplex
1 -
Single Sign On
8 -
Singlesource
1 -
SKLearn
1 -
Slow loading
1 -
soap
1 -
Software Development
1 -
SOLMAN
1 -
solman 7.2
2 -
Solution Manager
3 -
sp_dumpdb
1 -
sp_dumptrans
1 -
SQL
1 -
sql script
1 -
SSL
8 -
SSO
8 -
Substring function
1 -
SuccessFactors
1 -
SuccessFactors Platform
1 -
SuccessFactors Time Tracking
1 -
Sybase
1 -
system copy method
1 -
System owner
1 -
Table splitting
1 -
Tax Integration
1 -
Technical article
1 -
Technical articles
1 -
Technology Updates
14 -
Technology Updates
1 -
Technology_Updates
1 -
terraform
1 -
Threats
2 -
Time Collectors
1 -
Time Off
2 -
Time Sheet
1 -
Time Sheet SAP SuccessFactors Time Tracking
1 -
Tips and tricks
2 -
toggle button
1 -
Tools
1 -
Trainings & Certifications
1 -
Transformation Flow
1 -
Transport in SAP BODS
1 -
Transport Management
1 -
TypeScript
2 -
ui designer
1 -
unbind
1 -
Unified Customer Profile
1 -
UPB
1 -
Use of Parameters for Data Copy in PaPM
1 -
User Unlock
1 -
VA02
1 -
Validations
1 -
Vector Database
2 -
Vector Engine
1 -
Visual Studio Code
1 -
VSCode
1 -
Vulnerabilities
1 -
Web SDK
1 -
work zone
1 -
workload
1 -
xsa
1 -
XSA Refresh
1
- « Previous
- Next »
- Unable to log in to SAP BusinessObjects CMC in Technology Blogs by Members
- Start Hour of Sale at # instead of 1 in Technology Q&A
- Where Did The Web Intelligence Content Go? in Technology Q&A
- What is the next product of SAP BusinessObjects Business Intelligence (BI) 4.3? Is it still on-prem? in Technology Q&A
- There is a problem connecting to the database. JDBC PostgreSQL in Technology Q&A
| User | Count |
|---|---|
| 7 | |
| 5 | |
| 5 | |
| 5 | |
| 4 | |
| 4 | |
| 4 | |
| 4 | |
| 3 | |
| 3 |