This is a submission of the
Enhance your bot building with templates blog post series. In this blog post, I will show you how to automate a process on writing data into an excel file.
Steps to follow:
1.Create a project
2.Include the Excel Script Library
3. Add Activities and functions from ‘Excel Lib’ category
4.Set the data that has to be written to the Excel.
5. Save the excel.
Pre-requisites: Desktop Studio :1.0.8.36 MS Office
Instructions:
1. Create a project and a workflow.
Create a new project. Create a new workflow using Workflow perspective.
2. Include the Excel Library for the project.

3. Add the activities from the Excel Lib.
As the first step in the workflow, include the Activity
Initialize Excel to initialize Excel Library.
4. Create a new excel file.
Use the activity
Create Excel file to create a new excel file. If you want to write data into an existing excel file use the activity
Open Existing Excel file. In this blog, I am creating a new excel file.
5. Activate your worksheet to write data into excel.

6. Prepare Excel data
Create an activity
Custom to write the below code.
Custom activity is used to add manual code. The excel data should be in an array format. Create an item with an array in the Context. Click on the checkbox, to make the item as an array.

Prepare your Excel data in an array format as below.
        rootData.aExcelData[0] = ['Account ID','Opportunity ID','Status'];

	rootData.aExcelData[1] = ['4892737','1223','Open'];

	rootData.aExcelData[2] = ['4358635','987','Closed'];

	rootData.aExcelData[3] = ['68989','8999','In Process'];
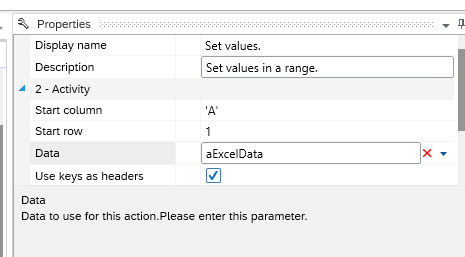
6.Set the data into excel.
Use activity
Set Values to write the values to the excel. Enter the parameters as below. Excel has a starting column as A and starting row as 1. The data that has to be written to the excel is bound to the field Data.
7. Save the excel
Use the activity Save as Excel to save the new excel file. Enter the location and name of the excel file to be saved.

8.Close the Excel File
Use the activity
Close Excel File to close the existing excel file.
9.End Excel file
Use the activity
End Excel in order to close the Excel Library once you are done using it in your project
10. Final workflow looks as below

Output
The file is saved in the mentioned location with the output as below.

Conclusion
This blog post should help you to understand the use of the ‘Excel Library’ and how to write data into excel.
