
- SAP Community
- Products and Technology
- Technology
- Technology Blogs by SAP
- SAP Intelligent RPA: Search for e-mails with diffe...
Technology Blogs by SAP
Learn how to extend and personalize SAP applications. Follow the SAP technology blog for insights into SAP BTP, ABAP, SAP Analytics Cloud, SAP HANA, and more.
Turn on suggestions
Auto-suggest helps you quickly narrow down your search results by suggesting possible matches as you type.
Showing results for
dianamatache
Explorer
Options
- Subscribe to RSS Feed
- Mark as New
- Mark as Read
- Bookmark
- Subscribe
- Printer Friendly Page
- Report Inappropriate Content
05-11-2020
7:50 AM
Introduction
This is a submission of the Enhance your bot building with templates blog post series.
In this post I will show you how to search for emails with certain criteria in Outlook using SAP Intelligent RPA. The emails that fit the searching criteria will be displayed in a table located in a popup. For this tutorial I will create the popup interface in UI Designer.
What you will learn in this tutorial:
Steps to follow:
1.Create and capture a popup in UI Designer;
2.Create a new workflow;
3.Import Outlook Library Scripts;
4.Add activities in your workflow;
5.Enrich the generated code by your workflow with your custom logic;
Prerequisites:
Microsoft Outlook
Desktop Studio 1.0.8.36
Instructions:
Create a new project and give it a name.
In order to create our interface, we need to go to the UI Designer perspective and right click on the ‘POPUPS’. We have two possible options to choose from: An Empty AppBar and An Empty Popup. Select the second one and give it a name. I named mine ‘outputTable’.
To be able to create the interface, make sure to select the ‘Design Mode’ – the second icon from left to right:
To create elements, right click in the square lined in red and choose what elements you want to add. To start, create a container. In the properties view you can see some properties you can customize. You can also use the settings.js file to customize your elements using code. If you are making changes in the setting.js file, make sure to save the file in order for the changes to appear also on your screen. If you add elements from your interface, you may need to close the setting.js file and reopen it, so the code it’s up to date.
After you created your container you can start adding other elements. For this exercise we will only need to add a table with the container as a parent (you can set it from properties or setting.js file). By default there is a dummy dataset and column structure. The structure can be altered and the dataset can be deleted from setting.js ( the “test” array above).
Our table will have 4 columns containing the details about each email: Date, Sender, Subject, Body. In order to create a column with 4 columns, right click in the container lined in red, choose “insert list/table” and then “table”.
You can choose any colors, icons and styles you prefer for your design and also you can modify the dimension of the columns from “column width”.
In the end, my table and popup looks like this:
This is the code generated by my popup:
If you want to use this popup in your workflow the next step is to capture it.
Important: Make sure your screen resolution is set to 100% so that the popup will be captured correctly. You can change it from display settings -> scale and layout. For the changes to be registered by Desktop Studio, you need to close it and open it again.
You can capture your popup using the last button and then press ‘Start Capture’:
After you captured your popup you should be able to see it in the Workflows perspective, under the “Pages” view:
2.Create a new workflow
Go to ‘Workflow’ perspective and create a new workflow. I named mine ‘searchEmail’.
3.Import Outlook Library Scripts
In the workspace of your new workflow you can use different functions for accessing and manipulating Microsoft Outlook files. In order for your project to compile and run without errors, you first have to enable the Outlook Library scripts in your project:
4.Add activities in your workflow
For this project you need to add a Custom activity in your workflow so you can use the functions in the Outlook library. You can give a name and a description for this activity, so you can distinguish better its purpose. I will name mine ‘Search for Email’. I named the corresponding step ‘SearchEmail’. Using suggestive names will allow you to better organize your code.
Your workflow should now look like this:
Important: Before you can continue with the rest of the functionalities you need to build your project. This way the script for the workflow will be generated and we can enhance it.
5.Enrich the generated code by your workflow with your custom logic
After you have built your project you can proceed to the Scripts perspective and open the script generated by your workflow (it will have the same name). Search for your activity and step by their name and you can add additional functionalities.
In this step we first need to initialize the outlook library, reset the email collection and declare some variables we will use later. I recommend using a mechanism of type “try – catch” in order to handle the possibility that the search returns an error.
In the “try” branch we first create the search function. In the filter property we can build our custom search criteria. My filter contains (in comments) multiple criteria that can be combined using logical operators (“AND”, “OR). The behavior I chose to implement in my bot is the return of the unread emails from last week, from the ‘fakemails@sap.com’ mailbox. Of course, you can choose your own requirement. In addition to the filter, we have additional properties, some of them also in comments. As already mentioned, you can specify which outlook email account you want to use for the search. Be careful, you need to have this account configured on your machine and be logged in. After the search is performed, I’m looping through each email and populate my array (dataset) with their details. I will use this array to set the emails in the table. Of course, at the end we need to show the table to the user, so we will open the popup.
In the “catch” branch we include the actions that need to trigger if an error has been encountered on the “try” branch. I chose to return the error in the console.
After the search is performed and popup opens to show the results, we release the outlook library and end the scenario.
Below is my code for the ‘Search_for_Email’ step:
Conclusion
This blog post should help you to understand the use of the ‘Outlook Library’, how to create a popup and how to search for an email using custom filtering from ‘Outlook Library’. At the end, you should be able to understand these functionalities and use them in your scenarios.
This is a submission of the Enhance your bot building with templates blog post series.
In this post I will show you how to search for emails with certain criteria in Outlook using SAP Intelligent RPA. The emails that fit the searching criteria will be displayed in a table located in a popup. For this tutorial I will create the popup interface in UI Designer.
What you will learn in this tutorial:
- How to use the Outlook Library;
- How to create a popup in UI Designer;
- How to search for certain emails in Outlook;
- How to use try – catch mechanism;
Steps to follow:
1.Create and capture a popup in UI Designer;
2.Create a new workflow;
3.Import Outlook Library Scripts;
4.Add activities in your workflow;
5.Enrich the generated code by your workflow with your custom logic;
Prerequisites:
Microsoft Outlook
Desktop Studio 1.0.8.36
Instructions:
- Create and capture a popup in UI Designer
Create a new project and give it a name.
In order to create our interface, we need to go to the UI Designer perspective and right click on the ‘POPUPS’. We have two possible options to choose from: An Empty AppBar and An Empty Popup. Select the second one and give it a name. I named mine ‘outputTable’.

To be able to create the interface, make sure to select the ‘Design Mode’ – the second icon from left to right:

To create elements, right click in the square lined in red and choose what elements you want to add. To start, create a container. In the properties view you can see some properties you can customize. You can also use the settings.js file to customize your elements using code. If you are making changes in the setting.js file, make sure to save the file in order for the changes to appear also on your screen. If you add elements from your interface, you may need to close the setting.js file and reopen it, so the code it’s up to date.

After you created your container you can start adding other elements. For this exercise we will only need to add a table with the container as a parent (you can set it from properties or setting.js file). By default there is a dummy dataset and column structure. The structure can be altered and the dataset can be deleted from setting.js ( the “test” array above).
Our table will have 4 columns containing the details about each email: Date, Sender, Subject, Body. In order to create a column with 4 columns, right click in the container lined in red, choose “insert list/table” and then “table”.
You can choose any colors, icons and styles you prefer for your design and also you can modify the dimension of the columns from “column width”.
In the end, my table and popup looks like this:

This is the code generated by my popup:
// This file is regenerated by Desktop Studio : modify it carefully !


popup = POPUPS.outputTable = POPUPS.popup({ outputTable: {

	template: e.popup.template.NoButton,

	url: "outputTable\\popup.html",

	CX: 1000,

	CY: 700,

	X: e.popup.position.Center,

	Y: e.popup.position.Center

}});


GLOBAL.events.START.on(function (ev) {

	if (ctx.options.isDebug) {

		systray.addMenu("", "TestPopup", "Test popups");

		systray.addMenu("TestPopup", "outputTableOpen" , "Open outputTable", "", function(ev) {

			POPUPS.outputTable.open({ testMode: true });

		});

		systray.addMenu("TestPopup", "outputTableClose" , "Close outputTable", "", function(ev) {

			POPUPS.outputTable.close();

		});

	}

});


POPUPS.outputTable.onTest(function(popup) {

	// TODO : add your tests here

});


popup.item({ container1: {

	type: e.item.type.container,

	auto: false,

	fluid: true

}});


popup.item({ finalTable: {

	type: e.item.type.table,

	showHeader: true,

	title: "Emails",

	tableHeight: 700,

	tableLength: 1000,

	parent: "container1",

	style: e.item.style.Cyan,

	auto: true,

	columns: [

		{

			value: "Date",

			style: e.item.style.Grey,

			icon: e.item.icon.none,

			iconStyle: e.item.style.None,

			badge: "",

			badgeStyle: e.item.style.None,

			colWidth: 3,

			alignment: e.item.alignment.None,

			textTransform: e.item.textTransform.None,

			myClass: "",

			myStyle: "",

			visible: true

		},

		{

			value: "From",

			style: e.item.style.Grey,

			icon: e.item.icon.none,

			iconStyle: e.item.style.None,

			badge: "",

			badgeStyle: e.item.style.None,

			colWidth: 4,

			alignment: e.item.alignment.None,

			textTransform: e.item.textTransform.None,

			myClass: "",

			myStyle: "",

			visible: true

		},

		{

			value: "Subject",

			style: e.item.style.Grey,

			icon: e.item.icon.none,

			iconStyle: e.item.style.None,

			badge: "",

			badgeStyle: e.item.style.None,

			colWidth: 4,

			alignment: e.item.alignment.None,

			textTransform: e.item.textTransform.None,

			myClass: "",

			myStyle: "",

			visible: true

		},

		{

			value: "Content",

			style: e.item.style.Grey,

			icon: e.item.icon.none,

			iconStyle: e.item.style.None,

			badge: "",

			badgeStyle: e.item.style.None,

			colWidth: 4,

			alignment: e.item.alignment.None,

			textTransform: e.item.textTransform.None,

			myClass: "",

			myStyle: "",

			visible: true

		}

	]

}});
If you want to use this popup in your workflow the next step is to capture it.
Important: Make sure your screen resolution is set to 100% so that the popup will be captured correctly. You can change it from display settings -> scale and layout. For the changes to be registered by Desktop Studio, you need to close it and open it again.
You can capture your popup using the last button and then press ‘Start Capture’:
![]()
After you captured your popup you should be able to see it in the Workflows perspective, under the “Pages” view:
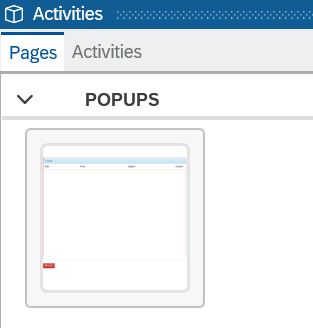
2.Create a new workflow
Go to ‘Workflow’ perspective and create a new workflow. I named mine ‘searchEmail’.
3.Import Outlook Library Scripts
In the workspace of your new workflow you can use different functions for accessing and manipulating Microsoft Outlook files. In order for your project to compile and run without errors, you first have to enable the Outlook Library scripts in your project:
- go to “Scripts” perspective;
- select “Project” tab(bottom-left corner);
- right click anywhere in the Panel;
- select “Include library Script”: The “Add Library Script” window pops;
- enable “Outlook integration”;
- click on “Save”;


4.Add activities in your workflow
For this project you need to add a Custom activity in your workflow so you can use the functions in the Outlook library. You can give a name and a description for this activity, so you can distinguish better its purpose. I will name mine ‘Search for Email’. I named the corresponding step ‘SearchEmail’. Using suggestive names will allow you to better organize your code.
Your workflow should now look like this:

Important: Before you can continue with the rest of the functionalities you need to build your project. This way the script for the workflow will be generated and we can enhance it.
5.Enrich the generated code by your workflow with your custom logic
After you have built your project you can proceed to the Scripts perspective and open the script generated by your workflow (it will have the same name). Search for your activity and step by their name and you can add additional functionalities.
In this step we first need to initialize the outlook library, reset the email collection and declare some variables we will use later. I recommend using a mechanism of type “try – catch” in order to handle the possibility that the search returns an error.
In the “try” branch we first create the search function. In the filter property we can build our custom search criteria. My filter contains (in comments) multiple criteria that can be combined using logical operators (“AND”, “OR). The behavior I chose to implement in my bot is the return of the unread emails from last week, from the ‘fakemails@sap.com’ mailbox. Of course, you can choose your own requirement. In addition to the filter, we have additional properties, some of them also in comments. As already mentioned, you can specify which outlook email account you want to use for the search. Be careful, you need to have this account configured on your machine and be logged in. After the search is performed, I’m looping through each email and populate my array (dataset) with their details. I will use this array to set the emails in the table. Of course, at the end we need to show the table to the user, so we will open the popup.
In the “catch” branch we include the actions that need to trigger if an error has been encountered on the “try” branch. I chose to return the error in the console.
After the search is performed and popup opens to show the results, we release the outlook library and end the scenario.
Below is my code for the ‘Search_for_Email’ step:
// ----------------------------------------------------------------

//   Step: Search_for_Email

// ----------------------------------------------------------------

GLOBAL.step({ Search_for_Email: function(ev, sc, st) {

	var rootData = sc.data;

	ctx.workflow('searchEmail', 'b929fa7c-630c-409d-be4c-40360d78a760') ;

	// Search for e-mails with different criteria


	ctx.outlook.init();


	var mails =  []; // will contain mail information

	var i; // contor

	var dataset = []; // array of arrays in which we insert the mail information


	// Resets the working mails list.

	ctx.outlook.mail.resetMailCollection();


	// Build the search function

	try {

	ctx.outlook.mail.search({

		filter : "%lastweek(" + "\"" +"DAV:getlastmodified" + "\"" + ")%" + " AND " +

		//"urn:schemas:httpmail:subject like ''" + " AND " +

		//"urn:schemas:httpmail:fromemail like ''" + " AND " +

		//"urn:schemas:httpmail:hasattachment = false" + " AND " +

		//"urn:schemas:httpmail:importance=1" + " AND " +

		//"urn:schemas:httpmail:textdescription like ''" + " AND " +

		//"urn:schemas:httpmail:sendername=''" + " AND " +

		//"urn:schemas:httpmail:to like ''" + " AND " +

		"urn:schemas:httpmail:read=0",

		maxRow : 5,

		storeName : 'fakemail@sap.com',

		//storeId: '',

		//folderID: '',

		//folderName: '',

		//folderPath: '',

		//sort: '',

		//descending: true,

		dontThrowExceptionIfNoMailFound: true

	});


	// Get the list of mail information for the mails that fit the criteria.

	mails = ctx.outlook.mail.getFilteredTable();


	// Build the working mails list by retrieving each mail

	if(mails.length) {

  for(i=0; i<mails.length; i++) {

    ctx.outlook.mail.retrieveMail({EntryID : mails[i]['EntryID'], StoreID : mails[i]['StoreID']});

  }


	// Display some info about each email that fit the criteria.

  ctx.log("---------------------------------------------------------");

  for(i=0; i<ctx.outlook.mail.getCollectionLength(); i++) {

    ctx.log("Mail no: " + i);

    ctx.log("From: " + mails[i]['Sender']);

		ctx.log("Date: " + mails[i]['Date']);

		// Covert the date to a string so it can be loaded into the table.

		var date = String(mails[i]['Date']);

		ctx.log("Aici"+String(mails[i]['Date']));

    ctx.log("Subject: " + ctx.outlook.mail.getSubject(i));

		ctx.log("---------------------------------------------------------");


		// Load the details of the current email into the final array (dataset).

		dataset.push([date, mails[i]['Sender'], ctx.outlook.mail.getSubject(i), ctx.outlook.mail.getBody(i)]);

	}


	// Provide the final array of details as datasource for the table.

	POPUPS.outputTable.finalTable.set(dataset);


	// Open the popup to display the table.

	POPUPS.outputTable.open();

	}

	} catch (err) {

    ctx.log("Fail (" + err.description + ").");

    return e.error.KO;

  }


	ctx.outlook.end();

	sc.endStep(); // end Scenario

	return;

}});
Conclusion
This blog post should help you to understand the use of the ‘Outlook Library’, how to create a popup and how to search for an email using custom filtering from ‘Outlook Library’. At the end, you should be able to understand these functionalities and use them in your scenarios.
- SAP Managed Tags:
- SAP Intelligent Robotic Process Automation
Labels:
3 Comments
You must be a registered user to add a comment. If you've already registered, sign in. Otherwise, register and sign in.
Labels in this area
-
ABAP CDS Views - CDC (Change Data Capture)
2 -
AI
1 -
Analyze Workload Data
1 -
BTP
1 -
Business and IT Integration
2 -
Business application stu
1 -
Business Technology Platform
1 -
Business Trends
1,658 -
Business Trends
92 -
CAP
1 -
cf
1 -
Cloud Foundry
1 -
Confluent
1 -
Customer COE Basics and Fundamentals
1 -
Customer COE Latest and Greatest
3 -
Customer Data Browser app
1 -
Data Analysis Tool
1 -
data migration
1 -
data transfer
1 -
Datasphere
2 -
Event Information
1,400 -
Event Information
66 -
Expert
1 -
Expert Insights
177 -
Expert Insights
298 -
General
1 -
Google cloud
1 -
Google Next'24
1 -
Kafka
1 -
Life at SAP
780 -
Life at SAP
13 -
Migrate your Data App
1 -
MTA
1 -
Network Performance Analysis
1 -
NodeJS
1 -
PDF
1 -
POC
1 -
Product Updates
4,577 -
Product Updates
344 -
Replication Flow
1 -
RisewithSAP
1 -
SAP BTP
1 -
SAP BTP Cloud Foundry
1 -
SAP Cloud ALM
1 -
SAP Cloud Application Programming Model
1 -
SAP Datasphere
2 -
SAP S4HANA Cloud
1 -
SAP S4HANA Migration Cockpit
1 -
Technology Updates
6,873 -
Technology Updates
421 -
Workload Fluctuations
1
Related Content
- Business Partner customizing for Automotive Industry in Technology Blogs by Members
- SAP Build Process Automation Pre-built content for Finance Use cases in Technology Blogs by SAP
- Start page of SAP Signavio Process Insights, discovery edition, the 4 pillars and documentation in Technology Blogs by SAP
- Demystifying the Common Super Domain for SAP Mobile Start in Technology Blogs by SAP
- SAP Datasphere インテリジェントルックアップ : 名寄せ機能のご紹介 in Technology Blogs by SAP
Top kudoed authors
| User | Count |
|---|---|
| 39 | |
| 25 | |
| 17 | |
| 13 | |
| 7 | |
| 7 | |
| 7 | |
| 7 | |
| 6 | |
| 6 |