
- SAP Community
- Products and Technology
- Technology
- Technology Blogs by SAP
- Receive instant notifications for your SAP Cloud P...
Technology Blogs by SAP
Learn how to extend and personalize SAP applications. Follow the SAP technology blog for insights into SAP BTP, ABAP, SAP Analytics Cloud, SAP HANA, and more.
Turn on suggestions
Auto-suggest helps you quickly narrow down your search results by suggesting possible matches as you type.
Showing results for
Advisor
Options
- Subscribe to RSS Feed
- Mark as New
- Mark as Read
- Bookmark
- Subscribe
- Printer Friendly Page
- Report Inappropriate Content
02-24-2020
7:43 PM
Note that this asset was created before our branding changes related to SAP technology were announced on January 2021
Introduction
In this blog post we would like to exemplify the integration between SAP Cloud Platform Alert Notification and MTA Deployment Service. Reading this you should be able to take advantage of the full potential this has. You can now receive instant notifications for the status of your deployments and undeployments. That includes the start, completion and in some cases, the failure of those processes.
For the sake of readability, we use Alert Notification and Deployment Service as substitutes for SAP Cloud Platform Alert Notification and MTA Deployment Service.
Configure Alert Notification in SAP Cloud Patform for the Cloud Foundry environment
In order to configure Alert Notification, you need to have the service enabled for your SAP Cloud Platform Cloud Foundry account. Please refer to the official documentation for the enablement process. Afterwards you should be able to see the service in the Service Marketplace.

Navigate to the Alert Notification tile, and then the Instances tab. Select New Instance.

The standard service plan is sufficient, and you need to provide a name for the instance.

Navigate to the newly created instance and then the Subscriptions tab. In order to receive notifications based on specific events, we need to create a subscription. If you are not familiar with the Alert Notification’s terminology, you can glance through the official documentation.

Let’s name it MTA-deployment-notification. We can define labels to find this subscription easier later on. If you want to enable the subscription after its creation, keep the State to ON as in the picture below and click on Create.

Currently there are no conditions, so select Create Condition.
Let’s name it MTA-deployment as we are interested in the cases, where “eventType” is equal to “DEPLOYMENT”. And that is what we select as a condition. This means we are interested in all events that are related to deployments in our account.

Select the newly created condition and click on Assign.

The same is the case with the action, since we have none, we can create a new one.
Let’s configure Email notifications for our events. You can refer to the official documentation or this series of blog posts related to Alert Notification for information on configuring additional or alternative communication channels.
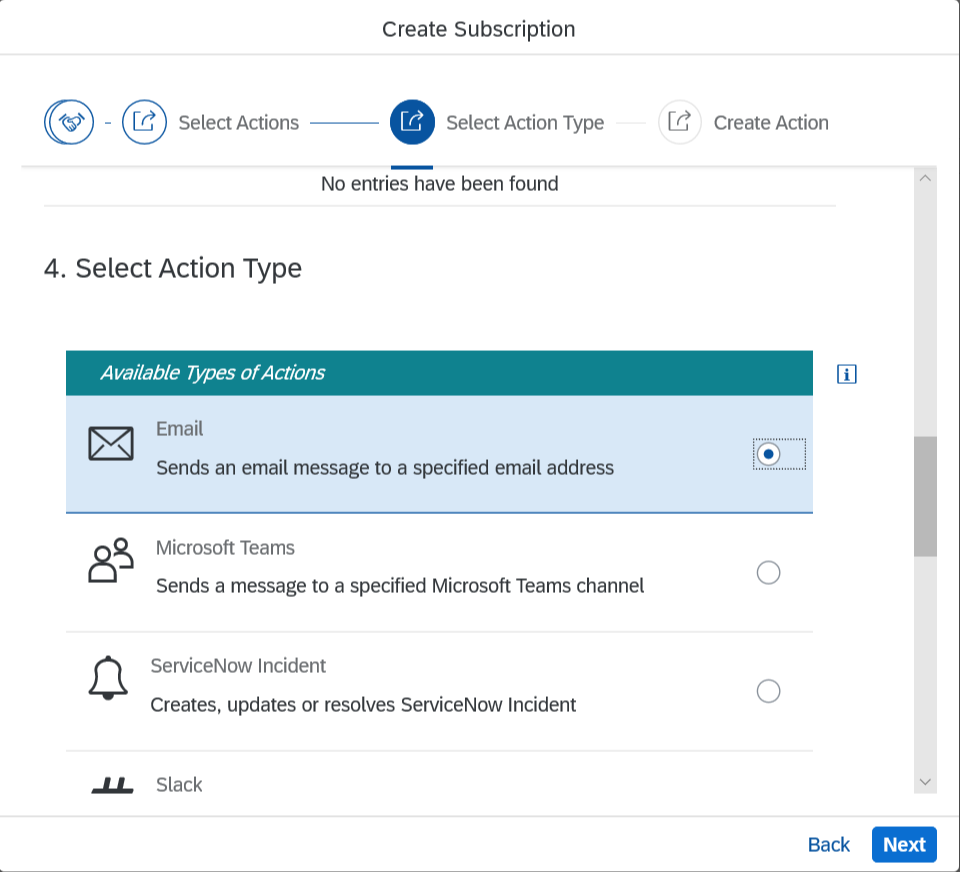
Specify the action’s name, for example Send-notifications-my-mail, and the email address, where the notification would be received. Select the action and then Assign. Afterwards a summary of the subscription is available.

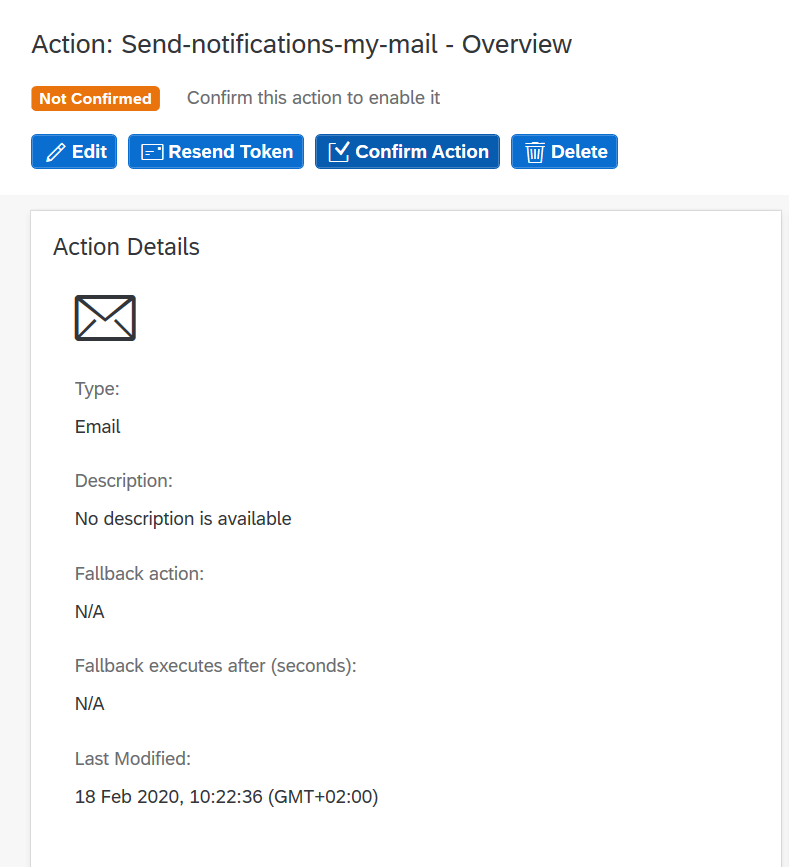
We see that our action is “of type Email that is Not Confirmed”. This is expected as this is the first time that email address is used. Let’s confirm it. Navigate to the Actions tab and then to new action, we just created.

Select Confirm Action. You will receive an automatic message from Alert Notification with the confirmation token.
Provide the confirmation token in the pop-up box. This will enable the action.

Now we can see the integration. From the command line we will trigger the deployment of a sample application. Pay attention to the timestamp (10:38:01)

A few seconds later we receive an automatically generated message via the configured email. The event timestamp, part of the event details is in GMT/UTC+0.

And within a minute, when the deployment completes, we receive another email, describing that:

But let’s say we would like to do additional filtering and receive only alerts, related to a failed status. For example, a failed undeployment.
First, we need to create a condition for any failure notification. Let’s call it MTA-failed.

We create a new subscription and give it a meaningful name like MTA-failed-undeployment. It will look for the string “Failed” in the notification’s subject:

We can create another condition - for undeployment:

Than we select the MTA-undeployment and MTA-failed to describe our case. Here is a summary:

Usually we are not as interested in the undeployment failures as we are in the deployment. Let’s use the MTA Deployment Service to change that configuration, using the command line.
Manage your Alert Notification configurations via MTA Deployment Service
You can export your current Alert Notification configurations form the Export or Import tab. This will give you all the details in JSON format.

Copy this information. In order to reuse it via the Deployment Service, you need to create a new JSON object with key “subscriptions” and value the copied information. Save this as a file, for example, ans-subscription.json.
{

    "subscriptions": {

		  "conditions": [

			{

			  "name": "MTA-failed",

			  "propertyKey": "subject",

			  "predicate": "CONTAINS",

			  "propertyValue": "Failed",

			  "labels": [],

			  "description": ""

			},

…

		}

}
After that, to change the configuration details, the JSON will be adjusted in the following way:
We renamed the subscription MTA-failed-undeployment to MTA-failed-deployment and changed the conditions in it to MTA-failed and MTA-deployment. In addition, the state of the MTA-deployment-notification, our first subscription, is now DISABLED. This way we will receive only one notification in case of a failed deployment.

Now we save the new JSON file in a new folder called ans-configuration.
We can package this as an MTA and using the Deployment Service, change our current configuration. In addition, if the ANS instance is not provisioned, the Deployment Service will do so and then apply the configurations. To do all of that we create a simple mtad.yaml file like the one below.
ID: ans-configuration

version: 0.0.1

_schema-version: 3.3.0


resources:

  - name: Demo-ans-settings

    type: org.cloudfoundry.managed-service

    parameters:

        service: alert-notification

        service-plan: standard

        service-name: Demo-ans-settings

        path: ans-subscription.json
Add this mtad.yaml to the ans-configuration folder and execute cf deploy ./ -f using the command line from that folder. This will deploy the configurations as an MTA and we see in the UI, the changes:


Now to test it, we’ve undeployed the sample application and we will redeploy it with a starting timeout of one second. Note the timestamp (12:33)

By 12:34 the deployment has failed, and we receive an email notification:

That’s it! Explore the full potential of this integration by applying it to your landscape. Enhance this scenario and adapt it to your business and development needs.
We are looking forward to your feedback.
Labels:
3 Comments
You must be a registered user to add a comment. If you've already registered, sign in. Otherwise, register and sign in.
Labels in this area
-
ABAP CDS Views - CDC (Change Data Capture)
2 -
AI
1 -
Analyze Workload Data
1 -
BTP
1 -
Business and IT Integration
2 -
Business application stu
1 -
Business Technology Platform
1 -
Business Trends
1,658 -
Business Trends
93 -
CAP
1 -
cf
1 -
Cloud Foundry
1 -
Confluent
1 -
Customer COE Basics and Fundamentals
1 -
Customer COE Latest and Greatest
3 -
Customer Data Browser app
1 -
Data Analysis Tool
1 -
data migration
1 -
data transfer
1 -
Datasphere
2 -
Event Information
1,400 -
Event Information
66 -
Expert
1 -
Expert Insights
177 -
Expert Insights
299 -
General
1 -
Google cloud
1 -
Google Next'24
1 -
Kafka
1 -
Life at SAP
780 -
Life at SAP
13 -
Migrate your Data App
1 -
MTA
1 -
Network Performance Analysis
1 -
NodeJS
1 -
PDF
1 -
POC
1 -
Product Updates
4,577 -
Product Updates
344 -
Replication Flow
1 -
RisewithSAP
1 -
SAP BTP
1 -
SAP BTP Cloud Foundry
1 -
SAP Cloud ALM
1 -
SAP Cloud Application Programming Model
1 -
SAP Datasphere
2 -
SAP S4HANA Cloud
1 -
SAP S4HANA Migration Cockpit
1 -
Technology Updates
6,873 -
Technology Updates
422 -
Workload Fluctuations
1
Related Content
- What’s New in SAP Analytics Cloud Release 2024.07 in Technology Blogs by SAP
- Augmenting SAP BTP Use Cases with AI Foundation: A Deep Dive into the Generative AI Hub in Technology Blogs by SAP
- SAP Cloud ALM Implementation and Operations Configuration Webinar Series in Technology Blogs by SAP
- SAP BTP, Kyma Runtime: Leveraging KEDA module capabilities for efficient and cost-effective scaling in Technology Blogs by SAP
- Dynamic Email Body for Email Notification in SAP BTP Workflow Management in Technology Q&A
Top kudoed authors
| User | Count |
|---|---|
| 40 | |
| 25 | |
| 17 | |
| 13 | |
| 7 | |
| 7 | |
| 7 | |
| 6 | |
| 6 | |
| 6 |