
- SAP Community
- Products and Technology
- Technology
- Technology Blogs by SAP
- #CloudFoundryFun #11 - Integrate a React app in th...
Technology Blogs by SAP
Learn how to extend and personalize SAP applications. Follow the SAP technology blog for insights into SAP BTP, ABAP, SAP Analytics Cloud, SAP HANA, and more.
Turn on suggestions
Auto-suggest helps you quickly narrow down your search results by suggesting possible matches as you type.
Showing results for
Developer Advocate
Options
- Subscribe to RSS Feed
- Mark as New
- Mark as Read
- Bookmark
- Subscribe
- Printer Friendly Page
- Report Inappropriate Content
02-03-2020
1:59 PM
In this CloudFoundryFun post, I demonstrate how web apps, written with any UI framework, can be integrated into the Fiori Launchpad on Cloud Foundry. To display this, I chose a React app that leverages the UI5 web components.
As your business users are already familiar with the Fiori Launchpad, it makes sense to integrate external business apps to create a seamless experience. This way, your business users have one central page from where they can complete all their tasks, and they won't have to bookmark multiple different web pages any longer.

It's fair to say that this post picks up where CloudFoundryFun #5 stopped. Back in that post, I took a React application and uploaded it to the HTML5 Application Repository. This time, I'll show you how to integrate such non-SAPUI5 web applications in the Fiori Launchpad. Technically, the integrated app will be displayed within an <iframe> in the Launchpad. We also cover how you can configure non-SAPUI5 web apps for the HTML5 Application Repository and how they can be packaged into a deployable .mtar archive.
Let's get started as we have much ground to cover ?.
The portal service has been one of the most popular services since the beginning of the HANA Cloud Platform, which later became the SAP Cloud Platform Neo environment. Since last year, this service is also available in the Cloud Foundry environment, and its popularity is still unbroken. This popularity was confirmed in the App Space of all three(!) TechEd events last year:

Broadly speaking, this service allows you to orchestrate the Fiori Launchpad with all its facets. It contains the design-time interface, in which you can group Fiori Apps in catalogs, assign them to roles, build landing pages for your business users, and integrate the so-called URL app. Additionally, it also provides the runtime dashboard that aggregates all Fiori apps, interfaces with the UI5 Flexibility Personalization service, and embeds the URL apps in iframe elements. All these functionalities are introduced in an excellent walk-through in the above-mentioned tutorial.
In this hands-on post, we use the URL app approach to integrate the web app into the Fiori Launchpad.
The first thing most people (including me) are trying is to copy the URL of a web application and to "force" a URL app in the content manager of the portal service. Unfortunately, this fails in most situations: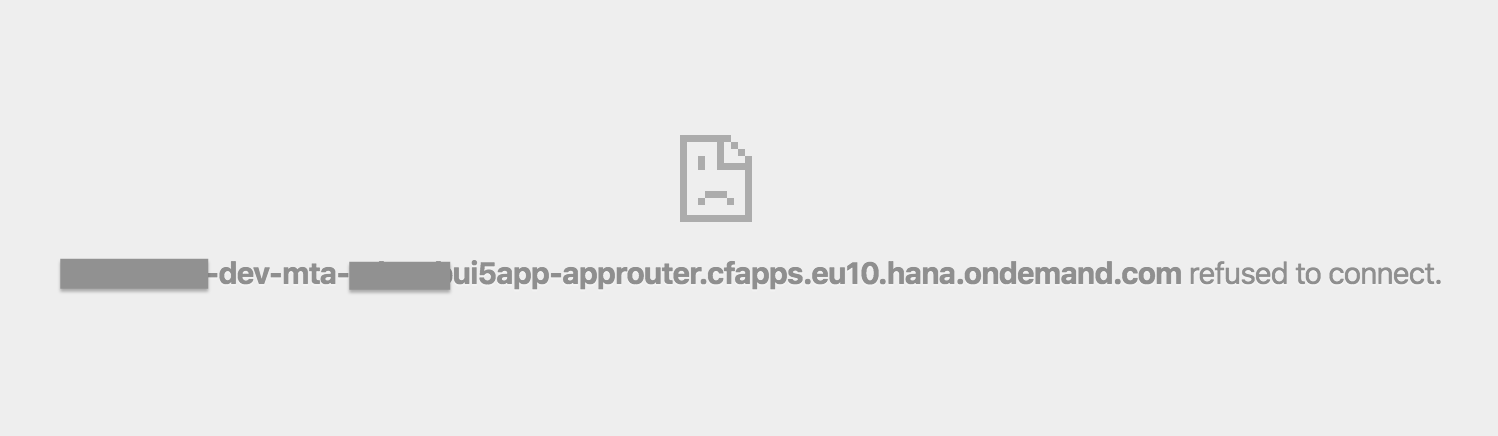
And the console will read:
This error message is not a bug, but a security feature of your browser. iframes, that point to your web app, are blocked if the web app doesn't allow this explicitly. We can resolve this problem by changing the value of the "X-Frame-Options" HTTP header in the webserver application.
In this post, I change this header in the Approuter, the go-to web server application by SAP. I'm sure you've used this component (@sap/approuter) before, knowingly or unknowingly. E.g., whenever you deployed a SAPUI5 app or CAP server module to SAP CP Cloud Foundry, you've used this Approuter. You can find the documentation of this component in the readme.md file of the npm module (or here on GitHub). This documentation contains the following section:
To implement this, I add an Approuter module to the existing project. I also add a deployer module which uploads the built React app to the HTML5 Application Repository. The latter step could also be done with the CF CLI as demonstrated in the previous CFF5 post.
While SAPUI5- and Fiori Elements-based apps integrate easily in the HTML5 Application Repository, we have to tweak the React app to fit in the HTML5 Application Repository.
The Approuter will route all incoming requests into the HTML5 Application Repository. As there can be multiple apps in the repo, the URL needs to specify which app it targets, e.g., https://my-approuter-url.com/myReactApp. React apps assume, by default, that all resources are served from the root. Therefore all relative routes to stylesheets or script files start from the root and don't have a prefix (e.g., https://my-approuter-url.com/stylesheet.css). This wouldn't cause broken links when the React app is served from the HTML5 Application Repository. Luckily, we can override the relative path property in the homepage field of the package.json descriptor.
This name is the name of the web application. Obviously, this name doesn't fall out of the sky. We have to specify this and other properties in the manifest.json file. React apps, and other Progressive Web Apps (PWAs), already include this file, and we can simply add the HTML5 Application Repository-specific properties.
Besides the properties in the manifest, the HTML5 Application Repository also expects an xs-app.json file that defines that welcome file and routes that point to the HTML5 Application Repository.
This is all we need to store the React app in the repository. For trial users, the capacity of the free repository is 5MB. Therefore, it makes sense to keep the bundle size as small as possible. In most React app projects, the largest files are the Webpack source maps. They are great helpers when you are debugging the app. If you feel confident, you can remove them from your build by setting an environment variable GENERATE_SOURCEMAP to false when running the React build script.
Before we get to the fun part, we need to install some tools which are mandatory for cloud development on SAP Cloud Platform (if you haven't done so already):
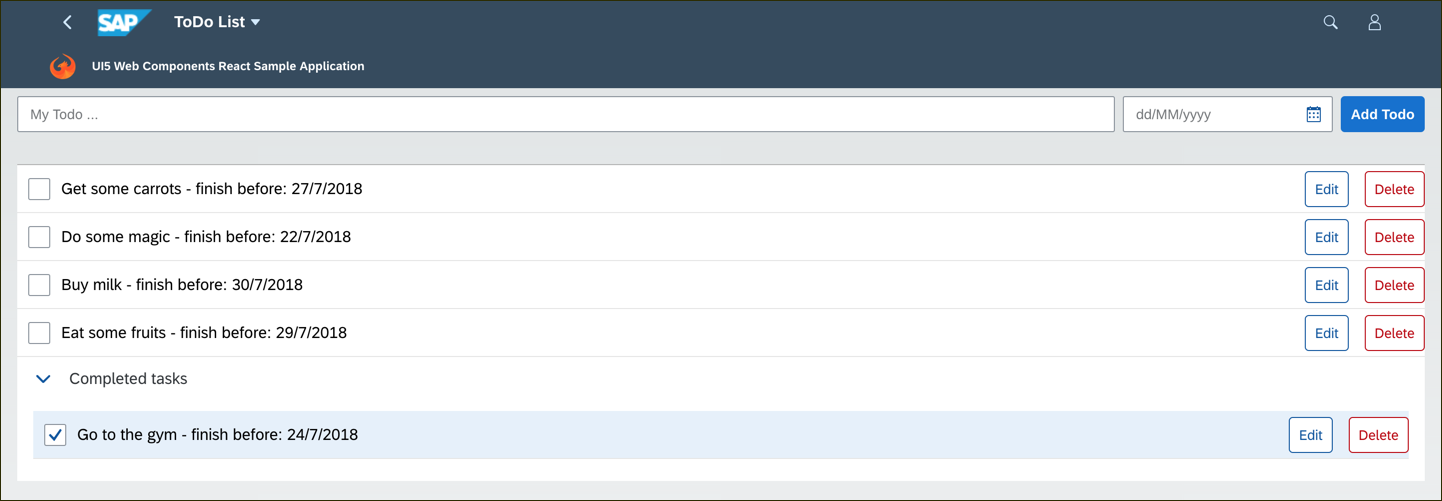
Clone this To-Do list sample app which has been built with the UI5 web components for React:
Feel free to check out the "SAP Cloud Platform" branch of this repo if you want to jump directly to step 4.
Alternatively, you can also use your own React app or create a new one with create-react-app.
All diffs are highlighted here.
I want to avoid long listings in this post and focus on the explanation of essential code lines here. You can find the files in full length here.
I only sketched some steps here. If needed, there are more detailed descriptions of these steps available in our tutorial navigator.
Congrats, you integrated a React-based application in the Fiori Launchpad! So far, the application is public, and everyone has access to it. Most likely, this not what you would want for real business apps. You can add an authentication check by adding an xsuaa service instance. I've explained these CloudFoundryFun #5 in great detail; you can read this post to find out how this works. Or, if you are code-focuses (like me), check out the "SAP Cloud Platform" branch of the sample code repository to see the final result.
In this edition, you have learned:
As your business users are already familiar with the Fiori Launchpad, it makes sense to integrate external business apps to create a seamless experience. This way, your business users have one central page from where they can complete all their tasks, and they won't have to bookmark multiple different web pages any longer.
The final result of this blog post: A react app embedded in the Fiori Launchpad
It's fair to say that this post picks up where CloudFoundryFun #5 stopped. Back in that post, I took a React application and uploaded it to the HTML5 Application Repository. This time, I'll show you how to integrate such non-SAPUI5 web applications in the Fiori Launchpad. Technically, the integrated app will be displayed within an <iframe> in the Launchpad. We also cover how you can configure non-SAPUI5 web apps for the HTML5 Application Repository and how they can be packaged into a deployable .mtar archive.
Let's get started as we have much ground to cover ?.
The Portal Service for the Cloud Foundry environment
The portal service has been one of the most popular services since the beginning of the HANA Cloud Platform, which later became the SAP Cloud Platform Neo environment. Since last year, this service is also available in the Cloud Foundry environment, and its popularity is still unbroken. This popularity was confirmed in the App Space of all three(!) TechEd events last year:
By the way, you can always do the tutorial from TechEd at home if you weren't there or missed to visit the App Space.
Broadly speaking, this service allows you to orchestrate the Fiori Launchpad with all its facets. It contains the design-time interface, in which you can group Fiori Apps in catalogs, assign them to roles, build landing pages for your business users, and integrate the so-called URL app. Additionally, it also provides the runtime dashboard that aggregates all Fiori apps, interfaces with the UI5 Flexibility Personalization service, and embeds the URL apps in iframe elements. All these functionalities are introduced in an excellent walk-through in the above-mentioned tutorial.
In this hands-on post, we use the URL app approach to integrate the web app into the Fiori Launchpad.
Configure the Approuter to return the correct HTTP header
The first thing most people (including me) are trying is to copy the URL of a web application and to "force" a URL app in the content manager of the portal service. Unfortunately, this fails in most situations:
And the console will read:
Refused to display 'https://yourURL.com' in a frame because it set 'X-Frame-Options' to 'sameorigin'.This error message is not a bug, but a security feature of your browser. iframes, that point to your web app, are blocked if the web app doesn't allow this explicitly. We can resolve this problem by changing the value of the "X-Frame-Options" HTTP header in the webserver application.
In this post, I change this header in the Approuter, the go-to web server application by SAP. I'm sure you've used this component (@sap/approuter) before, knowingly or unknowingly. E.g., whenever you deployed a SAPUI5 app or CAP server module to SAP CP Cloud Foundry, you've used this Approuter. You can find the documentation of this component in the readme.md file of the npm module (or here on GitHub). This documentation contains the following section:
Additional headers configuration

If configured, the application router can send additional

http headers in its responses to the client. Additional

headers can be set in the httpHeaders environment variable.
To implement this, I add an Approuter module to the existing project. I also add a deployer module which uploads the built React app to the HTML5 Application Repository. The latter step could also be done with the CF CLI as demonstrated in the previous CFF5 post.
Prepare the React app for the HTML5 Application Repository
While SAPUI5- and Fiori Elements-based apps integrate easily in the HTML5 Application Repository, we have to tweak the React app to fit in the HTML5 Application Repository.
The Approuter will route all incoming requests into the HTML5 Application Repository. As there can be multiple apps in the repo, the URL needs to specify which app it targets, e.g., https://my-approuter-url.com/myReactApp. React apps assume, by default, that all resources are served from the root. Therefore all relative routes to stylesheets or script files start from the root and don't have a prefix (e.g., https://my-approuter-url.com/stylesheet.css). This wouldn't cause broken links when the React app is served from the HTML5 Application Repository. Luckily, we can override the relative path property in the homepage field of the package.json descriptor.
"homepage": "/todoapp",This name is the name of the web application. Obviously, this name doesn't fall out of the sky. We have to specify this and other properties in the manifest.json file. React apps, and other Progressive Web Apps (PWAs), already include this file, and we can simply add the HTML5 Application Repository-specific properties.
Besides the properties in the manifest, the HTML5 Application Repository also expects an xs-app.json file that defines that welcome file and routes that point to the HTML5 Application Repository.
This is all we need to store the React app in the repository. For trial users, the capacity of the free repository is 5MB. Therefore, it makes sense to keep the bundle size as small as possible. In most React app projects, the largest files are the Webpack source maps. They are great helpers when you are debugging the app. If you feel confident, you can remove them from your build by setting an environment variable GENERATE_SOURCEMAP to false when running the React build script.
Hands-on: Integrate a ToDo-List App in the Fiori Launchpad
0. Preparation
Before we get to the fun part, we need to install some tools which are mandatory for cloud development on SAP Cloud Platform (if you haven't done so already):
1. Clone the UI5 web components sample app
Clone this To-Do list sample app which has been built with the UI5 web components for React:
git clone https://github.com/SAP-samples/ui5-webcomponents-sample-reactFeel free to check out the "SAP Cloud Platform" branch of this repo if you want to jump directly to step 4.
Alternatively, you can also use your own React app or create a new one with create-react-app.
2. Modify the React app
- Add the "homepage" property to specify the relative path.
"homepage": "/todoapp",
- Do the following changes to the existing build script: Set the flag to avoid the generation of the webpack source maps. After webpack ran successfully, move the "build" folder in the deployer module. Add the following packages and npm scripts to do this in a platform-independent manner:
npm install --save-dev cross-env npm-run-all shx
"build": "run-s build:react build:removeExistingResources build:moveNewResources",

"build:react": "cross-env GENERATE_SOURCEMAP=false node scripts/build.js",

"build:removeExistingResources": "shx rm -rf deployer/resources/*",

"build:moveNewResources": "shx mv build/ deployer/resources/react",
- Add the app name and version string to the public/manifest.json file
{
...,
"sap.app": {
"id": "todoapp",
"applicationVersion": {
"version": "1.0.0"
}
}
}
- Create the routing config file public/xs-app.json
{
"welcomeFile": "index.html",
"routes": [
{
"source": "^(.*)",
"target": "$1",
"authenticationType": "none",
"service": "html5-apps-repo-rt"
}
]
}
All diffs are highlighted here.
3. Add an application router and deployer module
I want to avoid long listings in this post and focus on the explanation of essential code lines here. You can find the files in full length here.
- Add the Approuter module, which is pretty straight forward. It consists of only two files: approuter/package.json and approuter/xs-app.json (open code).
- Add the deployer module that only contains one file. This deployer module is a Cloud Foundry task that takes the built React app and pushes it in the HTML5 Application Repository during runtime. The module doesn't contain the web app as we move the "dist" folder of the React app in this module when the "build" script runs.
{
"name": "webapp-deployer",
"engines": {
"node": "12.x.x"
},
"dependencies": {
"@sap/html5-app-deployer": "2.0.3"
},
"scripts": {
"start": "node node_modules/@sap/html5-app-deployer/index.js"
}
}
- Tie it all together with the mta.yaml file. This project descriptor defines all modules and build-steps for you. Note how the build step of the "deployer" module invocates the React build script we modified in step 1.
build-parameters:
builder: custom
commands:
- npm run build --prefix ..
- Another exciting part of this file is the following one: Here we define the environment variable httpHeaders of the Approuter. As this HTTP header only focuses on the domain, we don't need to specify the exact URL of the Fiori Launchpad. You might have to adapt this to the domain where your Launchpad is hosted.
- name: approuter
...
properties:
httpHeaders:
- X-Frame-Options: "ALLOW-FROM hana.ondemand.com"
- Next, install the mbt build tool as a dev dependency.
npm install -D mbt
We will use this module for packaging the entire application into a .mta archive. To do this, add the following npm script to the package.json file.
"scripts": {

  ...

  "build:mta": "mbt build"

},
4. Bundle the archive and deploy it
- Make sure there is a subdirectory with the name "resources" within the "deployer" directory. Otherwise the deployment will fail with the following error:
Error: The resources folder resources does not exist or is empty.
- Build the MTA archive
npm run build:mta
- Make sure you are logged in
cf target #This will print the org and space if you are logged in
# use "cf login -a <your CF endpoint>" otherwise
- Deploy the project
cf deploy mta_archives/reacttodoapp_0.7.0.mtar
- This process should take about 3-5 minutes. After the successful deployment, you can find the URL of the Approuter in the console output.

- Open this URL in a browser to see the React app that is served by the Approuter, in action.

5. Create an empty Portal site
I only sketched some steps here. If needed, there are more detailed descriptions of these steps available in our tutorial navigator.
- Open the Portal Service Site Directory to create a new site. Have a look at step 3 of the tutorial if you need help getting to this page.
- Click Create New Site and enter a name for this page. Confirm with Create.

- Go back to the Portal Service Site Directory.
- Add a new URL App in the Content Manager and enter the URL of the web app you just deployed.

- Add a new group and assign the app to this group.

- Assign this app also to the "Everyone" role.

- Switch back to the Content Directory and open the Fiori Launchpad with the button on the top-right corner.

- Now you can see a page that looks like this one (possibly with different strings and icons).

- Click on the tile to open your integrated URL app.
Next Steps
Congrats, you integrated a React-based application in the Fiori Launchpad! So far, the application is public, and everyone has access to it. Most likely, this not what you would want for real business apps. You can add an authentication check by adding an xsuaa service instance. I've explained these CloudFoundryFun #5 in great detail; you can read this post to find out how this works. Or, if you are code-focuses (like me), check out the "SAP Cloud Platform" branch of the sample code repository to see the final result.
Summary
In this edition, you have learned:
- How to add URL App to your Fiori Launchpad
- What the X-Frame-Options HTTP-header tells your Browser
- How to configure the Approuter
- How to define the environment variable in the project descriptor file (more cool MTA samples)
- Why embedding the React app in a multi apps archive brings advantages during deployment
- Which modifications are necessary to store a React app in the HTML5 Application Repository
- How to skip the TS-map files to keep your React app slim
About this series
| This was the eleventh blog post of my bi-monthly series #CloudFoundryFun. The name already says all there is to it; This series won’t be about building pure business apps on Cloud Foundry. I think there are already plenty of great posts about those aspects out there. Instead, this series rather thinks outside the box and demonstrates unconventional Cloud Foundry use-cases. |
Next episode: CloudFoundryFun #12 – Create a tiny CAP project
- SAP Managed Tags:
- SAP Fiori,
- HTML5,
- SAP BTP, Cloud Foundry runtime and environment,
- SAP Cloud Portal service,
- SAP Fiori Launchpad
Labels:
16 Comments
You must be a registered user to add a comment. If you've already registered, sign in. Otherwise, register and sign in.
Labels in this area
-
ABAP CDS Views - CDC (Change Data Capture)
2 -
AI
1 -
Analyze Workload Data
1 -
BTP
1 -
Business and IT Integration
2 -
Business application stu
1 -
Business Technology Platform
1 -
Business Trends
1,661 -
Business Trends
91 -
CAP
1 -
cf
1 -
Cloud Foundry
1 -
Confluent
1 -
Customer COE Basics and Fundamentals
1 -
Customer COE Latest and Greatest
3 -
Customer Data Browser app
1 -
Data Analysis Tool
1 -
data migration
1 -
data transfer
1 -
Datasphere
2 -
Event Information
1,400 -
Event Information
66 -
Expert
1 -
Expert Insights
178 -
Expert Insights
293 -
General
1 -
Google cloud
1 -
Google Next'24
1 -
Kafka
1 -
Life at SAP
784 -
Life at SAP
12 -
Migrate your Data App
1 -
MTA
1 -
Network Performance Analysis
1 -
NodeJS
1 -
PDF
1 -
POC
1 -
Product Updates
4,577 -
Product Updates
340 -
Replication Flow
1 -
RisewithSAP
1 -
SAP BTP
1 -
SAP BTP Cloud Foundry
1 -
SAP Cloud ALM
1 -
SAP Cloud Application Programming Model
1 -
SAP Datasphere
2 -
SAP S4HANA Cloud
1 -
SAP S4HANA Migration Cockpit
1 -
Technology Updates
6,886 -
Technology Updates
416 -
Workload Fluctuations
1
Related Content
- SAP Build Work Zone Content Explorer Can't Show App in Technology Q&A
- How to use Fiori-Launchpad and integrated 3rd-Party Website behind a Reverse-Proxy (nginx) to avoid in Technology Q&A
- Augmenting SAP BTP Use Cases with AI Foundation: A Deep Dive into the Generative AI Hub in Technology Blogs by SAP
- SAP BTP - A Deep Dive into SAP Build Capabilities in Technology Blogs by Members
- How to Connect a S/4HANA Cloud Private Edition System to SAP Start in Technology Blogs by SAP
Top kudoed authors
| User | Count |
|---|---|
| 31 | |
| 24 | |
| 10 | |
| 7 | |
| 6 | |
| 6 | |
| 5 | |
| 5 | |
| 5 | |
| 4 |