Background
As new recruits to the
SAP Integration and Certification Center, my colleague
abhishek.malik and I were keen on making our mark in the team. The opportunity presented itself to us when 2 of our colleagues had to create a large number of users on certain SAP systems. Having been introduced to SAP Intelligent RPA (through
courses on
openSAP), we were excited to start working on using iRPA to automate this task.
Use Case
Mass creation of users using tcode su01
In the SAP Logon application, the
su01 transaction code is used for creating users. Generally, users must be created individually using this transaction code. This project is suitable for scenarios where there is a
requirement for a mass creation of users.
Problem Statement
Currently, users are created on SAP systems manually. Creating around 3 or 4 users manually may generally be easy. However, in most practical scenarios,
users are created in bulk (around 50 or more at a time). In this case, a lot of time and manpower is wasted on a repetitive task. There is also a risk of
inaccuracy due to human error. Automation of this task can save a lot of time and effort, and can also substantially improve precision.
The Solution: SAP Intelligent RPA
SAP iRPA can help automate the task of creating users on an SAP system. SAP iRPA Desktop Studio has inbuilt support for the
SAP GUI connector, and can easily interface with the SAP Logon GUI application. The completed bot can be deployed on the
SAP iRPA Factory, and can be scheduled to run as required. The required data (system name, template user name and new user name) is entered into a
centrally located Excel spreadsheet, and the bot can automatically read this data and perform the automation task.
Overview of Workflow

Overall workflow
Block 1 - Initializing the spreadsheet
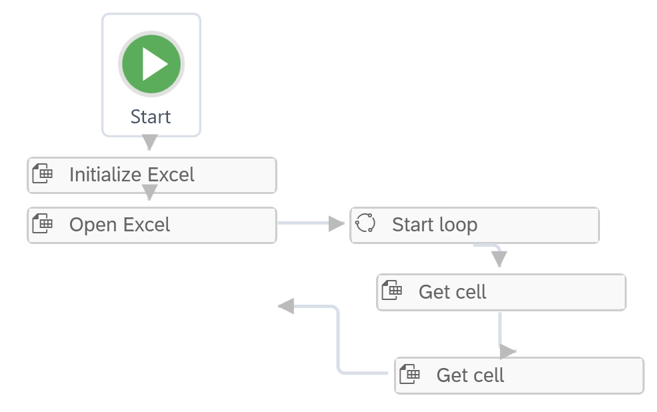
- The Excel library is initialized, and the loop block is started.
- The name of the system to login to is read.
Block 2 - Logging into the system

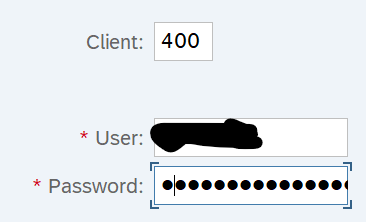
- The SAP Logon application is launched, and the bot logs into the system using hard-coded credentials.
- The tcode su01 is entered into the transaction field.
Block 3 - Creating the users
- The name of the first user to be created is entered into the input box, and the bot checks whether the user already exists or not.
- If the user exists, then the bot skips creating this user and loops back to the start of the loop. If the user doesn't exist, then the bot creates the user.
Block 4 - Closing the application

- Once all the users have been created, the loop terminates and the excel library is closed.
- The bot logs out of the system, and the SAP Logon 760 application closes.
Execution
Step 1: To begin with, the bot opens the remote spreadsheet and reads the data.
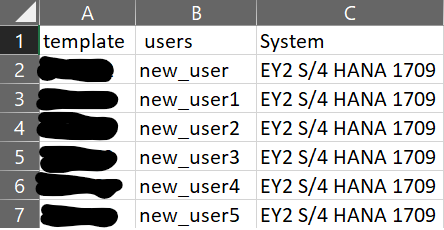
Sample spreadsheet
Step 2: The bot now launches the SAP Logon application and selects a system based on the data read from the spreadsheet.

Step 3: The hard-coded credentials are entered and the bot logs into the system.
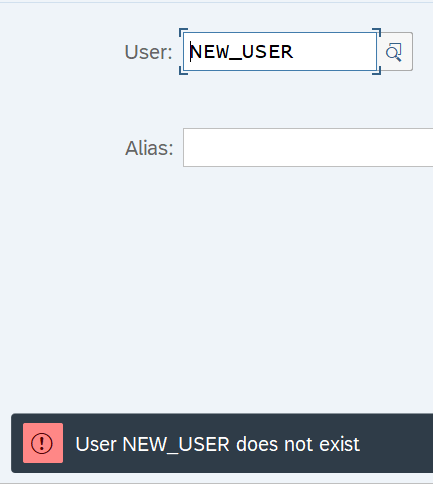
Step 4: The su01 transaction code is entered into the transaction field and the User Maintenance screen appears. On this screen, a check is performed to see if the user to be created already exists.
If the user exists, then the creation of this user is skipped. If the user does not exist, then the new user is created by copying roles from the template user specified in the spreadsheet.


Step 5: Once the user is created (or creation is skipped), the bot goes back to the list of systems on the SAP Logon page and selects the system in which the next user is to be created.
Step 6: Steps 3 to 5 are repeated until the data in the spreadsheet is exhausted. The SAP Logon application automatically closes and the process is complete.
Deployment
- Details on exporting packages and deployment can be found in Week 3 Unit 5 of the following openSAP course: https://open.sap.com/courses/rpa2
- Once you've logged into the iRPA Factory, you will arrive at the Dashboard.

iRPA Factory Dashboard
- Before proceeding with importing and deploying the bot, hierarchies should be defined. Click on the Management > Hierarchies tab to create them.
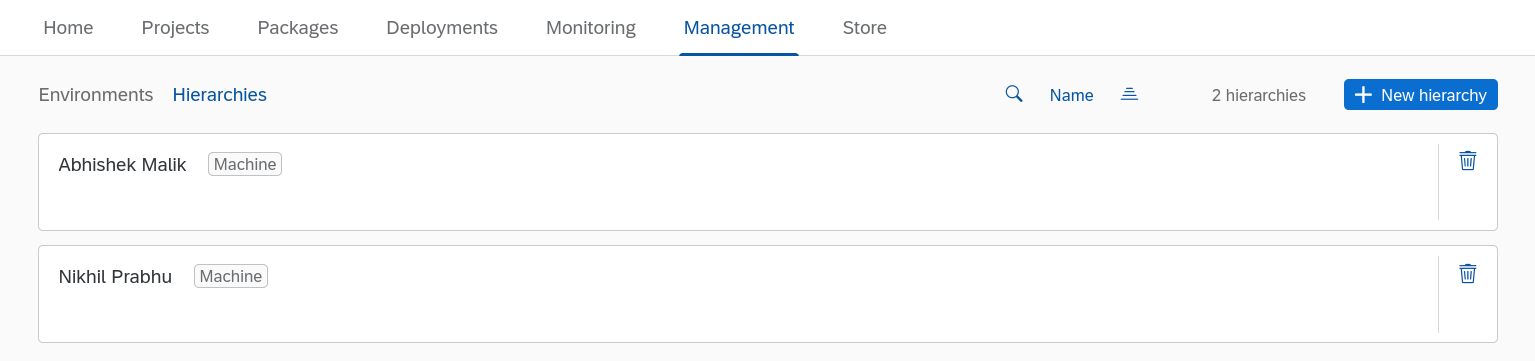
Hierarchies tab
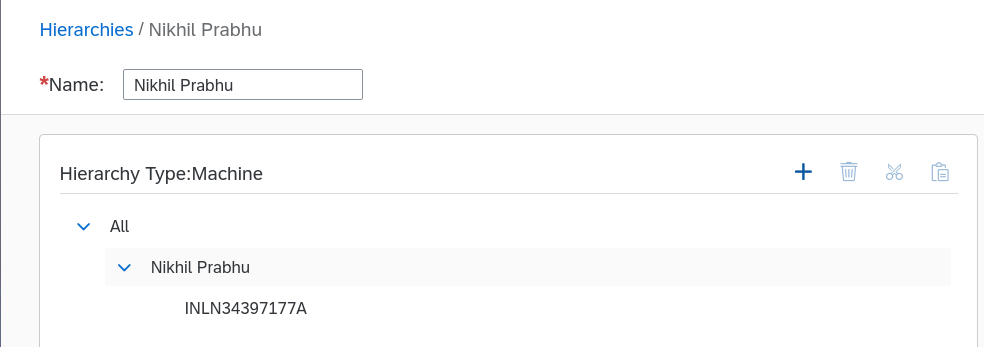
Example of a hierarchy
- Next, you should click on the Packages tab, and import the package that you exported from the Desktop Studio.
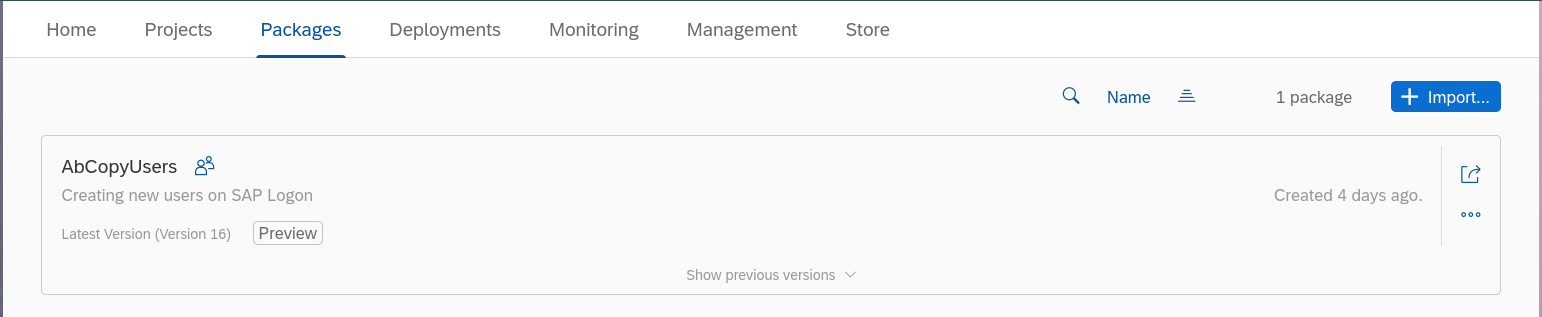
Packages tab
- After the package is imported, click on the Deployments tab to deploy the bot. After deployment, you can schedule when you want the bot to run.

Deployments tab
Learn More
