
- SAP Community
- Products and Technology
- Technology
- Technology Blogs by SAP
- How to use Python 3 to send sensor data to SAP Int...
Technology Blogs by SAP
Learn how to extend and personalize SAP applications. Follow the SAP technology blog for insights into SAP BTP, ABAP, SAP Analytics Cloud, SAP HANA, and more.
Turn on suggestions
Auto-suggest helps you quickly narrow down your search results by suggesting possible matches as you type.
Showing results for
former_member30
Explorer
Options
- Subscribe to RSS Feed
- Mark as New
- Mark as Read
- Bookmark
- Subscribe
- Printer Friendly Page
- Report Inappropriate Content
01-10-2020
5:43 AM
Python 3 is available on most linux operating systems. For example, you get Python 3 running out of the box when you setup Raspbian Buster Lite on your Raspberry Pi.
Therefore, you may want to use Python 3 on your IoT gateway to send sensor data to SAP Internet of Things Service.
If that's what you are looking for, this post shows how you can use Python 3 to send sensor data to SAP Internet of Things Service.
In order to have a purpose in mind, let's create a sample use case scenario. Given that, let's suppose that we are using Python 3 to send the humidity and temperature readings of a room to our SAP Internet of Things Service instance.
In addition to that, we will emulate the humidity and temperature readings to keep things simple.
After you have created your SAP Internet of Things Service instance, you will be able to get the instance owner credentials (username, password) and the service cockpit url from the service key
Use this set of credentials to login to your SAP Internet of Things Service cockpit:

After you have logged in, navigate to the Users page and click on +:

Once you have done so, the Create User page will be loaded. Enter a new set of user credentials and click Create:

Click Confirm if the Confirm Creation dialog appears:

When you confirm the user creation, the User details page will be shown. Remember the user ID:

After you had created your user, navigate to the Tenants page and click on +:

When the Create Tenant page loads, enter a Tenant name and click Create:

After you had done so, you should see your Tenant in the tenant details page. Click on + to add your user:

When you do that, the Add Member dialog appears. Enter the user id that you have jotted down earlier, choose Administrator as the role and click Add:

After you had done so, you will have your user added to the tenant that you had created:

Log the root user out by using the button on the top right corner:

After you had logged out the root user, log into the SAP Internet of Things Service cockpit again with your new user:

When you had logged in successfully into the Cockpit with your user account, you will find your tenant. Click on your Tenant.

Click on Device Management -> Capabilities in the main menu on the left panel.

A capability can be reused by different sensor types.
Let’s create a new capability to keep track of Temperature and Humidity level in the room.
Click + to create a capability.
Enter DHT_Capability for Name.
In the Properties section, enter Temperature for Name, choose float for Data Type, °C for Unit of Measure, Click + to add another property, enter Humidity for Name, choose float for Data Type, % for Unit of Measure and click Create.

After you click Create, a dialog may appear to ask you for confirmation. Click Confirm to confirm creation.

After you had confirmed the creation, DHT_Capability will be created.

Remember the Alternate ID of this capability.

Next, click on Device Management -> Sensor Types in the main menu on the left panel:

You may see some pre-defined sensor types.
Click + to create a sensor type.

Once the Create Sensor Type page appears, enter DHT_Sensor_Type for Name, In the Capabilities section, choose DHT_Capabililty for Capability, measure for Type and click Create:

After you had created the sensor type, you should see the following screen:

Next, click on Device Management -> Devices in the main menu on the left panel:

Click + to create a device.

After you had done so, the Create Device page will appear. Enter DHT_Sensing_Device for Name, choose IoT Gateway REST… for Gateway and click Create:

When you click on Create, you may see the confirmation dialog. Click on Confirm:

Once you have confirmed the creation, the following screen will appear:

A sensor is also created and associated with this device. We will delete this default sensor after we had added a new one later.
Remember the Alternate ID of the device:

Click + to create a new sensor that is tagged to this device:

When you do so, the Create Sensor page will appear. Enter DHT_Sensor for Name, choose DHT_Sensor_Type for Sensor Type and click Create:

When you do so, a confirmation message may appear to confirm your creation. Click Confirm:

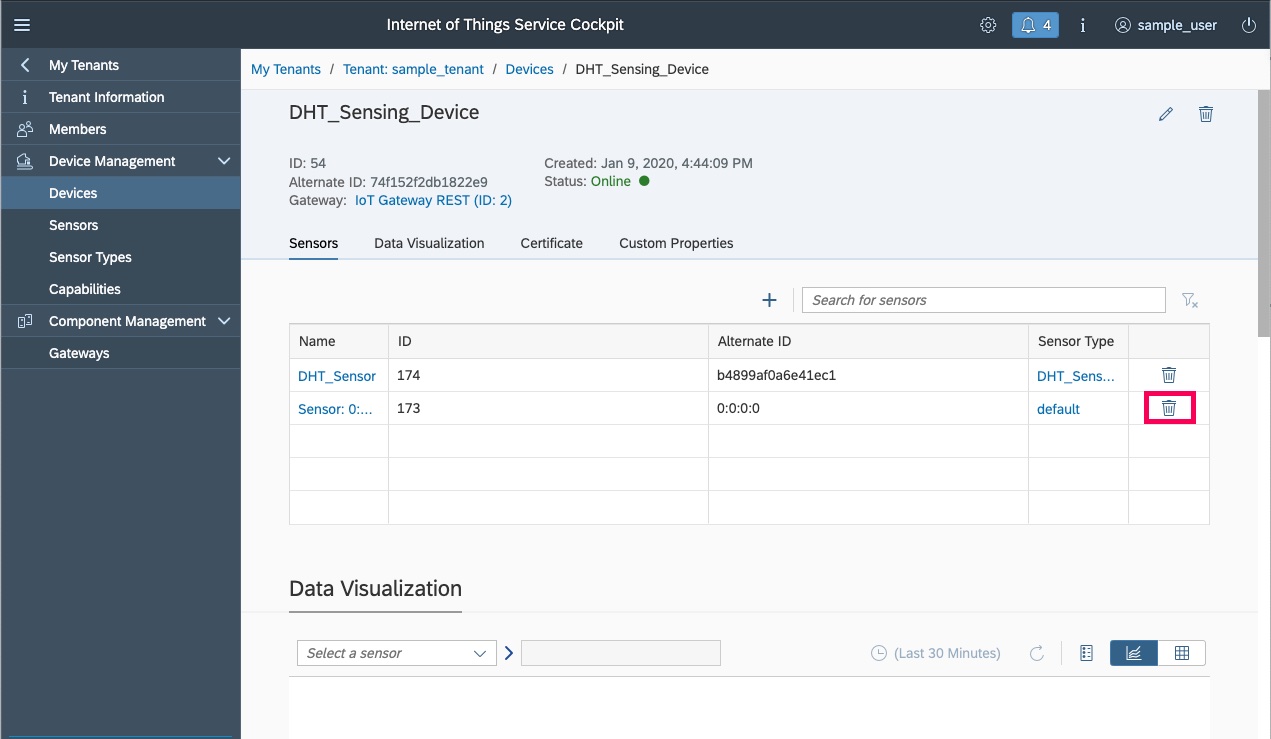
When you do so, you will see your sensor in the device detail page of DHT_Sensing_Device:

Remember the Alternate ID of the sensor that you had just created:

Delete the default sensor by clicking on the bin icon beside it:
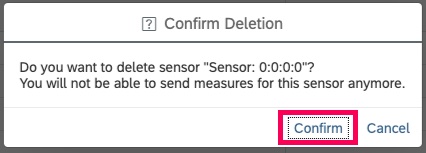
When you do so, a confirmation dialog will appear. Click Confirm:
After you had done so, you should find the default sensor being deleted:

At this point in time, our IoT service endpoint is ready for us to send sensor data to it.
In order to send sensor data to our IoT service endpoint, we will need to generate a client certificate.
Click on Certificate tab, and then click on Generate Certificate:

When you do so, the Generate Certificate dialog will appear. Choose Certificate Type as pem and click Generate:

Once you had done so, your browser will prompt you for instructions to save a file as DHT_Sensing_Device-device_certificate.pem.
After saving the file, remember to note down the certificate secret:

This DHT_Sensing_Device-device_certificate.pem contains a certificate and encrypted private key for the client program to authenticate itself with the server endpoint. The certificate secret is used by the client program to decrypt the private key during the client authentication process.
At this point in time, we will have the HTTP endpoint at our instance of SAP Internet of Things Service to send sensor data. In addition to that, we also has a key store with a client certificate for the endpoint to authenticate the HTTP requests that we will be sending.
Given these points, let's gather the variables that we had recorded while creating our digital twin:
With these information in our hands, we can then send a HTTP request with client certificate + private key + password/secret in Python 3.
Given these points, let's look at a sample Python 3 script that fulfil the sample use case that we had defined earlier:
After running the sample Python 3 script for a while, you should be able to check out the humidity and temperature readings in the SAP IoT cockpit.
In order to do so, click on Device Management -> Devices in the main menu on the left panel:

Click on DHT_Sensing_Device:

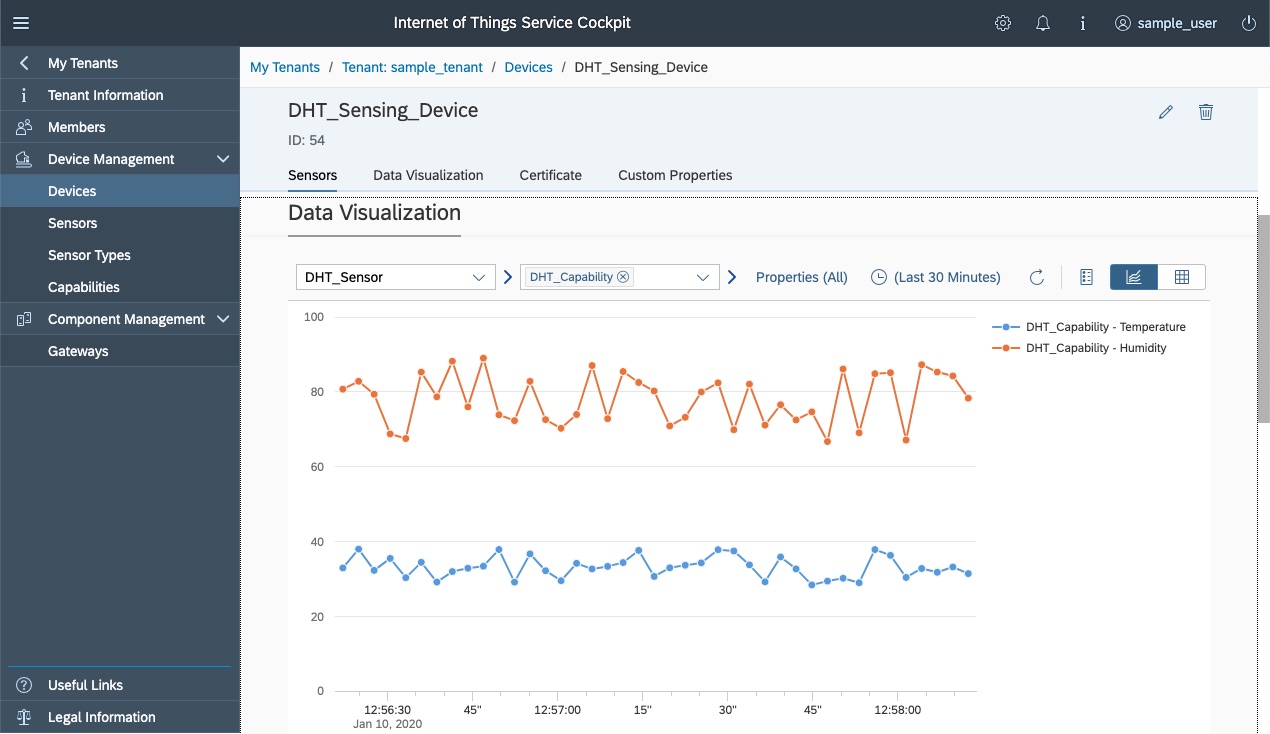
When you do so, you will see the detail page for DHT_Sensing_Device. In the Data Visualization section, select DHT_Sensor in the dropdown box:

After you do that, a graph will appear showing two line charts for the Humidity and Temperature readings:
In summary, we have seen how we can create a digital twin in an instance of SAP Internet of Things Service easily. After we had create the digital twin, we will be able to get the client certificate and secret for the server to authenticate any client program that we create.
In this case, we have seen how we can use Python 3 to build a client program to send sensor data to the digital twin that we had created. Although the Humidity and temperature readings are emulated, it is not too difficult to tweak the codes to read from actual sensor data.
For example, we can read temperature and humidity from a DHT11 sensor that is connected to a Raspberry Pi 3 before sending the readings to our digital twin.
Therefore, you may want to use Python 3 on your IoT gateway to send sensor data to SAP Internet of Things Service.
If that's what you are looking for, this post shows how you can use Python 3 to send sensor data to SAP Internet of Things Service.
Sample use case scenario
In order to have a purpose in mind, let's create a sample use case scenario. Given that, let's suppose that we are using Python 3 to send the humidity and temperature readings of a room to our SAP Internet of Things Service instance.
In addition to that, we will emulate the humidity and temperature readings to keep things simple.
Creating a User and Tenant to access the SAP Internet of Things Service
After you have created your SAP Internet of Things Service instance, you will be able to get the instance owner credentials (username, password) and the service cockpit url from the service key
Use this set of credentials to login to your SAP Internet of Things Service cockpit:
After you have logged in, navigate to the Users page and click on +:
Once you have done so, the Create User page will be loaded. Enter a new set of user credentials and click Create:
Click Confirm if the Confirm Creation dialog appears:
When you confirm the user creation, the User details page will be shown. Remember the user ID:
After you had created your user, navigate to the Tenants page and click on +:
When the Create Tenant page loads, enter a Tenant name and click Create:
After you had done so, you should see your Tenant in the tenant details page. Click on + to add your user:
When you do that, the Add Member dialog appears. Enter the user id that you have jotted down earlier, choose Administrator as the role and click Add:
After you had done so, you will have your user added to the tenant that you had created:
Log the root user out by using the button on the top right corner:
Creating the digital twin to receive sensor data from your Python 3 application
After you had logged out the root user, log into the SAP Internet of Things Service cockpit again with your new user:
When you had logged in successfully into the Cockpit with your user account, you will find your tenant. Click on your Tenant.
Click on Device Management -> Capabilities in the main menu on the left panel.
A capability can be reused by different sensor types.
Let’s create a new capability to keep track of Temperature and Humidity level in the room.
Click + to create a capability.
Enter DHT_Capability for Name.
In the Properties section, enter Temperature for Name, choose float for Data Type, °C for Unit of Measure, Click + to add another property, enter Humidity for Name, choose float for Data Type, % for Unit of Measure and click Create.
After you click Create, a dialog may appear to ask you for confirmation. Click Confirm to confirm creation.
After you had confirmed the creation, DHT_Capability will be created.
Remember the Alternate ID of this capability.
Next, click on Device Management -> Sensor Types in the main menu on the left panel:
You may see some pre-defined sensor types.
Click + to create a sensor type.
Once the Create Sensor Type page appears, enter DHT_Sensor_Type for Name, In the Capabilities section, choose DHT_Capabililty for Capability, measure for Type and click Create:
After you had created the sensor type, you should see the following screen:
Next, click on Device Management -> Devices in the main menu on the left panel:
Click + to create a device.
After you had done so, the Create Device page will appear. Enter DHT_Sensing_Device for Name, choose IoT Gateway REST… for Gateway and click Create:
When you click on Create, you may see the confirmation dialog. Click on Confirm:
Once you have confirmed the creation, the following screen will appear:
A sensor is also created and associated with this device. We will delete this default sensor after we had added a new one later.
Remember the Alternate ID of the device:
Click + to create a new sensor that is tagged to this device:
When you do so, the Create Sensor page will appear. Enter DHT_Sensor for Name, choose DHT_Sensor_Type for Sensor Type and click Create:
When you do so, a confirmation message may appear to confirm your creation. Click Confirm:
When you do so, you will see your sensor in the device detail page of DHT_Sensing_Device:
Remember the Alternate ID of the sensor that you had just created:
Delete the default sensor by clicking on the bin icon beside it:
When you do so, a confirmation dialog will appear. Click Confirm:
After you had done so, you should find the default sensor being deleted:
At this point in time, our IoT service endpoint is ready for us to send sensor data to it.
Generating the client certificate to send sensor data to the digital twin
In order to send sensor data to our IoT service endpoint, we will need to generate a client certificate.
Click on Certificate tab, and then click on Generate Certificate:
When you do so, the Generate Certificate dialog will appear. Choose Certificate Type as pem and click Generate:
Once you had done so, your browser will prompt you for instructions to save a file as DHT_Sensing_Device-device_certificate.pem.
After saving the file, remember to note down the certificate secret:
This DHT_Sensing_Device-device_certificate.pem contains a certificate and encrypted private key for the client program to authenticate itself with the server endpoint. The certificate secret is used by the client program to decrypt the private key during the client authentication process.
Building the Python 3 program that send random humidity and temperature readings to SAP Internet of Things Service
At this point in time, we will have the HTTP endpoint at our instance of SAP Internet of Things Service to send sensor data. In addition to that, we also has a key store with a client certificate for the endpoint to authenticate the HTTP requests that we will be sending.
Given these points, let's gather the variables that we had recorded while creating our digital twin:
- host portion of Internet of Things Service instance: 1c2ab5d1-ff4d-4629-bae3-7422adb4de6a.us10.cp.iot.sap
- device alternate Id: 74f152f2db1822e9
- sensor alternate Id: b4899af0a6e41ec1
- capability alternate Id: 028b7bb9bc2b2a07
- certificate file: DHT_Sensing_Device-device_certificate.pem
- certificate secret: wJl2N6EhxZkX1mta
With these information in our hands, we can then send a HTTP request with client certificate + private key + password/secret in Python 3.
Given these points, let's look at a sample Python 3 script that fulfil the sample use case that we had defined earlier:
import http.client

import json

import random

import ssl

import time


certfile='DHT_Sensing_Device-device_certificate.pem'


###### Change the values here ######

host = '1c2ab5d1-ff4d-4629-bae3-7422adb4de6a.us10.cp.iot.sap'

certificate_secret= 'wJl2N6EhxZkX1mta'

device_alternate_id = '74f152f2db1822e9'

capability_alternate_id = '028b7bb9bc2b2a07'

sensor_alternate_id = 'b4899af0a6e41ec1'

####################################


request_url='/iot/gateway/rest/measures/%s' % device_alternate_id

request_headers = {

    'Content-Type': 'application/json'

}

request_body_dict={

    'capabilityAlternateId': capability_alternate_id,

    'sensorAlternateId': sensor_alternate_id,

    'measures': [{

        'Temperature': 38,

        'Humidity': 80

    }]

}


# Define the client certificate settings for https connection

context = ssl.SSLContext(ssl.PROTOCOL_SSLv23)

context.load_cert_chain(certfile=certfile, password=certificate_secret)


connection = http.client.HTTPSConnection(host, port=443, context=context)


# Periodically send random temperature and humidity data

while(True):


    # Emulate random values for Temperature and Humidity

    request_body_dict['measures'] = [

        {

            'Temperature':random.uniform(28, 38),

            'Humidity':random.uniform(66, 89)

        }

    ]


    # Use connection to submit a HTTP POST request

    connection.request(method="POST", url=request_url,headers=request_headers, body=json.dumps(request_body_dict))


    # Print the HTTP response from the IOT service endpoint

    response = connection.getresponse()

    print(response.status, response.reason)

    data = response.read()

    print(data)


    time.sleep(2)


connection.close()
Visualizing the data in SAP Internet of Things Service cockpit
After running the sample Python 3 script for a while, you should be able to check out the humidity and temperature readings in the SAP IoT cockpit.
In order to do so, click on Device Management -> Devices in the main menu on the left panel:
Click on DHT_Sensing_Device:
When you do so, you will see the detail page for DHT_Sensing_Device. In the Data Visualization section, select DHT_Sensor in the dropdown box:
After you do that, a graph will appear showing two line charts for the Humidity and Temperature readings:
Summary
In summary, we have seen how we can create a digital twin in an instance of SAP Internet of Things Service easily. After we had create the digital twin, we will be able to get the client certificate and secret for the server to authenticate any client program that we create.
In this case, we have seen how we can use Python 3 to build a client program to send sensor data to the digital twin that we had created. Although the Humidity and temperature readings are emulated, it is not too difficult to tweak the codes to read from actual sensor data.
For example, we can read temperature and humidity from a DHT11 sensor that is connected to a Raspberry Pi 3 before sending the readings to our digital twin.
- SAP Managed Tags:
- Internet of Things,
- SAP Business Technology Platform
Labels:
You must be a registered user to add a comment. If you've already registered, sign in. Otherwise, register and sign in.
Labels in this area
-
ABAP CDS Views - CDC (Change Data Capture)
2 -
AI
1 -
Analyze Workload Data
1 -
BTP
1 -
Business and IT Integration
2 -
Business application stu
1 -
Business Technology Platform
1 -
Business Trends
1,661 -
Business Trends
88 -
CAP
1 -
cf
1 -
Cloud Foundry
1 -
Confluent
1 -
Customer COE Basics and Fundamentals
1 -
Customer COE Latest and Greatest
3 -
Customer Data Browser app
1 -
Data Analysis Tool
1 -
data migration
1 -
data transfer
1 -
Datasphere
2 -
Event Information
1,400 -
Event Information
65 -
Expert
1 -
Expert Insights
178 -
Expert Insights
280 -
General
1 -
Google cloud
1 -
Google Next'24
1 -
Kafka
1 -
Life at SAP
784 -
Life at SAP
11 -
Migrate your Data App
1 -
MTA
1 -
Network Performance Analysis
1 -
NodeJS
1 -
PDF
1 -
POC
1 -
Product Updates
4,577 -
Product Updates
330 -
Replication Flow
1 -
RisewithSAP
1 -
SAP BTP
1 -
SAP BTP Cloud Foundry
1 -
SAP Cloud ALM
1 -
SAP Cloud Application Programming Model
1 -
SAP Datasphere
2 -
SAP S4HANA Cloud
1 -
SAP S4HANA Migration Cockpit
1 -
Technology Updates
6,886 -
Technology Updates
408 -
Workload Fluctuations
1
Related Content
- It’s Official - SAP BTP is Again a Leader in G2’s Reports in Technology Blogs by SAP
- Analyze Expensive ABAP Workload in the Cloud with Work Process Sampling in Technology Blogs by SAP
- It has never been easier to print from SAP with Microsoft Universal Print in Technology Blogs by Members
- SAP Cloud Integration: Understanding the XML Digital Signature Standard in Technology Blogs by SAP
- Setup of Synthetic User Monitoring in SAP Cloud ALM in Technology Blogs by Members
Top kudoed authors
| User | Count |
|---|---|
| 13 | |
| 10 | |
| 10 | |
| 7 | |
| 6 | |
| 5 | |
| 5 | |
| 5 | |
| 4 | |
| 4 |