Introduction:
In this blog post, we’ll go over a series of steps that will explain how to perform screen level changes such as column label, column sequence, visible length of the column and make use of excess space on screen in TMG without any modification in the table structure.
We generally use TMG to create, change and delete entries from the DB table. By following the steps mentioned in this post, you can change the look and feel of the screen as per your requirement.
Note: This is only applicable to Custom Tables.
Step 1: Select a Custom Database Table or create a new table based on your requirements.
In my case, I’m using the DB Table with the structure illustrated below.
 Step 2:
 Create TMG for the Table.

I’ve used ‘One Step’ as a maintenance type and Overview Screen ‘110’.
Step 3: Double click on screen number, it will navigate to Module Pool.
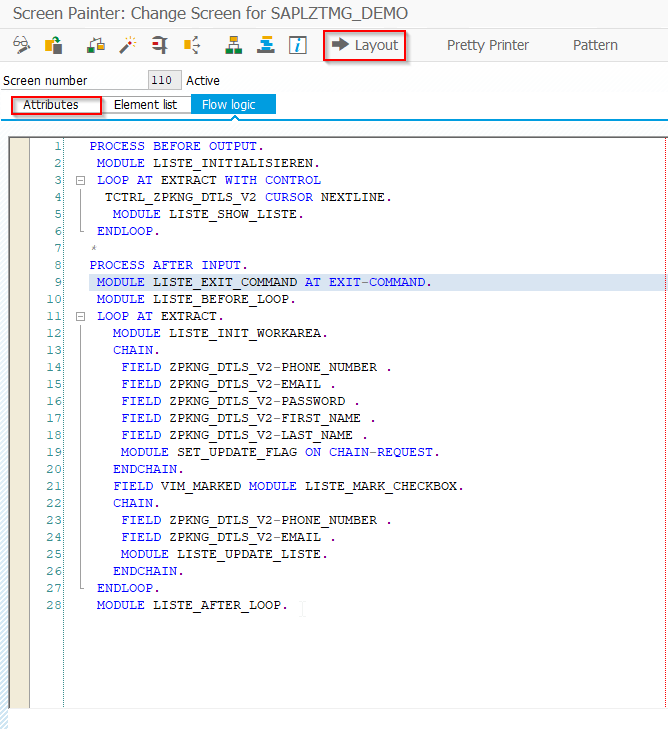
You can now find the ‘Layout’ and ‘Attributes’ option on the screen as illustrated above.
Step 4: Click on the ‘Layout’ option, it will navigate to the screen painter.

If there are several fields, we need to scroll the page to view the fields.
But we can avoid the above case by changing the value in the Attributes section.
Step 5: Proceed to attributes section in step 3.
In the Attributes section, you can find the
Editing field in the
Other Attributes section.
Step 6: Change it as per the requirement and make use of excess space on the screen.

Here, I’ve changed it from 80 to 100 so that I can view all the fields at a time without the need to scroll.
Resultant layout would be as illustrated below.

If you would like to change the position of the field, you can do so by following the next step.
Step 7:
Double click on the tab below the field that you would like to move and change the value of the
column field.
For Example: In my case, the layout would be as illustrated below.
I would like to change the position of the
Password field to the last i.e. 5
th position.
So, I need to change the value in the column field.

After changing the value, the layout would be as illustrated below.

In the above image you can see that the length of the field
‘Last Name’ is less.
If you would like to change the visible length of the field, you can do so by changing the
Vis. Length field.
Step 8: Double click on the field which you would like to modify the properties.
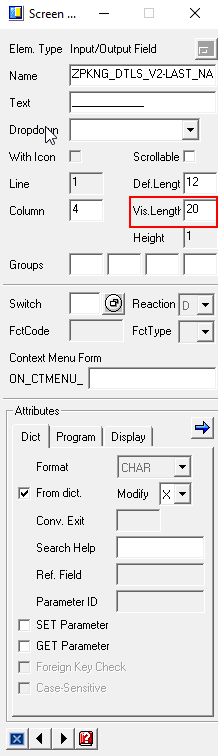
In my case, I’ve changed the visible length of the
Last Name field to 20.
Now, the screen layout would be as below.

You can also change label of field without changing the data-element or domain.
You can do so by changing the
Text field.
Step 9: Double click on the field that you would like to change the properties.
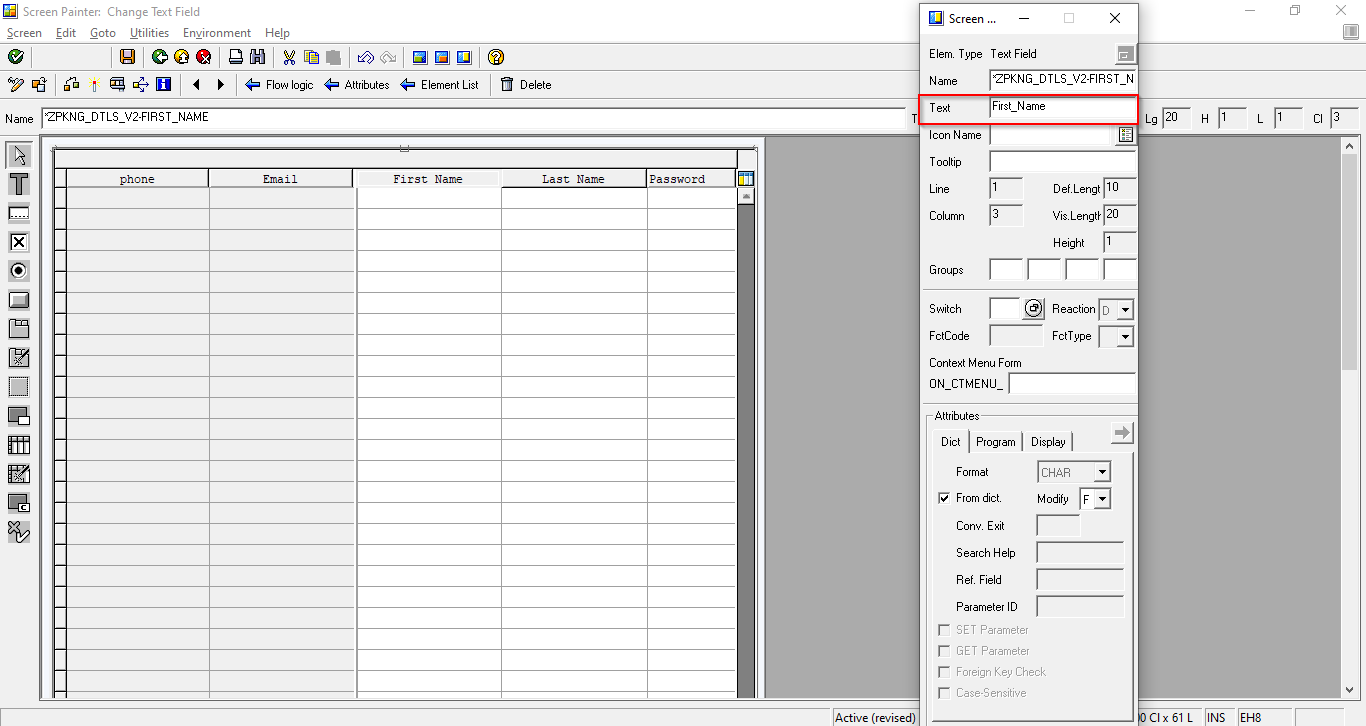
In my case, I’ve changed it from
Name to
First Name.
So, we’ve seen how to
- change the label,
- change the column position and
- change the visible length of the field.
The final output in TMG would be as below.

The operations mentioned in this post will be applicable only in TMG, it will not reflect in SE16.
Thanks for reading.
Hope this post would be helpful.
