Introduction
following blog post treats explains how to implement the integration of SAP Cloud for Real Estate with a SAP S/4HANA On Premise’s Contract and Lease Management (part of RE-FX). It shows one way of exposing OData services in the SAP and setting up the respective destinations in the SAP Cloud Platform Cockpit (SCP) We do that to connect the RE-FX to SAP Cloud for Real Estate. With that, we will be able to see our Contracts within . This blog post tries to break down the whole process in a step-by-step manual. , we are using the basic authentication method to connect to the OData services. If you want to use this system productively, we recommend using Principal Propagation. A link for that is provided in the end of this blog post.
How to set up access control in the SCP Cloud Connector
Go to Cloud Connector and login.
 Configure the access control:
Let’s navigate to your subaccount in the menu on the left side and go to “Cloud To On-Premise”.
Configure the access control:
Let’s navigate to your subaccount in the menu on the left side and go to “Cloud To On-Premise”.
 We click on “Add System Mapping”.
Here we map the virtual to the internal system.
As Back-end Type you choose ABAP System.
We click on “Add System Mapping”.
Here we map the virtual to the internal system.
As Back-end Type you choose ABAP System.
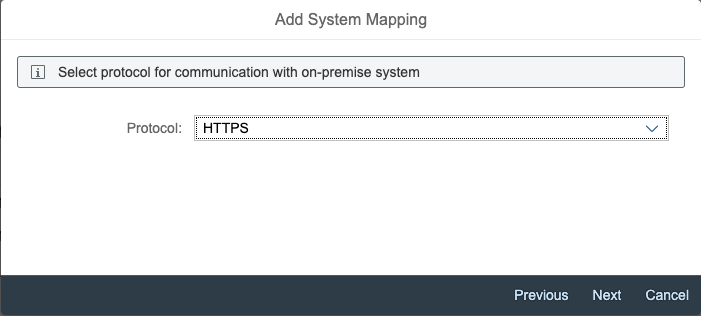
 On the next dialog we set the protocol to HTTPS:
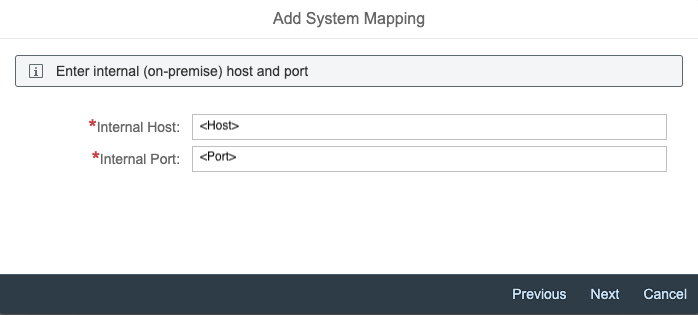
 After that we type the internal host and port of the target system within the intranet.
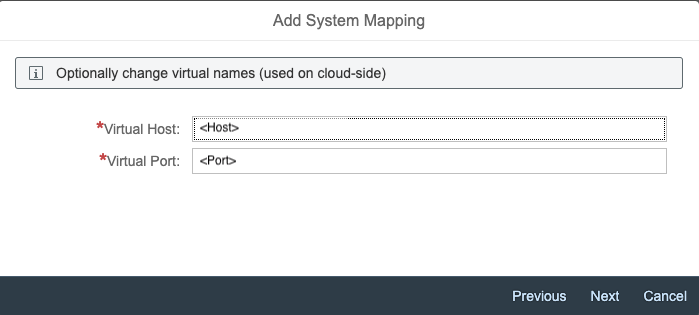
 Then we specify the Virtual Host (The URL property you will use to setup the destination in the SCP). You can type any name you like. The port lets you distinguish between different entry points (HTTP/80, HTTPS/443). We use this Virtual Host later to specify the destination in the SCP.
 As we don’t use Principal Propagation as authentication type in this blog, we don’t need to set a principal type.
 Next, we define which host header is being sent to the target system. Either virtual or internal host. In the next dialog we can add a description, that is shown, if we click on the “Show details” button in the “Actions” column of the Mapping table. Recheck your petitions in the summary and click on finish if everything is correct.
After setting up the mapping we define the accessible resources. For that we select the mapping we just created. Below the mapping table we can see another table with the header “Resources Accessible On <Host>:<Port>”. We click on the Add Button to add a resource. In the popup we define the path, that leads to the resources we want to access. In our case we want to make all resources under “sap/opu/odata/sap” accessible. So, we set the URL-Path to “sap/opu/odata/sap” and check the selectbox “Path and all sub-paths". If you want to expose a certain OData service only, you will have to select the “Path only” selectbox.
Next, we define which host header is being sent to the target system. Either virtual or internal host. In the next dialog we can add a description, that is shown, if we click on the “Show details” button in the “Actions” column of the Mapping table. Recheck your petitions in the summary and click on finish if everything is correct.
After setting up the mapping we define the accessible resources. For that we select the mapping we just created. Below the mapping table we can see another table with the header “Resources Accessible On <Host>:<Port>”. We click on the Add Button to add a resource. In the popup we define the path, that leads to the resources we want to access. In our case we want to make all resources under “sap/opu/odata/sap” accessible. So, we set the URL-Path to “sap/opu/odata/sap” and check the selectbox “Path and all sub-paths". If you want to expose a certain OData service only, you will have to select the “Path only” selectbox.
 After this click the save button. That’s it, we configured the .
How to set up the destinations in the SCP
In this step we will set up the client authentication for the destination. For that we need to go to the SAP Cloud Platform Cockpit. We navigate to our global account. Afterwards we click on subaccounts in the left menu and choose the subaccount, in which we want to set the destinations. In the subaccount we can see under the “Connectivity” point in the menu the “Destinations”. Now we add the destination by clicking on “New Destination”.
 In the following enumeration <host> and <port> are used for the Virtual Host and Virtual Port, that we defined previously.
- To enable the service for connecting SAP RE-FX to the location management option, you set up the destination with the name contract-association-api and point it to the OData service by setting the URL to http://<host>:<port>/sap/opu/odata/sap/RE_CN_C4RE_ODATA_SRV_01.
- To enable the service for connecting SAP RE-FX to the contract and lease management option, you set up the destination with the name lease-contract-api and point it to the OData service by setting the URL to http://<host>:<port>/sap/opu/odata/sap/RE_CN_CONTRACT_ODATA_SRV.
- To enable the service for creating new contracts in SAP RE-FX via the location management option, you set up the destination with the name contract-creation-api and point it to the OData service by setting the URL to http://<host>:<port>/sap/opu/odata/sap/RE_CN_CONTRACT_ODATA_SRV.
The basic authentication user, is the SAP-Gateway user. SAP NetWeaver AS ABAP provides the user authentication functions for SAP Gateway. For user maintenance, use transactions SU01, or SU10. For role maintenance, use transaction PFCG.
Now, that we set up everything correctly, we successfully implemented the Contract and Lease Management in an On-Premise System.
The last step to make the functionalities usable is to enable the feature toggle.
For that we are navigating to the Admin Settings app. Within this app we enable the feature toggle “Contract Management”, which is in the section “Features”.

Conclusion
Now we can see the Contract Management app in the SAP Fiori Launch Pad.
 Cloud for Real Estate location management. We can add new contracts to a building, delete existing, or create new ones. In addition to that we can jump directly to the Contract Management app to view the details of these contracts.

The principal propagation method is the recommended way to authenticate in a productive system. A business user logs in to the cloud app in the web browser e.g. via email address. After that the cloud app will call the master API within S/4HANA Cloud and forwards the currently logged on user to the S/4HANA Cloud. The S/4HANA Cloud trusts this app and you are automatically logged on to S/4HANA Cloud. The industry standard protocol for this method is OAuth 2.
you are interested in how to leverage Principal Propagation via OAuth 2 when consuming a Business API from SAP S/4HANA Cloud follow the related blog post.
Related Blogs
https://blogs.sap.com/2018/02/05/deep-dive-8-with-sap-s4hana-cloud-sdk-leverage-principal-propagatio...
