Ever since it’s inception and inclusion in the SAP Ecosystem, Qualtrics has gained a lot of attention. Along with it, most of us have heard the terms like experience management, X-data and O-data, etc.
To start with, this blog will give you a simple interpretation of such terms. However, the main focus of this blog would be to enable it’s readers to have their own first “Hello World” equivalent of Qualtrics i.e.,
creating their first survey on Qualtrics experience management platform.
So, without any wait, let’s get started!
Meaning of Experience Management – It is the process of monitoring every interaction people experience with a company in order to discover opportunities for improvement. Collecting data from the customers/people at various touch-points and using this data (after applying appropriate analytics) to enhance their overall experience.
What is X data? - Data collected from the people for the purpose of experience management is known as X data or experience data.
What is O data? – It refers to an organization’s operational data (master and transactional data)
As businesses turn their focus towards the experience more and more often, combining O-data(operational data) and X-data(experience data) is the next frontier. Qualtrics enables users to perform many kinds of online data collection and analysis including market research, customer satisfaction and loyalty, product and concept testing, employee evaluations, etc. The final outcome is the overall enhancement in people’s experience with a company.
Now that our basics are clear, let’s jump on to create our very first survey in Qualtrics.
Following are the steps for creating the survey-
- Signing up with Qualtrics for free- Qualtrics also allow you to create account for free. For this just go to Qualtrics.com and click on "FREE ACCOUNT" button as shown below-

After providing some basic information, it will create a free account for you. For the first time login, you will have to accept Terms of service in order to continue.
2. After successful registration and login, you can directly get started with creating your very first Qualtrics survey. Under Research Core node, choose between creating a blank survey or creating a survey from another existing survey. As part of this blog, we’ll be creating a survey from scratch. Hence, select “Blank survey Project” option and then give a project name (Customer_Feedback_Survey in our example) and click on “Create Project” button.

3. After the end of step 2, we are ready to add questions to our Customer Feedback survey.To create a simple survey, you may click on the text next to “Q1” and start writing your question. For providing answers to choose from, just click on the texts next to radio button and provide appropriate answers to choose from.You may add another question(s) by clicking on “Create a New Question” button at the bottom of the screen.

At this point of time, it also becomes necessary to make ourselves aware of the various capabilities provided by Qualtrics (as part of free account) for creating variety of survey questions and various ways of providing answers. However, being the first time user, if you are more eager to get your first survey up and running , you may omit reading the list of features mentioned below and directly jump on to step 4.
Here is the list of features provided by Qualtrics which can be explored by the users –
i)
Question Type – Click on “
Change Question Type” on the right panel of the screen to display available options for question types like multiple entry (default question type), text entry, slider, rank order, etc. Some of the options are not available in free account and would be disabled. Depending upon the chosen question type, follow-on options for configuration also vary.

ii)
Choices – Select the number of options you want to provide your audience for answering a specific question. There is also an option of providing automatic choices from the list of pre-defined values configured for rapid design and deployment of surveys.

iii)
Answers and Position– Different types of answers could be single answer, multiple answers, dropdown list, etc. Position refers to the how answers will be positioned below the question. It can be vertical, horizontal or columnar.

iv)
Validation - Qualtrics allows us to add custom validations on surveys depending upon the answer(s). It also allows us to choose an error message from the available list of messages in case of failure of validation.

v)
Actions – One common scenario while creating surveys is to display a question only if a condition is met. For handling this type of scenarios, there are rich capabilities in Qualtrics which allows us to tackle such situation based on various simple and advanced attributes like Question, embedded data, GeoIP Location, etc. This is known Display Logic. Similarly, there are other actions like Skip Logic, Page Break, Add note (below a question), preview question, etc.

vi)
Other options – Apart from the right sided panel, there are options at the top of the screen which makes our survey creating experience simpler and easier.
A) Look & feel- Choose from the existing templates, layout, configure your own styling, page transition, logo, background screen, etc.
B) Survey Flow- It provides various options to configure the flow of our survey like adding a block, branch, etc.

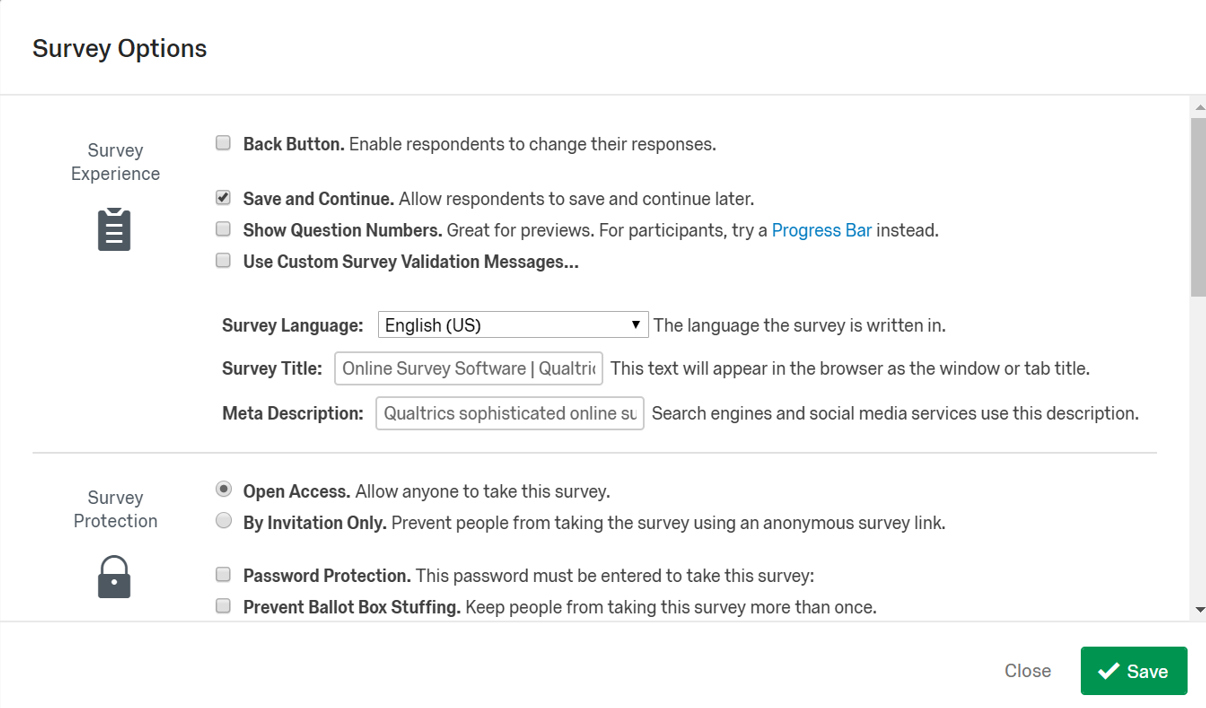
C) Survey options – “Survey options“ provide ample configurations to enhance our survey creation experience by providing easy to use configurable options for managing survey experience, protection, termination, etc.
D) Tools – One of the most common situation in surveys is to import survey questions from an excel/CSV sheet. This is made possible in Qualtrics from the Import/Export option under Tools menu in Qualtrics. Various other options underTools can be explored to get the best out of features provided by Qualtrics.

4. Once the survey is created, it’s time to publish the same. For this, click on the publish button at the top right-hand side of the screen. After clicking, you will also get to see some expert review for the survey prepared by you. So that you can make necessary corrections, if required.

5. Once the survey is published, a unique link gets generated which can be used to distribute the survey.
6. Once the survey is filled in by the intended recepients, it’s results can be analyzed in Qualtrics to make strategies for enhancing the overall experience of the people involved.
Now that you have reached here, I assume you would have created your very first survey and are aware of the basic terminology associated with Qualtrics.
Thanks for being patient while reading this blog! I will attempt another blog focusing on the analytical capabilities provided by Qualtrics.
Till then, keep learning and stay curious!
Thanks!
H Mandoliya
