
- SAP Community
- Products and Technology
- Technology
- Technology Blogs by SAP
- Alerting from hyper-scaler provided backing servic...
Technology Blogs by SAP
Learn how to extend and personalize SAP applications. Follow the SAP technology blog for insights into SAP BTP, ABAP, SAP Analytics Cloud, SAP HANA, and more.
Turn on suggestions
Auto-suggest helps you quickly narrow down your search results by suggesting possible matches as you type.
Showing results for
former_member35
Active Participant
Options
- Subscribe to RSS Feed
- Mark as New
- Mark as Read
- Bookmark
- Subscribe
- Printer Friendly Page
- Report Inappropriate Content
08-08-2019
10:24 AM
Pre-read
This blog post is part of a series of blog posts related to SAP Cloud Platform Alert Notification service.
You can relate to the parent blog post for more detailed information about the service itself.
Let's take the following situation - we have a solution which we deploy on SAP Cloud Platform. This solution consumes backing services from different hyper-scalers - such as AWS or GCP. Naturally, we would like to have a single approach to receive alerts from both our solution on SAP Cloud Platform and the hyper-scalers services that it uses. Furthermore, we want to do that into an hyper-scaler agnostic manner.
In the next couple of blog posts, we are going to show you precisely how you can receive alerts for the backing services from hyper-scalers via SAP Cloud Platform Alert Notification. That way, you are going to have a common alert management approach for both SAP Cloud Platform and your hyper-scalers regardless of which one you use.
Into that particular blog post, we are going to concentrate on AWS.
Prerequisites
To start, you are going to need:
- Active AWS account
- An active subscription to SAP Cloud Platform Alert Notification
- SAP Cloud Platform application deployed on SAP Cloud Platform Cloud Foundry environment and using some of the AWS backing services. You can refer to this blog post to understand more details about this topic.
Setup
In this particular case, we are going to have the setup below.

- The example application is consisting of two modules. It is living on SAP Cloud Platform Cloud Foundry environment. It is already sending custom alerts to Alert Notification. More about custom alerts read here.
- This application uses DynamoDB instantiated on AWS as a NoSQL backing service.
- We are using AWS CloudWatch, AWS SNS to monitor the backing service
- We are using AWS Lambda to post custom alerts to SAP Cloud Platform Alert Notification
- Our sample application is also posting its application's specific custom alerts to Alert Notification. For example, it posts an error alert whenever an exception in its code occurs.
Steps to Execute
Follow the steps below to achieve similar results.
Configure your Alert Notification
We are going to start by creating our configuration for Alert Notification. Firstly we should create a subscription, and also, we are going to create a user for basic authentication. That's right Alert Notification REST APIs support both OAuth and Basic authentication methods.
Configure BASIC Authentication Client
- Subscribe for Alert Notification if you haven't done so.
- Navigate to your Alert Notification service instance UI
- In SAP Cloud Platform Cockpit navigate to your Cloud Foundry Space -> Services -> Service Instance -> Click on your instance
- In the menu, select "Service Keys" and then click on the create service key button.

- In the popup give your keys a name, for example, "AWS Integration Keys" and in the description field copy and paste the following JSON:
{
"type":"BASIC"
}
- These are the client, secret and endpoint, which we are going to use for our integration.
Configure Subscriptions
In this section, we are going to use one of the coolest features of SAP Cloud Platform Alert Notification. The import feature. We have preconfigured the subscriptions and actions for you.
- Copy-Paste the provided JSON below into some text editor.
{
"conditions": [
{
"name": "AnyCondition",
"propertyKey": "eventType",
"predicate": "ANY",
"propertyValue": "",
"labels": [],
"description": ""
}
],
"actions": [
{
"name": "NotifyMeByEmail",
"state": "ENABLED",
"labels": [],
"destination": "your.email@here",
"description": "",
"type": "EMAIL"
}
],
"subscriptions": [
{
"name": "AWSDynamoDBAlert",
"conditions": [
"AnyCondition"
],
"actions": [
"NotifyMeByEmail"
],
"labels": [],
"state": "ENABLED",
"description": ""
}
]
}
- Replace the "your.email@here" with the email you want to receive alerts. If you would like to use another channel different than email, create a new action and attach it to your subscription.
- In the Alert Notification UI, click on "Export or Import".
- Copy-Paste the modified JSON into the import field and click on "Import".

- Now the only thing left is to confirm your email.
- Go to the "Actions" menu and click on the "NotifyMeByEmail" tile.

- Click on "Confirm Action" button.

- You are going to receive an email with confirmation code. Copy the code and post it into the popup. Then click the "Confirm" button.

Note that you can fine-tune the provided subscription. Currently, it accepts any alert coming to Alert Notification. To achieve better filtering, you can play around with the provided condition in the Conditions tab of the menu. For hyper-scaler alerts, we recommend the usage of tags to achieve better results.
Configure your AWS
Below is a one-time configuration which you should execute on in your AWS account.
We assume that you already have an instance of DynamoDB or some other service that you use in your application.
We are going to use a Node.js based function-as-a-service from AWS Lambda to integrate with SAP Cloud Platform Alert Notification.
Since AWS Lambda currently does not support installing modules, we should upload our Node.js app as a zip file.
Below you can find the code that we have used for our example.
'use strict';


const request = require('request');

const util = require('util');


const REQUEST_TIMEOUT = 10000;

const MSG_ATTRIBUTE_KEYS = ["Name", "Type", "Value"];

const UNKNOWN_RESOURCE = "unknown";


exports.handler = (event, context, callback) => {

   let events = convertRecordsToAnsEvents(event.Records);


    let hasError = false;

    let tempError = undefined;


    for (let event of events) {

        console.log("Posting event: ");

        console.log(util.inspect(event, {depth: null}));

        let options = buildOptions(event);

        request(options, function(error, response, body) {

            if(error) {

                hasError = true;

                tempError = error;

                return;

            }

            console.log("Successfully posted to ANS");

        });

    }


    return hasError ? callback(null, 202) : callback(Error(tempError));

};


const convertRecordsToAnsEvents = (records) => {

    let tempAnsEvents = [];


    for(let record of records) {

        tempAnsEvents.push(convertToAnsPayload(record));

    }


    return tempAnsEvents;

};


const buildOptions = (body) => {

    return {

        url: process.env.ANS_SERVICE_API,

        method: "POST",

        auth: {

            user: process.env.CLIENT_ID,

            password: process.env.CLIENT_SECRET

        },

        json: body,

        timeout: REQUEST_TIMEOUT

    };

};


const convertToAnsPayload = (notification) => {

    let snsNotification = notification || {};


    return {

        "eventType": snsNotification.Sns.Type,

        "severity": "INFO",

        "category": "NOTIFICATION",

        "subject": snsNotification.Sns.Subject,

        "body": snsNotification.Sns.Message,

        "resource": {

            "resourceName": UNKNOWN_RESOURCE,

            "resourceType": UNKNOWN_RESOURCE

        },

        "tags": buildTags(snsNotification)

    }

}


const buildTags = (snsNotification) => {

    let tempTags = {

        "sns:messageId": snsNotification.Sns.MessageId,

        "sns:topicArn": snsNotification.Sns.TopicArn,

        "sns:timestamp": snsNotification.Sns.Timestamp,

        "sns:eventSource": snsNotification.EventSource,

        "sns:subscriptionArn": snsNotification.EventSubscriptionArn

    };

    let messageAttributes = extractMessageAttributes(snsNotification.Sns.MessageAttributes);


    return Object.assign(tempTags, messageAttributes);

};


const extractMessageAttributes = (attributes) => {

    let tempAttrubutes = {};


    let buildKey = function(parentKey, childKey) {

        return `${parentKey}.${childKey}`;

    };


    for (let [parentKey, value] of Object.entries(attributes)) {

        for (let messageAttributeKey of MSG_ATTRIBUTE_KEYS) {

            if (value.hasOwnProperty(messageAttributeKey)) {

                let key = buildKey(parentKey, messageAttributeKey);

                tempAttrubutes[`${key}`] = value[messageAttributeKey];

            }

        }

    }


    return tempAttrubutes;

};
Another option is to use the shared Lambda function from here.
Note that this is just a code snippet and you can decide not to use it or to change it or to proceed with your own implementation.
Importing sample function into AWS Lambda
- In the AWS Console look-up for Lambda and select it.

- Click on the "Create Function" button and give it some meaningful name

- In our example, we are using Node.js 8.10 version to cover not only AWS but also other hyper-scalers with the same code.
- In the Function Code section, as a "Code entry type" select "Upload a .zip file" and upload the zip file that you have assembled.

- Once the import of the function finishes, navigate to the "Environment Variables" section. Here you should fill the endpoint and the client and secret which you have configured in the "Configure BASIC Authentication" section of that blog post.

- Once you fill this, click on the "Save" button.
Configuring AWS Simple Notification Service
Now once we have our function-as-a-service in place, it is time to configure SNS working with it.
- In the AWS Console look-up for SNS and select it.
- In the UI click on the "Topics" menu
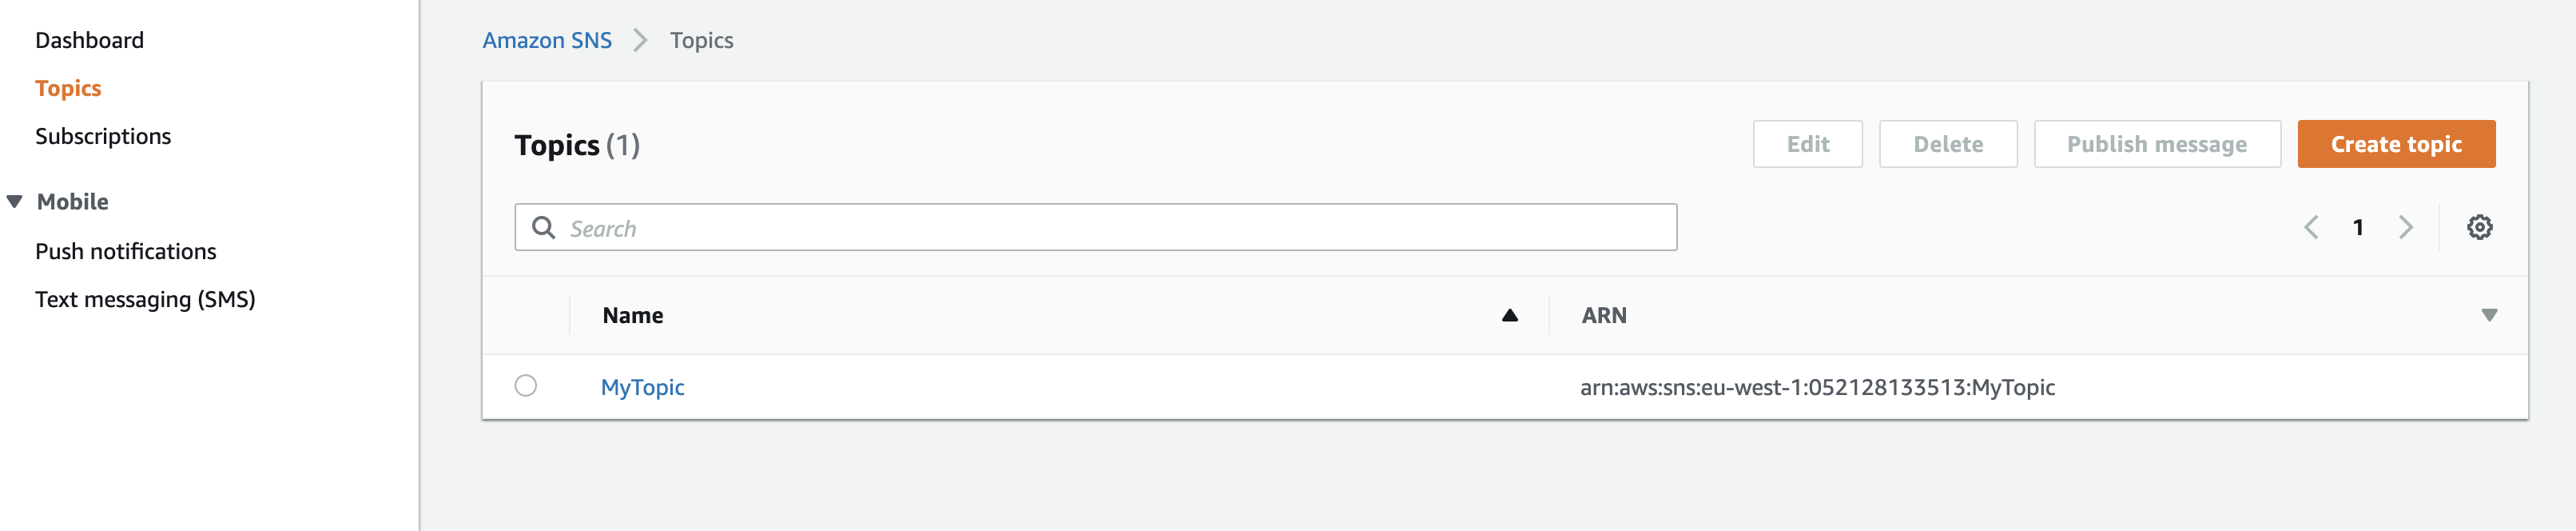
- Click on "Create Topic" and give it some meaningful name.

- Once you do that, click on "Create Subscription".

- As Protocol select "AWS Lambda". Click on the "Endpoint" field and from the dropdown select the lambda function you have just created.

Creating an alarm via AWS CloudWatch
The final step is to create an alarm which has to execute the function in case of a problem.
- In the AWS Console look-up for CloudWatch and select it.
- Go to the "Alarms" menu and click on "Create Alarm".

- Click on "Select Metric" and select the metrics in which you are interested. In our case, we have selected the AccountMaxRead metric.

- Set some threshold and click on "Next".
- Select "Select an existing SNS topic" radio button. From the dropdown field "Select a notification to..." select the topic you just created.

- Click on Next and give some meaningful alarm name. Click on "Next" and then click on "Create alarm".
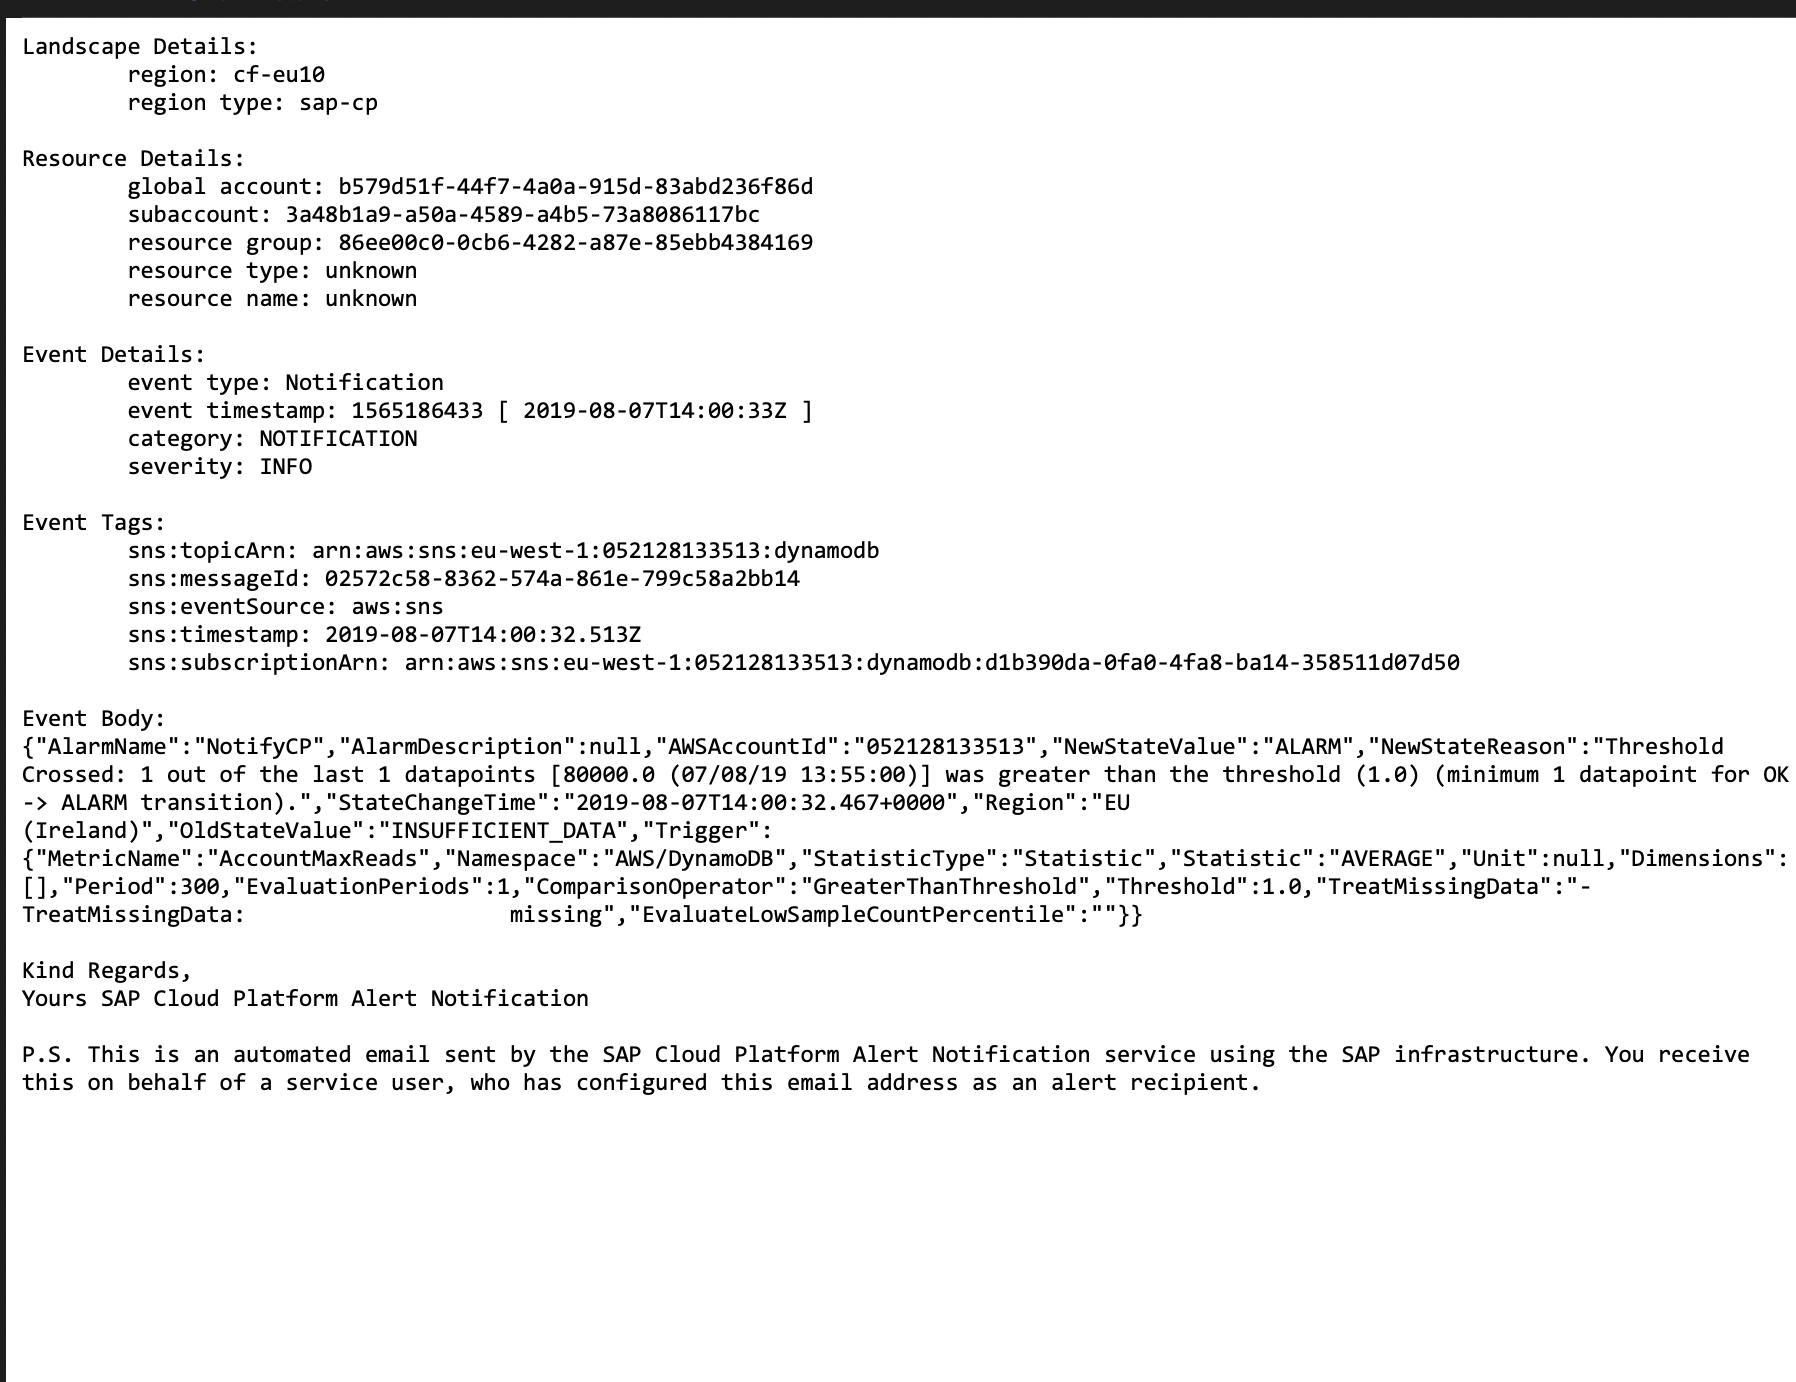
From now on, whenever your alarm passes the threshold, you are going to receive an email via the very same channel from where you receive your other alerts. Here's a sample email that you will receive
What's Next
You can fine-tune and play around with this configuration.
We are working on similar blogs for providing integration with other hyper-scalers like Google Cloud Platform. Also, this integration will evolve over time and the format and the way how we display notifications will be much more appealing.
We are working on many cool features - like fallback channels for alert, alerts for CPI integration flows, lifecycle management alerts for applications, templating of alerts towards different systems like JIRA and many more.
- SAP Managed Tags:
- SAP Alert Notification service for SAP BTP,
- SAP Business Technology Platform
Labels:
You must be a registered user to add a comment. If you've already registered, sign in. Otherwise, register and sign in.
Labels in this area
-
ABAP CDS Views - CDC (Change Data Capture)
2 -
AI
1 -
Analyze Workload Data
1 -
BTP
1 -
Business and IT Integration
2 -
Business application stu
1 -
Business Technology Platform
1 -
Business Trends
1,658 -
Business Trends
91 -
CAP
1 -
cf
1 -
Cloud Foundry
1 -
Confluent
1 -
Customer COE Basics and Fundamentals
1 -
Customer COE Latest and Greatest
3 -
Customer Data Browser app
1 -
Data Analysis Tool
1 -
data migration
1 -
data transfer
1 -
Datasphere
2 -
Event Information
1,400 -
Event Information
66 -
Expert
1 -
Expert Insights
177 -
Expert Insights
293 -
General
1 -
Google cloud
1 -
Google Next'24
1 -
Kafka
1 -
Life at SAP
780 -
Life at SAP
13 -
Migrate your Data App
1 -
MTA
1 -
Network Performance Analysis
1 -
NodeJS
1 -
PDF
1 -
POC
1 -
Product Updates
4,577 -
Product Updates
340 -
Replication Flow
1 -
RisewithSAP
1 -
SAP BTP
1 -
SAP BTP Cloud Foundry
1 -
SAP Cloud ALM
1 -
SAP Cloud Application Programming Model
1 -
SAP Datasphere
2 -
SAP S4HANA Cloud
1 -
SAP S4HANA Migration Cockpit
1 -
Technology Updates
6,873 -
Technology Updates
417 -
Workload Fluctuations
1
Related Content
- How to use AI services to translate Picklists in SAP SuccessFactors - An example in Technology Blogs by SAP
- Improvising Time Management in SAP S/4HANA Cloud: A Co-Innovation Solution in Technology Blogs by SAP
- IoT - Ultimate Data Cyber Security - with Enterprise Blockchain and SAP BTP 🚀 in Technology Blogs by Members
- Accelerate Business Process Development with SAP Build Process Automation Pre-Built Content in Technology Blogs by SAP
- SAP Partners unleash Business AI potential at global Hack2Build in Technology Blogs by SAP
Top kudoed authors
| User | Count |
|---|---|
| 35 | |
| 25 | |
| 13 | |
| 7 | |
| 7 | |
| 6 | |
| 6 | |
| 6 | |
| 5 | |
| 4 |