
- SAP Community
- Products and Technology
- Technology
- Technology Blogs by Members
- Deploying a Flask-Powered SAP Conversational AI Ch...
Technology Blogs by Members
Explore a vibrant mix of technical expertise, industry insights, and tech buzz in member blogs covering SAP products, technology, and events. Get in the mix!
Turn on suggestions
Auto-suggest helps you quickly narrow down your search results by suggesting possible matches as you type.
Showing results for
former_member61
Explorer
Options
- Subscribe to RSS Feed
- Mark as New
- Mark as Read
- Bookmark
- Subscribe
- Printer Friendly Page
- Report Inappropriate Content
07-17-2019
1:32 PM
Introduction
This article describes how to deploy a Flask-powered SAP Conversational AI (SAP CAI) chatbot on an Amazon Web Services (AWS) EC2 instance running an Apache2 Web Server.
When I recently set out to deploy a SAP CAI chatbot with Flask on AWS, I thought this was going to be a quick job. I didn’t however consider two important and interconnected facts, that is SAP CAI requires a secure (i.e. https) webhook in order to communicate with a third party (a Flask application in my case), and EC2 instances come by default only with a non-secure IP address. In this article I describe my findings of the journey undertaken to try and overcome this problem. The article is in part inspired by Vishnu Thiagarajan’s excellent article Setting up Flask and Apache on AWS EC2 Instance.
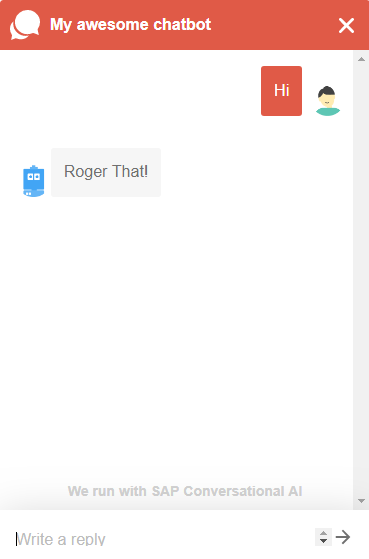
The focus of the article is not so much on developing a fully fledged conversational chatbot but rather to provide a scaffolding upon which to develop a Flask-powered SAP CAI chatbot hosted on an EC2 instance. For this reason, the chatbot is intentionally kept basic. The bot simply returns “Roger That!” to whatever you tell it. The SAP CAI implementation consist of only one skill, namely a Fallback skill that initiates communication with the Flask application. The Flask application boilerplate code repository can be found here. The SAP CAI bot can be found here.
The article assumes that the reader is familiar with basic web development concepts, the basics of the SAP CAI and AWS platforms and with Linux command line. Please do note proposed implementation will incur small costs. If you are fine with this and are interested in replicating the proposed implementation I recommend to follow the steps in the same order as described in the article. The code snippets in the article should be adapted to reflect your own domain name.
The areas covered in this article include:
- Setting up and configuring AWS Services
- Installing and configuring Apache2 and WSGI
- Domain Name and SSL Certificate
- Deploying the Flask Application
- SAP CAI Chatbot Configuration
Setting up and configuring AWS Services
In this section we will look at two AWS-specific services and configurations needed for the implementation: EC2 and Route 53. Within EC2, we will setup an instance to host the chatbot, a Security Group and an Elastic IP. Within Route 53 we will setup a Hosted Zone which will hold the Domain Name Server (DNS) records to be used for the secure domain name configuration.

First let’s start by setting up a security group that we will subsequently associate with our EC2 instance. Below is a (partial) screenshot of what worked for me. Select My IP for the SSH setting, and Anywhere for all others. Note that each of the unique types below needs only be specified once. AWS automatically duplicates them when creating the group (not sure why).


Next, let’s launch an EC2 instance. Note that as part of this process you must follow the instructions for creating a key pair. The .pem key is required for connecting remotely to the EC2 instance. The instance used for this tutorial is an Ubuntu Server 16.04 of type t2.micro. Associate the instance with the above security group.

As a sidenote, depending on the dependencies of your application you may need to select an instance other than the free tier option. For example, if you were to run an application with a deep learning library such as PyTorch one would need to select at least an instance of type t2.medium in order to satisfy the dependencies’ memory footprint.
We now turn our attention to the topics of static IP addresses and DNS servers. In order to be able to stop and restart instances at will, without having to worry about changing IP addresses, we need to avail of the AWS Elastic IP service. An Elastic IP is in essence a static IP that can be associated to a given instance on a permanent basis. A good video tutorial for setting up an Elastic IP can be found here.
The Route 53 service allows to set up Hosted Zone to hold the DNS records for our instance . This is required in a subsequent step in order to complete secure domain name configuration. A good article for setting up a hosted zone can be found here (about half way down the page). Note that you will need your Elastic IP in place before setting up the hosted zone.
Installing and Configuring Apache2 and WSGI
Ok, so now that we have the AWS-specific building blocks in place, let’s start with some web development. First we install the Apache2 and WSGI (for Python 3). Login to your EC2 instance and run the below command. Note that the web server will be started as part of the installation.
sudo apt-get update &&

sudo apt-get install apache2 libapache2-mod-wsgi-py3
The Apache2 directory of interest in the current context is etc/apache2/sites-available . This directory contains two files:000-default.confand default-ssl.conf . We will leave both files untouched and make a copy of the former:
sudo cp /etc/apache2/sites-available/000-default.conf

/etc/apache2/sites-available/000-default-ssl.conf
Open the new file:
sudo nano /etc/apache2/sites-available/000-default-ssl.confModify as shown below:
<VirtualHost *:443>

ServerName example.dev

ServerAlias www.example.dev

DocumentRoot /var/www/html

SSLEngine on

SSLCertificateFile /etc/ssl/example_dev.crt

SSLCertificateKeyFile /etc/ssl/private/example.dev.key

SSLCertificateChainFile /etc/ssl/example_dev.ca-bundle

WSGIDaemonProcess sap_cai_boilerplate threads=5

WSGIScriptAlias / /var/www/html/sap_cai_boilerplate/sap_cai_boilerplate.wsgi

<Directory sap_cai_boilerplate>

  WSGIProcessGroup sap_cai_boilerplate

  WSGIApplicationGroup %{GLOBAL}

  Order deny,allow

  Allow from all

</Directory>

</VirtualHost>
Then, save and close the file usingCtrl + oand Ctrl + s.
Domain Name and SSL Certificate
As mentioned in the introduction, SAP CAI requires a secure webhook in order to communicate with a third party application such as Flask. Therefore, if we wish to use an EC2 instance to host our SAP CAI bot, we need a secure domain, henceforth referred to as https://example.dev. This section describes the steps involved in getting a secure domain name.
There is a plethora of options out there for buying a domain name. I looked at this review article of domain registrars and picked namecheap. (I have no affiliation with these guys!). Note that the steps I describe next are specific to that platform and may vary if you use a different registrar.
Once the (non-secure) domain name has been purchased, two actions must be taken: add the Hosted Zone DNS records to the registrar’s platform and obtain an SSL certificate. Instructions for the DNS configuration can be found in this article. A detailed description of the SSL process can be found in this article . In summary, a Certificate Signing Request (CSR) has to be issued first. To do so, login to your EC2 instance and, from the root directory, run the below command:
openssl req -new -newkey rsa:2048 -nodes -keyout example.dev.key -out example.dev.csrThe CSR process will prompt to fill in information required for registering the certificate. As we are doing this for learning purposes, the only field that needs to be accurate is Common Name. This should be the domain name e.g. example.dev (without the http://prefix). The process will generate two files with extensions .csr and .key respectively. The .csr file is required for completing the certificate request, while the .key file will be needed for configuring Apache2. Copy the contents of the .csr file. (e.g. using cat example.dev.csrto see the file content) and follow the steps in this article to complete the process for obtaining an SSL certificate.
The process will generate two files with extensions .csr and .key respectively. The former is required for completing the certificate request, while the latter will be needed for configuring Apache2. Copy the contents of the .csr file. (e.g. using cat example.dev.csrto see the file content) and follow the steps in this article to complete the process for obtaining an SSL certificate.
Once the process is completed you will receive an email containing two files with extensions .ca-bundle and .crt respectively. Upload those two files, along with the .key file mentioned above, to the EC2 instance. This can be done using, for example, FileZilla. To learn how to connect FileZilla to your EC2 instance, check out this video. As another sidenote, I recommend to download the .key file to your local machine and to store it somewhere safely. The reason being that if at some stage you need to start the overall process from scratch including terminating your EC2 instance and relaunching a fresh one, the .key will be lost and you would have to resubmit a CSR which will unnecessarily complicate things.
Next, assuming you have uploaded the three files to the root directory of your EC2 instance, run the following command:
sudo cp ~/example_dev.crt /etc/ssl/ &&

sudo cp ~/example_dev.ca-bundle /etc/ssl/ &&

sudo cp ~/example.dev.key /etc/ssl/private/
Then, execute the following commands to instruct Apache2 to activate the sites and to enable SSL:
cd /etc/apache2/sites-available &&

sudo a2ensite * &&

sudo a2enmod ssl
Lastly, execute sudo apachectl configtestto ensure all is in order (you should seeSyntax OK), then restart Apache2: sudo service apache2 restart.
Deploying the Flask Application
The final steps in the process involve cloning the Flask boilerplate code into our EC2 instance, installing and activating a virtual environment, installing application dependencies, and creating a symbolic link referencing the application source directory to the Apache2 web directory.
From the root directory of the instance, clone the application repository:
cd ~ && git clone https://github.com/raoulbia/sap_cai_boilerplate.gitInstall and activate a virtual environment:
cd sap_cai_boilerplate &&

sudo apt install virtualenv &&

virtualenv -p python3 myenv &&

source myenv/bin/activate
Note that the name of the virtual environment (in this case myenv ) and the directory in which it is created (in this case /home/ubuntu/sap_cai_boilerplate/) must match the path defined in the WSGI script of the Flask application. For example, in my case, the first line of the sap_cai_boilerplate.wsgi script looks like this:
activate_this = '/home/ubuntu/sap_cai_boilerplate/myenv/bin/activate_this.py'Finally, we install the application’s dependencies and create the symbolic link:
pip install -r requirements.txt &&

sudo ln -sT /home/ubuntu/sap_cai_boilerplate /var/www/html/sap_cai_boilerplate
SAP CAI Chatbot Configuration
We are now ready to configure the SAP CAI bot. Put the base URL https://example.dev (without trailing /) in the bot’s settings:

And configure the Fallback skill accordingly in line with the Flask application:

We can now start to use the bot in production! To start the Flask application go to your EC2 instance and execute the command
FLASK_APP=app.py flask runThe chatbot should now be running and ready to go. Note that disconnecting from your instance will not affect the application.
Conclusion
In this tutorial we looked at the various moving parts involved in deploying a SAP CAI chatbot on AWS and how they fit together. As is common for such projects, I had to go through several iterations of terminating and relaunching instances, and reinstalling everything multiple times, before i got it to work as expected. If you decided to follow the instructions above I do hope it worked out for you relatively smoothly. The one to watch out for will be the naming convention. Say, your bot project is named myflaskbot, then this needs to be reflected across board in most of sections described above.
The process described in this tutorial has, no doubt, some gaps in terms of security such as SSL key handling and in terms of Flask best practice etc. However do keep in mind that this article is meant to act as a reference guide, and security concerns need to be addressed separately if required.
Last but not least, I would like to thank the authors from whom I gathered the various bits and pieces used to produce this article. As Isaac Newton said in 1675: “If I have seen further it is by standing on the shoulders of Giants.”
- SAP Managed Tags:
- SAP Conversational AI
You must be a registered user to add a comment. If you've already registered, sign in. Otherwise, register and sign in.
Labels in this area
-
"automatische backups"
1 -
"regelmäßige sicherung"
1 -
"TypeScript" "Development" "FeedBack"
1 -
505 Technology Updates 53
1 -
ABAP
14 -
ABAP API
1 -
ABAP CDS Views
2 -
ABAP CDS Views - BW Extraction
1 -
ABAP CDS Views - CDC (Change Data Capture)
1 -
ABAP class
2 -
ABAP Cloud
2 -
ABAP Development
5 -
ABAP in Eclipse
1 -
ABAP Platform Trial
1 -
ABAP Programming
2 -
abap technical
1 -
absl
2 -
access data from SAP Datasphere directly from Snowflake
1 -
Access data from SAP datasphere to Qliksense
1 -
Accrual
1 -
action
1 -
adapter modules
1 -
Addon
1 -
Adobe Document Services
1 -
ADS
1 -
ADS Config
1 -
ADS with ABAP
1 -
ADS with Java
1 -
ADT
2 -
Advance Shipping and Receiving
1 -
Advanced Event Mesh
3 -
AEM
1 -
AI
7 -
AI Launchpad
1 -
AI Projects
1 -
AIML
9 -
Alert in Sap analytical cloud
1 -
Amazon S3
1 -
Analytical Dataset
1 -
Analytical Model
1 -
Analytics
1 -
Analyze Workload Data
1 -
annotations
1 -
API
1 -
API and Integration
3 -
API Call
2 -
Application Architecture
1 -
Application Development
5 -
Application Development for SAP HANA Cloud
3 -
Applications and Business Processes (AP)
1 -
Artificial Intelligence
1 -
Artificial Intelligence (AI)
5 -
Artificial Intelligence (AI) 1 Business Trends 363 Business Trends 8 Digital Transformation with Cloud ERP (DT) 1 Event Information 462 Event Information 15 Expert Insights 114 Expert Insights 76 Life at SAP 418 Life at SAP 1 Product Updates 4
1 -
Artificial Intelligence (AI) blockchain Data & Analytics
1 -
Artificial Intelligence (AI) blockchain Data & Analytics Intelligent Enterprise
1 -
Artificial Intelligence (AI) blockchain Data & Analytics Intelligent Enterprise Oil Gas IoT Exploration Production
1 -
Artificial Intelligence (AI) blockchain Data & Analytics Intelligent Enterprise sustainability responsibility esg social compliance cybersecurity risk
1 -
ASE
1 -
ASR
2 -
ASUG
1 -
Attachments
1 -
Authorisations
1 -
Automating Processes
1 -
Automation
2 -
aws
2 -
Azure
1 -
Azure AI Studio
1 -
B2B Integration
1 -
Backorder Processing
1 -
Backup
1 -
Backup and Recovery
1 -
Backup schedule
1 -
BADI_MATERIAL_CHECK error message
1 -
Bank
1 -
BAS
1 -
basis
2 -
Basis Monitoring & Tcodes with Key notes
2 -
Batch Management
1 -
BDC
1 -
Best Practice
1 -
bitcoin
1 -
Blockchain
3 -
bodl
1 -
BOP in aATP
1 -
BOP Segments
1 -
BOP Strategies
1 -
BOP Variant
1 -
BPC
1 -
BPC LIVE
1 -
BTP
12 -
BTP Destination
2 -
Business AI
1 -
Business and IT Integration
1 -
Business application stu
1 -
Business Application Studio
1 -
Business Architecture
1 -
Business Communication Services
1 -
Business Continuity
1 -
Business Data Fabric
3 -
Business Partner
12 -
Business Partner Master Data
10 -
Business Technology Platform
2 -
Business Trends
4 -
CA
1 -
calculation view
1 -
CAP
3 -
Capgemini
1 -
CAPM
1 -
Catalyst for Efficiency: Revolutionizing SAP Integration Suite with Artificial Intelligence (AI) and
1 -
CCMS
2 -
CDQ
12 -
CDS
2 -
Cental Finance
1 -
Certificates
1 -
CFL
1 -
Change Management
1 -
chatbot
1 -
chatgpt
3 -
CL_SALV_TABLE
2 -
Class Runner
1 -
Classrunner
1 -
Cloud ALM Monitoring
1 -
Cloud ALM Operations
1 -
cloud connector
1 -
Cloud Extensibility
1 -
Cloud Foundry
4 -
Cloud Integration
6 -
Cloud Platform Integration
2 -
cloudalm
1 -
communication
1 -
Compensation Information Management
1 -
Compensation Management
1 -
Compliance
1 -
Compound Employee API
1 -
Configuration
1 -
Connectors
1 -
Consolidation Extension for SAP Analytics Cloud
2 -
Control Indicators.
1 -
Controller-Service-Repository pattern
1 -
Conversion
1 -
Cosine similarity
1 -
cryptocurrency
1 -
CSI
1 -
ctms
1 -
Custom chatbot
3 -
Custom Destination Service
1 -
custom fields
1 -
Customer Experience
1 -
Customer Journey
1 -
Customizing
1 -
cyber security
3 -
cybersecurity
1 -
Data
1 -
Data & Analytics
1 -
Data Aging
1 -
Data Analytics
2 -
Data and Analytics (DA)
1 -
Data Archiving
1 -
Data Back-up
1 -
Data Flow
1 -
Data Governance
5 -
Data Integration
2 -
Data Quality
12 -
Data Quality Management
12 -
Data Synchronization
1 -
data transfer
1 -
Data Unleashed
1 -
Data Value
8 -
database tables
1 -
Datasphere
3 -
datenbanksicherung
1 -
dba cockpit
1 -
dbacockpit
1 -
Debugging
2 -
Delimiting Pay Components
1 -
Delta Integrations
1 -
Destination
3 -
Destination Service
1 -
Developer extensibility
1 -
Developing with SAP Integration Suite
1 -
Devops
1 -
digital transformation
1 -
Documentation
1 -
Dot Product
1 -
DQM
1 -
dump database
1 -
dump transaction
1 -
e-Invoice
1 -
E4H Conversion
1 -
Eclipse ADT ABAP Development Tools
2 -
edoc
1 -
edocument
1 -
ELA
1 -
Embedded Consolidation
1 -
Embedding
1 -
Embeddings
1 -
Employee Central
1 -
Employee Central Payroll
1 -
Employee Central Time Off
1 -
Employee Information
1 -
Employee Rehires
1 -
Enable Now
1 -
Enable now manager
1 -
endpoint
1 -
Enhancement Request
1 -
Enterprise Architecture
1 -
ETL Business Analytics with SAP Signavio
1 -
Euclidean distance
1 -
Event Dates
1 -
Event Driven Architecture
1 -
Event Mesh
2 -
Event Reason
1 -
EventBasedIntegration
1 -
EWM
1 -
EWM Outbound configuration
1 -
EWM-TM-Integration
1 -
Existing Event Changes
1 -
Expand
1 -
Expert
2 -
Expert Insights
2 -
Exploits
1 -
Fiori
14 -
Fiori Elements
2 -
Fiori SAPUI5
12 -
Flask
1 -
Full Stack
8 -
Funds Management
1 -
General
1 -
General Splitter
1 -
Generative AI
1 -
Getting Started
1 -
GitHub
8 -
Grants Management
1 -
GraphQL
1 -
groovy
1 -
GTP
1 -
HANA
6 -
HANA Cloud
2 -
Hana Cloud Database Integration
2 -
HANA DB
2 -
HANA XS Advanced
1 -
Historical Events
1 -
home labs
1 -
HowTo
1 -
HR Data Management
1 -
html5
8 -
HTML5 Application
1 -
Identity cards validation
1 -
idm
1 -
Implementation
1 -
input parameter
1 -
instant payments
1 -
Integration
3 -
Integration Advisor
1 -
Integration Architecture
1 -
Integration Center
1 -
Integration Suite
1 -
intelligent enterprise
1 -
iot
1 -
Java
1 -
job
1 -
Job Information Changes
1 -
Job-Related Events
1 -
Job_Event_Information
1 -
joule
4 -
Journal Entries
1 -
Just Ask
1 -
Kerberos for ABAP
8 -
Kerberos for JAVA
8 -
KNN
1 -
Launch Wizard
1 -
Learning Content
2 -
Life at SAP
5 -
lightning
1 -
Linear Regression SAP HANA Cloud
1 -
Loading Indicator
1 -
local tax regulations
1 -
LP
1 -
Machine Learning
2 -
Marketing
1 -
Master Data
3 -
Master Data Management
14 -
Maxdb
2 -
MDG
1 -
MDGM
1 -
MDM
1 -
Message box.
1 -
Messages on RF Device
1 -
Microservices Architecture
1 -
Microsoft Universal Print
1 -
Middleware Solutions
1 -
Migration
5 -
ML Model Development
1 -
Modeling in SAP HANA Cloud
8 -
Monitoring
3 -
MTA
1 -
Multi-Record Scenarios
1 -
Multiple Event Triggers
1 -
Myself Transformation
1 -
Neo
1 -
New Event Creation
1 -
New Feature
1 -
Newcomer
1 -
NodeJS
2 -
ODATA
2 -
OData APIs
1 -
odatav2
1 -
ODATAV4
1 -
ODBC
1 -
ODBC Connection
1 -
Onpremise
1 -
open source
2 -
OpenAI API
1 -
Oracle
1 -
PaPM
1 -
PaPM Dynamic Data Copy through Writer function
1 -
PaPM Remote Call
1 -
PAS-C01
1 -
Pay Component Management
1 -
PGP
1 -
Pickle
1 -
PLANNING ARCHITECTURE
1 -
Popup in Sap analytical cloud
1 -
PostgrSQL
1 -
POSTMAN
1 -
Process Automation
2 -
Product Updates
4 -
PSM
1 -
Public Cloud
1 -
Python
4 -
Qlik
1 -
Qualtrics
1 -
RAP
3 -
RAP BO
2 -
Record Deletion
1 -
Recovery
1 -
recurring payments
1 -
redeply
1 -
Release
1 -
Remote Consumption Model
1 -
Replication Flows
1 -
research
1 -
Resilience
1 -
REST
1 -
REST API
2 -
Retagging Required
1 -
Risk
1 -
Rolling Kernel Switch
1 -
route
1 -
rules
1 -
S4 HANA
1 -
S4 HANA Cloud
1 -
S4 HANA On-Premise
1 -
S4HANA
3 -
S4HANA_OP_2023
2 -
SAC
10 -
SAC PLANNING
9 -
SAP
4 -
SAP ABAP
1 -
SAP Advanced Event Mesh
1 -
SAP AI Core
8 -
SAP AI Launchpad
8 -
SAP Analytic Cloud Compass
1 -
Sap Analytical Cloud
1 -
SAP Analytics Cloud
4 -
SAP Analytics Cloud for Consolidation
3 -
SAP Analytics Cloud Story
1 -
SAP analytics clouds
1 -
SAP BAS
1 -
SAP Basis
6 -
SAP BODS
1 -
SAP BODS certification.
1 -
SAP BTP
21 -
SAP BTP Build Work Zone
2 -
SAP BTP Cloud Foundry
6 -
SAP BTP Costing
1 -
SAP BTP CTMS
1 -
SAP BTP Innovation
1 -
SAP BTP Migration Tool
1 -
SAP BTP SDK IOS
1 -
SAP Build
11 -
SAP Build App
1 -
SAP Build apps
1 -
SAP Build CodeJam
1 -
SAP Build Process Automation
3 -
SAP Build work zone
10 -
SAP Business Objects Platform
1 -
SAP Business Technology
2 -
SAP Business Technology Platform (XP)
1 -
sap bw
1 -
SAP CAP
2 -
SAP CDC
1 -
SAP CDP
1 -
SAP CDS VIEW
1 -
SAP Certification
1 -
SAP Cloud ALM
4 -
SAP Cloud Application Programming Model
1 -
SAP Cloud Integration for Data Services
1 -
SAP cloud platform
8 -
SAP Companion
1 -
SAP CPI
3 -
SAP CPI (Cloud Platform Integration)
2 -
SAP CPI Discover tab
1 -
sap credential store
1 -
SAP Customer Data Cloud
1 -
SAP Customer Data Platform
1 -
SAP Data Intelligence
1 -
SAP Data Migration in Retail Industry
1 -
SAP Data Services
1 -
SAP DATABASE
1 -
SAP Dataspher to Non SAP BI tools
1 -
SAP Datasphere
9 -
SAP DRC
1 -
SAP EWM
1 -
SAP Fiori
3 -
SAP Fiori App Embedding
1 -
Sap Fiori Extension Project Using BAS
1 -
SAP GRC
1 -
SAP HANA
1 -
SAP HCM (Human Capital Management)
1 -
SAP HR Solutions
1 -
SAP IDM
1 -
SAP Integration Suite
9 -
SAP Integrations
4 -
SAP iRPA
2 -
SAP LAGGING AND SLOW
1 -
SAP Learning Class
1 -
SAP Learning Hub
1 -
SAP Odata
2 -
SAP on Azure
1 -
SAP PartnerEdge
1 -
sap partners
1 -
SAP Password Reset
1 -
SAP PO Migration
1 -
SAP Prepackaged Content
1 -
SAP Process Automation
2 -
SAP Process Integration
2 -
SAP Process Orchestration
1 -
SAP S4HANA
2 -
SAP S4HANA Cloud
1 -
SAP S4HANA Cloud for Finance
1 -
SAP S4HANA Cloud private edition
1 -
SAP Sandbox
1 -
SAP STMS
1 -
SAP successfactors
3 -
SAP SuccessFactors HXM Core
1 -
SAP Time
1 -
SAP TM
2 -
SAP Trading Partner Management
1 -
SAP UI5
1 -
SAP Upgrade
1 -
SAP Utilities
1 -
SAP-GUI
8 -
SAP_COM_0276
1 -
SAPBTP
1 -
SAPCPI
1 -
SAPEWM
1 -
sapmentors
1 -
saponaws
2 -
SAPS4HANA
1 -
SAPUI5
5 -
schedule
1 -
Script Operator
1 -
Secure Login Client Setup
8 -
security
9 -
Selenium Testing
1 -
Self Transformation
1 -
Self-Transformation
1 -
SEN
1 -
SEN Manager
1 -
service
1 -
SET_CELL_TYPE
1 -
SET_CELL_TYPE_COLUMN
1 -
SFTP scenario
2 -
Simplex
1 -
Single Sign On
8 -
Singlesource
1 -
SKLearn
1 -
Slow loading
1 -
soap
1 -
Software Development
1 -
SOLMAN
1 -
solman 7.2
2 -
Solution Manager
3 -
sp_dumpdb
1 -
sp_dumptrans
1 -
SQL
1 -
sql script
1 -
SSL
8 -
SSO
8 -
Substring function
1 -
SuccessFactors
1 -
SuccessFactors Platform
1 -
SuccessFactors Time Tracking
1 -
Sybase
1 -
system copy method
1 -
System owner
1 -
Table splitting
1 -
Tax Integration
1 -
Technical article
1 -
Technical articles
1 -
Technology Updates
14 -
Technology Updates
1 -
Technology_Updates
1 -
terraform
1 -
Threats
2 -
Time Collectors
1 -
Time Off
2 -
Time Sheet
1 -
Time Sheet SAP SuccessFactors Time Tracking
1 -
Tips and tricks
2 -
toggle button
1 -
Tools
1 -
Trainings & Certifications
1 -
Transformation Flow
1 -
Transport in SAP BODS
1 -
Transport Management
1 -
TypeScript
2 -
ui designer
1 -
unbind
1 -
Unified Customer Profile
1 -
UPB
1 -
Use of Parameters for Data Copy in PaPM
1 -
User Unlock
1 -
VA02
1 -
Validations
1 -
Vector Database
2 -
Vector Engine
1 -
Visual Studio Code
1 -
VSCode
1 -
Vulnerabilities
1 -
Web SDK
1 -
work zone
1 -
workload
1 -
xsa
1 -
XSA Refresh
1
- « Previous
- Next »
Related Content
- SAP Integration Suite - IDOC to flat file conversion in Technology Q&A
- UNVEILING THE INNOVATIONS OF ARTIFICIAL INTELLIGENCE in Technology Q&A
- BW/4 conversion: Export datasources 8* - can it deleted before the conversion? in Technology Q&A
- SAC Currency Conversion Rate from previous Month (Priorities of Calculations) in Technology Q&A
- Elevating Customer Engagement: Harnessing the Power of SAP Chatbots for a Personalized Experience in Technology Blogs by Members
Top kudoed authors
| User | Count |
|---|---|
| 8 | |
| 5 | |
| 5 | |
| 4 | |
| 4 | |
| 4 | |
| 4 | |
| 4 | |
| 3 | |
| 3 |