As part of SAP Field Service Management (shorten as FSM), the Customer Self-Service application is a self-service portal that allows customers to help themselves during a service journey. It's super easy for the system administrator to setup such a self-service portal.
Here are the steps to setup the Customer Self-Service portal.
1. Enable Now access
Go to your FSM system, e.g.
https://apps.coresystems.net/workforce-management/. Navigate to Administration application.

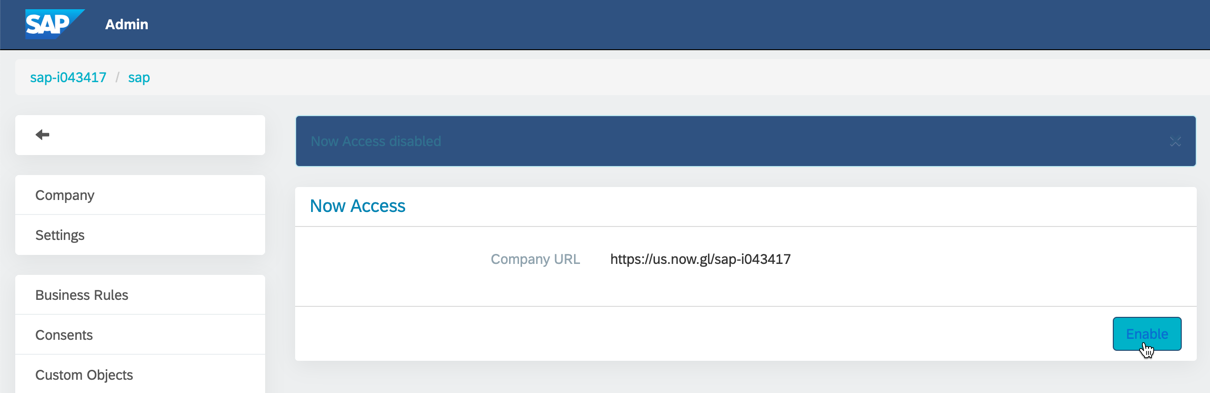
Click the company name to navigate to the company profile page of the company for which you are going to setup customer self-service portal.

Navigate to Now Access page from the left navigation pane.

Click the Enable button to enable the self-service portal.
2. Log on Customer Self-Service as admin user
Open the company URL enabled in above steps. Enter user name and password.

3. Create moment-sets
Moment-sets are used to configure what customer support options and information are available to a customer for a specific equipment. For example, you can specify if a hotline number is to be displayed on the equipment land page and what the number is. You can also configure which options are available to customers during creation of service request.
Click the Configure Moment-Sets link.

Alternatively, you can click the Moment-Sets menu item on the left navigation pane.

Click the "+" icon.

Enter name and description. Choose object type as Equipment or Item. Once the Moment-Set is created, the object type cannot be changed anymore.


The next step is to create moments that represent sections on equipment land page. A Moment-set consists of one or more moments.
Click the Moment-set to expand the card. Click the "+" icon.

Choose moment type. The following moment types are supported.
- Equipment Details: important information related to the equipment.
- Call Number: a number that customer can click to make a call, for example, when the issue is urgent.
- Open URL: a link pointing to another resource, such as a FAQ page.
- Request Service: entry point for creating service call for an issue or service request.

Choose "Equipment details (v1)". Enter text which will be displayed for the moment.

Similarly, create an "Open URL" moment.

Create a "Call number" moment.

Finally, create a "Request a service" moment.


4. Create QR-codes
Click the QR-codes menu item on left side.
Now you can create QR-codes and assign each of them to an equipment or item. Once this is done, customers can scan the QR-Code to view details and report issues.
Click the "+" icon.

Enter number of short URLs and push the GENERATE button. A “short URL” is a unique web page that is linked to a QR-Code.


Another option to create QR-codes is to choose equipments and select the Pair Automatically option on Equipment tab. The QR-codes will be generated automatically and paired with the selected equipments.

You can also manually pair an item or equipment record to a QR-code by selecting the Pair Manually option and selecting the desired short URL from the list in the dialog.


Similarly, you can assign QR-codes to items on Items tab.
After a short URL has been assigned to an equipment or item record, you can then assign a moment-set to the equipment or item by selecting the Assign Moment-Set option.

5. Configure branding
Click the Branding menu item on left side.
On the work area you can upload a company logo and avatar, and define the colors. These settings will influence the look-and-feel in the self-service portal used by customers.

6. Configure workflow assignments
Click the Workflow Assignments menu item in the left navigation pane.
The Workflow Assignments screen is used to assign workflow steps to Chat/Portal status. The Chat/Portal status of a given service request will be shown to customers, for example: travel, work, etc.
The workflow steps refer to the milestones available to the technician for responding to a service request. For example, you can define workflow step Prepare Tools and Repair. Then you can assign them to the Chat/Portal status Work.
Click the "+" icon below an Chat/Portal status, for example Travel.

Select a workflow step to assign it to that status.

Repeat the steps to assign remaining workflow steps to external status.

Now the self-service portal has been setup with basic settings.
If you want to know how the self-service portal looks like from end user point of view and how to use it, you can have a look at the article
Step by step to experience FSM Customer Self-Service portal.
