
- SAP Community
- Products and Technology
- CRM and Customer Experience
- CRM and CX Blogs by Members
- Integrating the Twin Towers - SAP C4C & SAP ERP
CRM and CX Blogs by Members
Find insights on SAP customer relationship management and customer experience products in blog posts from community members. Post your own perspective today!
Turn on suggestions
Auto-suggest helps you quickly narrow down your search results by suggesting possible matches as you type.
Showing results for
former_member59
Explorer
Options
- Subscribe to RSS Feed
- Mark as New
- Mark as Read
- Bookmark
- Subscribe
- Printer Friendly Page
- Report Inappropriate Content
06-16-2019
8:43 AM
Integration helps us connect various systems irrespective of the format of information. Integration of SAP Cloud for Customer with SAP ERP using SAP Middleware is to exchange both master data and transactional data. Most of the communication is bidirectional, and automated replication that is resolved by the SAP Middleware system which is particularly for mapping purposes.
Let’s see how to configure the Integration system in SAP C4C with on Premise system. Before going with configuration in SAP C4C we must check the scope of our cloud solution and ensure that the required integration is active.
Procedure 1: -Checking the Scope of our cloud solution
Procedure 2: - Set up Communication System
A communication system represents an external system for communication. A communication system is also the reference for ID mapping maintained within your Cloud solution. It must be representative of the on-premise client, even if the technical communication occurs using an SAP middleware.
To integrate your Cloud solution and an on-premise system using an SAP middleware, you define the on-premise client as the communication system. Note that all information except the host name is that of the on-premise system. Before a communication system can be used for data exchange, communication arrangements must be maintained.

Procedure 3: - Code List Mapping in SAP C4C
Code list mapping is critical step to integrate to ensure the integration works functionally with correct data. Code list mapping is used to map the codes such as Partners, Roles, Distribution channel etc from SAP ERP to Cloud Solutions.
Procedure 4: -Configure Communication Arrangements
We need to configure and activate the communication arrangements to enable the integration between an on-premise system and the Cloud solution.
1.Navigate-->Administrator-->Integration-->Communication Arrangement
2.Click on New Communication Arrangement system.

3.Once we click on that button, then we will see all the communication scenarios.
4.Choose the system communication id from the help check button. It will show all the communication system id which are present in the cloud.

5.Now Choose code list mapping id as “SAP on-Premise Integration” and note the Tenant ID that will be used in SAP ERP System.
6.Click on Next and fill all the Inbound and Outbound Details.

7.Click on Edit Advanced Settings and fill all the details.

8.Click on Review and submit the finish button.
9.Once you submit then click on confirmation button and close the page.
Procedure 5: -Create ID Mapping
This section describes how to create ID mapping for, selected objects, such as sales and product categories. For these business objects, ID mapping is created manually.
○Company
○ Accounts
○ Contacts
○ Employees
○ Materials
○ Product categories
○ Sales office
○ Sales organizations
7.Save and Close.
Procedure 6: -Maintain Number Ranges

1.In the Business Configuration work center, choose the Implementation Projects view.
2.Select the line that contains your project, and click Open Activity List.
3.On the Activity List screen, choose Fine-Tune.
4.Click Integration of Business Partner Data from Your Cloud Solution to SAP ERP. The system provides default number ranges for prospects, contacts, and customers that can be used in SAP ERP.
5.Make sure the number ranges you define match the number ranges defined in the ERP system.
This blog is all about how to configure the Integration Part in SAP Cloud solution with SAP ERP on Premise System.
Hope you enjoyed reading this blog and found it useful!!!!
Let’s see how to configure the Integration system in SAP C4C with on Premise system. Before going with configuration in SAP C4C we must check the scope of our cloud solution and ensure that the required integration is active.
Procedure 1: -Checking the Scope of our cloud solution
- Logon to the Cloud solution as a system administrator.
- In the Business Configuration work center, choose the Implementation Projects view.
- Select your implementation project and click Edit Project Scope.
- In the scoping wizard, choose Next until the Scoping screen appears
- Expand the nodes Communication and Information Exchange and click on Integration with External Applications and Solutions.
- Select the required scoping options and choose Next.
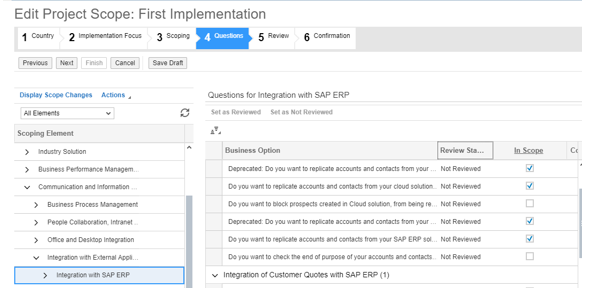
- On the Questions screen, expand Communication and Information Exchange, and review the scoping questions.
- After you have carefully reviewed and confirmed your entries, click Finish.
Procedure 2: - Set up Communication System
A communication system represents an external system for communication. A communication system is also the reference for ID mapping maintained within your Cloud solution. It must be representative of the on-premise client, even if the technical communication occurs using an SAP middleware.
To integrate your Cloud solution and an on-premise system using an SAP middleware, you define the on-premise client as the communication system. Note that all information except the host name is that of the on-premise system. Before a communication system can be used for data exchange, communication arrangements must be maintained.
- In the Administrator work center choose Communication Systems.
- Click New.
- On the New Communication System screen, in the Basic Information section, enter the following information.
- ID: - ID or name of the on-premise system to be connected e.g QP2
- SAP Business Suite: -Select the checkbox
- Host Name: -If using PI, then enter the reverse proxy of the middleware and If using HCI, then enter the SAP HANA Cloud Integration worker node host name.
- System Access Type: - Internet
- In the Technical Contact section, you can enter data of the contact person for this system and save your data.
- In the System Instances section, enter the following data:
- Business System Id: -Displays the ID or name of your business instance of the SAP on-premise system client e.g QC2ABC100.
- Business System Id: -Business system ID of the SAP on-premise client.
- Idoc Logical System Id: -The IDoc logical system ID of the SAP on-premise client, maintained in ALE Path
- SAP Client: - Client of the SAP on Premise System
- Preferred Application Protocol: -5-Web Service
- Choose Actions Set to Active.
- Choose Save and Close.
Procedure 3: - Code List Mapping in SAP C4C
Code list mapping is critical step to integrate to ensure the integration works functionally with correct data. Code list mapping is used to map the codes such as Partners, Roles, Distribution channel etc from SAP ERP to Cloud Solutions.
- Logon to the Cloud solution as a system administrator.
- In the Business Configuration work center, choose the Implementation Projects view.
- Select your implementation project and click Open Activity List
- Choose Code List mapping for Integration with External Applications activity and click on maintained code list mapping.
- Now we will able to see all the mapping group like Customer Classifications where we have to maintain the classification groups under local system with external system.
- We have option to make the local and external codes are equal as well as we can map our individual codes.
- Once we maintained all the code list mapping then we can close the page.
Procedure 4: -Configure Communication Arrangements
We need to configure and activate the communication arrangements to enable the integration between an on-premise system and the Cloud solution.
1.Navigate-->Administrator-->Integration-->Communication Arrangement
2.Click on New Communication Arrangement system.
3.Once we click on that button, then we will see all the communication scenarios.
4.Choose the system communication id from the help check button. It will show all the communication system id which are present in the cloud.
5.Now Choose code list mapping id as “SAP on-Premise Integration” and note the Tenant ID that will be used in SAP ERP System.
6.Click on Next and fill all the Inbound and Outbound Details.
7.Click on Edit Advanced Settings and fill all the details.
8.Click on Review and submit the finish button.
9.Once you submit then click on confirmation button and close the page.
Procedure 5: -Create ID Mapping
This section describes how to create ID mapping for, selected objects, such as sales and product categories. For these business objects, ID mapping is created manually.
- In the Administrator work center under Common Tasks, choose Edit ID Mapping for Integration.
- From the Mapping Of dialog box, choose the object for which you want to map the IDs
- In the System Instance ID field, use the input help to select the ID of your SAP ERP system.
- Click Go.
- In the External ID column, enter the ID of the object in the system.
- Repeat steps 2 to 5 for the following objects.
○Company
○ Accounts
○ Contacts
○ Employees
○ Materials
○ Product categories
○ Sales office
○ Sales organizations
7.Save and Close.
Procedure 6: -Maintain Number Ranges
1.In the Business Configuration work center, choose the Implementation Projects view.
2.Select the line that contains your project, and click Open Activity List.
3.On the Activity List screen, choose Fine-Tune.
4.Click Integration of Business Partner Data from Your Cloud Solution to SAP ERP. The system provides default number ranges for prospects, contacts, and customers that can be used in SAP ERP.
5.Make sure the number ranges you define match the number ranges defined in the ERP system.
This blog is all about how to configure the Integration Part in SAP Cloud solution with SAP ERP on Premise System.
Hope you enjoyed reading this blog and found it useful!!!!
- SAP Managed Tags:
- SAP Cloud for Customer add-ins,
- C4C Sales,
- C4C Service
You must be a registered user to add a comment. If you've already registered, sign in. Otherwise, register and sign in.
Labels in this area
-
ABAP
1 -
API Rules
1 -
CRM
1 -
Custom Key Metrics
1 -
Customer Data
1 -
Determination
1 -
Determinations
1 -
Introduction
1 -
KYMA
1 -
Kyma Functions
1 -
open SAP
1 -
Sales and Service Cloud Version 2
1 -
Sales Cloud v2
1 -
SAP
1 -
SAP Community
1 -
SAP CPQ
1 -
SAP CRM Web UI
1 -
SAP Customer Data Cloud
1 -
SAP Customer Experience
1 -
SAP Integration Suite
1 -
SAP Sales Cloud v2
1 -
SAP Service Cloud v2
1 -
SAP Service Cloud Version 2
1 -
Service Cloud v2
1 -
Validation
1 -
Validations
1