
- SAP Community
- Products and Technology
- Technology
- Technology Blogs by SAP
- SAP Cloud Platform Alert Notification - receive al...
Technology Blogs by SAP
Learn how to extend and personalize SAP applications. Follow the SAP technology blog for insights into SAP BTP, ABAP, SAP Analytics Cloud, SAP HANA, and more.
Turn on suggestions
Auto-suggest helps you quickly narrow down your search results by suggesting possible matches as you type.
Showing results for
former_member35
Active Participant
Options
- Subscribe to RSS Feed
- Mark as New
- Mark as Read
- Bookmark
- Subscribe
- Printer Friendly Page
- Report Inappropriate Content
06-10-2019
7:31 AM
Pre-read
This blog post is part of a series of blog posts related to SAP Cloud Platform Alert Notification service.
You can relate to the parent blog post for more detailed information about the service itself.
If you are using (or plan to use) Dynatrace - SAP Cloud Platform Alert Notification offers integration with this solution. In that way, you can have a single channel for all kind of alerts (coming from Dynatrace and other services). Before, setting Alert Notification, however, you should set up your Dynatrace - SAP Cloud Platform integration. If you haven't done so until now, check out this page.
Also, make sure that you have enabled Alert Notification into the account where your application lives.
Configuring Dynatrace and Alert Notification
To receive alerts from Dynatrace, you should create a custom Webhook integration inside your Dynatrace Environment. We’ll show you a standard mapping between the Dynatrace alert and the expected alert from Alert Notification. The integration is one time, so once you have done that you will be able to receive any kind of dynatrace alerts.
After getting familiar with the process of creating a Webhook integration and the Dynatrace payload, you can proceed with subscriptions for these events inside your Alert Notification instance.
For such integration, you need to create an identity with type basic from the Alert Notification UI.
Example of necessary credentials payload from Alert Notification
   {

      "client_id": "<<generated_username>>",

      "client_secret": "<<generated_password>>",

      "url": "https://<<AlertNotification-service-API>>.cfapps.eu1.hana.ondemand.com"

   }
In Dynatrace, navigate to the creation of custom Webhook, by following the guide from above.
Inside Webhook URL input you should paste the Alert Notification Producer API URL and add to the end the following path /cf/producer/v1/resource-events.
Example of full Alert Notification API URL:
https://clm-sl-ans-live-ans-service-api.cfapps.eu10.hana.ondemand.com/cf/producer/v1/resource-eventsProceed with adding Basic Authorization Header. You should copy the client_id and client_secret inside the username and password fields respectively.
In Custom payload paste the following generic JSON payload:
{

    "eventType": "Dynatrace_EVENT",

    "resource": {

        "resourceName": "unknown",

        "resourceType": "unknown"

    },

    "severity": "ERROR",

    "category": "ALERT",

    "subject": "{ProblemTitle}",

    "body": "{ProblemDetailsText}",

    "tags": {

        "ans:detailsLink": "{ProblemURL}",

        "dynatrace:PID": "{PID}",

        "dynatrace:problemID": "{ProblemID}",

        "dynatrace:impactedEntity": "{ImpactedEntity}",

        "dynatrace:problemSeverity": "{ProblemSeverity}",

        "dynatrace:problemImpact": "{ProblemImpact}",

        "dynatrace:problemState": "{State}",

        "dynatrace:tags": "{Tags}"

    }

}
NOTE: This is an example of standard mapping that we suggest. Of course, you could adapt it to your needs. For example, you can remove any dynatrace field from tags, which you may not need.
At the bottom of the page, for Alerting Profile choose Default. We presume that you have not changed severity rules in the Default profile.
In the end, your integration should look like in the following pictures:

Let’s proceed to the creation of Alert Notification action, condition and subscription. If you are not aware of what those are, check out the following help page. Below you can find a subscription template, which will match a payload with “eventType: Dynatrace_EVENT” and will send it to Store, Email and Slack. Use the following help page to check how you can import it.
{
"conditions": [{
"name": "match-dynatrace-events",
"propertyKey": "eventType",
"predicate": "CONTAINS",
"propertyValue": "Dynatrace_EVENT",
"labels": [],
"description": ""
}],
"actions": [{
"name": "dynatrace-to-store",
"state": "ENABLED",
"labels": [],
"description": "",
"type": "STORE"
},
{
"name": "dynatrace-to-slack",
"state": "ENABLED",
"labels": [],
"destination": "<<your-destination-to-slack-hook>>",
"description": "",
"type": "SLACK"
},
{
"name": "dynatrace-to-email",
"state": "ENABLED",
"labels": [],
"destination": "<<your-email-address>>",
"description": "",
"type": "EMAIL"
}
],
"subscriptions": [{
"name": "dynatrace-subscription",
"conditions": [
"match-dynatrace-events"
],
"actions": [
"dynatrace-to-store",
"dynatrace-to-slack",
"dynatrace-to-email"
],
"labels": [],
"state": "ENABLED",
"description": ""
}]
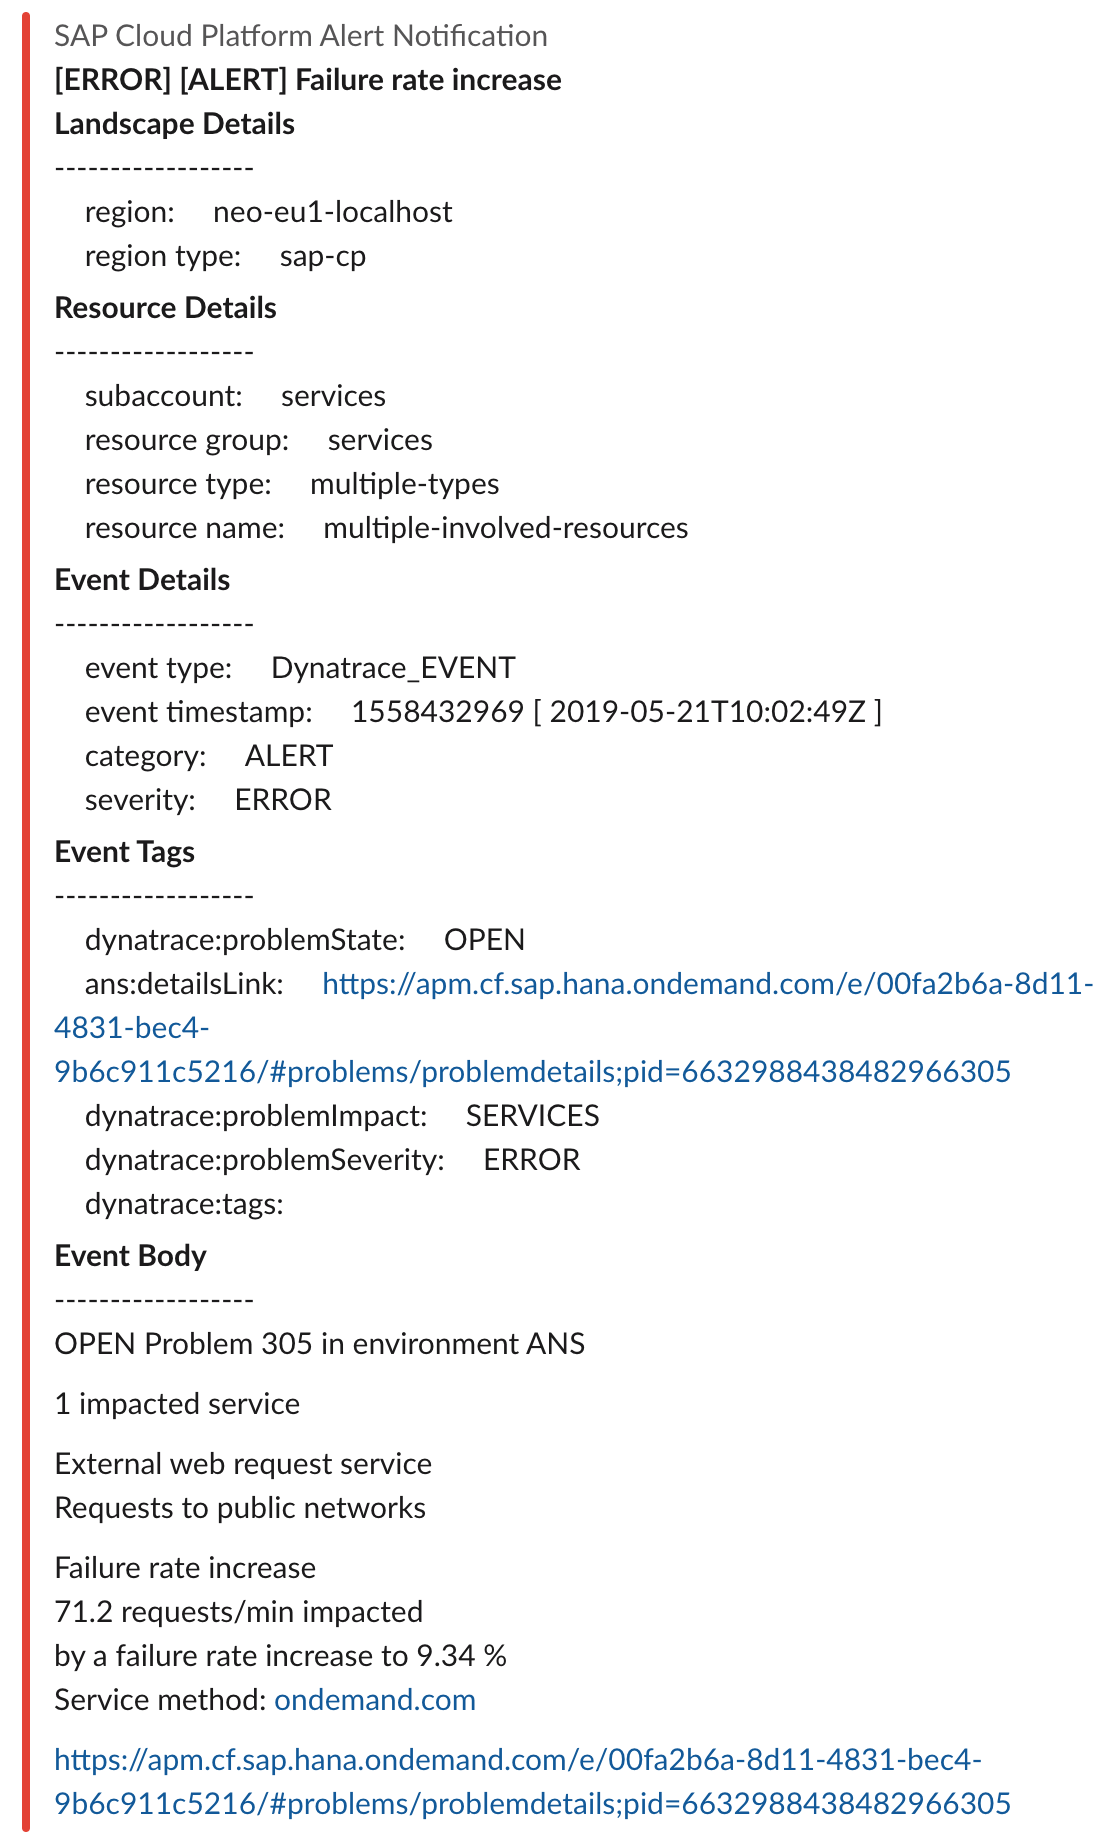
}Example of Alert Nortification processed message from Dynatrace, which is delivered to Slack:
If you want to get familiar with dynatrace alerting profiles and efficiently filter problem notifications, you may read this blog post. To distinguish Dynatrace severity levels in different alerting profiles, you can check out advanced steps for correct mapping between Alert Notification severity level and Dynatrace severity.
Advanced Steps
Mapping Alert Notification severity to Dynatrace
The custom payload for different alerting profiles differentiates only by the Alert Notification severity level. For the moment one severity rule (in an alerting profile) should be mapped to one Webhook integration. If you want to combine severity rules, use the generic payload above.
Dynatrace severity rules should be mapped to Alert Notifcation severity as follows:
- For
Availabilityseverity should beFATAL - For
Errorseverity should beERROR - For
Slowdownseverity should beWARNING - For
Resourcesseverity should beWARNING - For
Customseverity should beWARNING
For example:
Assuming that you have created an Alerting profile with Availability severity rule and one Webhook integration attached to that profile, your custom payload should be as follows:
{

    "eventType": "Dynatrace_EVENT",

    "resource": {

        "resourceName": "unknown",

        "resourceType": "unknown"

    },

    "severity": "FATAL",

    "category": "ALERT",

    "subject": "{ProblemTitle}",

    "body": "{ProblemDetailsText}",

    "tags": {

        "ans:detailsLink": "{ProblemURL}",

        "dynatrace:problemSeverity": "{ProblemSeverity}",

        "dynatrace:problemImpact": "{ProblemImpact}",

        "dynatrace:problemState": "{State}",

        "dynatrace:tags": "{Tags}"

    }

}
Defining custom thresholds in Dynatrace
To create custom thresholds, for your business case, you should read and get familiar with how Dynatrace detects and analyses a problem and then proceed with a more practical example for creating custom alerts. Also, here is the definition of custom alert in Dynatrace’s context.
- SAP Managed Tags:
- SAP Alert Notification service for SAP BTP,
- SAP Business Technology Platform
Labels:
4 Comments
You must be a registered user to add a comment. If you've already registered, sign in. Otherwise, register and sign in.
Labels in this area
-
ABAP CDS Views - CDC (Change Data Capture)
2 -
AI
1 -
Analyze Workload Data
1 -
BTP
1 -
Business and IT Integration
2 -
Business application stu
1 -
Business Technology Platform
1 -
Business Trends
1,661 -
Business Trends
88 -
CAP
1 -
cf
1 -
Cloud Foundry
1 -
Confluent
1 -
Customer COE Basics and Fundamentals
1 -
Customer COE Latest and Greatest
3 -
Customer Data Browser app
1 -
Data Analysis Tool
1 -
data migration
1 -
data transfer
1 -
Datasphere
2 -
Event Information
1,400 -
Event Information
65 -
Expert
1 -
Expert Insights
178 -
Expert Insights
283 -
General
1 -
Google cloud
1 -
Google Next'24
1 -
Kafka
1 -
Life at SAP
784 -
Life at SAP
11 -
Migrate your Data App
1 -
MTA
1 -
Network Performance Analysis
1 -
NodeJS
1 -
PDF
1 -
POC
1 -
Product Updates
4,577 -
Product Updates
330 -
Replication Flow
1 -
RisewithSAP
1 -
SAP BTP
1 -
SAP BTP Cloud Foundry
1 -
SAP Cloud ALM
1 -
SAP Cloud Application Programming Model
1 -
SAP Datasphere
2 -
SAP S4HANA Cloud
1 -
SAP S4HANA Migration Cockpit
1 -
Technology Updates
6,886 -
Technology Updates
409 -
Workload Fluctuations
1
Related Content
- 2405 Early Release Series for SAP Procurement and SAP Business Network releases in Technology Blogs by SAP
- New webcast series on “SAP BTP DevOps and Observability in Action” in Technology Blogs by SAP
- Empowering Vendors: The Transformative Impact of SAP Chatbot in Technology Blogs by Members
- How to get Service/instance name in Technology Q&A
- SAP PI/PO migration? Why you should move to the Cloud with SAP Integration Suite! in Technology Blogs by SAP
Top kudoed authors
| User | Count |
|---|---|
| 14 | |
| 12 | |
| 10 | |
| 10 | |
| 9 | |
| 7 | |
| 6 | |
| 5 | |
| 5 | |
| 5 |