Introduction
The intent of the blog is to bring and share the new usability features in the SAP Cloud Integration’s Web Application which shall enrich the user experience and improve the developer productivity.
With April 2019 release (v2.52.x/v3.10.x), the externalization of text area attribute has been revamped to simplify the user experience which shall eventually improve the developer efficiency. This release is planned to reach our customers around 14
th April 2019. You can find the details about this new behavior in the SAP Help Portal ( see
Text Area Externalization)
Revamped Text Area Externalization
Text Area attribute is one of the crucial attributes that is generally used in the Mail body of the Content Modifier and the Message body of the Mail adapter.
The control used to support the externalization of text area in the previous version of the integration flow editor had limitations of its own.
The rendering of the text area containing huge payload was not smooth and in other cases the pasting of a payload obtained from external editors (Notepad, Notepad++) into the text area resulted in issues with the formatting. You would have come across this in the ‘Note’ section in SAP Help documentation.

With this revamped version, not only these issues have been resolved but also the user experience has been simplified leading to an increase in developer efficiency.
Now, let’s have a look at this new revamped version of text area externalization.
- Select an integration flow component.

- Choose the content modifier Message.
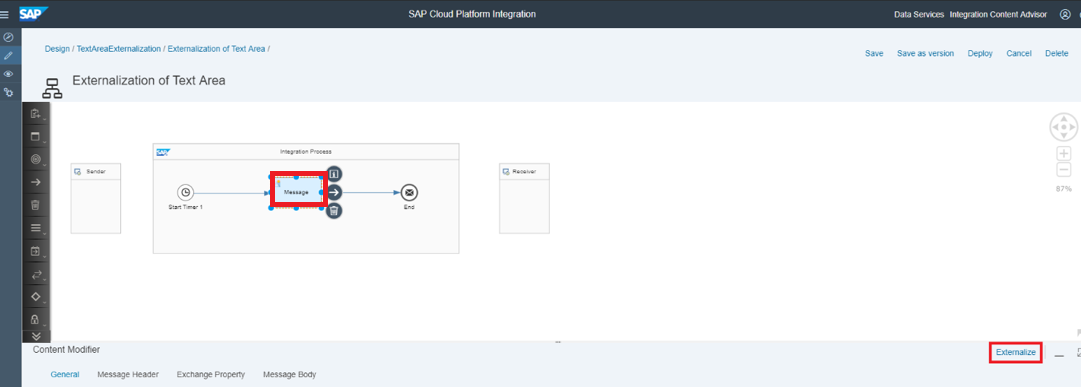
- Choose Externalize to define a new parameter and value for the text area.

- Under the tab Message Body, enter the parameter in curly brackets ‘{}’ in the text-area field and press Tab. A table appears to the right listing the parameters.
Example: {{header_message}}{{header_queryresponse}}

- Enter the value of the parameters under the Parameter Value field in the table.

- Choose OK to save the changes.

- You can see the externalized parameters in the property sheet.

- Click on Preview under the property sheet to view the resolved values of the parameters. Preview button is enabled only when a text area attribute is externalized.

- Clicking on Preview will display the resolved values in bold.

Conclusion
We plan to continue working in improving the user experience and developer productivity as an increment in the future.
I hope, you can benefit from the enhancements presented in this blog post. Looking forward to your questions, remarks and feedback.
