
- SAP Community
- Products and Technology
- Technology
- Technology Blogs by SAP
- Cloud Integration - How to create a sample integra...
Technology Blogs by SAP
Learn how to extend and personalize SAP applications. Follow the SAP technology blog for insights into SAP BTP, ABAP, SAP Analytics Cloud, SAP HANA, and more.
Turn on suggestions
Auto-suggest helps you quickly narrow down your search results by suggesting possible matches as you type.
Showing results for
Employee
Options
- Subscribe to RSS Feed
- Mark as New
- Mark as Read
- Bookmark
- Subscribe
- Printer Friendly Page
- Report Inappropriate Content
03-13-2019
10:36 AM
Introduction
SAP Cloud Platform Integration will have a new receiver adapter OpenConnectors available in the upcoming releases which will help to leverage the features of SAP Cloud Platform Open Connectors in the integration scenarios. You can connect to non-SAP cloud application which are available as pre-built connectors and consume their API's in your integration scenarios.
In this blog, I will give you a step-by-step description of how can we set up a simple integration scenario using open connectors adapter.
Prerequisite:
1. Enable open connectors service in sap cloud platform.
You can refer this blog and enable the open connectors in your sap cloud platform account-
https://blogs.sap.com/2018/09/19/part-1-enable-sap-cloud-platform-open-connectors-in-trial/
2. Create Service instance
Click on Go to service link that you have enabled in previous step. This will navigate you to home page for the Open Connectors.
3. Click on Connectors in the left menu and you will see a list of all available 150+ build in connectors that you can consume.
4. Click on Instances in the left menu and then click on Create Instance.

In this blog we will use outlook instance, so we will create it in the next step.
5. Select Outlook Email from the connectors list.

6. In the next screen, give name for the outlook instance & click on Create Instance.

This will open the Microsoft outlook account login page.
7. Enter the email id of your outlook account if you have any existing or else you can create a new account by clicking on Create one.
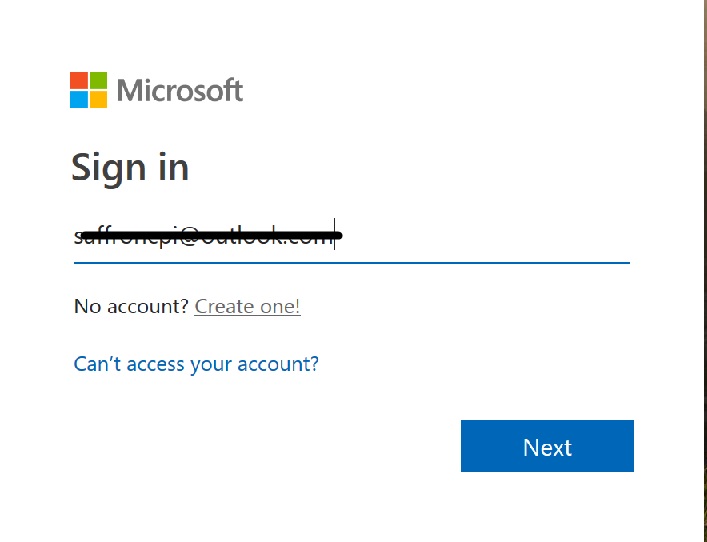
8. Click on Next & enter the password for your outlook account & click on Sign in.

You will get redirected to your open connectors instance page.
9. You will see the outlook instance being created here with name outlooktest.

10. Click on API Docs & then Resources. Now select any one of the HTTP methods.

11. Click on Try it outbutt. This will display the Authorization Header.

12. Copy Authorization Header Value.
This value will be of the form: User xxxxxxUmVeAvAn350UV3Hfa+q1nSbuOBJuIC+WcoacA=, Organization xxxxxxfd1bb383969c087e834c5068ec, Element xxxxxxc/Z3QGFUsfMBjI6VOB76CK8LtlB32K4svuQ2c=
It has three components: User, Organization and Element. Copy these three individual values without comma and spaces. We will use these values while creating OpenConnectors alias.
Creating Integration Flow using OpenConnectors adapter
Let's now create a simple integration flow using OpenConnectors adapter that will send outlook mail with the body obtained from a content modifier.
Create OpenConnectors alias
- Open the Web UI for the CPI tenant (https://<tenant address>/itspaces).
- Go to the Operations view and choose the tile Security Material.
- Click on Add and select User Credentials.
- Specify following values in the popup window -
Name - Name of the OpenConnectors alias
Description - text describing the alias
Type - Select Openconnectors from the drop down menu.
User - Value of User obtained from authorization header in step 9 in above Prerequisites section.
Organization - Value of Organization obtained from authorization header
Element - Value of Element obtained from authorization header

5. Click on Deploy. User Credentials for outlooktest alias will get deployed. We will use this alias in the integration flow.
Model the Integration Flow
Scenario Description:- Send mail using outlook instance
1. Go to Design view. Create new package. Click on Artifacts & Add Integration Flow.

2. Edit the Integration flow. We will delete the Start Event & add a Start Timer.

3. Now we will add a Content Modifier here. Go to Message Body in Content Modifier & select type as Constant.

Enter the below swagger xml in the Body -
<?xml version="1.0" encoding="UTF-8" standalone="no"?>
<SwaggerParser>
<basePath>/elements/api-v2</basePath>
<host>…………..</host>
<Resources>
<Resource>
<name>/messages</name>
<Operations>
<Operation>
<methodType>post</methodType>
<parameters>
<parameter>
<in>body</in>
<name>body</name>
<value>
<Body>
<Content>Test OC Body</Content>
</Body>
<CcRecipients>
<ArrayElement>
<EmailAddress>
<Address>xyz@gmail.com</Address>
</EmailAddress>
</ArrayElement>
</CcRecipients>
<From>
<EmailAddress>
<Address>xyz@outlook.com</Address>
</EmailAddress>
</From>
<Importance>2</Importance>
<InferenceClassification>Focused</InferenceClassification>
<Sender>
<EmailAddress>
<Address>xyz@outlook.com</Address>
</EmailAddress>
</Sender>
<Subject>Test OC Subject</Subject>
<ToRecipients>
<ArrayElement>
<EmailAddress>
<Address>xyz@gmail.com</Address>
</EmailAddress>
</ArrayElement>
</ToRecipients>
</value>
</parameter>
</parameters>
</Operation>
</Operations>
</Resource>
</Resources>
</SwaggerParser>
You can replace email ids in Address element with the valid email ids for intended sender & recipient. Also replace host value with open connectors service url hostname.
The above swagger xml is for the post messages request for outlook element.
4. Now we will put a Request Reply step after Content Modifier.
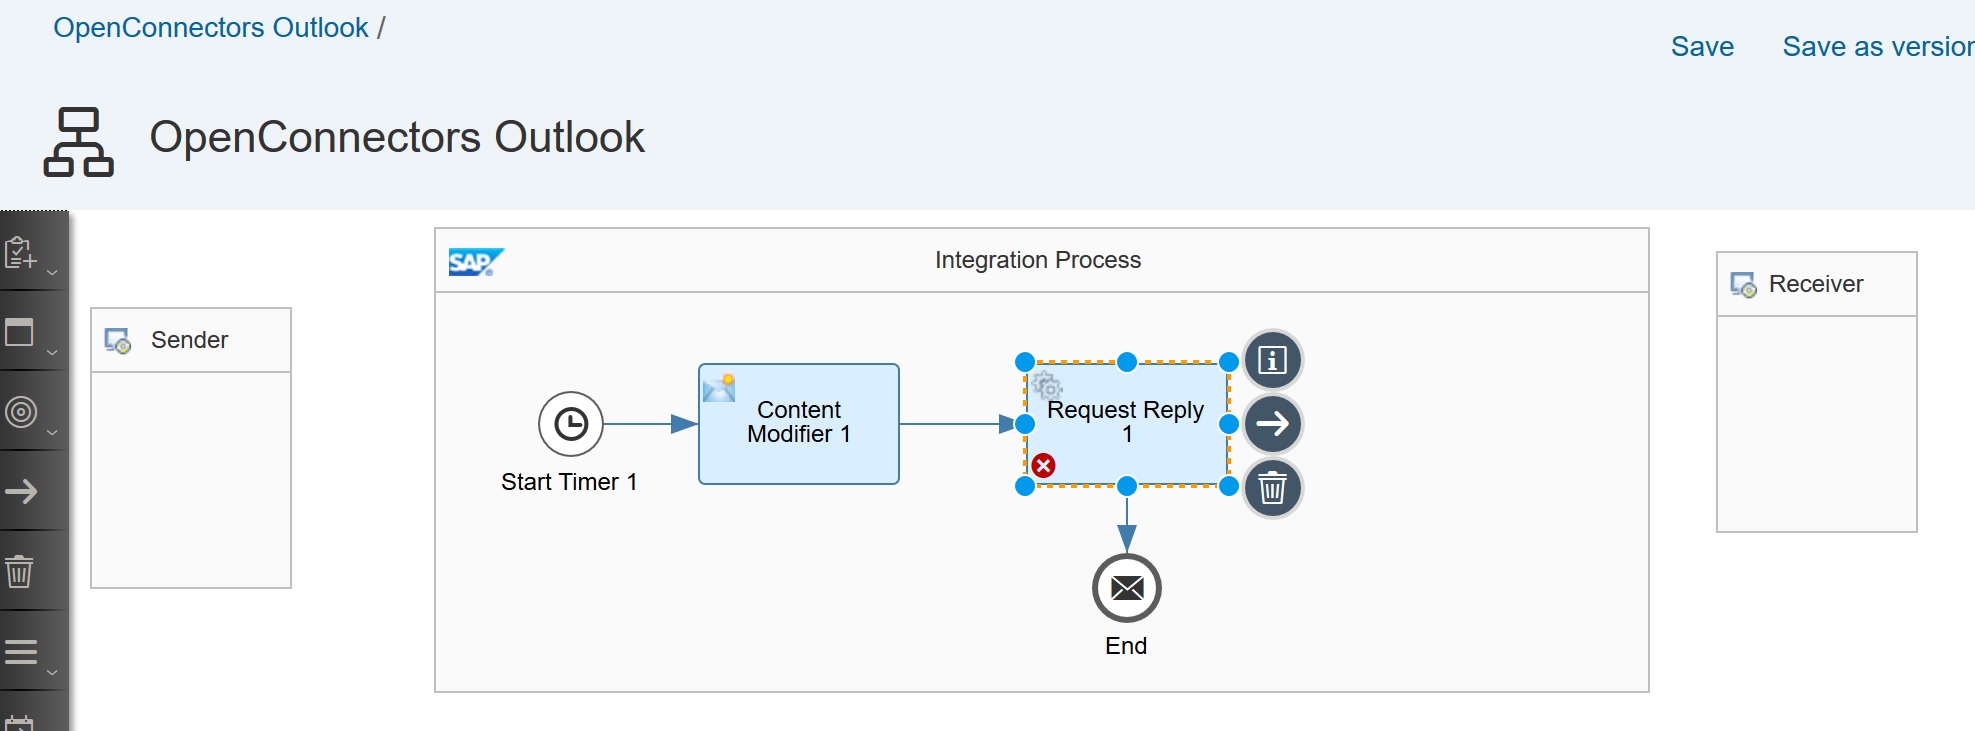
5. Now we will add the OpenConnectors adapter after Request Reply step.
Select OpenConnectors from the Adapter list.

Click on Connection in your adapter & specify the parameter values -
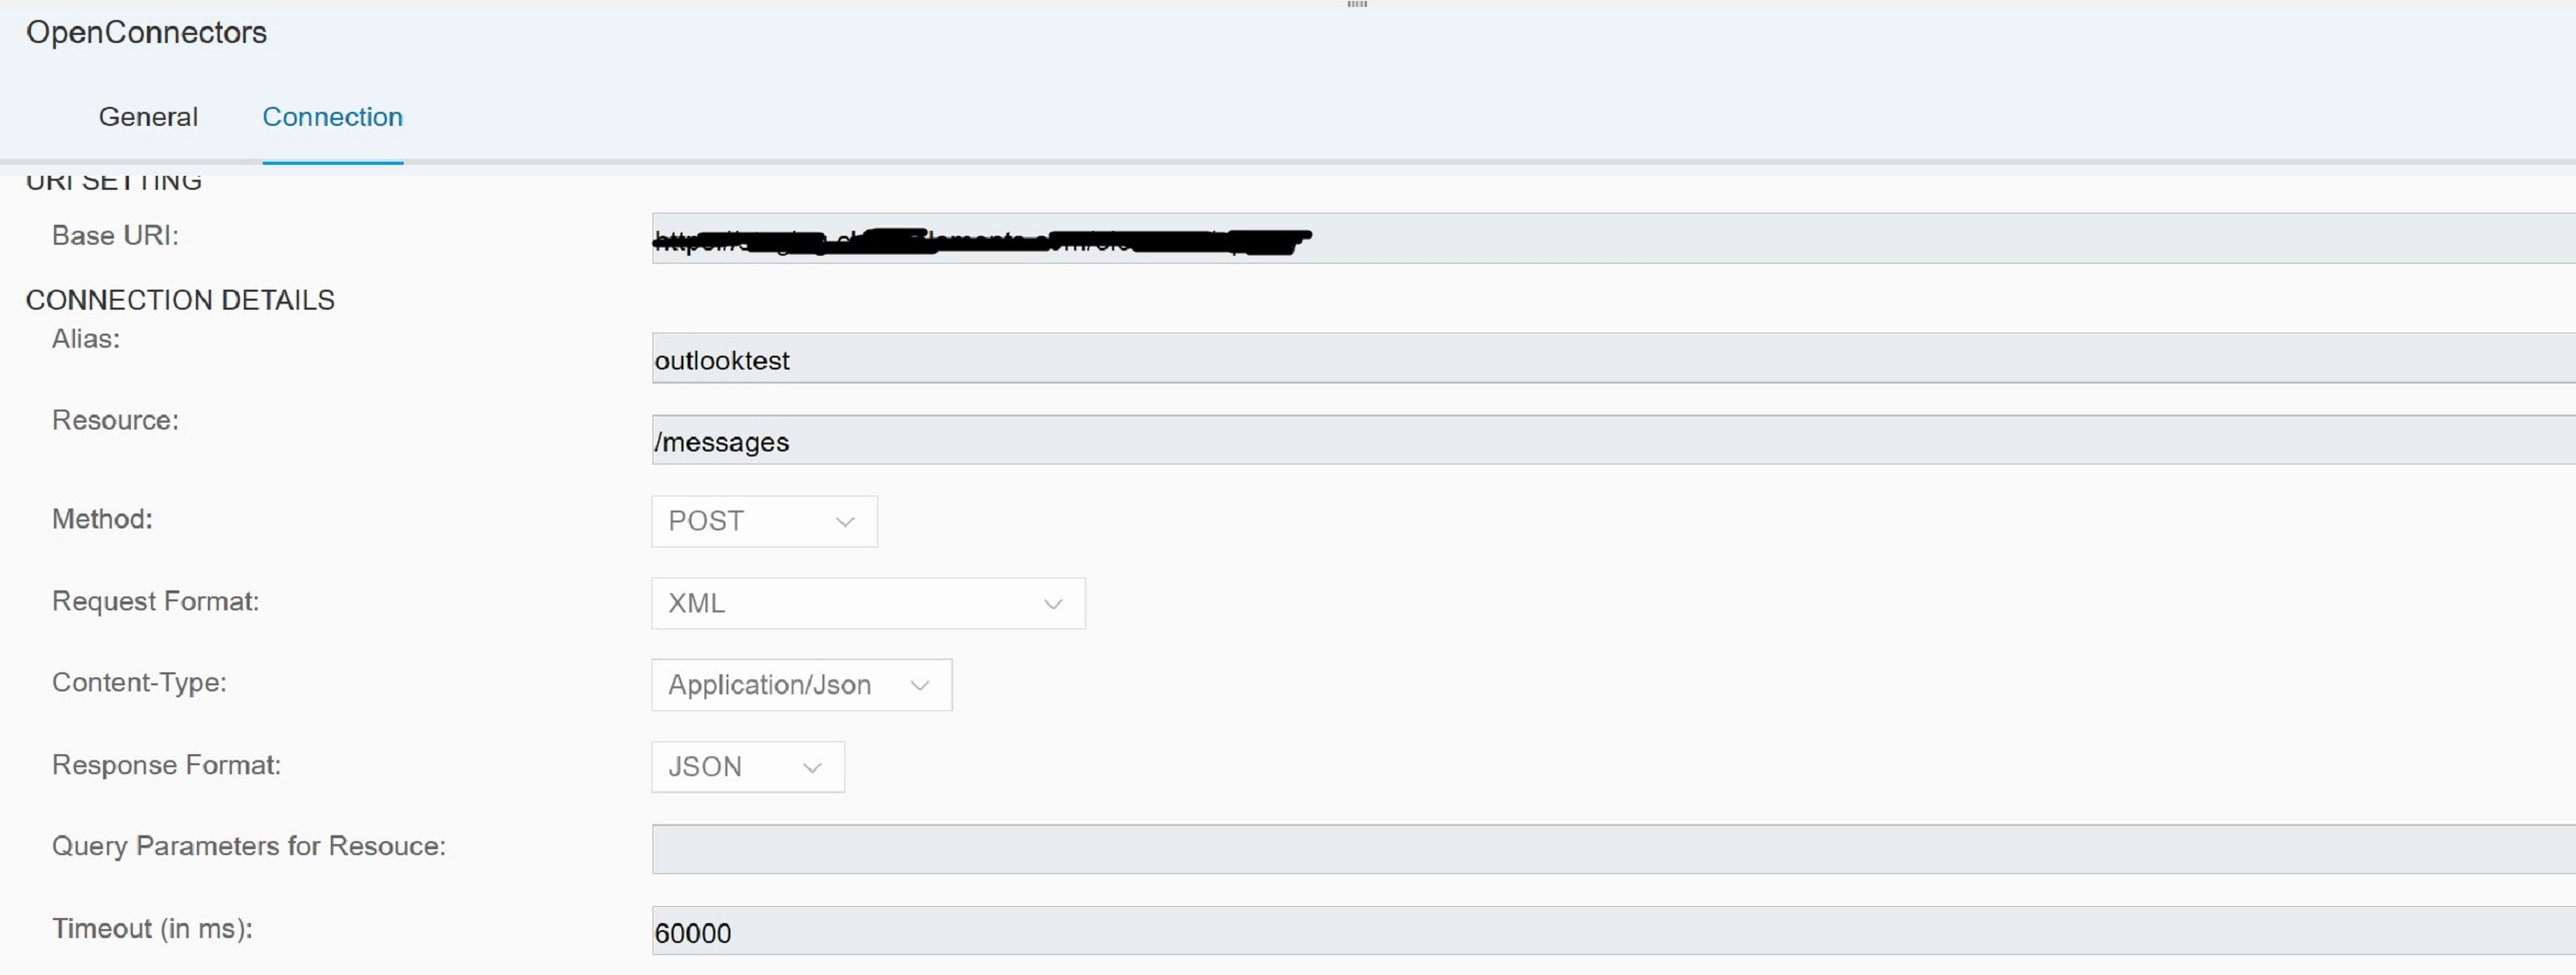
Base UrI :- This url can be obtained from the open connectors service. Open the open connectors service url. Go to API Docs, here click on try it out for any of HTTP method. When you execute it, you will get the base url.
It will be of the form - https://<open connectors service url>/elements/api-v2
Enter this value for base url.
Alias:- Give the OpenConnectors alias name "outlooktest" that we created earlier in the prerequisite step.
Resource:- This corresponds to the resources that your Open Connectors instance supports. You can get the list of all available resources from Open Connectors service when you click on Resources.

Here we are using messages resource for sending outlook mail. So we will specify the value as "/messages".
Method:- We will use Post method for sending outlook mail
Request Format:- This corresponds to data type of the incoming request that you are sending to OpenConnectors adapter.
In this example we are using Request Format as xml.
Content-Type:- This option appears only when you select request format as xml.
This corresponds to the content type which open connectors service (cloud elements api) is expecting. In our scenario, we are using outlook element and its api for sending messages is expecting application/json as the content type. So we will specify Content-Type value as application/json. Since we have specified request format as xml, so internally OpenConnectors adapter will perform xml to json conversion, before sending the payload to open connectors service.
If request format is selected as any value other than xml then payload is sent as it is without any conversion being done by OpenConnectors adapter. So only for request-format xml, you have to specify the content-type to be either application/json or application/xml.
Response Format:- You can choose it as either JSON or XML. In our scenario, we are choosing JSON.
Timeout:- We will keep default value of 60000 milliseconds only.
6. Save the integration flow.

Now the integration flow is ready to deploy. We will deploy this integration flow. Once it is started, you will receive the email. Outlook instance Authorization token has a validity period. So if its validity is expired then you might get error - 401, Unauthorized. In that case you can re-authenticate the instance & update the open connector alias & redeploy the integration flow.
In the above scenario, if we are setting Request-Format as application/json, then we need to do modifications in Content Modifier step. Content-Modifier Message Body will have below Constant value in this case -
{
"Body": {
"Content": "Test OC Body"
},
"CcRecipients": [
{
"EmailAddress": {
"Address": "xyz@gmail.com"
}
}
],
"From": {
"EmailAddress": {
"Address": "xyz@outlook.com"
}
},
"Importance": "2",
"InferenceClassification": "Focused",
"Sender": {
"EmailAddress": {
"Address": "xyz@outlook.com"
}
},
"Subject": "Test OC Subject",
"ToRecipients": [
{
"EmailAddress": {
"Address": "xyz@gmail.com"
}
}
]
}
API to create, read and delete OpenConnectors credentials
Below you can find the link for remote APIs to create, read and delete user credentials.
https://help.sap.com/viewer/DRAFT/4b57f249012e4e1f8c15cbd5dbb4fff3/IAT/en-US/69cda76bb94e40448152d19...
This APIs supports credentials of type OpenConnectors also.
Below is the sample HTTP body for creating OpenConnectors credentials:
{
"Name": "uc_name_oc",
"Kind": "openconnectors",
"Description": "uc_description_for_oc",
"User": "uc_user_oc ",
"Password": "User XXXXegJSb0/+4AlGUcu+VOghbzwWfUo6zxlUzCPEZ8k=,Organization 123887f883b9acd4ea4e90ba33e8e823,Element xxxxxxkOO9Bkkmr11y5djnxZv3v9GWvyJvPMkYTUPB4="
}
Note:- In your request value for Kind will always be specified as openconnectors. Also Password should be specified in above mentioned format only.
So the step that we have performed earlier to Create OpenConnectors alias can be done alternatively using this create API.
- SAP Managed Tags:
- Cloud Integration,
- SAP Business Technology Platform
Labels:
7 Comments
You must be a registered user to add a comment. If you've already registered, sign in. Otherwise, register and sign in.
Labels in this area
-
ABAP CDS Views - CDC (Change Data Capture)
2 -
AI
1 -
Analyze Workload Data
1 -
BTP
1 -
Business and IT Integration
2 -
Business application stu
1 -
Business Technology Platform
1 -
Business Trends
1,658 -
Business Trends
91 -
CAP
1 -
cf
1 -
Cloud Foundry
1 -
Confluent
1 -
Customer COE Basics and Fundamentals
1 -
Customer COE Latest and Greatest
3 -
Customer Data Browser app
1 -
Data Analysis Tool
1 -
data migration
1 -
data transfer
1 -
Datasphere
2 -
Event Information
1,400 -
Event Information
66 -
Expert
1 -
Expert Insights
177 -
Expert Insights
293 -
General
1 -
Google cloud
1 -
Google Next'24
1 -
Kafka
1 -
Life at SAP
780 -
Life at SAP
12 -
Migrate your Data App
1 -
MTA
1 -
Network Performance Analysis
1 -
NodeJS
1 -
PDF
1 -
POC
1 -
Product Updates
4,577 -
Product Updates
340 -
Replication Flow
1 -
RisewithSAP
1 -
SAP BTP
1 -
SAP BTP Cloud Foundry
1 -
SAP Cloud ALM
1 -
SAP Cloud Application Programming Model
1 -
SAP Datasphere
2 -
SAP S4HANA Cloud
1 -
SAP S4HANA Migration Cockpit
1 -
Technology Updates
6,873 -
Technology Updates
416 -
Workload Fluctuations
1
Related Content
- Lowest SAP ECC version that can be integrated with SAP BTP through Cloud Connector in Technology Q&A
- how to read the name of groovy script sap cloud integration cpi in Technology Q&A
- How to host static webpages through SAP CPI-Iflow in Technology Blogs by Members
- How to use AI services to translate Picklists in SAP SuccessFactors - An example in Technology Blogs by SAP
- IoT - Ultimate Data Cyber Security - with Enterprise Blockchain and SAP BTP 🚀 in Technology Blogs by Members
Top kudoed authors
| User | Count |
|---|---|
| 31 | |
| 24 | |
| 8 | |
| 7 | |
| 7 | |
| 6 | |
| 6 | |
| 5 | |
| 5 | |
| 4 |