
- SAP Community
- Products and Technology
- Technology
- Technology Blogs by SAP
- How to write unit tests for Hyperledger Fabric Go ...
Technology Blogs by SAP
Learn how to extend and personalize SAP applications. Follow the SAP technology blog for insights into SAP BTP, ABAP, SAP Analytics Cloud, SAP HANA, and more.
Turn on suggestions
Auto-suggest helps you quickly narrow down your search results by suggesting possible matches as you type.
Showing results for
former_member23
Participant
Options
- Subscribe to RSS Feed
- Mark as New
- Mark as Read
- Bookmark
- Subscribe
- Printer Friendly Page
- Report Inappropriate Content
01-11-2019
10:41 PM
Hyperledger Chaincode is a program, written in Go, JavaScript or Java. Like any other software, it sometimes tends to become complex and may include various invocations, interactions and business logic. It is important for a developer to be confident in their code during rapid application development cycles.
In this blog I would like to share my attempt to test a Hyperledger application locally before deployment using Hyperledger's built-in capabilities and later show how to use the BDD appoach.
In my scenario, I’d like to demonstrate a basic assets transfer process between blockchain network participants.
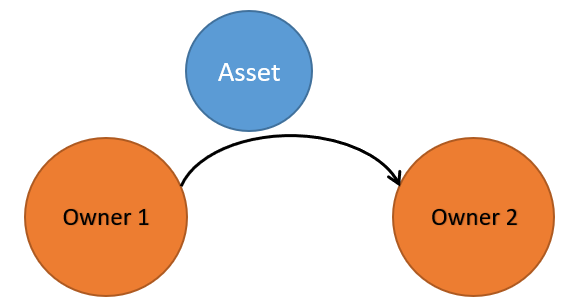
So, there will be two Owners instantiated, which will exchange an Asset object. This transfer of the asset will be unit tested as well as the process of creation of the entities. This is a VERY basic setup just to show the approach and barely keep the state of the ledger. It can certainly be advanced to a more complex end-to-end process with the respective code quality and testing coverage.
If you haven’t yet set up your SAP Cloud Foundry account and would like to try out the Hyperledger Fabric service, I’d recommend you follow up those great blogs of our community members:
From the tooling point of view, you can use Atom as code editor. Even though any text editor will do. The build and test commands will be run in the Git client and Go language runtime. Please take a look here for detailed setup instructions.
Let’s get started!
TIP: If you have experience in Go and you’d like to see the final results without going into setup details, you are very welcome to jump straight to Step 3 below.
The Owner will be represented by a flat structure:
The two methods to record and read Owner will look as follows:
We would also like to model an Asset to be exchanged between Owners. The structure of it would consist of Id field, serial number, material number, description and owner’s id like below:
The two methods to record and read an Asset to and from the ledger will be quite similar to the Owner's ones, so there's no point to show them here. It would be interesting to have a look at the set_owner method, which moves an Asset from one Owner to another:
The entities we created can now be used by the chaincode main program consisting of the Init method for network initialisation and the Invoke method to call an instance method directly.
The code above is fully deployable to the SAP CF Hyperledger Fabric service, so you can try it out yourself. Don't forget to create a zip file when installing the chaincode as explained here.
Now we can start building our first tests based on the basic model we’ve implemented. Luckily, we don’t have to build a lot of code on top as Go runtime environment provides us with a lot of ready to use functionality in the testing package.
The official SAP Chaincode Unit Testing documentation gives a valuable input on how to start writing unit tests. Let’s try to follow it up.
The test will be located in a separate _test.go file. We just need to import the testing package and create at least one function prefixed with “Test” exactly like in the code below.
Let’s break this down:
Tests are run in console by the go test -v command (verbose mode).
Overall, the code for this step repeats the official SAP guide and looks quite primitive. Let’s try to add some sugar and semantics into it.
When I started preparing this step, I was driven by the following considerations:
I prepared my code and was going to explain it here in the blog, but then I realised that I actually fell into anti-pattern. The tests have become way too complex without any essential benefit. They were difficult to follow. So I decided to look around and found an excellent BDD Testing Framework for Go called Ginkgo.
Ginkgo allows you to write expressive tests in an efficient manner. It installs itself into existing Go environment and allows you to run tests with the usual go test command. As with popular BDD frameworks in other languages, Ginkgo allows grouping tests into container blocks which can also hold your assertions. It also comes with handy structural utilities that improve code reuse. Let's see how to use it.
Firstly, you should install Ginkgo:
Secondly, you should bootstrap Ginkgo's test suite into your working directory:
The latter command will generate a file named your_project_suite_test.go containing code similar to the following:
Let's have a look into it closer:
At this stage you can already run the suite and see the empty results:
Now we can build a Specification on how we actually want the first test for Asset to look like:
This Specification can be expressed using Ginkgo as follows:
So now we understand that we'll have three 'assertions' within the same 'context'. The Specify block above is only an alias of the It block. It just helps the specification to be read as natural language. We can also make specifications more expressive by using the full list of Gomega matchers.
Let's try to specify the logic of the first It block:
We did the following in the code above:
We can now implement the second It block:
Here is what we've done here:
The third Specify statement is quite straight forward:
Two remarks here:
So all together the code for Asset tests will look as follows:
As you see, we've described several global variables, which are initialised just before the Specifications are run and their Context is loaded. After that the assertions are executed one by one.
If we run the tests by the go test in the command line, all of them should pass:
We are seeing 7 specs in the results because each Describe, Context, It and Specify statement considered a spec. If you'd like more details in the output, you can switch to verbose mode by using the go test -ginkgo.v or ginkgo -v console commands.
Now our local tests have become much more comprehensive, so let's try to test the assets transfer process that was depicted in the beginning. It's not that difficult at all:
Couple of important notes here:
While the topic actually looks pretty boring, the importance of Smart Contract quality cannot be underestimated. You can start writing tests in Go fairly easily using the Hyperledger's mockStub implementation. However, you can always choose a BDD library for a structured approach and more reliable applications.
In this blog I would like to share my attempt to test a Hyperledger application locally before deployment using Hyperledger's built-in capabilities and later show how to use the BDD appoach.
My scenario
In my scenario, I’d like to demonstrate a basic assets transfer process between blockchain network participants.
So, there will be two Owners instantiated, which will exchange an Asset object. This transfer of the asset will be unit tested as well as the process of creation of the entities. This is a VERY basic setup just to show the approach and barely keep the state of the ledger. It can certainly be advanced to a more complex end-to-end process with the respective code quality and testing coverage.
Tools and prerequisites
If you haven’t yet set up your SAP Cloud Foundry account and would like to try out the Hyperledger Fabric service, I’d recommend you follow up those great blogs of our community members:
- Step by Step process to create your first Blockchain Project
- Creating blockchain based applications in SAP Cloud Platform
From the tooling point of view, you can use Atom as code editor. Even though any text editor will do. The build and test commands will be run in the Git client and Go language runtime. Please take a look here for detailed setup instructions.
Let’s get started!
TIP: If you have experience in Go and you’d like to see the final results without going into setup details, you are very welcome to jump straight to Step 3 below.
Step 1. Build the basic entities and initialise the chaincode
The Owner will be represented by a flat structure:
type Owner struct {

	Id         string `json:"id"`

	Username   string `json:"username"`

	Company    string `json:"company"`

}
The two methods to record and read Owner will look as follows:
//=====================================================================================================

// Create Owner - create a new owner and store it in the chaincode state

//=====================================================================================================

func create_owner(stub shim.ChaincodeStubInterface, args []string) peer.Response {

	var err error


	if len(args) < 3 {

		return shim.Error("Incorrect number of arguments. Expecting at least 3")

	}


	var owner Owner

	owner.Id = args[0]

	owner.Username = args[1]

	owner.Company = args[2]


	// check if Owner already exists

	_, err = get_owner(stub, owner.Id)

	if err == nil {

		return shim.Error("This Owner already exists - " + owner.Id)

	}


	// save the Owner

	ownerAsBytes, _ := json.Marshal(owner)         // convert to array of bytes

	err = stub.PutState(owner.Id, ownerAsBytes)    // store Owner by its Id

	if err != nil {

		fmt.Println("Could not save an Owner")

		return shim.Error(err.Error())

	}


	return shim.Success(nil)

}


//=====================================================================================================

// Read Owner - get an Owner record as bytes from the ledger

//=====================================================================================================

func read_owner(stub shim.ChaincodeStubInterface, args []string) peer.Response {

	var err error

    key := args[0]


	valAsbytes, err := stub.GetState(key)

	if err != nil {

    return shim.Error("Owner does not exist with Id '" + key + "'")

	}


	return shim.Success(valAsbytes)

}
We would also like to model an Asset to be exchanged between Owners. The structure of it would consist of Id field, serial number, material number, description and owner’s id like below:
type Asset struct {

  ExternalId  string `json:"externalId"` // Asset Id

  Sernr	      string `json:"sernr"`      // Serial Number

  Matnr	      string `json:"matnr"`      // Material Number

  ObjDesc     string `json:"objDesc"`    // Description

  OwnerId     string `json:"ownerId"`    // Owner Id

}
The two methods to record and read an Asset to and from the ledger will be quite similar to the Owner's ones, so there's no point to show them here. It would be interesting to have a look at the set_owner method, which moves an Asset from one Owner to another:
// ============================================================================================================================

// Change Owner for an Asset

// ============================================================================================================================

func set_owner(stub shim.ChaincodeStubInterface, args []string) peer.Response {

	var err error


	if len(args) != 2 {

		return shim.Error("Incorrect number of arguments. Expecting 2")

	}


	var asset_id = args[0]

	var new_owner_id = args[1]


	// check if user already exists

	owner, err := get_owner(stub, new_owner_id)

	if err != nil || len(owner.Username) == 0 {

		return shim.Error("This Owner does not exist - " + new_owner_id)

	}


	// get asset's current state

	assetAsBytes, err := stub.GetState(asset_id)

	if err != nil {

		return shim.Error("Failed to read Asset")

	}


	var asset Asset

	json.Unmarshal(assetAsBytes, &asset)


	asset.OwnerId = new_owner_id


	jsonAsBytes, _ := json.Marshal(asset)

	err = stub.PutState(asset_id, jsonAsBytes)

	if err != nil {

		return shim.Error(err.Error())

	}


	return shim.Success(nil)

}
The entities we created can now be used by the chaincode main program consisting of the Init method for network initialisation and the Invoke method to call an instance method directly.
func (t *SimpleChaincode) Init(stub shim.ChaincodeStubInterface) peer.Response {

    return shim.Success(nil)

}


func (t *SimpleChaincode) Invoke(stub shim.ChaincodeStubInterface) peer.Response {

	function, args := stub.GetFunctionAndParameters()


	// Handle invoke functions

	if function == "init" {                   // initialise the chaincode state

		return t.Init(stub)

	} else if function == "create_asset" {    // create a new asset

		return create_asset(stub, args)

	} else if function == "read_asset" {   	  // read an asset

		return read_asset(stub, args)

	} else if function == "create_owner" {    // create an owner

        return create_owner(stub, args)

    } else if function == "read_owner" {   	  // read an owner

		return read_owner(stub, args)

	} else if function == "set_owner" {       // change owner of an asset

		return set_owner(stub, args)

	}


  // error out

	fmt.Println("Received unknown invoke function name - '" + function + "'")

	return shim.Error("Received unknown invoke function name - '" + function + "'")

}
The code above is fully deployable to the SAP CF Hyperledger Fabric service, so you can try it out yourself. Don't forget to create a zip file when installing the chaincode as explained here.
Step 2. Build the first chaincode test
Now we can start building our first tests based on the basic model we’ve implemented. Luckily, we don’t have to build a lot of code on top as Go runtime environment provides us with a lot of ready to use functionality in the testing package.
The official SAP Chaincode Unit Testing documentation gives a valuable input on how to start writing unit tests. Let’s try to follow it up.
The test will be located in a separate _test.go file. We just need to import the testing package and create at least one function prefixed with “Test” exactly like in the code below.
package main


import (

    "testing"

    "github.com/hyperledger/fabric/core/chaincode/shim"

)


func TestInstancesCreation(test *testing.T) {

    stub := InitChaincode(test)


    assetExternalId := "ID01"

    ownerId := "o1"

    Invoke(test, stub, "create_owner", ownerId, "Username_1", "Company_1")

    Invoke(test, stub, "create_asset", assetExternalId, "Sernr1234", "Matnr1234", "ObjDesc", ownerId)

}


func InitChaincode(test *testing.T) *shim.MockStub {

    stub := shim.NewMockStub("testingStub", new(SimpleChaincode))

    result := stub.MockInit("000", nil)


    if result.Status != shim.OK {

       test.FailNow()

    }

    return stub

}


func Invoke(test *testing.T, stub *shim.MockStub, function string, args ...string) {


    cc_args := make([][]byte, 1+len(args))

    cc_args[0] = []byte(function)

    for i, arg := range args {

        cc_args[i + 1] = []byte(arg)

    }

    result := stub.MockInvoke("000", cc_args)

    fmt.Println("Call:    ", function, "(", strings.Join(args,","), ")")

    fmt.Println("RetCode: ", result.Status)

    fmt.Println("RetMsg:  ", result.Message)

    fmt.Println("Payload: ", string(result.Payload))


    if result.Status != shim.OK {

        test.FailNow()

    }

}
Let’s break this down:
- We specify that this test belongs to the “main” package by the first statement. Ideally tests should be in a separate package to respect the encapsulation of the “main” package being tested, but here we don’t want to over-complicate the matter. This is because the folder structure and global variables may not be configured properly for the code to be runnable should you try it out yourself. You can find more information on this topic here.
- The test starts itself with the MockStub initialisation in the helper method called “InitChaincode”.
- The chaincode functions are invoked by the MockInvoke method wrapped into the "Invoke" helper.
- The helpers have been separated into the utils file
Tests are run in console by the go test -v command (verbose mode).
Overall, the code for this step repeats the official SAP guide and looks quite primitive. Let’s try to add some sugar and semantics into it.
Step 3. Improving the code
When I started preparing this step, I was driven by the following considerations:
- I needed to re-organise the tests to make the code more readable. I planned to improve by applying the Arrange-Act-Assert approach. So that I'd prepare all the data for execution first, then I'd call the chaincode invoke methods and finally would check the state of the ledger by comparing the returned results with the desired results.
- While doing this, I should not focus on the pure technical details and check meticulously each method as it would take too much effort. It would be beneficial to focus instead on behavioral aspects so that the tests ensure that invoke functions work together as expected.
I prepared my code and was going to explain it here in the blog, but then I realised that I actually fell into anti-pattern. The tests have become way too complex without any essential benefit. They were difficult to follow. So I decided to look around and found an excellent BDD Testing Framework for Go called Ginkgo.
Ginkgo allows you to write expressive tests in an efficient manner. It installs itself into existing Go environment and allows you to run tests with the usual go test command. As with popular BDD frameworks in other languages, Ginkgo allows grouping tests into container blocks which can also hold your assertions. It also comes with handy structural utilities that improve code reuse. Let's see how to use it.
Firstly, you should install Ginkgo:
$ go get github.com/onsi/ginkgo/ginkgo

$ go get github.com/onsi/gomega/...
Secondly, you should bootstrap Ginkgo's test suite into your working directory:
$ cd path/to/your_project

$ ginkgo bootstrap
The latter command will generate a file named your_project_suite_test.go containing code similar to the following:
package main


import (

	"testing"

	. "github.com/onsi/ginkgo"

	. "github.com/onsi/gomega"

)


func TestAsset(t *testing.T) {

	RegisterFailHandler(Fail)

	RunSpecs(t, "Asset Transfer Suite")

}
Let's have a look into it closer:
- Our tests share the main package with the chaincode logic.
- We import the necessary packages. Gomega is Ginkgo's preferred matcher/assertion library.
- The TestAsset is a regular Go test function which will be run by the go test command. The name of it should begin with Test.
- RegisterFailHandler creates the coupling between Ginkgo and Gomega. Here Ginkgo's Fail function is passed to Gomega in case of test failure.
- RunSpecs(t *testing.T, suiteDescription string) tells Ginkgo to start the test suite.
At this stage you can already run the suite and see the empty results:
$ go test -v

=== RUN   TestAsset

Running Suite: Asset Suite

==========================

Random Seed: 1546738572

Will run 0 of 0 specs


Ran 0 of 0 Specs in 0.000 seconds

SUCCESS! -- 0 Passed | 0 Failed | 0 Pending | 0 Skipped

--- PASS: TestAsset (0.00s)

PASS
Now we can build a Specification on how we actually want the first test for Asset to look like:
When running tests for the Asset

  We would like to check that its create/read methods work fine

    Once an Asset is successfully created

    Another Asset instance is also retrieved successfully by the same Id

    Once compared, the both Asset instances are identical
This Specification can be expressed using Ginkgo as follows:
Describe("Running tests for the Asset", func() {

    Context("Checking that create/read for Asset work fine", func() {

        It("Should be created successfully", func() {})

        It("Another Asset instance is retrieved successfully by the same Id", func() {})

        Specify("Asset instances are identical", func() {})

    })

})
So now we understand that we'll have three 'assertions' within the same 'context'. The Specify block above is only an alias of the It block. It just helps the specification to be read as natural language. We can also make specifications more expressive by using the full list of Gomega matchers.
Let's try to specify the logic of the first It block:
It("Should be created successfully", func() {


    mockOwner := [][]byte{

    	[]byte("o1"),              // Id

    	[]byte("Username_1"),      // Username

    	[]byte("Company_1")        // Company

    }

    argsToCreate := append([][]byte{[]byte("create_owner")}, mockOwner...)

    stub.MockInit("000", nil)

    receivedStatus := stub.MockInvoke("000", argsToCreate).Status

    status200 := int32(200)

    Expect(receivedStatus).Should(Equal(status200))

})
We did the following in the code above:
- Created a mock Owner with data. This can be defined as a separate util method or put into a fixture file.
- Defined the variable to contain the arguments for the MockInvoke including the function name and the mock Owner.
- Initialised the chaincode by MockInit.
- Called the MockInvoke.
- Checked that the received status of the operation is "200" (Success).
We can now implement the second It block:
It("Another Asset instance is retrieved successfully by the same Id", func() {

    argsToRead := [][]byte{[]byte("read_owner"), []byte("o1")}

    stub.MockInit("000", nil)

    result := stub.MockInvoke("000", argsToRead)

    status200 := int32(200)

    Expect(result.Status).Should(Equal(status200))

})
Here is what we've done here:
- Defined the argsToRead variable holding the function name to Invoke the blockchain and the only parameter for it with the owner's id.
- Initialised the chaincode by MockInit. This can be moved into a common setup block called BeforeEach which is run before each specification.
- We checked the received results exactly as we did in the previous block. It looks like status200 needs to be defined in the global Context scope.
The third Specify statement is quite straight forward:
Specify("Asset instances are identical", func() {

    Expect(payload).To(Equal(mockOwner))

})
Two remarks here:
- The payload needs to be a global variable in the Context scope. The value of it will be set in the second It assertion.
- The mockOwner variable needs to have the same type of byte[] as the payload variable.
So all together the code for Asset tests will look as follows:
package main


import (

  "github.com/hyperledger/fabric/core/chaincode/shim"

  . "github.com/onsi/ginkgo"

  . "github.com/onsi/gomega"

)


var _ = Describe("Tests for Assets", func() {


  stub := shim.NewMockStub("testingStub", new(SimpleChaincode))

  status200 := int32(200)

  mockOwner := GetFirstOwnerForTesting()

  mockOwnerAsBytes := ConvertBytesToOwnerAsBytes(mockOwner)

  argsToCreate := append([][]byte{[]byte("create_owner")}, mockOwner...)

  argsToRead := [][]byte{[]byte("read_owner"), mockOwner[0]}

  payload := []byte{}


  BeforeSuite(func() {

    stub.MockInit("000", nil)

  })


  Describe("Checking the CRUD operations", func() {

      Context("Checking that create/read work fine", func() {

          It("An Owner should be created successfully first", func() {

              receivedStatus := stub.MockInvoke("000", argsToCreateOwner).Status

              Expect(receivedStatus).Should(Equal(status200))

          })

          It("First Asset instance should be saved successfully", func() {

              receivedStatus := stub.MockInvoke("000", argsToCreate).Status

              Expect(receivedStatus).Should(Equal(status200))

          })

          It("Another Asset instance is retrieved by the same Id", func() {

              result := stub.MockInvoke("000", argsToRead)

              payload = []byte(result.Payload)

              Expect(result.Status).Should(Equal(status200))

          })

          Specify("Asset instances are identical", func() {

              Expect(payload).To(Equal(mockOwnerAsBytes))

          })

      })

  })

})
As you see, we've described several global variables, which are initialised just before the Specifications are run and their Context is loaded. After that the assertions are executed one by one.
If we run the tests by the go test in the command line, all of them should pass:
$ go test

Running Suite: Asset Suite

==========================

Random Seed: 1546775466

Will run 7 of 7 specs


+++

Ran 7 of 7 Specs in 0.000 seconds

SUCCESS! -- 7 Passed | 0 Failed | 0 Pending | 0 Skipped

PASS

ok
We are seeing 7 specs in the results because each Describe, Context, It and Specify statement considered a spec. If you'd like more details in the output, you can switch to verbose mode by using the go test -ginkgo.v or ginkgo -v console commands.
Now our local tests have become much more comprehensive, so let's try to test the assets transfer process that was depicted in the beginning. It's not that difficult at all:
Describe("Running tests to check Assets tracking", func() {

  Context("Checking that Asset is transferred correctly between Owners", func() {

    It("First Owner should be created successfully", func() {

      stub.DelState(string(mockOwner[0]))

      receivedStatus := stub.MockInvoke("000", argsToCreateOwner).Status

      Expect(receivedStatus).Should(Equal(status200))

    })

    It("Second Owner should be created successfully", func() {

      receivedStatus := stub.MockInvoke("000", argsToCreateAnotherOwner).Status

      Expect(receivedStatus).Should(Equal(status200))

    })

    It("Asset should be created successfully belonging to the first Owner", func() {

      receivedStatus := stub.MockInvoke("000", argsToCreateAsset).Status

      Expect(receivedStatus).Should(Equal(status200))

    })

    It("Asset should be passed to the second Owner", func() {

      result := stub.MockInvoke("000", argsToPassAsset)

      Expect(result.Status).Should(Equal(status200))

    })

    Specify("Check that Asset belongs to the second Owner", func() {

      result := stub.MockInvoke("000", argsToReadAsset)

      payload = []byte(result.Payload)

      var asset Asset

      json.Unmarshal(payload, &asset)

      Expect(asset.OwnerId).Should(Equal(string(anotherMockOwner[0])))

    })

  })

})
Couple of important notes here:
- We removed the first Owner by the DelState statement. It was left from the previous spec run as the specs are currently not isolated.
- We converted the bytes into object by the json.Unmarshal statement to compare the OwnerIds in the last Specify block. Those conversion operations could probably be moved into utility methods.
Conclusion
While the topic actually looks pretty boring, the importance of Smart Contract quality cannot be underestimated. You can start writing tests in Go fairly easily using the Hyperledger's mockStub implementation. However, you can always choose a BDD library for a structured approach and more reliable applications.
- SAP Managed Tags:
- Blockchain,
- SAP Business Technology Platform
Labels:
You must be a registered user to add a comment. If you've already registered, sign in. Otherwise, register and sign in.
Labels in this area
-
ABAP CDS Views - CDC (Change Data Capture)
2 -
AI
1 -
Analyze Workload Data
1 -
BTP
1 -
Business and IT Integration
2 -
Business application stu
1 -
Business Technology Platform
1 -
Business Trends
1,661 -
Business Trends
87 -
CAP
1 -
cf
1 -
Cloud Foundry
1 -
Confluent
1 -
Customer COE Basics and Fundamentals
1 -
Customer COE Latest and Greatest
3 -
Customer Data Browser app
1 -
Data Analysis Tool
1 -
data migration
1 -
data transfer
1 -
Datasphere
2 -
Event Information
1,400 -
Event Information
64 -
Expert
1 -
Expert Insights
178 -
Expert Insights
273 -
General
1 -
Google cloud
1 -
Google Next'24
1 -
Kafka
1 -
Life at SAP
784 -
Life at SAP
11 -
Migrate your Data App
1 -
MTA
1 -
Network Performance Analysis
1 -
NodeJS
1 -
PDF
1 -
POC
1 -
Product Updates
4,577 -
Product Updates
324 -
Replication Flow
1 -
RisewithSAP
1 -
SAP BTP
1 -
SAP BTP Cloud Foundry
1 -
SAP Cloud ALM
1 -
SAP Cloud Application Programming Model
1 -
SAP Datasphere
2 -
SAP S4HANA Cloud
1 -
SAP S4HANA Migration Cockpit
1 -
Technology Updates
6,886 -
Technology Updates
402 -
Workload Fluctuations
1
Related Content
- SAP HANA Integration with External Hyperledger network in Technology Q&A
- Blockchain Projects Made Easy in Technology Blogs by SAP
- DB2 LUW 11.5 log4j CVE-2021-44228 in Technology Q&A
- Which account has to be ordered in order to be able to use Hyperledger Fabric on SAP BTP in Technology Q&A
- Part 4 : Provide secure authentication and authorization using Hyperledger Fabric CA in Technology Blogs by SAP
Top kudoed authors
| User | Count |
|---|---|
| 12 | |
| 9 | |
| 7 | |
| 7 | |
| 7 | |
| 6 | |
| 6 | |
| 6 | |
| 6 | |
| 4 |