
- SAP Community
- Products and Technology
- Technology
- Technology Blogs by SAP
- Sending a mobile card from an SAP Cloud Platform S...
Technology Blogs by SAP
Learn how to extend and personalize SAP applications. Follow the SAP technology blog for insights into SAP BTP, ABAP, SAP Analytics Cloud, SAP HANA, and more.
Turn on suggestions
Auto-suggest helps you quickly narrow down your search results by suggesting possible matches as you type.
Showing results for
Advisor
Options
- Subscribe to RSS Feed
- Mark as New
- Mark as Read
- Bookmark
- Subscribe
- Printer Friendly Page
- Report Inappropriate Content
10-31-2018
11:42 AM
As one of the lead PMs for SAP Cloud Platform Mobile Services, I often have the privilege to hear about customers describe the business problems they are trying to solve with mobility, or increasingly with the business opportunities they would like to create with mobility. I'm constantly impressed with the ideas that people come up with!
In several scenarios I see multiple mobile technologies combined in order to achieve a higher purpose. Indeed this concept is productized in the mobile card kit feature of SAP Cloud Platform Mobile Services, where a card can easily be linked to places to get more information, whether it be a web site, another mobile app, or even the Fiori Client. This synergy allows the user to benefit from one technology (in this case SAP Mobile Cards) as an innovation layer while at the same time providing a connection to pre-existing content. I decided to focus on how multiple technologies can be used together in a new way.
That's what we're going to build today.
In order to minimize the steps required in this blog, it assumes that you have built a wizard based Android app, using SAML authentication, and that you have configured SAP Mobile Cards to connect to the same Mobile Services account. To build your Android app - follow the steps in the Android tutorial found here, with one exception. When it says to configure your Mobile Services application definition to use Basic auth, use SAML instead. To install and connect SAP Mobile Cards (on iOS, Android or both), follow the steps in the Mobile Interactive Tutorial guide that describes the process.
There are basically 3 steps to enabling your Android app to send a card:
That's it! Okay, let's get to the details!
NOTE: This is not a tutorial. I'm assuming here that you know your way around Mobile Services. You're going to need to know your way around Android Studio too. But I hope that even with a basic understanding of Mobile Services and Android Studio you can complete the steps - but feel free to post anything I missed in the comments!
You can do this! And for those of us who jump to the last page of the book and read the ending first, here's what the results will look like:
Add this destination to SAP Mobile Cards under Mobile Applications > SAP Mobile Cards > Connectivity.

Import the mobile card from here. This card that I created is basically a modification of the sample Product card included in Template manager with a few updates for formatting. To import a mobile card, follow the steps to add a new card and select the zip file you downloaded as the "Resource Package". Give the card a name and Save.
NOTE: If the newly created card does NOT point to the newly created destination, change it in the dropdown to do so.
This part of the exercise requires the most knowledge of Android Studio, but the steps are relatively simple. We'll add a menu item in the Item Detail activity to let the user send a card. While we could get smarter on how to do this, in our example the user will see the menu item for every entity type. We'll add some code to only send a card if the detail item is a product.
Open /res/menu/itemlist_view_options.xml. (it may be located under /res/menu/itemlist_view_options (2)/itemlist_view_options.xml).

Add a new <item> entry above the other two existing items:
In this last couple steps we'll add the code that interacts with the Mobile Services REST API to trigger the card delivery.
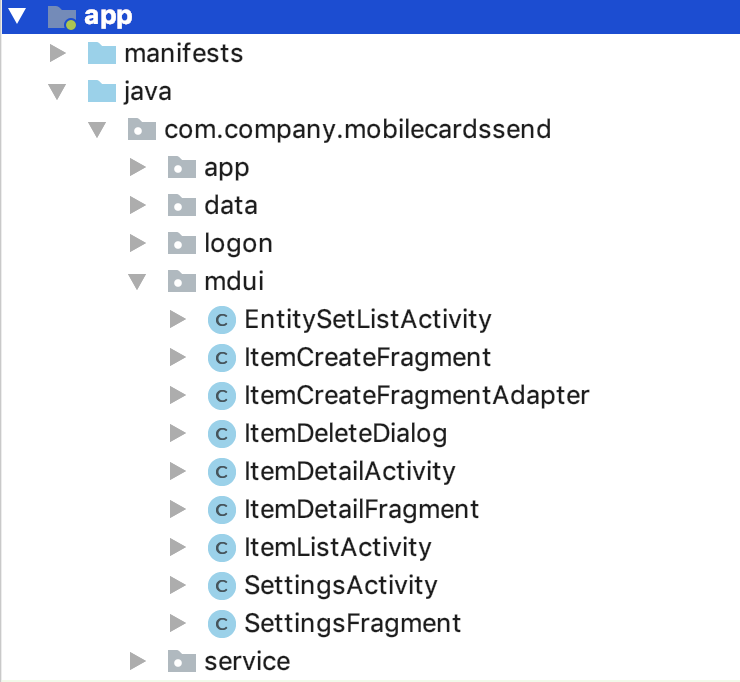
Open /java/[yourprojectnamespace]/mdui/ItemDetailFragment.java. This is the class that is associated with the menu we just edited. The screenshot below shows the location in my project, where my namespace is com.company.mobilecardssend;
Add code to the onOptionsItemSelected(MenuItem item) method to handle when the icon is tapped:
directly above the following line:
This added code determines if you're on the Product Item detail page, obtains the Product ID for the current record, and triggers card delivery on a separate thread.
Last we need to add the code to send the card. To do this, we'll create an inner class called CardManager to do the work. CardManager extends Android's AsyncTask class, a class often used to perform network operations. The following code should be place just above the last "}" for ItemDetailFragment.java:
This will trigger a message box that prompts you to import several new classes. Make sure you do so or the code won't compile.
As you can see, you need to supply the Template ID of the card that you are sending. To do this, open the card you created earlier and copy the "ID" field.

At this point, you've done everything you need on the client side, but there is still one more step. If you miss this step, you'll have done all this work but the result of the call to send a card will be a 403 error.
In the client side code, you can notice that we are calling a URL that includes a reference to the connID variable:
Basically the client is requesting that Mobile Services connect to the named Destination on its behalf. In this scenario the destination name is SAPCPMobileServices. All the stuff that is added on the end is actually the Mobile Services REST API to send the card. But if you've created the app with the wizard, that destination won't be available - we have to add it. To do so, open the Mobile Services application definition for your newly created Android app and add the SAPCPMobileServices destination to the Connectivity feature:

Nov 16 2018 Update: This step must be completed AFTER the SDK wizard has been used to create the mobile app. If you try to add the SAPCPMobileServices destination before you run the wizard, the project generation will not complete successfully.
And with that, this blog is all wrapped up! Run your app and navigate to a particular product page. Click on the icon in the menu that allows you to save a card. You should see a Toast message that says "Card Successfully Added" and more importantly, you should receive the card in SAP Mobile Cards. Edit the Product record in your native app then swipe to refresh SAP Mobile Cards and that content will quickly get reflected there as well. Or you can do nothing with SAP Mobile Cards and wait to see that the content gets updated automatically. If you try to add the card again, you'll receive a 409 status code which means the card's already been added to the mobile. If things didn't go exactly as planned, "Error Will Robinson" will appear and it's time to do a little bit more debugging.
I hope you find this sample useful, happy coding!
In several scenarios I see multiple mobile technologies combined in order to achieve a higher purpose. Indeed this concept is productized in the mobile card kit feature of SAP Cloud Platform Mobile Services, where a card can easily be linked to places to get more information, whether it be a web site, another mobile app, or even the Fiori Client. This synergy allows the user to benefit from one technology (in this case SAP Mobile Cards) as an innovation layer while at the same time providing a connection to pre-existing content. I decided to focus on how multiple technologies can be used together in a new way.
My idea is simple - to integrate an app built with the SAP Cloud Platform SDK for Android with SAP Mobile Cards. This same exact scenario could be enabled with the SAP Cloud Platform SDK for IOS, but to be honest my Swift skills leave a little bit to be desired. Perhaps my IOS colleagues can post a follow up blog on that topic!
Here's the scenario. Imagine a native app that has lots of information in it. Imagine, in that sea of information, that you are really concerned with just one aspect. Maybe it's a specific product, or certain customer. Wouldn't it be nice to be able to save the information for that particular product or customer SAP Mobile Cards, your enterprise digital wallet? That way, instead of navigating through the native app to find what I need, I can open Mobile Cards and the information will be right there, up to date, ready for me to take action if I need to.
That's what we're going to build today.
In order to minimize the steps required in this blog, it assumes that you have built a wizard based Android app, using SAML authentication, and that you have configured SAP Mobile Cards to connect to the same Mobile Services account. To build your Android app - follow the steps in the Android tutorial found here, with one exception. When it says to configure your Mobile Services application definition to use Basic auth, use SAML instead. To install and connect SAP Mobile Cards (on iOS, Android or both), follow the steps in the Mobile Interactive Tutorial guide that describes the process.
There are basically 3 steps to enabling your Android app to send a card:
- Create / import a card to send.
- Add a mechanism in your mobile app to let the user indicate that he wants to save information for a specific product.
- Add the code to interact with the Mobile Services REST API to send the card.
That's it! Okay, let's get to the details!
NOTE: This is not a tutorial. I'm assuming here that you know your way around Mobile Services. You're going to need to know your way around Android Studio too. But I hope that even with a basic understanding of Mobile Services and Android Studio you can complete the steps - but feel free to post anything I missed in the comments!
You can do this! And for those of us who jump to the last page of the book and read the ending first, here's what the results will look like:
Create/Import a card
Before creating your card, you need to first create a new Mobile Services destination and assign it to SAP Mobile Cards. In the Mobile Services cockpit, under Destinations, add a new Mobile\ destination. Give it a name of "sample.svc.v2", then for the URL, enter "https://hcpms-i825225trial.hanatrial.ondemand.com/mobileservices/origin/hcpms/ESPM.svc/v2". This is the sample service destination, but we will need to add it as a dedicated item in order to use it in the mobile card kit.
Add this destination to SAP Mobile Cards under Mobile Applications > SAP Mobile Cards > Connectivity.
Import the mobile card from here. This card that I created is basically a modification of the sample Product card included in Template manager with a few updates for formatting. To import a mobile card, follow the steps to add a new card and select the zip file you downloaded as the "Resource Package". Give the card a name and Save.
NOTE: If the newly created card does NOT point to the newly created destination, change it in the dropdown to do so.
Add a mechanism to let the user trigger card delivery
This part of the exercise requires the most knowledge of Android Studio, but the steps are relatively simple. We'll add a menu item in the Item Detail activity to let the user send a card. While we could get smarter on how to do this, in our example the user will see the menu item for every entity type. We'll add some code to only send a card if the detail item is a product.
Open /res/menu/itemlist_view_options.xml. (it may be located under /res/menu/itemlist_view_options (2)/itemlist_view_options.xml).
Add a new <item> entry above the other two existing items:
    <item

        android:icon="@android:drawable/ic_menu_share"

        android:id="@+id/sendcard"

        android:title="Send Card"

        app:showAsAction="always" />
Add the code to send the card
In this last couple steps we'll add the code that interacts with the Mobile Services REST API to trigger the card delivery.
Open /java/[yourprojectnamespace]/mdui/ItemDetailFragment.java. This is the class that is associated with the menu we just edited. The screenshot below shows the location in my project, where my namespace is com.company.mobilecardssend;
Add code to the onOptionsItemSelected(MenuItem item) method to handle when the icon is tapped:
            case R.id.sendcard:


                if (entityValueUiConnector.getConnectedObject() instanceof Product) {

                    String productID = entityValueUiConnector.getPropertiesWithValues().get("ProductId");

                    new CardManager().execute(productID);

                } else {

                    Toast.makeText(getActivity().getBaseContext(), "Sorry, Product cards only!", Toast.LENGTH_LONG).show();

                }


                return true;
directly above the following line:
case R.id.delete_item:This added code determines if you're on the Product Item detail page, obtains the Product ID for the current record, and triggers card delivery on a separate thread.
Last we need to add the code to send the card. To do this, we'll create an inner class called CardManager to do the work. CardManager extends Android's AsyncTask class, a class often used to perform network operations. The following code should be place just above the last "}" for ItemDetailFragment.java:
    public class CardManager extends AsyncTask<String, Void, Integer> {

        @Override

        protected Integer doInBackground(String... strings) {


            SAPWizardApplication wizardApp = (SAPWizardApplication)getActivity().getApplication();

            ConfigurationData configData = wizardApp.getConfigurationData();

            final String connID = "SAPCPMobileServices";

            final String templateID = "YOUR_TEMPLATE_ID";


            OkHttpClient client = ClientProvider.get();


            String serviceURL = configData.getServiceUrl();

            String templateURL = serviceURL + connID + "/mobileservices/origin/hcpms/CARDS/v1/cardTypes/" + templateID + "/cardInstances";


            try {


                JSONObject jsonBody = new JSONObject();

                JSONArray jsonArray = new JSONArray();

                JSONObject uri = new JSONObject();


                uri.put("uri", "/Products('" + strings[0] + "')?$expand=SupplierDetails");


                JSONArray imageArray = new JSONArray();

                imageArray.put(entityValueUiConnector.getPropertiesWithValues().get("PictureUrl"));

                uri.put("imagePaths", imageArray);


                jsonArray.put(uri);


                jsonBody.put("resourceIdentifiers", jsonArray);


                MediaType JSON = MediaType.parse("application/json; charset=utf-8");

                RequestBody body = RequestBody.create(JSON, jsonBody.toString());


                Request request = new Request.Builder()

                        .url(templateURL)

                        .post(body)

                        .build();


                Response response =  client.newCall(request).execute();


                return new Integer(response.code());


            } catch (Exception e) {

                Log.d("MOBILECARD", e.getMessage());

            }


            return new Integer(0);

        }


        @Override

        protected void onPostExecute(Integer httpCode) {

            super.onPostExecute(httpCode);


            if (httpCode == 201) {

                Toast.makeText(getActivity().getApplicationContext(), "Card Successfully Added", Toast.LENGTH_SHORT).show();

            } else if (httpCode == 409) {

                Toast.makeText(getActivity().getApplicationContext(), "Card has already been Added", Toast.LENGTH_SHORT).show();

            } else {

                Toast.makeText(getActivity().getApplicationContext(), "Error Will Robinson!", Toast.LENGTH_SHORT).show();

            }

        }

    }
This will trigger a message box that prompts you to import several new classes. Make sure you do so or the code won't compile.
As you can see, you need to supply the Template ID of the card that you are sending. To do this, open the card you created earlier and copy the "ID" field.
At this point, you've done everything you need on the client side, but there is still one more step. If you miss this step, you'll have done all this work but the result of the call to send a card will be a 403 error.
In the client side code, you can notice that we are calling a URL that includes a reference to the connID variable:
String templateURL = serviceURL + connID + "/mobileservices/origin/hcpms/CARDS/v1/cardTypes/" + templateID + "/cardInstances";Basically the client is requesting that Mobile Services connect to the named Destination on its behalf. In this scenario the destination name is SAPCPMobileServices. All the stuff that is added on the end is actually the Mobile Services REST API to send the card. But if you've created the app with the wizard, that destination won't be available - we have to add it. To do so, open the Mobile Services application definition for your newly created Android app and add the SAPCPMobileServices destination to the Connectivity feature:
Nov 16 2018 Update: This step must be completed AFTER the SDK wizard has been used to create the mobile app. If you try to add the SAPCPMobileServices destination before you run the wizard, the project generation will not complete successfully.
And with that, this blog is all wrapped up! Run your app and navigate to a particular product page. Click on the icon in the menu that allows you to save a card. You should see a Toast message that says "Card Successfully Added" and more importantly, you should receive the card in SAP Mobile Cards. Edit the Product record in your native app then swipe to refresh SAP Mobile Cards and that content will quickly get reflected there as well. Or you can do nothing with SAP Mobile Cards and wait to see that the content gets updated automatically. If you try to add the card again, you'll receive a 409 status code which means the card's already been added to the mobile. If things didn't go exactly as planned, "Error Will Robinson" will appear and it's time to do a little bit more debugging.
I hope you find this sample useful, happy coding!
- SAP Managed Tags:
- SAP Mobile Services,
- SAP BTP SDK for Android
Labels:
You must be a registered user to add a comment. If you've already registered, sign in. Otherwise, register and sign in.
Labels in this area
-
ABAP CDS Views - CDC (Change Data Capture)
2 -
AI
1 -
Analyze Workload Data
1 -
BTP
1 -
Business and IT Integration
2 -
Business application stu
1 -
Business Technology Platform
1 -
Business Trends
1,661 -
Business Trends
88 -
CAP
1 -
cf
1 -
Cloud Foundry
1 -
Confluent
1 -
Customer COE Basics and Fundamentals
1 -
Customer COE Latest and Greatest
3 -
Customer Data Browser app
1 -
Data Analysis Tool
1 -
data migration
1 -
data transfer
1 -
Datasphere
2 -
Event Information
1,400 -
Event Information
65 -
Expert
1 -
Expert Insights
178 -
Expert Insights
280 -
General
1 -
Google cloud
1 -
Google Next'24
1 -
Kafka
1 -
Life at SAP
784 -
Life at SAP
11 -
Migrate your Data App
1 -
MTA
1 -
Network Performance Analysis
1 -
NodeJS
1 -
PDF
1 -
POC
1 -
Product Updates
4,577 -
Product Updates
330 -
Replication Flow
1 -
RisewithSAP
1 -
SAP BTP
1 -
SAP BTP Cloud Foundry
1 -
SAP Cloud ALM
1 -
SAP Cloud Application Programming Model
1 -
SAP Datasphere
2 -
SAP S4HANA Cloud
1 -
SAP S4HANA Migration Cockpit
1 -
Technology Updates
6,886 -
Technology Updates
407 -
Workload Fluctuations
1
Related Content
- Error submitting iOS App to AppStore in Technology Q&A
- Gamifying SAP C4C with BTP, the Flutter or Build Apps way. in Technology Blogs by SAP
- User Experience Advances with SAP S/4HANA 2023 FPS01 (Private Cloud and On-Premise) in Technology Blogs by SAP
- What’s New for SAP Integration Suite – February 2024 in Technology Blogs by SAP
- SAP Enterprise Architecture: Positioning Blockchain Database as an Enterprise Technology Standard 🚀 in Technology Blogs by Members
Top kudoed authors
| User | Count |
|---|---|
| 13 | |
| 10 | |
| 9 | |
| 7 | |
| 6 | |
| 5 | |
| 5 | |
| 5 | |
| 5 | |
| 4 |