The
first blog post of this series, provides a step by step guide to create all assets that are required to develop your first Fiori launchpad site. In this blog post, we continue where we left, and create a Fiori launchpad site, based on the assets you should already have.
We will start by creating a Fiori launchpad site from SAP Web IDE Full Stack, configure the site, deploy it to SAP Cloud Platform and access it.
Read the bottom section of this blog for some answers to FAQ.
Add SAP Fiori Launchpad Site Module to your development project
A. Enable the SAP Fiori Launcpad Site feature, from the settings.
Navigate to the settings of Web IDE Full Stack settings, select Features, locate the SAP Fiori Launchpad Site feature, and turn it to On. Click Save to
save your settings.
Enabling the SAP Fiori launchpad Site feature, will allow you to create Fiori Launchpad (FLP) modules from Web IDE Full Stack.

B. Add SAP Fiori launchpad site module to your development project
Navigate to the development section.
Right click on the project to open the menu, and add a new SAP Fiori Launchpad Site Module to our project. Note: this is available only for projects of type Multi Target Application (MTA)
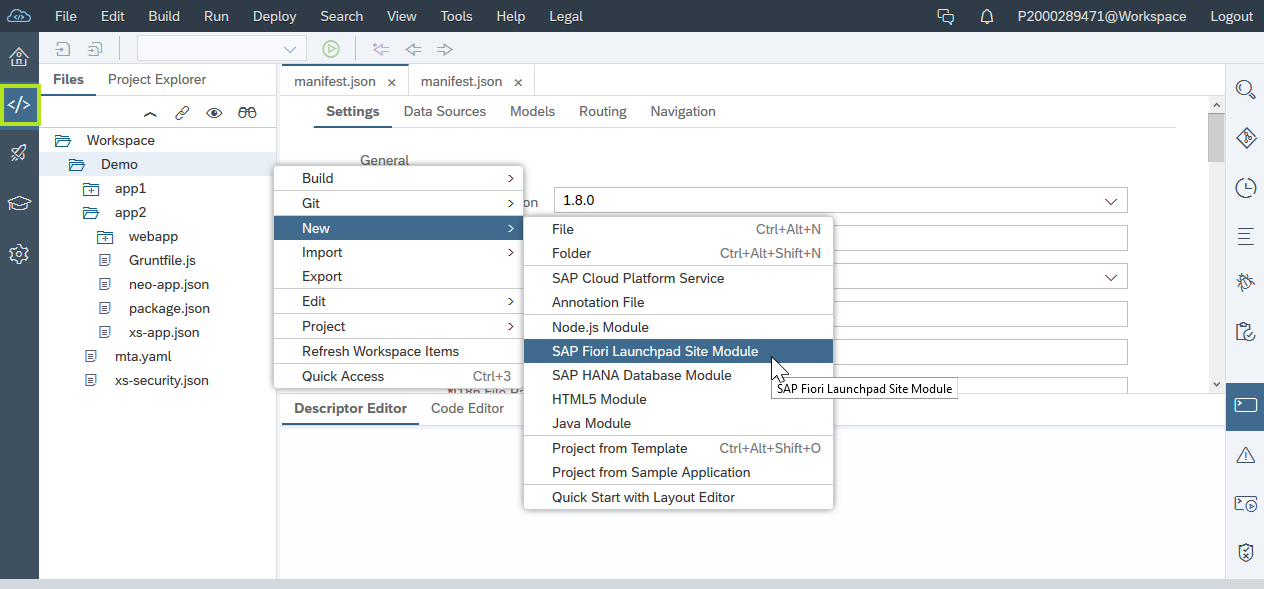
We provide the module a name (in this demo we use flp) and click
Finish.
Configure the content and settings of your Fiori launchpad site
A. Add apps to your FLP site
Open the CommonDataModel.json file under the
flp\portal-site folder

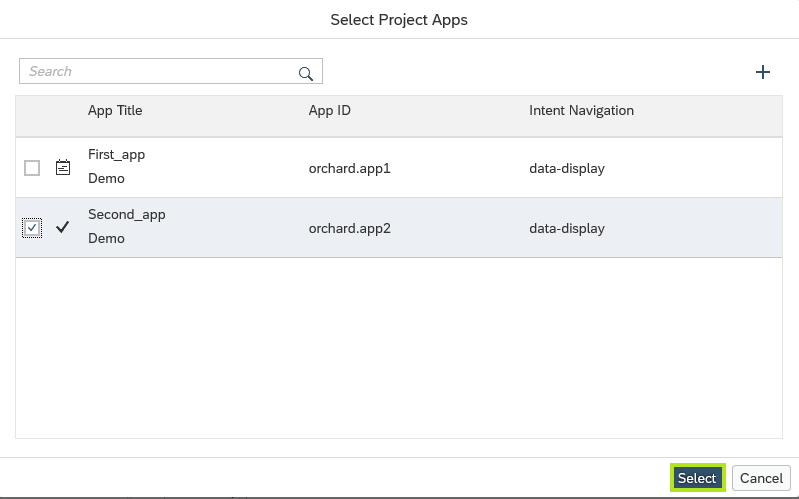
Click on the Add Group to add two groups: Group1 and Group2

Click on the + icon to add apps to a group. Add app1 to Group1 and App2 to Group2. After you click the + icon to add an app, check the relevant app and click
Select
Your CommonDataModel.json launchpad editor should look like this
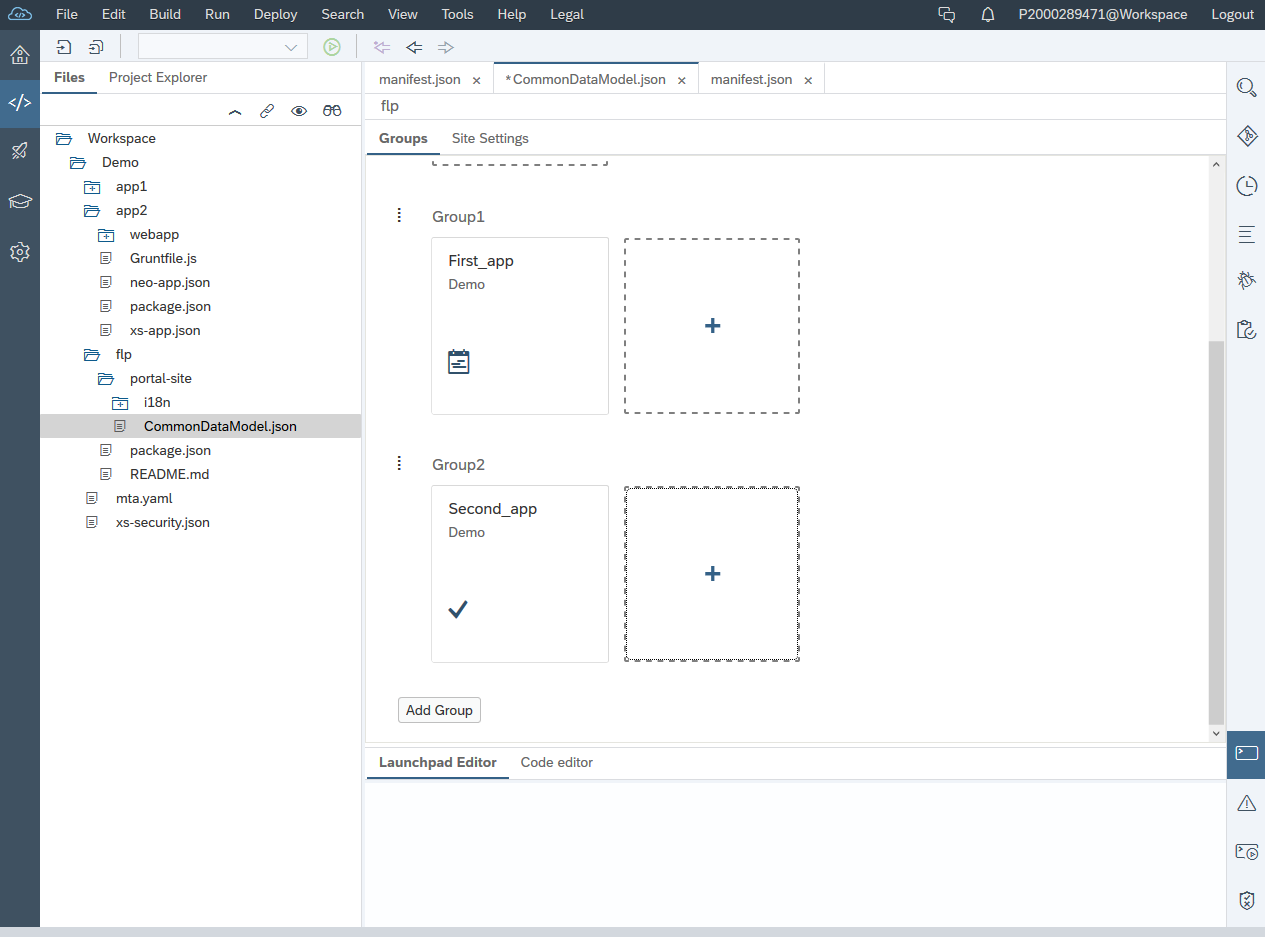
Note that you can also select the Code Editor tab, to edit the json representation of your portal site
Edit your site setting
Click on the Site Settings tab, view and edit the available settings
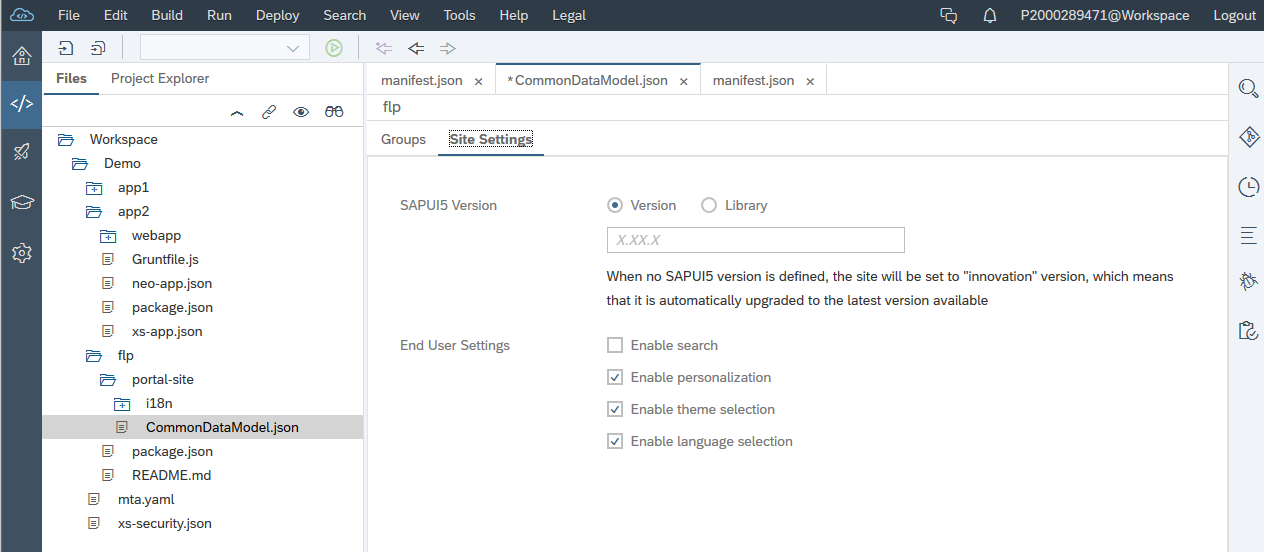
Click the save all icon, to save your changes or click ctrl+s.
Build and Deploy your project
A. Right click on your project and select Build

An mta archive file is generated. The file is located under the
mta_archives folder in your workspace.
Right click on your project mtar file and select to
Deploy to SAP Cloud Platform

If required, select your end point organization and space and click
Deploy. (you will be asked to enter your Cloud Foundry environment credentials)

Look on your console pane, to see a log of the successful deployment. After a successful deployment, a URL address of the deployed project is listed in the console pane.
You can access your SAP Fiori luanchpad site by navigating to this link and adding the extension
/cp.portal to the URL address
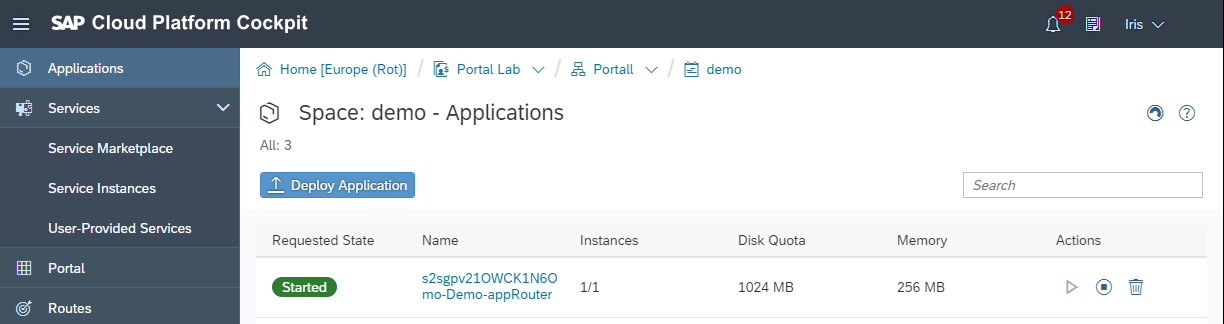
View your site in the SAP Cloud Platform cockpit
Let's navigate to our Cloud Foundry subaccount
We can see that under our space, our application is now available. Note that the name of your app can have a prefix and that it has the appRouter name as postfix.
Click on the app on the Cloud Foundry environment to see it's information. You can see the project URL. Click on it. Add to the URL the extension
/cp.portal to view the SAP Fiori luanchpad site

End users can now access the Fiori launchpad to access their apps. They can also personalize their home page from the me area.
Answers to frequently asked questions
A. What Cloud Providers are supported?
You can view the supported Cloud Providers from the
SAP Cloud Platform Regions and Service Portfolio page
B. What features are supported?
Visit
SAP Cloud Platform Portal - Cloud Foundry page to learn more about the supported features
C. I have a license for SAP Cloud Platform portal, can I use the license also for SAP Cloud Platform Portal on the Cloud Foundry environment?
Yes. The quota you licensed (portal site visits or portal users) can be used across Neo and Cloud Foundry – it is not limited to any specific cloud. However, using SAP Cloud Platform services on the Cloud Foundry environment, may require additional licenses.
