
- SAP Community
- Products and Technology
- Technology
- Technology Blogs by SAP
- Guide to easily create and deploy an OData Service...
Technology Blogs by SAP
Learn how to extend and personalize SAP applications. Follow the SAP technology blog for insights into SAP BTP, ABAP, SAP Analytics Cloud, SAP HANA, and more.
Turn on suggestions
Auto-suggest helps you quickly narrow down your search results by suggesting possible matches as you type.
Showing results for
lana_12
Participant
Options
- Subscribe to RSS Feed
- Mark as New
- Mark as Read
- Bookmark
- Subscribe
- Printer Friendly Page
- Report Inappropriate Content
10-07-2018
5:42 AM
About the Mobile Backend Generator
If you haven’t heard already, there’s a brand-new way to create and deploy an OData service, using the Mobile Backend Generator. The Mobile Backend Generator is a set of tools included with SAP Web IDE that interacts with SAP Cloud Platform Mobile Services. These tools are now available to customers with the latest release of the Mobile Development Kit (MDK) on SAP Web IDE for trial or preview landscapes. You’ll need to create a trial account to use this new feature, if you don’t have one already.
This blog walks you through generating and deploying an OData service to the Neo or Cloud Foundry landscape. Even if you plan to deploy to Neo, you require a Cloud Foundry account as well. Cloud Foundry provides the builder service for the Mobile Backend Generator.
About the MDK
MDK is a feature of SAP Cloud Platform Mobile Services. If you’re new to MDK and want to learn more about developing apps without having to do much coding, you might want to begin by going through this Learning Journey and these helpful videos.
Setting Up Your Environment
Ensure that the SAP Web IDE Full-Stack is enabled.

Select the box and under Take Action, select “Go to Service”.

Select the gear in the left menu (1) and select “Features” (2). Make sure that “Mobile Services App Development Tools V master” is On (3).

Select “Cloud Foundry” (1), verify that you have a builder installed (2) and that it is up to date. When the installation or update is complete, select “Save” (3). I missed this and wondered why I couldn’t continue!

Generating an OData Service
Select the “</>” symbol (1) to enter your workspace. Right-click your workspace folder, select “New” (2) then “Project from Template.”(3)

Change the Category to “All categories” (1) and select “Mobile OData Service Project.” (2) Select “Next.” (3)

Provide a project name (1), then select “Next.” (2).

Provide a service app name (1) and the version (2). Here, for simplicity, I’m using a deployment target of Neo (3), “None” (4) as the authentication mode, and an in-memory database (5). If you wish to have test data generated, check "Use generated test data"(6).Select “Finish” (7) when done. See Generating an OData Service for choices other than in-memory database.

You have the ability to view and edit these generation properties at any time by right clicking your project folder(1), select "Project"(2) then "Project Settings"(3).

Add a model to your project by importing a CSDL (Common Schema Definition Language) file that you’ve previously created. Right-click your project folder (1), select “Import” (2), then “File or Project.” (3)

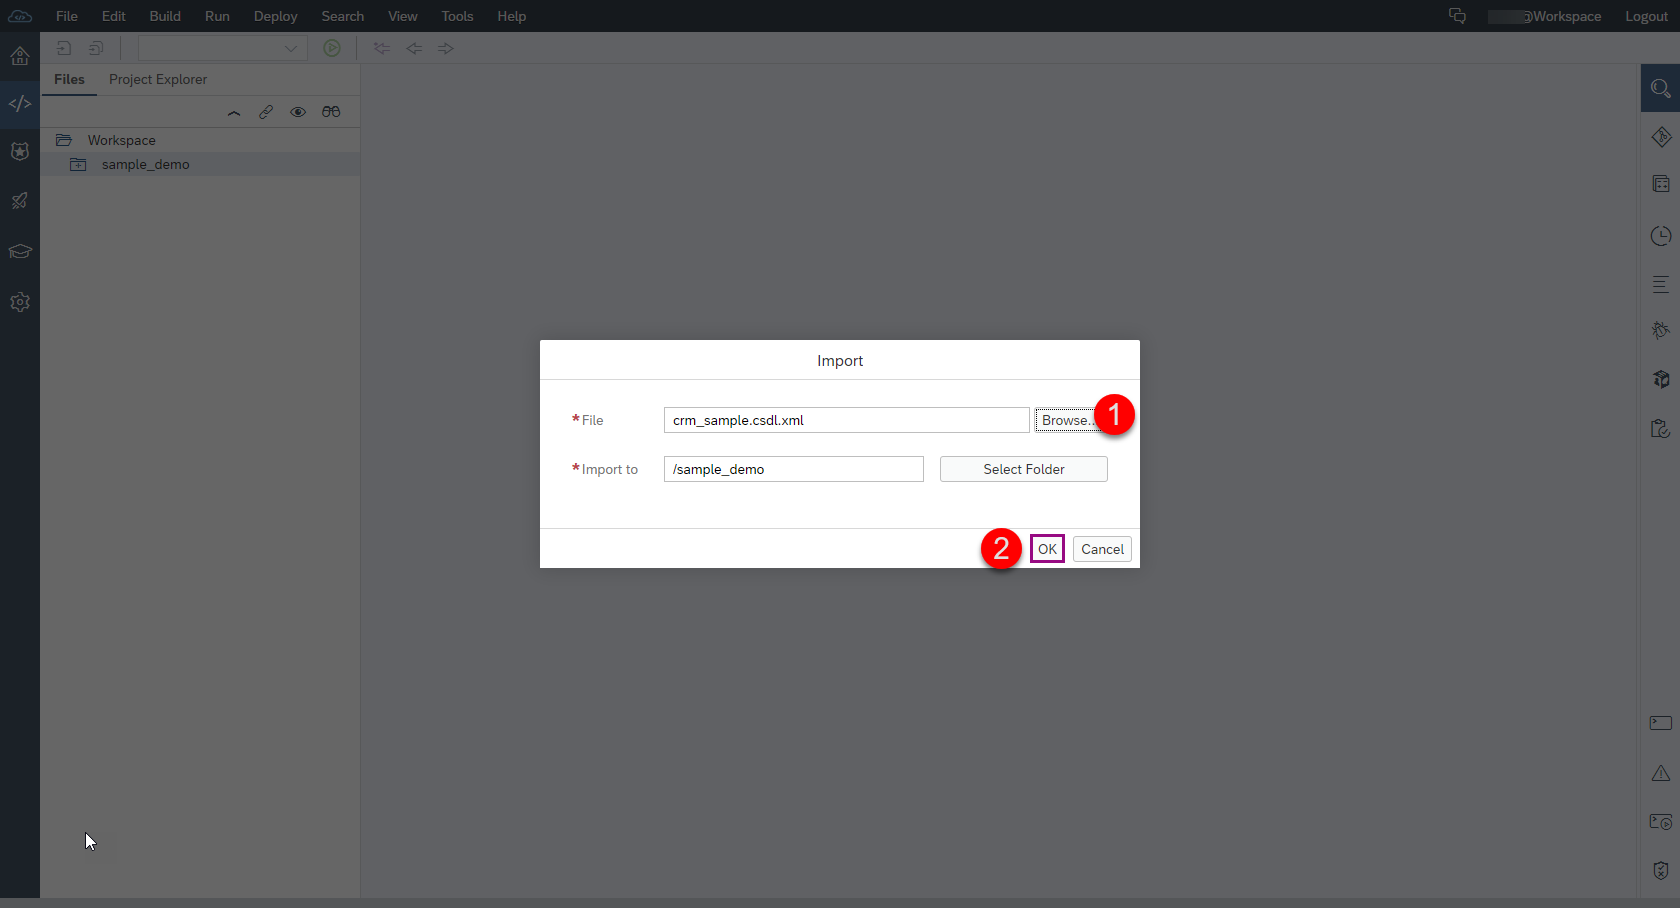
When you see the import screen, browse to the location of your csdl.xml file (1), then select “OK”. (2)
Next, you’ll see a visual representation of your CSDL file. You can use our CSDL graphical modeling tool to create or modify an existing csdl.xml file.

You can create your own csdl.xml file if you don’t already have one. Right-click your project folder, (1) and select “New” (2), then select “OData CSDL Document.” (3)

You can use either OData Version 2.0 or Version 4.0 (1). Please see Overview for OData versions to help determine what version is correct for you. Provide a schema namespace (2) and a namespace alias (3), then select “Create” (4). The file name is generated automatically from the schema namespace.

Double-click the csdl.xml file to use the graphic editor to graphically create your model. Remember to save your changes!
Right-click your csdl.xml file (1), select “Generate Mobile OData Service” (2) to generate the OData service.

The srv (service) folder now contains new files and folders. Right-click your srv folder (1),
select “Build”(2)(3) .

The target folder now contains an odata-service-version#.war file.

Deploying the Generated Service to Neo
Right-click your generated war file in the target folder (1) , select “Export.” (2) This saves the file locally.

Since you cannot deploy to Neo from Web IDE, move to the SAP Cloud Platform cockpit of your Neo landscape. Select “Tools” (1) from the top menu and select “SAP Cloud Platform Cockpit”. (2)

Once you’re in the cockpit, go to “Applications” (1) then “Java Applications,” (2) then select “Deploy Application”. (3)

Browse to the war file you exported (1) and enter an application name (2) (this is the name that will display in Neo). Select the runtime “Java EE 7 Web Profile TomEE 7.” (3) When done, select “Deploy.” (4)

When the deployment completes, select “Done”. Don’t start the service yet.

Select the service name.

Since this blog used the in-memory database and None as authentication method options, select "Start". Otherwise, you’ll need to bind your database to your application.

Once the service starts, you see its URL in the Application URLs.

Select this link to access your OData service and make sure it works from a browser.

Deploying the Generated Service to Cloud Foundry
Even though I chose Neo as the deployment landscape, I’ve added the instructions to Cloud Foundry because they are simple!
You can deploy your application to Cloud Foundry from Web IDE. Right-click on your project folder (1) and select “Build” (2), then “Build.” (3)

Right-click on the srv folder (1), select “Run” (2), then “Run as Java Application” (3).

Once the app is deployed, you’ll see a URL just above the console. You can test and debug your service within Web IDE.

Select the link to access your OData service and make sure it works from a browser.

Now you are ready to use your newly generated OData service by building a mobile app with SAP Cloud Platform SDK for iOS, SAP Cloud Platform SDK for Android, MDK or SAP Mobile Cards!
I hope you enjoyed my first blog!
- SAP Managed Tags:
- SAP Mobile Services,
- SAP Web IDE,
- SAP Business Technology Platform
Labels:
18 Comments
You must be a registered user to add a comment. If you've already registered, sign in. Otherwise, register and sign in.
Labels in this area
-
ABAP CDS Views - CDC (Change Data Capture)
2 -
AI
1 -
Analyze Workload Data
1 -
BTP
1 -
Business and IT Integration
2 -
Business application stu
1 -
Business Technology Platform
1 -
Business Trends
1,658 -
Business Trends
93 -
CAP
1 -
cf
1 -
Cloud Foundry
1 -
Confluent
1 -
Customer COE Basics and Fundamentals
1 -
Customer COE Latest and Greatest
3 -
Customer Data Browser app
1 -
Data Analysis Tool
1 -
data migration
1 -
data transfer
1 -
Datasphere
2 -
Event Information
1,400 -
Event Information
66 -
Expert
1 -
Expert Insights
177 -
Expert Insights
299 -
General
1 -
Google cloud
1 -
Google Next'24
1 -
Kafka
1 -
Life at SAP
780 -
Life at SAP
13 -
Migrate your Data App
1 -
MTA
1 -
Network Performance Analysis
1 -
NodeJS
1 -
PDF
1 -
POC
1 -
Product Updates
4,577 -
Product Updates
344 -
Replication Flow
1 -
RisewithSAP
1 -
SAP BTP
1 -
SAP BTP Cloud Foundry
1 -
SAP Cloud ALM
1 -
SAP Cloud Application Programming Model
1 -
SAP Datasphere
2 -
SAP S4HANA Cloud
1 -
SAP S4HANA Migration Cockpit
1 -
Technology Updates
6,873 -
Technology Updates
423 -
Workload Fluctuations
1
Related Content
- Consuming SAP with SAP Build Apps - Mobile Apps for iOS and Android in Technology Blogs by SAP
- FAQ for C4C Certificate Renewal in Technology Blogs by SAP
- GroupBy CDS annotation is not working in Technology Q&A
- Developing & Deploying the UI5 App to Cloud Foundry and Accessing from App-router End-to-End Steps in Technology Blogs by Members
- Mistral gagnant. Mistral AI and SAP Kyma serverless. in Technology Blogs by SAP
Top kudoed authors
| User | Count |
|---|---|
| 40 | |
| 25 | |
| 17 | |
| 14 | |
| 8 | |
| 7 | |
| 7 | |
| 7 | |
| 6 | |
| 6 |