This is my first blog ? and excited.
In this blog, I will share my experience on PRD and its functionalities. Recently, one of my clients came up with LMS reporting requirements; they were looking for few additional columns which were not available in the Standard report. So, we took the opportunity and delivered. So I felt this would be a good opportunity to share it through a blog.
As you know, we can use Plateau Report Designer (PRD) tool to customize standard LMS reports. PRD extends the BIRT Report Designer. The BIRT Report Designer is an open source application built in the Eclipse framework.
Firstly, listing the possibilities and prerequisites for developing custom reports using PRD:
- You can add new fields in SF Learning reports
- Deleting the existing fields in the report
- Copying the fields
- Changing the order of fields
- Add a logo
Prerequisites for developing custom reports:
- Basic Knowledge of LMS standard reports and Plateau Report Designer (PRD).
- Basic understanding of SQL Query.
- Required permissions to import and export reports from your SuccessFactors LMS instance.
- Open a ticket with SuccessFactors support to create/enable a connection between LMS, staging instance with the PRD Tool for more details to go through KBA 2171592.
- Report Developer Role needs to be created in the instance if it is missing.
- Download Latest version of PRD through LMS Instance or KBA 2318900. In this KBA I will be downloading from LMS instance.
- You will also need LMS Data dictionary to find tables names and column names (database column name), you can get it through KBA 2326249.
Initial setup for PRD:
1.Check for Role Assigned:
Navigate to System Admin>Application Admin >Admin Management>Select user >Check for Report Developer Role
 2.Download Plateau Report Designer through LMS instance:
Login into SuccessFactors Learning Management Instance navigates to
Reports>
Learning Report Designer to download as shown below.
Note:
- You will see learning report designer and connection URL details only after raising a ticket to SAP; SAP will enable the connection.
- The download button is only available on Stage or Sandbox instances. There is no download button on Production instances.
 3.Install PRD tool and make a shortcut of workspace file on your desktop for easy navigation
4.Download standard report from SF LMS system which you want to edit and save it in the work space.
5.Extract Zip file.
6.Launch the PRD tool and open RPTDESIGN File in PRD tool by clicking on Open file as shown below.
3.Install PRD tool and make a shortcut of workspace file on your desktop for easy navigation
4.Download standard report from SF LMS system which you want to edit and save it in the work space.
5.Extract Zip file.
6.Launch the PRD tool and open RPTDESIGN File in PRD tool by clicking on Open file as shown below.
 7.Check for database connections:
It is mandatory to check for connectivity before making any changes in Plateau Report Designer.
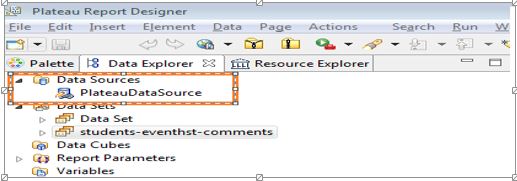
- Login to the PRD tool Under Data Sources double click on Plateau Data Source as shown below.
Database URL: Copy URL of stage system, navigate to Reports>Learning Report Designer>
Report Designer Client and Parameter >Copy DataBase URL
LMS Login Credentials: In username and password give native login credential details of the admin who have report developer role assigned. For more details check below.
Driver Class: de.simplicit.vjdbc.VirtualDriverBirtWrapper (v1.6)
Database URL: jdbc:vjdbc:servlet:
https://CUSTOMERNAME-stage.plateau.com/vjdbc/vjdbc,db10g (look this up in the Operations Customer Support information page)
User Name: Staging Admin ID (in this case, HOSTING) with REPORT_DEVELOPER role
Password: Associated password
JNDI URL: <LEAVE BLANK>
 Note:
Note: Click on “Test Connections” to ensure the connection is working fine.
Once you complete the initial setup for PRD, just understand the basic things required for developing the custom reports.
First, understand what tables are being used in your report. The tables in the SuccessFactors Learning database begin with a two letter code.
- PA_: Application data that is stored in the database.
- PH_: History information that is generated when a record is added, edited, or deleted in the application. Audit reports can be created using the information stored in these tables.
- PS_: All of the System configurations, search selectors, notifications, approval processes, etc.
- PV_: To make it easier to create specific reports, SuccessFactors has created a group of virtual tables knows as Views.
- PX_: When using a connector to import data from an HR system into SuccessFactors, the data is temporarily stored in the PX tables before it is moved to the PA tables.
You need to know when to use
SELECT,
FROM,
WHERE and
AND for Inner joins and left joins clauses within the actual SQL statements but to write a complex report one need to have sound knowledge of SQL.
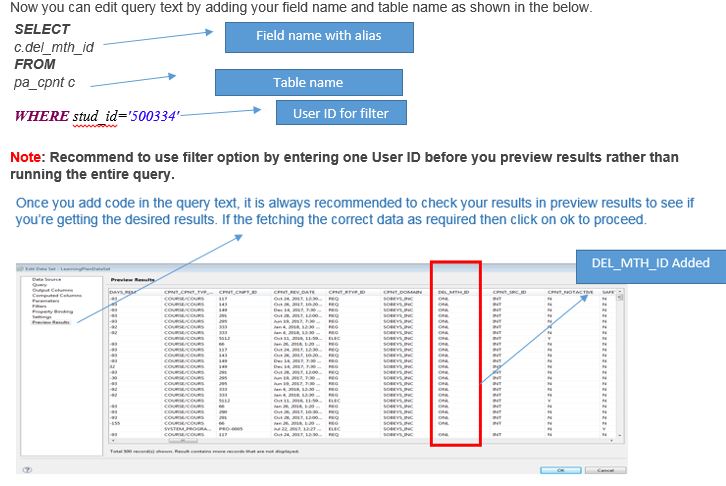
Basic SQL Coding used:
- SELECT Statement: The SELECT statement allows you to get the data from tables or views. A table consists of rows and columns like a spreadsheet.
SELECT followed by a list of comma-separated columns or an asterisk (*) to indicate that you want to return all columns.
- FROM specifies the table or view where you want to query the data.
- WHERE clause allows you to specify exact rows to select based on a particular filtering expression or condition.
- AND The AND operator is often used in the WHERE clause of the SELECT, UPDATE, DELETE statement to form Boolean expressions. The AND operator is also used in join conditions of the INNER JOIN and LEFT JOIN
Example:

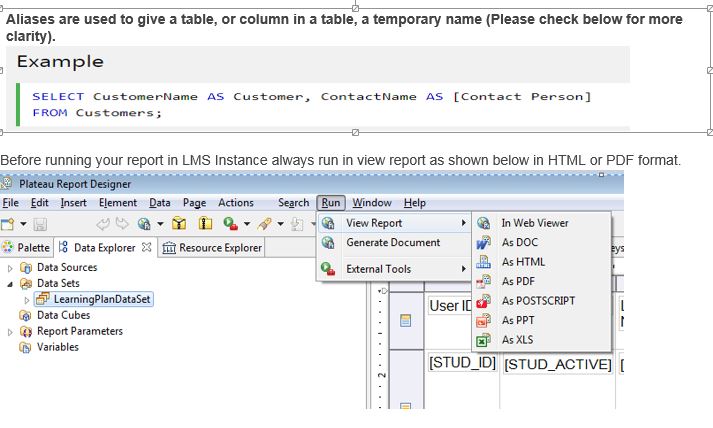
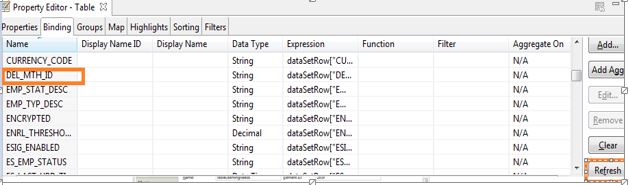
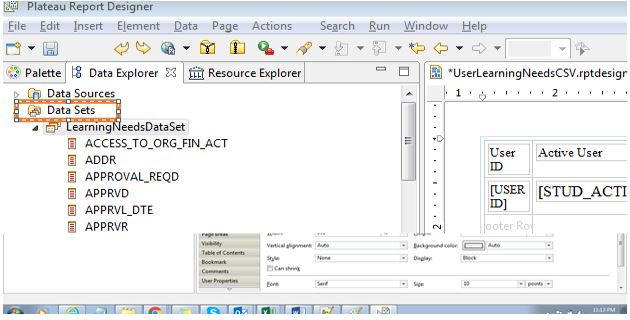
To get your field click on the Table area of the SQL editor window as shown below and then click on the table binding.

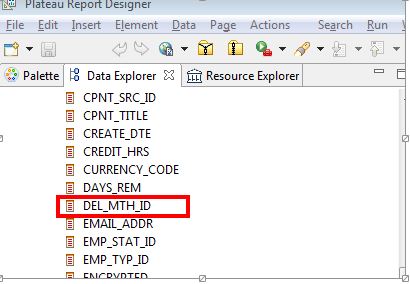
Once you click on the binding check if the
DEL_MTH_ID is added to the table, if not added just click on refresh option to add a field to the table.
Now once the field has been added to the binding, now go to the Datasets on the left-hand side and expand the arrow to check all the field names to add the
DEL_MTH_ID field to the table on the right.
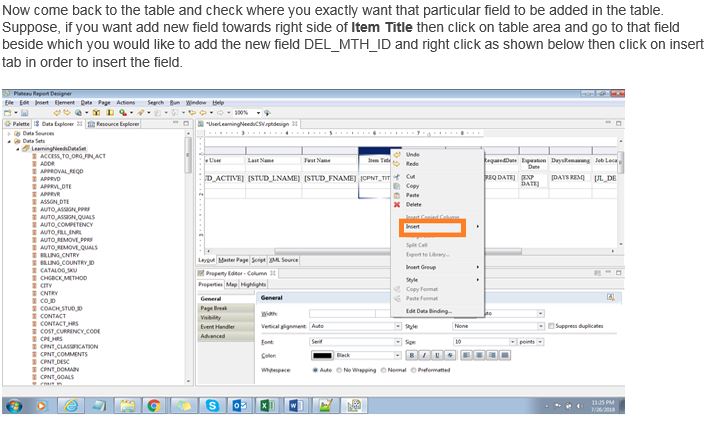
Once you click on
insert, there is an option to select
a column to the right, to get the field on the right-hand side of the selected column.

Secondly, If I want to delete the field from the report in Plateau Reporting.
- Click on table area as shown in the below screenshot.
- Select the desired column which needs to be deleted.
- Right click and select delete option to delete the selected column.


Similarly, we can copy the fields and change the order of the fields.


Select target users as shown below.

 Note:
Note: Navigate to System Admin>Role Management>Select Role assigned>Click on workflows>Add workflow to roles for above report.
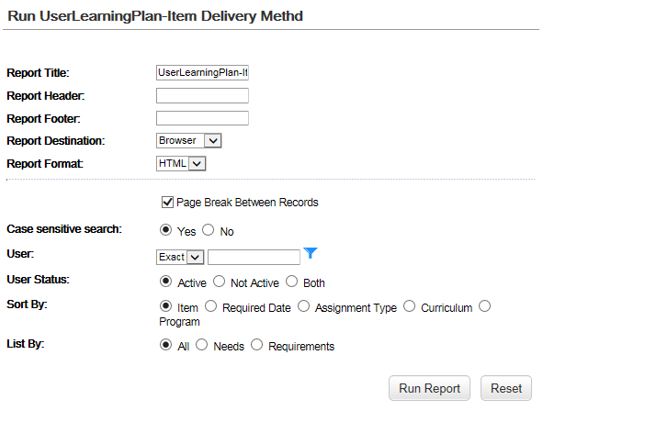
Finally, we can test the report by selecting the custom report and report.


I hope my post was helpful, will try to add more post related to PRD which will help to build custom reports.
