
- SAP Community
- Products and Technology
- Technology
- Technology Blogs by SAP
- SAP Cloud Integration – Principal Propagation with...
Technology Blogs by SAP
Learn how to extend and personalize SAP applications. Follow the SAP technology blog for insights into SAP BTP, ABAP, SAP Analytics Cloud, SAP HANA, and more.
Turn on suggestions
Auto-suggest helps you quickly narrow down your search results by suggesting possible matches as you type.
Showing results for
Associate
Options
- Subscribe to RSS Feed
- Mark as New
- Mark as Read
- Bookmark
- Subscribe
- Printer Friendly Page
- Report Inappropriate Content
07-30-2018
4:55 AM
Introduction
SAP Cloud Integration version 2.43.x comes with enhancement of Principal Propagation to SuccessFactors OData V2 endpoints. This blog explains on how to make use of this enhancement.
Feature per se, is very easy to consume with the SuccessFactors OData V2 adapter/connector but understanding the required setup of Custom Identity Provider (IdP) and establishing trust between SAP Business Technology Platform (BTP) accounts, is little complex and time consuming.
Setting up trust between two accounts, custom Identity providers, authentication etc. are security related topics. If you are new to it, it is worth having a look at https://www.sap.com/india/developer/tutorials/abap-custom-ui-trust-settings.html
The feature shall be explained with a sample use case as depicted in below diagram

myTasksApp needs to collect the tasks created with ToDoEntryV2 API in SuccessFactors, by making use of an integration flow designed and deployed with SAP Cloud Integration. Specifically, the need is, the tasks – of the user who logged-in to myTasksApp – should be fetched by integration flow. That means, the logged-on user’s context (principal) must be propagated from myTasksApp to Integration Flow and then to SuccessFactors. This has been achieved via OAuth2 SAML Bearer assertion in SAP Cloud Integration SuccessFactors connector/adapter.
The myTasksApp runs in a subscriber account SubAccnt1, integration flow project/integration message processing happens in another subscriber account SubAccnt2. The myTasksApp communicates with integration flow via SAP BTP destination configured in SubAccnt1.
In this scenario, the identity providers between SAP BTP and SuccessFactors are not shared. myTasksApp uses the custom IdP (Cust. IdP). For this, the pre- requisite is, the email ID’s of the user in Cust. Idp and SuccessFactors user should be maintained same.
1. Setup
1.1 Create a user in custom IdP.
One of the pre-requisite is to have the custom IdP. Below is a sample screenshot of what is being referred as custom IdP.
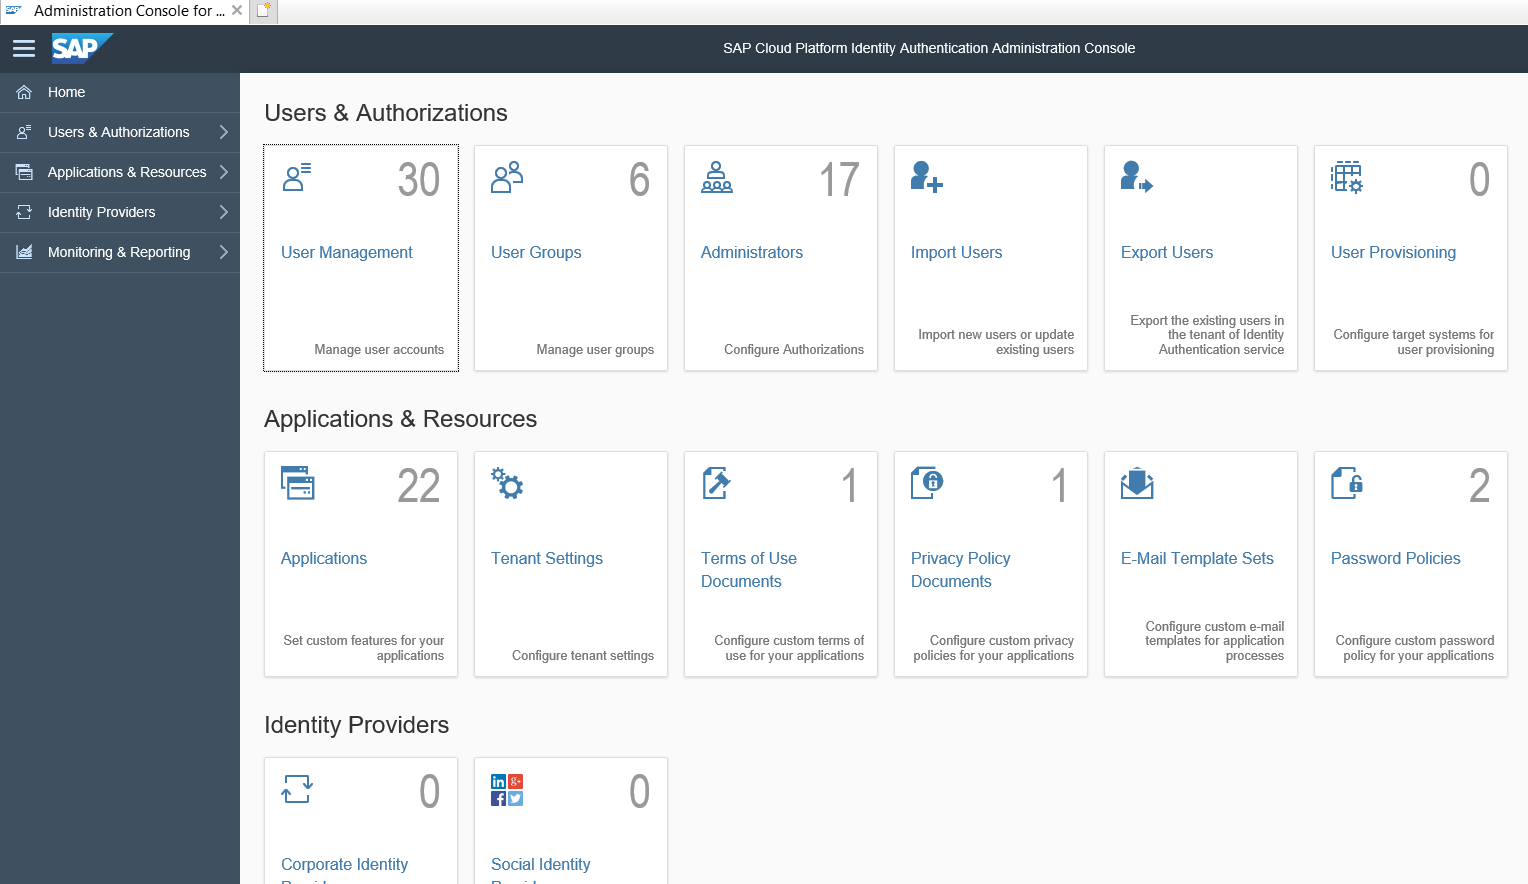
Login as admin, since we need to create a sample user. Let’s create user called with name myTasksAppUserFirstName with email (any valid email id) as mytasksappuser1@gmail.com.
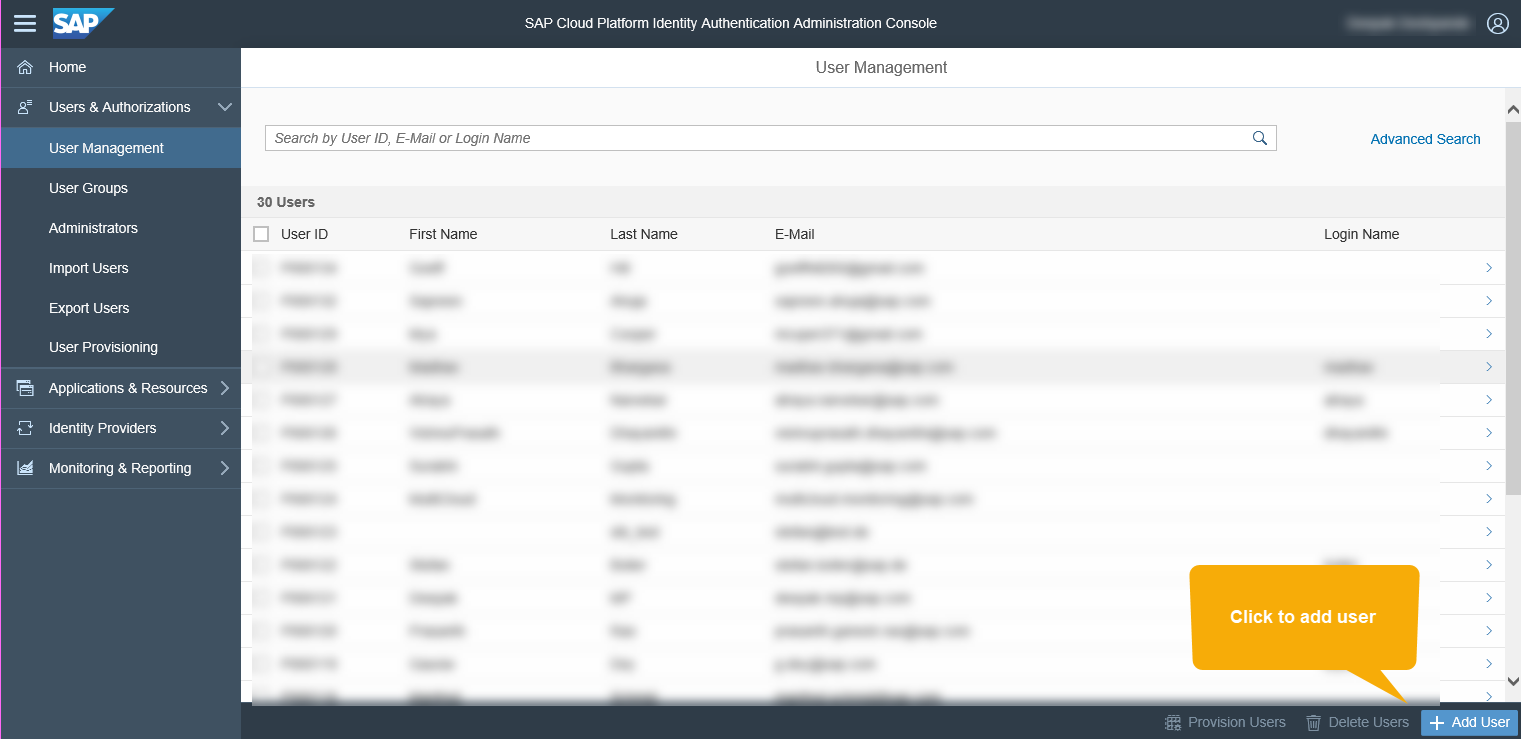

Click on Save and complete the activation of the user with the link sent to the email id provided in E-Mail field.
1.1.1 Mapping email ID
Log into your SuccessFactors instance and for a user (who has some tasks) change the existing email id with the one mentioned above, as showed in the screenshot below.

1.2 Create a Group in custom IdP
Go to the groups section, create a group called myTasksAppGroup. Assign the user (created in section Create a user in custom IdP), to this group. Sample screenshots of the same is given below.


Click on Save button.
Assign the user created with email id mytasksappuser1@gmail.com to the group myTasksAppGroup by following the below steps
Click on the user

Select the “Users Group” tab and assign group

Select the group and click save

This will assign the selected group to the user as shown below

1.3 Linking Custom Idp with myTasksApp/Account
myTasksApp needs to work with user of its custom IdP, hence, when user tries to access the myTasksApp, he shall be authenticated against it. To achieve this, you need to link (used a very simple word the custom IdP with account SubAccnt1 where myTasksApp is running.
- Switch the default to custom: Click on the edit, click on and select Custom as shown in the below screenshot
- Metadata XML exchange:
- Download the metadata file from trust configuration as shown below. Let us name this as SubAccnt1Metadata.xml
- Create an application, named myTasksAppUsers in custom IdP, upload SubAccnt1Metadata.xml as shown in the screenshot below
- In the custom IdP, go to the applications and click on download link as shown in the screenshot below. Let’s name it as custIdp.xml.
- Click on Identity provide tab, click on add and upload the custIdP.xml file
- Add the required assertion attributes for mail and groups. For the sample execution, provide * on both sides.
- Role/Group creation
- myTasksApp might need some role to access it. E.g. if you treat myTasksApp as a servlet, then such roles could be defined in web.xml under <security-constraint> and name of that role is myTasksAccessRole. When you deploy such servlet or web application, that role shall be available under the Roles tab on your SAP BTP subaccount (subaccnt1 in our example).
- Go to the subaccnt1 and under Authorizations tab, create a group


- Click on Save
- Select the group and click on Assign button


- Click on Save button. This will list the roles assigned to the group.
- Follow the same steps as above (from 2 to 9) in another account subaccnt2 where your integration flow shall be running. Create the group with same name as subaccnt1_group, but the integration flow requires a role called ESBMessaging.send (or the custom role if you have created), assign the role ESBMessaging.send to the group subaccnt1_group.
1.4 Trust establishment
In the sample use case, the communication is happening between two applications (within SAP BTP) which are in two different subscriber accounts. In the context of principal propagation, the two different accounts should trust each other. In general terms, the SubAccnt2 shall trust SubAccnt1.
You can establish the trust as explained in below example.
- In the section 1.3, you have changed the trust of account SubAccnt1 to custom. Copy the Local Provider Name, copy the Signing Certificate (equivalent to public certificate) and paste in some temporary place (e.g. any text editor application, i.e. Notepad).
- Go to the SubAccnt2, click to the custom, copy the Signing Certificate in a temporary place, this shall be used in for OAuth2 Client in SuccessFactors system
- Click on Application Identity Provider tab, click on Add Trusted Identity Provider. Sample screenshot below

- Clicking on Add Trusted Identity Provider, opens a dialog window as shown below.

- In the Name section, provide the Local Provider Name and for Signing Certificate, provide the Signing Certificate of Local Service Provider of SubAccnt1 (which you pasted in a temporary place as in the step 1 above).
- Click on the Attributes tab, click on Add Assertion-Based Attributes. Here, you need to add the assertion attributes for mail, but just for the sample scenario, let us put * such as to pass on all the assertion attributes in SAML

- In section 1.3 under step (3) Role/Group creation, you have created group subaccnt1_group having required roles. Now, you need to map this group to the group created in Custom IdP myTasksAppGroup. For this, click on Groups tab and click on Add-Assertion Based Group

- In the drop-down control under Group, select the role subaccnt1_group created in subscriber account subaccnt1 and map it as per the screenshot below

- Click on Save button of the dialog window. Now, you will see an entry in the Application Identity Provider tab which a URL matching the Local Provider Name of Local Service Provider of SubAccnt1.
1.5 Create OAuth Client in SubAccnt2
As mentioned, myTasksApp will be communicating with integration flow via destination configuration. For this, we shall be making use of OAuth2SAMLBearerAssertion authentication in destination configuration. For this, we need to first create OAuth client details in SubAccnt2. In the cockpit, click on OAuth section, and Clients tab and then click on Register New Client button. Sample screenshot below

Choose any name of your choice, for example myTasksAppOAuthClient. I have maintained the same for ID and for Secrete. Authorization Grant shall be Client Credentials. And make sure that you subscribe for the correct application (where your integration flow project will be running). In most of the SAP Cloud Integration scenarios, the subscription will be <your_provider_account_name>/<application_name>hcioem or <your_provider_account_name>/<application_name>iflmap
Save the changes. And make sure that you remember/note the cliend secrete because it shall be used in the destinations configuration which will be created for myTasksApp in SubAccnt1.
1.6 Create OAuth Client in SuccessFactors
Integration Flow, modeled in SubAccnt2, will communicate with SuccessFactors OData V2 endpoint via OAuth2 SAML Bearer assertion authentication. For this, you need to register OAuth client in SuccessFactors.
- Login to your SuccessFactors instance with administrator user. In the search field, search with text Manage Oauth2

- Click on Register Client Application

- Provider the client name and URL.
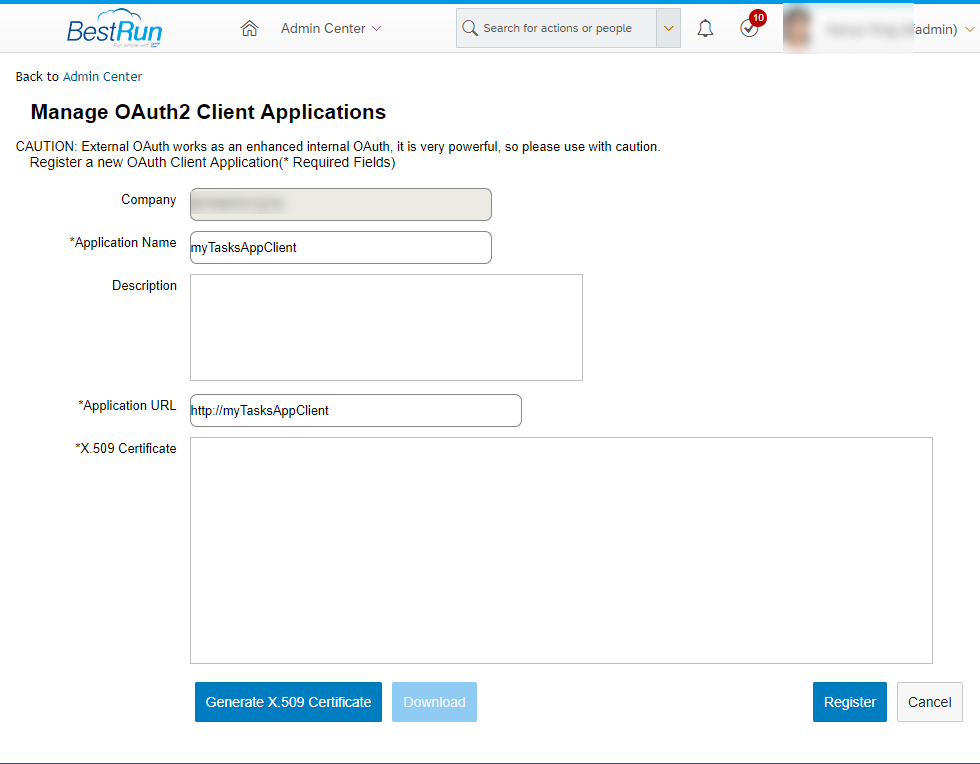
- For *X.509 Certificate, you need to provide the Signing Certificate of SubAccnt2 Trust Management’s Local Service Provider. This was mentioned in section 1.4 step 2. Whatever you have stored for Signing Certificate in a temporary text editor, paste the contents here for *X.509 Certificate text area. Click on Register button.
- After the successful client registration, an entry shall be created for myTasksAppClient as show below

- Click on View button, it will open the details. The API Key (as shown in the below screen) is the OAuth2 client key/client id which will be used for the deployment of credentials in SAP Cloud Platfrom Integration. Again, copy this information and put it in a text editor temporarily.

- Now you have successfully registerd the OAuth2 client in SuccessFactors
This completes the setup part of the sample scenario.
2. Integration Flow Design and Deployment
Now, we will design the integration flow which talks to SuccessFactors OData V2 endpoint with OAuth2 authentication. We will start with deployment of OAuth2 credentials for SAML bearer assertion.
2.1 Credentials Deployment
Below are the steps which explains on how to deploy the required OAuth2 SAML bearer assertion credential
- In the Web UI of your SAP Cloud Integration instance, go to the monitoring and click on Security Material.

- It opens the security materials page where you can add the security artifacts. Click on Add->OAuth2 Credentials.

- Select the OAuth2SAMLBearerAssertion grant type

- Now, you need to add the required parameters for the OAuth2SAMLBearerAssertion credential artifact
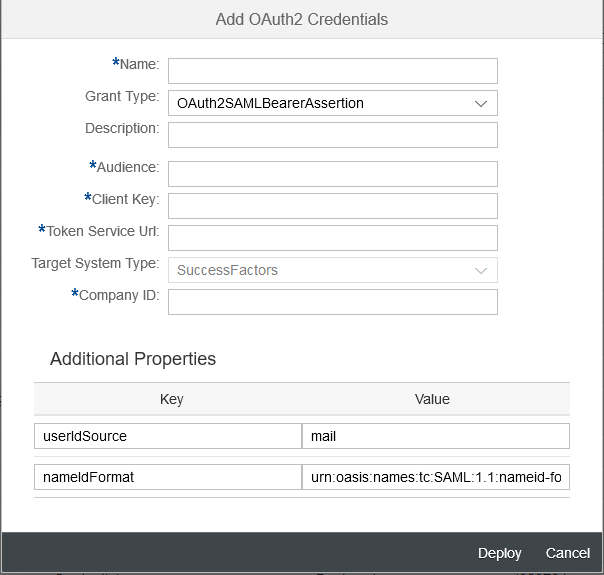
- Parameters details:
- Name: Name of your choice, this shall be used as alias name for whole of this security artifact. This name must be provided under the Credential Name in SuccessFactors OData V2 connector/adapter properties inside the integration flow.
- Description: Any description of your choice
- Audience: Since the communication is with SuccessFactors, you can mention successfactors.com
- Client Key: The OAuth2 client key (API Key of SuccessFactors), which was captured in Section 1.6 step number 6.
- Token Service Url: The token service URL provided by your SuccessFactors instance.
- Target System Type: Currently it is only SuccessFactors.
- Company ID: Company ID of your SuccessFactors instance
- Additional Properties: The deploy dialog window already captures the additional properties required for the complete use case. Let the default values as is.
This completes the credentials deployment
2.2 Integration Flow Design
In the Design space of your SAP Cloud Integration Web UI, create or choose a package of your choice. Create integration flow artifact. (Steps to create integration flow project are omitted).
Consider the sample integration flow created.

In SuccessFactors OData v2 adapter Connection properties, you can observe the the Authentication dropdown value OAuth2SAMLBearerAssertion. Provide the alias name, the name you have provided in the section 2.1 for deployment of OAuth2 Credential, in the Credential Name field.
In SuccessFactors OData v2 adapter Processing properties, the TodoEntryV2 entity/api has been modeled with Query operation. The idea here is, the tasks as part of TodoEntryV2 api shall be fetched which are owned by the logged on user of myTasksApp application.

The tasks details (SuccessFactors OData V2 response) shall be put into the SFTP receiver as shown in the sample integration flow above.
Save and deploy the integration flow. Since it has SOAP sender adapter, it shall result in the SOAP endpoint URL in SAP Cloud Integration. To get the SOAP endpoint URL, go to monitoring of your Web UI and then in, Manage Integration Content ->click on Started tile. Copy the SOAP endpoint URL keep it in temporarily in a text editor. This shall be used in destination configuration created for myTasksApp

3. Destination Configuration for myTasksApp
Now, as the final step, we need to configure the destination which will be used for the communication between myTasksApp and Integration flow. Go to the subscription account subaccnt1 where the myTasksApp is running. Click on Destinations, create a destication. Below is the sample screen of a destination configured

Below are the details on the desitnation configuration
Name: Name of your choice, which will be invoked by myTasksApp
Type: HTTP
URL: The endpoint URL of integration flow you captured after the deployment
Proxy Type: Internet
Authentication: OAuth2SAMLBearerAssertion
Audience: Local Provider Name of subaccount2 (under Trust -> Local Service Provider)
Client Key: OAuth2 Cliend ID created in subaccnt2
Token Service URL: OAuth2 token service URL of subaccnt2
Token Service User: OAuth2 Cliend ID created in subaccnt2
Token Service Password: OAuth2 Cliend Secrete created in subaccnt2
Along with addination properties name authnContextClassRef and value urn:oasis:names:tc:SAML:2.0:ac:classes:X509.
Finally, you can invoke the myTasksApp, the login screen shall be of the custom IdP what has been configured. Once you authenticate using the email myTasksAppUser1@gmail.com, it shall internally invoke the integration flow via destination and further, the integration flow communicates to SuccessFactors OData V2 endpoint with principal propagation to retrive the tasks owner by logged-on user.
You can repeat the execution flow with another user having different set of tasks assinged to/owned by him/her
Summary
With OAuth2 SAML Bearer Assertion support in SuccessFactors OData V2 adapter, you can now, achieve principal propagation from SAP Cloud Integration to SuccessFactors system. And yes, with little complex infrastructure setup 🙂
- SAP Managed Tags:
- SAP Integration Suite,
- Cloud Integration
Labels:
12 Comments
You must be a registered user to add a comment. If you've already registered, sign in. Otherwise, register and sign in.
Labels in this area
-
ABAP CDS Views - CDC (Change Data Capture)
2 -
AI
1 -
Analyze Workload Data
1 -
BTP
1 -
Business and IT Integration
2 -
Business application stu
1 -
Business Technology Platform
1 -
Business Trends
1,661 -
Business Trends
88 -
CAP
1 -
cf
1 -
Cloud Foundry
1 -
Confluent
1 -
Customer COE Basics and Fundamentals
1 -
Customer COE Latest and Greatest
3 -
Customer Data Browser app
1 -
Data Analysis Tool
1 -
data migration
1 -
data transfer
1 -
Datasphere
2 -
Event Information
1,400 -
Event Information
65 -
Expert
1 -
Expert Insights
178 -
Expert Insights
283 -
General
1 -
Google cloud
1 -
Google Next'24
1 -
Kafka
1 -
Life at SAP
784 -
Life at SAP
11 -
Migrate your Data App
1 -
MTA
1 -
Network Performance Analysis
1 -
NodeJS
1 -
PDF
1 -
POC
1 -
Product Updates
4,577 -
Product Updates
330 -
Replication Flow
1 -
RisewithSAP
1 -
SAP BTP
1 -
SAP BTP Cloud Foundry
1 -
SAP Cloud ALM
1 -
SAP Cloud Application Programming Model
1 -
SAP Datasphere
2 -
SAP S4HANA Cloud
1 -
SAP S4HANA Migration Cockpit
1 -
Technology Updates
6,886 -
Technology Updates
409 -
Workload Fluctuations
1
Related Content
- SAP Cloud Integration: Understanding the XML Digital Signature Standard in Technology Blogs by SAP
- CAP LLM Plugin – Empowering Developers for rapid Gen AI-CAP App Development in Technology Blogs by SAP
- Single Sign On to SAP Cloud Integration (CPI runtime) from an external Identity Provider in Technology Blogs by SAP
- SAP BTP and Third-Party Cookies Deprecation in Technology Blogs by SAP
- 10+ ways to reshape your SAP landscape with SAP BTP - Blog 3 Interview in Technology Blogs by SAP
Top kudoed authors
| User | Count |
|---|---|
| 13 | |
| 12 | |
| 10 | |
| 10 | |
| 9 | |
| 7 | |
| 6 | |
| 5 | |
| 5 | |
| 5 |