This blog explains the enhancement for adding a custom tab in RELMPL transaction using BDT and to store the custom fields data in VILMPL table.
BDT:
The Business Data Toolset (BDT) is a central control tool for maintaining SAP programs. It supports maintenance via the use of dialog techniques, direct input and/or function modules. The BDT is basically the tool, SAP use when they want to add new fields, change field names, change/add field groups etc for specific customers, but they are now started to allow customers access to these maintenance transactions.
Step 1: Go to table
VILMPL and add custom fields to include
CI_VILMPL.
 Step 2:
 Go to T-code SE80 and create function group
ZZ_RELM.

Create Subscreen
0100 to add custom fields in the custom tab.

Add field
CI_VILMPL-ZZID in the screen
100.

Declarations in the Top Include

Logic in PBO.

Logic in PAI.
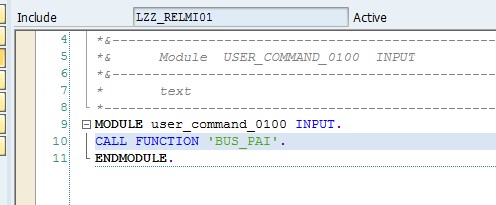
Create 2 function modules Z_RELM_ADDTIONAL_PBO and Z_RELM_ADDTIONAL_PAI.
 Logic:
FUNCTION Z_RELM_ADDTIONAL_PBO.

*"----------------------------------------------------------------------

*"*"Local Interface:

*"----------------------------------------------------------------------


DATA: eo_busobj TYPE REF TO  if_reca_bus_object,

ed_activity TYPE recaactivity.

* To get instance

CALL FUNCTION 'REL1_GET_BUSOBJ'

IMPORTING

eo_busobj   = eo_busobj

ed_activity = ed_activity.


gv_change = ed_activity.

EO_BUSOBJ->get_ci_data(

IMPORTING

es_ci_data = ci_vilmpl    " Data of CI Include

).


ENDFUNCTION.
 Logic:
FUNCTION z_relm_addtional_pai.

*"----------------------------------------------------------------------

*"*"Local Interface:

*"----------------------------------------------------------------------


DATA: eo_busobj   TYPE REF TO  if_reca_bus_object,

ed_activity TYPE recaactivity.

* To get instance

CALL FUNCTION 'REL1_GET_BUSOBJ'

IMPORTING

eo_busobj   = eo_busobj

ed_activity = ed_activity.

*  To set custom fields data

eo_busobj->set_ci_data( is_ci_data = ci_vilmpl ).

* Used to check create/change/display mode

gv_change = ed_activity.


ENDFUNCTION.
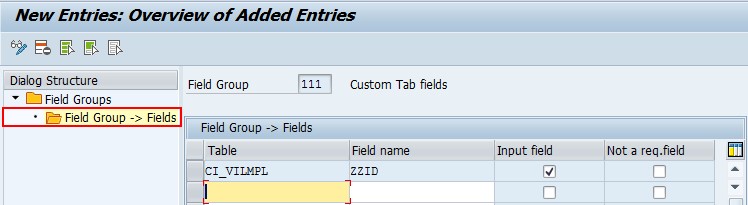
Step 3: Go to T-code
RELML10002 and create Field Group
111 as below.


Click on the
Field Group -> Fields and assign the custom fields to the field group.
 Step 4:
 Go to T-code
RELML10003 and create custom view
ZRELAT as below.

Assign Sub screen of program
SAPLZZ_RELM and PBO/PAI function modules to the custom view
ZRELAT.

Assign field group
111 to the view.
 Step 5:
 Go to T-code
RELML10004 and create new section
ZREL1A.


Assign custom view
ZRELAT to the section.
 Step 6:
 Go to T-code
RELML10005 and create custom screen
ZRELSC as below.


Assign section
ZREL1A to the custom screen
ZRELSC.
Add Empty Section
REL19X in the first position otherwise, it won't display.
 Step 7:
 Go to T-code
RELML10006
Select Screen Sequence
REL1 and click
screen sequence -> screens.
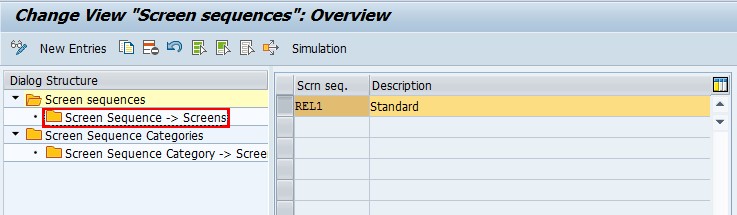
Assign screen
ZRELSC in screen sequence as below.


The custom tab will display after Overviews tab.

Now go to T-code
RELMPL and we can see the custom tab.

Thank you,
Venkat
