
- SAP Community
- Groups
- Interest Groups
- Application Development
- Blog Posts
- The Big Bang of Web Development: jQuery - what is ...
Application Development Blog Posts
Learn and share on deeper, cross technology development topics such as integration and connectivity, automation, cloud extensibility, developing at scale, and security.
Turn on suggestions
Auto-suggest helps you quickly narrow down your search results by suggesting possible matches as you type.
Showing results for
former_member20
Participant
Options
- Subscribe to RSS Feed
- Mark as New
- Mark as Read
- Bookmark
- Subscribe
- Printer Friendly Page
- Report Inappropriate Content
06-05-2018
11:13 PM
Need to catch up? Here's your recap below.
1: Starting at index.html
2: Adding some style with CSS
3: Get moving with JavaScript
4: What is Bootstrap?
5: Accessibility
This week let's have a chat about jQuery.

jQuery is, at its core, a DOM manipulation and navigation library. Remember DOM is our Document Object Model - basically the actually rendered web page. jQuery simplifies many JavaScript functions from multi-line, complex code snippets to single functions.It provides us an API of JavaScript functionality, which means any browser can interpret it without us needing to compile the code. We don't need to do anything fancy to get up and running with jQuery. We treat it like any other JavaScript script or file.
The jQuery library is served either via a local file in your website file system or via a CDN - or Content Distribution Network. Using a CDN means you don't need to host the library yourself, but you need to monitor the support of the version. If you don't, the version you are using might become deprecated or unsupported and you'll have some fun times ahead! If you download the repo, you have to do the management and upgrades yourself, but your link will never "disappear". Check out all the ways to access jQuery on their Downloads page.
While you are on the download page, why don't you grab the uncompressed, Development version of jQuery. Save it to your web page's directory. It can be on the same level as the index file, or in a resources file.
jQuery is one of the building blocks of many front-end frameworks, including SAPUI5. (Basically, all of this is relevant if you are building a UI5 app 🙂 )
Now that i've babbled about all that non-sense, let's actually see it in action.
Open up your index.htm file for your web page that we've been working on. (I know its been a while, so I'll give you a minute to find it.) Make sure you have jQuery download, or if you feel comfortable doing so, you can use a CDN.
We can load in the library by calling a script tag in the header just like we did with the js files we did a couple weeks ago. If you downloaded the jQuery Development library and saved the file in the top level folder of you web app, your script tag should look a little something like this.
If you are accessing it via CDN, the src will be a URL. Make sure to save the changes.
Now, we can use the jQuery library!
Let' see how much jQuery simplifies things for us. Open up your script.js file.
Rename your onPictureButtonClicked function to onOldPictureButtonClicked or something like that. We want to be able to reuse the function name, but let's keep the old code for reference.
Now create a new onPictureButtonClicked function.
To access the jQuery library, we can use the $ token. This is a shortcut for calling jQuery functions. Inside the function, make a call to toggle the image. Here's how you do that:
Save your changes and open the index.html file in the browser. Clicking the button still does the same thing, but with 1 line of code!
How did that work?
With jQuery, we can shortcut the getElementById call using the selectors.
We can use selectors to get tags, class, or ids. In our example, we prepended myImage, which is our ID for our image, with the #. # is used to denote ID. We want to select anything with ID myImage. If you want to select based on css class (so from the class="" attribute), use a . (period). To select a tag, don't add anything.
See how simplified accessing the DOM is now?
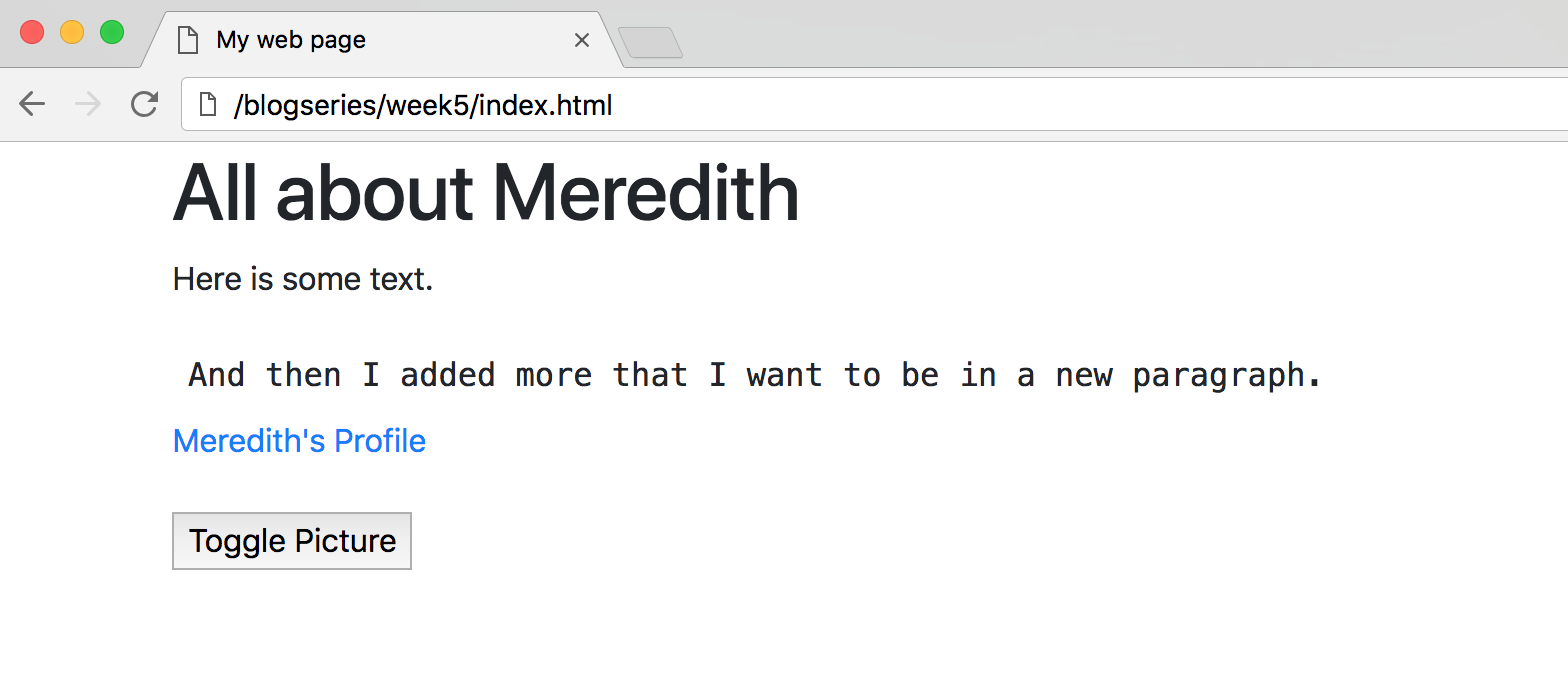
We always want our text attributes to reflect what the item is doing, so go into your index.html file in an editor. Update the text of the button from Load Picture to Toggle Picture. Save your changes.
jQuery also makes DOM traversal easier. Let's take a look at how to target related tags. And by related, I do mean relatives 🙂
Let's add a new button to our index.html file. Under the H1 tag, create a new button. This button will have the text value of Border Div's Children. What it will do is a wrap a border around all elements that are inside a div tag! The button will need a onclick callback function. And it is always a good idea to add a unique ID. Don't remember how to add a button? You can use the code below.
Save your changes!
Now we need to actually implement the callback function so let's head over to the script.js file.
Create a new empty function for the new button's callback. If you need some help with that, copy the code below.
Now we need to actually border all the div's children. How do you we do that when all the children are different types, classes, and ids?
That's what makes jQuery so helpful! It has prebuilt methods to help us traverse the DOM tree. jQuery has a children method which will retrieve all tags that are between the opening and closing tag for that element. How do we get the children? By calling the .children() function from the selector, we can target all children of the select item. That looks like this:
Now we have all the children tags of the div tag. How do we add a border to these tags? jQuery also has methods to add properties to tags, like a CSS class. Since we have bootstrap available to our app, we can use the Bootstrap border class to add a border. To add a class, chain the .addClass method to the children() method.
This will wrap all children of a div tag with a border since the border CSS class will be added to each element.
Save your changes and open index.html in the browser. You will see a new button!

Click the Border Div's Children button. All elements inside a div will now have a border!

jQuery has many more methods to access siblings, next closest tags, remove class, animate elements, and more. I would recommend Codecademy's jQuery course if you want to have a hand's on guide, or you can always explore the jQuery Documentation to learn so much more. Also - if you've seen some of my other blogs as part of the #APIFriday series, you have seen the $ before. That's because jQuery also gives us AJAX which makes calling APIs and external resources much simpler.
jQuery is a great resource to have in your web development tool belt! Continue to explore all the great functionality it provides you and get ready to learn more!
1: Starting at index.html
2: Adding some style with CSS
3: Get moving with JavaScript
4: What is Bootstrap?
5: Accessibility
This week let's have a chat about jQuery.
jQuery is, at its core, a DOM manipulation and navigation library. Remember DOM is our Document Object Model - basically the actually rendered web page. jQuery simplifies many JavaScript functions from multi-line, complex code snippets to single functions.It provides us an API of JavaScript functionality, which means any browser can interpret it without us needing to compile the code. We don't need to do anything fancy to get up and running with jQuery. We treat it like any other JavaScript script or file.
The jQuery library is served either via a local file in your website file system or via a CDN - or Content Distribution Network. Using a CDN means you don't need to host the library yourself, but you need to monitor the support of the version. If you don't, the version you are using might become deprecated or unsupported and you'll have some fun times ahead! If you download the repo, you have to do the management and upgrades yourself, but your link will never "disappear". Check out all the ways to access jQuery on their Downloads page.
While you are on the download page, why don't you grab the uncompressed, Development version of jQuery. Save it to your web page's directory. It can be on the same level as the index file, or in a resources file.
jQuery is one of the building blocks of many front-end frameworks, including SAPUI5. (Basically, all of this is relevant if you are building a UI5 app 🙂 )
Now that i've babbled about all that non-sense, let's actually see it in action.
Open up your index.htm file for your web page that we've been working on. (I know its been a while, so I'll give you a minute to find it.) Make sure you have jQuery download, or if you feel comfortable doing so, you can use a CDN.
We can load in the library by calling a script tag in the header just like we did with the js files we did a couple weeks ago. If you downloaded the jQuery Development library and saved the file in the top level folder of you web app, your script tag should look a little something like this.
<script src="jquery-3.3.1.js"></script>If you are accessing it via CDN, the src will be a URL. Make sure to save the changes.
Now, we can use the jQuery library!
Let' see how much jQuery simplifies things for us. Open up your script.js file.
Rename your onPictureButtonClicked function to onOldPictureButtonClicked or something like that. We want to be able to reuse the function name, but let's keep the old code for reference.
Now create a new onPictureButtonClicked function.
function onPictureButtonClicked() {


}
To access the jQuery library, we can use the $ token. This is a shortcut for calling jQuery functions. Inside the function, make a call to toggle the image. Here's how you do that:
$("#myImage").toggle()Save your changes and open the index.html file in the browser. Clicking the button still does the same thing, but with 1 line of code!
How did that work?
With jQuery, we can shortcut the getElementById call using the selectors.
$(selector)We can use selectors to get tags, class, or ids. In our example, we prepended myImage, which is our ID for our image, with the #. # is used to denote ID. We want to select anything with ID myImage. If you want to select based on css class (so from the class="" attribute), use a . (period). To select a tag, don't add anything.
$("#id")

$(".css-class")

$("tag")
See how simplified accessing the DOM is now?
We always want our text attributes to reflect what the item is doing, so go into your index.html file in an editor. Update the text of the button from Load Picture to Toggle Picture. Save your changes.
jQuery also makes DOM traversal easier. Let's take a look at how to target related tags. And by related, I do mean relatives 🙂
Let's add a new button to our index.html file. Under the H1 tag, create a new button. This button will have the text value of Border Div's Children. What it will do is a wrap a border around all elements that are inside a div tag! The button will need a onclick callback function. And it is always a good idea to add a unique ID. Don't remember how to add a button? You can use the code below.
<button id="divButton" onclick="onUpdateDivs()">Border Div's Children</button>Save your changes!
Now we need to actually implement the callback function so let's head over to the script.js file.
Create a new empty function for the new button's callback. If you need some help with that, copy the code below.
function onUpdateDivs(){


}
Now we need to actually border all the div's children. How do you we do that when all the children are different types, classes, and ids?
That's what makes jQuery so helpful! It has prebuilt methods to help us traverse the DOM tree. jQuery has a children method which will retrieve all tags that are between the opening and closing tag for that element. How do we get the children? By calling the .children() function from the selector, we can target all children of the select item. That looks like this:
$("div").children()Now we have all the children tags of the div tag. How do we add a border to these tags? jQuery also has methods to add properties to tags, like a CSS class. Since we have bootstrap available to our app, we can use the Bootstrap border class to add a border. To add a class, chain the .addClass method to the children() method.
$("div").children().addClass("border")This will wrap all children of a div tag with a border since the border CSS class will be added to each element.
Save your changes and open index.html in the browser. You will see a new button!
Click the Border Div's Children button. All elements inside a div will now have a border!
jQuery has many more methods to access siblings, next closest tags, remove class, animate elements, and more. I would recommend Codecademy's jQuery course if you want to have a hand's on guide, or you can always explore the jQuery Documentation to learn so much more. Also - if you've seen some of my other blogs as part of the #APIFriday series, you have seen the $ before. That's because jQuery also gives us AJAX which makes calling APIs and external resources much simpler.
jQuery is a great resource to have in your web development tool belt! Continue to explore all the great functionality it provides you and get ready to learn more!
- SAP Managed Tags:
- HTML5,
- JavaScript
3 Comments
You must be a registered user to add a comment. If you've already registered, sign in. Otherwise, register and sign in.
Labels in this area
-
A Dynamic Memory Allocation Tool
1 -
ABAP
8 -
abap cds
1 -
ABAP CDS Views
14 -
ABAP class
1 -
ABAP Cloud
1 -
ABAP Development
4 -
ABAP in Eclipse
1 -
ABAP Keyword Documentation
2 -
ABAP OOABAP
2 -
ABAP Programming
1 -
abap technical
1 -
ABAP test cockpit
7 -
ABAP test cokpit
1 -
ADT
1 -
Advanced Event Mesh
1 -
AEM
1 -
AI
1 -
API and Integration
1 -
APIs
8 -
APIs ABAP
1 -
App Dev and Integration
1 -
Application Development
2 -
application job
1 -
archivelinks
1 -
Automation
4 -
BTP
1 -
CAP
1 -
CAPM
1 -
Career Development
3 -
CL_GUI_FRONTEND_SERVICES
1 -
CL_SALV_TABLE
1 -
Cloud Extensibility
8 -
Cloud Native
7 -
Cloud Platform Integration
1 -
CloudEvents
2 -
CMIS
1 -
Connection
1 -
container
1 -
Debugging
2 -
Developer extensibility
1 -
Developing at Scale
4 -
DMS
1 -
dynamic logpoints
1 -
Eclipse ADT ABAP Development Tools
1 -
EDA
1 -
Event Mesh
1 -
Expert
1 -
Field Symbols in ABAP
1 -
Fiori
1 -
Fiori App Extension
1 -
Forms & Templates
1 -
IBM watsonx
1 -
Integration & Connectivity
10 -
JavaScripts used by Adobe Forms
1 -
joule
1 -
NodeJS
1 -
ODATA
3 -
OOABAP
3 -
Outbound queue
1 -
Product Updates
1 -
Programming Models
13 -
Restful webservices Using POST MAN
1 -
RFC
1 -
RFFOEDI1
1 -
SAP BAS
1 -
SAP BTP
1 -
SAP Build
1 -
SAP Build apps
1 -
SAP Build CodeJam
1 -
SAP CodeTalk
1 -
SAP Odata
1 -
SAP UI5
1 -
SAP UI5 Custom Library
1 -
SAPEnhancements
1 -
SapMachine
1 -
security
3 -
text editor
1 -
Tools
16 -
User Experience
5
Top kudoed authors
| User | Count |
|---|---|
| 6 | |
| 5 | |
| 3 | |
| 3 | |
| 2 | |
| 2 | |
| 2 | |
| 2 | |
| 1 | |
| 1 |