In the last months, I was working on several customer engagements with issues on the usage of the ERP Customer Cockpit as Mashup from Cloud for Customer. The most common issue was that (hyper-)links, for example to open a sales order by clicking on the order number did not work. All these issues were caused by incorrect configuration on Cloud for Customer side or/and on ERP side. So, I spent quite some time to investigate these issues and set up a correct working example in our internal SAP system. Now I would like to take the opportunity to share my experience how to set up the ERP Customer Cockpit Mashup correctly.
The ERP Customer Cockpit was designed to be used within the NetWeaver Business Client (NWBC) Portal role Internal Sales Representative. This brings some prerequisites which must be considered to have the complete functionality working.
I will start with the configuration needed to be done on ERP side, followed by the required steps on Cloud for Customer side. The minimum release on ERP side to use what I am describing is
EHP 5 for SAP ERP 6.00.
- To benefit from the complete functionality the cockpit is offering activating the following business functions is required:
- SD_01 (required)
- LOG_SD_CI_01 (prerequisite for activating LOG_SD_SIMP_02
- LOG_SD_SIMP_02 (recommended to display sales orders when clicking on the order number)
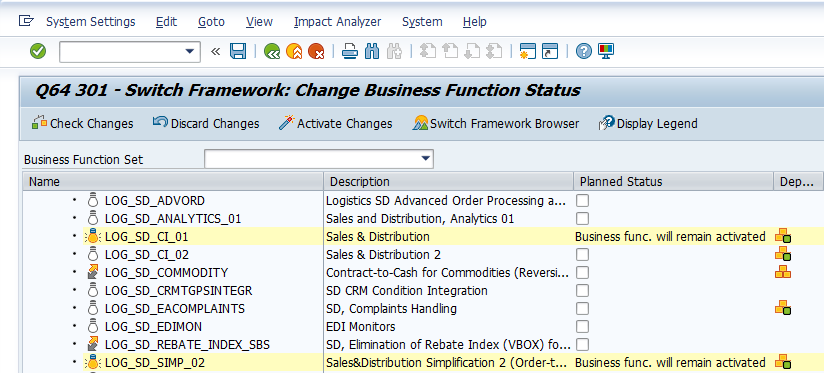
To activate these business functions (in the sequence above), go to transaction SFW5. Inside SFW5, expand the menu ‘ENTERPRISE_BUSINESS_FUNCTIONS. Then in this list, search for the respective business functions. Unfortunately, in this transaction no search is available, so you must scroll down till you find the entry. Mark the checkbox in column ‘Planned Status’, then press the ‘Activate Changes’ button
- The navigation in the cockpit happens through object based navigation (OBN) (for example to navigate to a sales order by a click on the order number). To enable this navigation one of the following PFCG-roles for the Internal Sales Representative needs to be assigned to the user in the ERP backend system
- SAP_SR_INT_SALES_REP_6 or
- SAP_SR_INT_SALES_REP_5
To assign one of these roles, go to transaction SU01 and choose the respective user. Enter in tab 'Roles' the required Internal Sales Representative role and Save.
- As next step, the URL for the mashup needs to be retrieved from ERP side. Since the Cockpit was designed to be used within a NWBC environment, the cockpit URL needs to have NWBC included. You can get this in the following way (see also the screenshot):
- In the ERP system, go to transaction SE80 and enter Web-Dynpro-Comp. / Intf. CUST_COCKPIT_COMP
- Place the cursor on Web Dynpro Applications-> CUST_COCKPIT_COMP
- Do a right mouse click and choose 'Test in Business Client->HTML Client (this opens the Customer Cockpit in a NWBC environment. Only in this environment the object based navigation can work).
- If asked for, enter your system user and password in the browser window which is opened
- Copy the URL from the browser window, for example in a notepad to remember it. This is the URL to use for the Mash-Up in Cloud for Customer.
Remark: Don’t be surprised that in the launched application window, you will only see customer address data and no information about sales documents. This information will be available later in the Mashup, since the application ID (applid) O2C-Customer_Cockpit is provided as standard parameter in the mashup. This application ID provides information like last sales orders, deliveries, invoices by preconfigured personal object worklists (POWL) queries.

Having the ERP side set up, the Mashup can now be configured on Cloud for Customer side.
- In the Administrator work center, go to Mashup Authoring: Administrator->Business Flexibility->Mashup Authoring
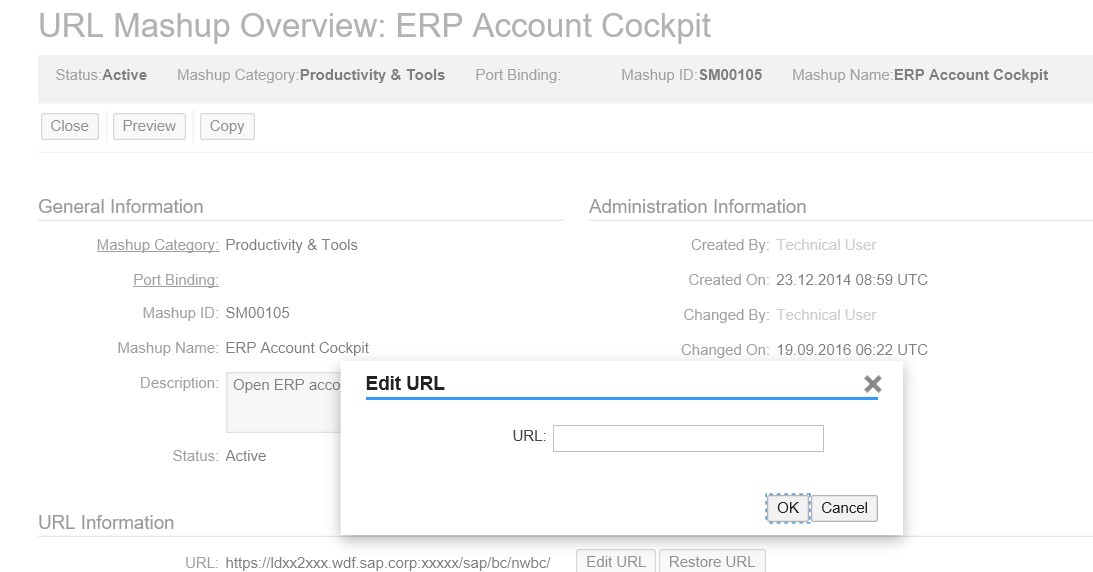
- Search for the ERP Account Cockpit (Mashup ID SM00105) and open it.
- Click on Edit URL and enter the URL you retrieved for the application on ERP side. Then save it.
- Remark: for this standard delivered Mashup, only the URL can be changed. All other parameters like URL Parameters and Port Binding cannot be changed.
- Click on preview to see that the URL launches correctly the Customer Cockpit on ERP side.
- Go back to the Mashup overview screen, mark the just adapted mashup SM00105 and press activate.
- Inside the Sales Data of an Account, the ERP Cockpit should now be available (see screenshot)

- When launching it, the ERP Customer Cockpit for this selected customer in the selected sales area is opened in a new browser window. The customer and sales area data are already preset when launching the application, as data binding to external customer ID and sales area is preconfigured in this Mashup.

That's it. I hope these steps make it easy to implement this standard Mashup. Enjoy using it.
In my next blog, I am describing how you can create a html Code Mashup to call any ERP GUI transaction embedded in SAP GUI for html.
Please check it out:
Cloud for Customer Mashup: Call an ERP transaction in SAP GUI for html
