
- SAP Community
- Products and Technology
- Technology
- Technology Blogs by SAP
- SAP Web IDE Ninja #4: Develop Full-Stack To-Do app...
Technology Blogs by SAP
Learn how to extend and personalize SAP applications. Follow the SAP technology blog for insights into SAP BTP, ABAP, SAP Analytics Cloud, SAP HANA, and more.
Turn on suggestions
Auto-suggest helps you quickly narrow down your search results by suggesting possible matches as you type.
Showing results for
Former Member
Options
- Subscribe to RSS Feed
- Mark as New
- Mark as Read
- Bookmark
- Subscribe
- Printer Friendly Page
- Report Inappropriate Content
11-07-2017
1:46 PM

This blog post is part 3 of a series of blogs on how to develop full-stack To-Do application in SAP Web IDE Full-Stack.
Prerequisites
Before reading this blog please make sure that you have read, understood and implemented part 0, part 1 and part 2 of this series.
Let’s Get Started!
Create your UI Module
The UI module is the front-end of our full-stack application.
This module will consume the OData service that we created in part 2 and will present the list of Tasks with their details.
To create the UI module:
- In SAP Web IDE, select the todo project.
- Right-click it and select New -> HTML5 Module

- Select the SAP Fiori Worklist Application - OData V4 template and click Next

- Enter ui as the module name and click Next
- The next step is to select the OData service.
SAP Web IDE will auto detect that you already have a service in your project (created in part 2) and it will allow you to select it. - Click on the todo(v4) service to select it and click Next

- In the Template Customization step you need to bind the data from the OData service to the UI fields. Make sure that your form looks like the below:

- Notice the app Type is Standalone App, and that we selected the Task collection with 2 fields: id and title.
- Click Finish.
- Now the UI5 module is generated in the project and listed in the mta.yaml.
- Also, a destination was created in the background in order for the UI module to communicate with the OData service.

- Now we are ready to run the UI module!
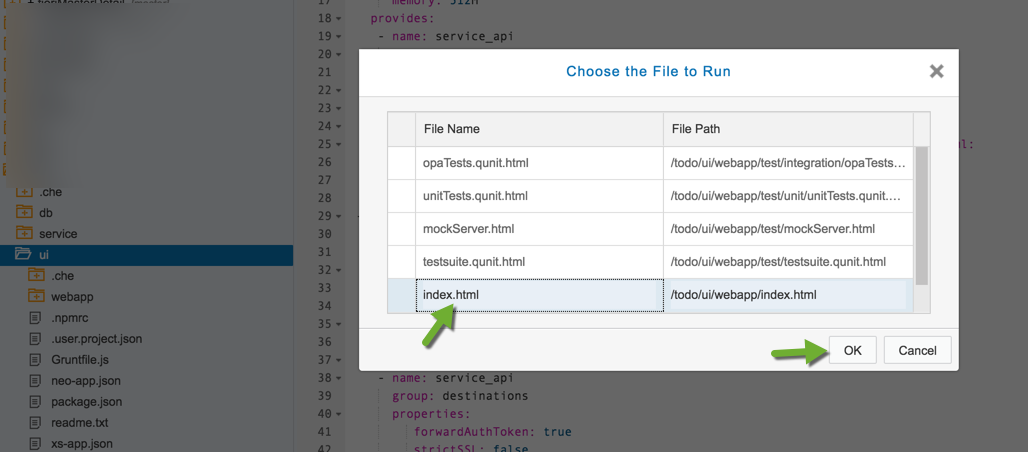
Click on the ui folder and then on the Run button.
- Choose to execute the index.html file.
- Almost running 🙂
In the next dialog, enter your Cloud Foundry credentials. Make sure you enter your email address and not user id.
This action will create a new destination in SAP Cloud Platform Neo, responsible to access and use Cloud Foundry services.
- Now the app is running, and (hopefully) you can see a list of task titles from your Task table.

- Click on one of the tasks to see its details.

- As you can see from the screenshots above, currently our app is very basic, it displays only the task title in the details page. Let's enhance it and add more content.
- Back in SAP Web IDE workspace, expand the ui > webapp > view folder, right-click the Object.view.xml file and choose Open with > Layout Editor.

- In the Layout Editor, select the outline tab on the left and select the SemanticPage control (sap.f.semantic.SemanticPage).
- Click on the delete button to delete it.

- After deleting the SemanticPage you will have a blank page.
- Now we wish to add a SimpleForm to our view, BUT we will not be able to drag and drop it to the Canvas, because the sap.ui.layout UI5 library is not enabled by default.
- To enable it, right click the ui folder and choose Project Settings.
- Select SAPUI5 from the left-side pane.
- Search for layout and check the sap.ui.layout checkbox in order to enable this library for your project.
- Click Save.

- The Layout Editor is now reloaded with the sap.ui.layout support.
- In the Layout Editor, open the Controls tab on the left, search for Object Header and then drag and drop it into the Canvas.
- In the Properties pane, delete the values of the following properties: Intro, Number, Number Unit and make sure only Title is displayed.

- Search for Simple Form and drag and drop it under the Object Header.
- Double-click the title inside the Simple Form and rename it to Status & Notes.
- Double-click Label 1 and rename it to Status.
- Double-click Label 2 and rename it to Notes.
- The Status of a task will be shown as a radio button.
We have 2 different statuses: New and Completed. - Drag and drop a Radio Button Group and under the Status label.
- Delete both text fields under the Status label.
- Please make sure your Details screen looks like the below:

- Rename Option 1 to New and Option 2 to Completed. This can be done by selecting the relevant radio button and change the text property value on the properties pane.
- Now let's bind the data from our OData service to the UI!
- Open the Outline tab.
- Select the Object.view.xml which is the root node of the outline
- Using the Properties Pane, change the Data Set from Not defined to /Task and confirm the popup dialog.

- Don't forget the save your changes by clicking on the Save button or Ctrl/Cmd + S.
- After selecting the OData Collection, we should bind the specific UI fields to the OData collection's properties:
- Select the Object Header control.
- In the Properties pane, search for Title and click on the little Binding button:

- In the dialog that opens, delete the value of the Expression and double-click the title OData property on the left.
- Click OK.

- In the Layout Editor Canvas, click on the text field under the Notes label.
- In the Properties pane, search for Value and click on the Binding button.

- Bind this field to the note OData property.
- Following the same steps, bind the status OData property to the Radio Button Group control.
Make sure to select the Radio Button Group and not a single radio button.
- Binding the Status property means that if the status is 0 (NEW), the radio button at position 0 is selected.
If the status is 1 (COMPLETED), the radio button at position 1 is selected.
We can add more statuses and radio button as we like (e.g. 0 - New, 1 - In Process, 3 - Completed and more).
- Don't forget to save all your changes.
The final step is to run the app to see the changes!
Select the ui folder and click Run.

That's it! You now have a full-stack application, consists of DB, Java and UI modules.
The next step would be to deploy the app to SAP Cloud Platform, Cloud Foundry environment.
Learn how to do that in part 4.
- SAP Managed Tags:
- SAP Business Application Studio,
- SAPUI5,
- SAP Web IDE
5 Comments
You must be a registered user to add a comment. If you've already registered, sign in. Otherwise, register and sign in.
Labels in this area
-
ABAP CDS Views - CDC (Change Data Capture)
2 -
AI
1 -
Analyze Workload Data
1 -
BTP
1 -
Business and IT Integration
2 -
Business application stu
1 -
Business Technology Platform
1 -
Business Trends
1,658 -
Business Trends
93 -
CAP
1 -
cf
1 -
Cloud Foundry
1 -
Confluent
1 -
Customer COE Basics and Fundamentals
1 -
Customer COE Latest and Greatest
3 -
Customer Data Browser app
1 -
Data Analysis Tool
1 -
data migration
1 -
data transfer
1 -
Datasphere
2 -
Event Information
1,400 -
Event Information
66 -
Expert
1 -
Expert Insights
177 -
Expert Insights
299 -
General
1 -
Google cloud
1 -
Google Next'24
1 -
Kafka
1 -
Life at SAP
780 -
Life at SAP
13 -
Migrate your Data App
1 -
MTA
1 -
Network Performance Analysis
1 -
NodeJS
1 -
PDF
1 -
POC
1 -
Product Updates
4,577 -
Product Updates
344 -
Replication Flow
1 -
RisewithSAP
1 -
SAP BTP
1 -
SAP BTP Cloud Foundry
1 -
SAP Cloud ALM
1 -
SAP Cloud Application Programming Model
1 -
SAP Datasphere
2 -
SAP S4HANA Cloud
1 -
SAP S4HANA Migration Cockpit
1 -
Technology Updates
6,873 -
Technology Updates
423 -
Workload Fluctuations
1
Related Content
- FullStack BTP developer exercises in Technology Q&A
- Error starting application "FullStack": Some instances have crashed. in Technology Q&A
- Where is the deployed UI module in SCP CAP App with Freestyle Fiori UI in Technology Q&A
- what is the best practice for developing the UI module of full-stack CAP project? in Technology Q&A
- Extending SAP Fiori elements Applications - What you need to know in Technology Blogs by SAP
Top kudoed authors
| User | Count |
|---|---|
| 40 | |
| 25 | |
| 17 | |
| 13 | |
| 8 | |
| 7 | |
| 7 | |
| 7 | |
| 6 | |
| 6 |