Latest revisions |
|
25-Jan-2022 |
Updated content as per latest updates |
10-Aug-2021 |
Updated latest screenshots and content |
03-Jun-2020 |
Updated latest screenshots and content |
17-Jan-2019 |
Updated latest content |

Extensibility Framework
Target Audience – Key Users of SAP S/4HANA Cloud, SAP S/4HANA On-Premise and Developers
In this part of the blog series, we will now see how we can maintain the values of our newly created custom business object. If you remember in the previous blog –
Part 3, we have created the new CBO. However, we did choose the option ‘User Interface’ yet. In this blog we will now select that option and publish again.
If you have directly landed on this blog, please first go through
Part 1,
Part 2 and
Part 3 of this blog series. Please note that you should have the pre-requisites already in place as discussed in the
Part 1 of this blog series.
Let’s select that option and publish our newly created CBO. Selecting the User Interface option will also select the Back End Service checkbox.
Please note this option User Interface is not available in SAP S/4HANA On-Premise. Refer to
Part 1 of this blog series for further details.
Go to your CBO and then click on Edit Draft.
Now select the checkbox – User Interface and click on publish.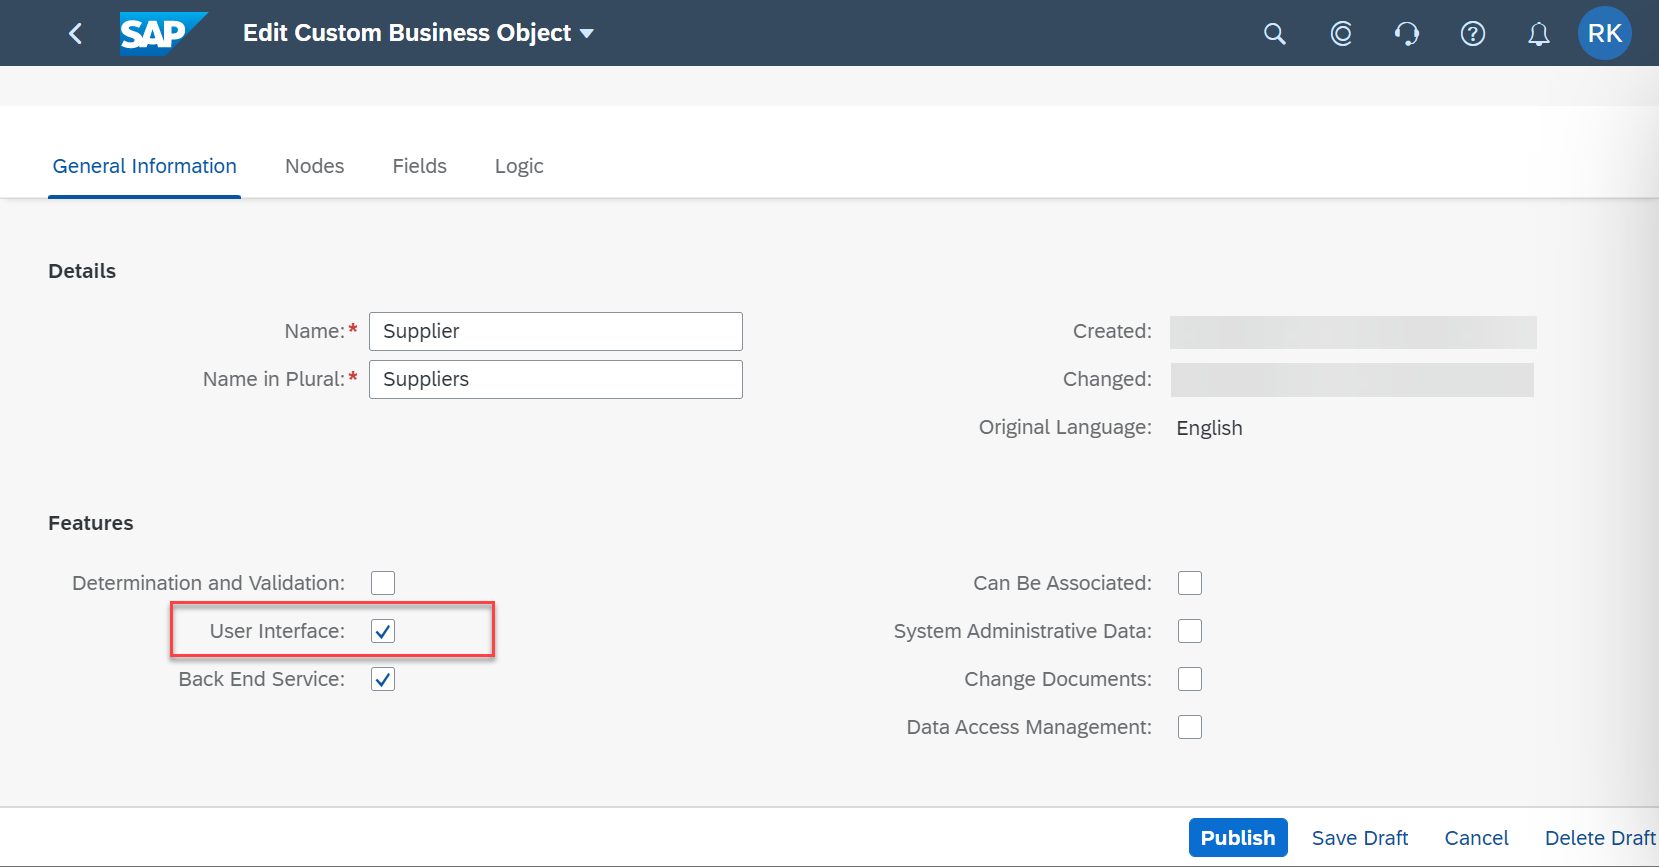
UI generation for the Custom Business Object
Note – After the changes are published, the link – Go To Generated UI will appear in sometime.

Link generated after successfully publishing the Custom Business Object
Once this link is available, you can click on it. It will open-up the maintenance UI. At this stage, if you click on
‘Go To Generated UI’, it will open the Fiori app where you can maintain the records.
But think of the actual Productive scenario, where the end user will not have access to the custom business objects tile, right? So how will it work then? Of course, the end user will need a tile that should appear in his/her Fiori Launchpad. They can click on it and maintain values. Think of this like providing a new custom transaction code in an On-Premise system. If you are reading this blog and you are an On-Premise customer then go back to the
Part 1 of this blog.
Let us go through the next steps and see how to create a new custom tile for the newly created maintenance UI for the Custom Business Object.
Since we are already inside the editor of Custom Business Object, you would notice another link –
Maintain Catalog Extensions
Before we go ahead, let us understand - Maintain Custom Catalog Extension.
Custom Catalog Extension is another tool provided in Key-User Extensions and you would notice that it is present in the same group as other Key-User tools. If not that, you would need to find the app and assign it to your group.

Custom Catalog Extensions app
This tile displays all the custom tiles that have been assigned to custom or standard catalogs.
Now let us come back to where we started. Click on the link Maintain Catalog as stated above, and it will take you inside the Custom Catalog Editor. Click on ‘Add’.

Adding the app to the Business Catalog
Once you click on
Add, it will open a pop-up where we need to choose a
Business Catalog. You need to choose a Business Catalog to which you would assign this new tile. Remember, this catalog would be assigned to the end user. Therefore, this way the tile will appear in the end user’s Launchpad.
Let’s assign to a catalog as shown in the pic below and click on OK.

Choosing a Business Catalog
Next select the line and click on Ok and then Publish.


Publish the changes
The publishing process will start. It will take some time before it is completely published.

Publishing process
Now click on your me icon and click on App Finder.

Find the app
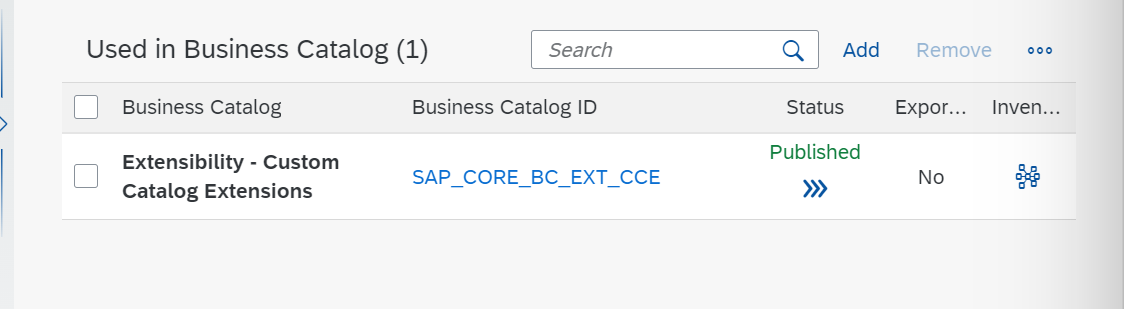
In the search box, search with ‘supplier’. The system should show you the newly created tile. You can see that it is appearing under the same catalog that you have assigned to.

Supplier app under the added Business Catalog
Click on the Pin icon and you can then assign it to your desired group. For this blog, I will add it to My Home.

Adding to the My Home section for demo purpose
The tile will now be added to the Home page under My Home group. Click on back arrow from the top-left until you arrive in your home page. Refresh the page once and you should be able to see the new app.

Newly created tile
Let us now go ahead and maintain some records for this custom business object.
Click the tile and it will open the maintenance UI. Now click on create a new record for the parent node – Supplier

Create a record for the Parent Node
Enter the desired values. Pay special attention to the field - Supplier Account Group

Supplier Account Group with Code List Values
Here you will notice that the custom code list values are now appearing as value help. Remember this we had created in the
Part 2 of this blog series.
Click on it and choose the desired account group.

Previously created Code List appearing here
Click on create and it should create a record for the Supplier node.

Newly created Parent Node record
Once you come back to the original screen, click on the Go button and your newly created record will appear.

Saved record
Select the record and click on the arrow on the right side.

Navigation
Now you can now see that the sub-node – Roles is appearing. In the similar way, you can now create the record for Roles.
Congratulations you have successfully learned how to create a new custom business object, how to create a new custom code list value and how to create a custom tile and maintain the values for the custom business object in SAP S/4HAHA Cloud! For creating a custom app in On-Premise, refer to the links provided in part 1 of this blog series.
Rohit Khan, S/4HANA Regional Implementation Group
Let’s stay connected -
Rohit on LinkedIn

Click below for the previous blogs of this series
Part 1:
Introduction to Custom Business Objects
Part 2:
Create a Custom Code List for a Custom Business Object
Part 3:
Create a new Custom Business Object
Part 4:
Create a custom UI and maintain data in Custom Business Object
