
- SAP Community
- Products and Technology
- Technology
- Technology Blogs by SAP
- How to Guide – Integrate Microsoft Active Director...
Technology Blogs by SAP
Learn how to extend and personalize SAP applications. Follow the SAP technology blog for insights into SAP BTP, ABAP, SAP Analytics Cloud, SAP HANA, and more.
Turn on suggestions
Auto-suggest helps you quickly narrow down your search results by suggesting possible matches as you type.
Showing results for
former_member25
Explorer
Options
- Subscribe to RSS Feed
- Mark as New
- Mark as Read
- Bookmark
- Subscribe
- Printer Friendly Page
- Report Inappropriate Content
09-28-2017
4:13 PM
How to Guide
Integrate Microsoft Active Directory Federation Services to SAP Cloud Platform Mobile Services
Introduction
The trust configuration in SAP Cloud Platform (SCP) allows one to configure an external / third party / on premise or in the cloud Identity Provider (IdP) as a trusted Identity Provider. Indeed, one may even set these to default IdP should that be necessary. This guide demonstrates the steps required to setup a Microsoft Active Directory Federation Services (MS ADFS) instance to act as our default IdP.
The final goal is to use existing credentials to authenticate to different services built on SCP.
Resources used to showcase Microsoft ADFS integration
- A trial SAP Cloud Platform account
- Service SAP Cloud Platform Mobile Services enabled
- A trial Windows Server with Microsoft ADFS
General Architecture

Process overview
- Configure the Local Service Provider in the SAP Cloud Platform
- Download the metadata file from the SAP Cloud Platform Local Service Provider
- Create a Third Party Trust in Microsoft ADFS
- Collect the metadata file from the Microsoft ADFS
- Configure the Application Identity Provider in SAP Cloud Platform
- Test the overall setup in accessing SAP Cloud Platform Mobile Services
SAP Cloud Platform Local Service Provider Configuration
The configuration of the trust between SCP and the existing ADFS you would like to use takes place in the security area of your SCP instance.
If you look at the second tab in Trust you will notice they default SAP ID Service
Go to Security ► Trust.
Select the second tab “Application Identity Provider”.
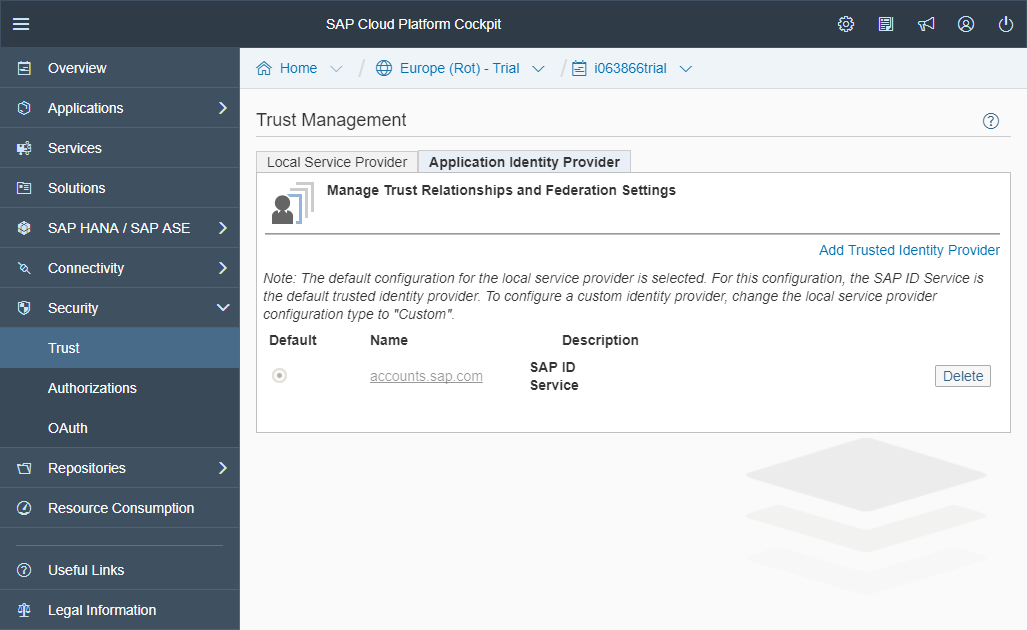
The purpose of this section will be to change the configuration to another Application Identity Provider that points to our ADFS instance.
But before doing this we need to make some adjustments to the authorizations prior to the trust configuration.
Defining groups in SCP
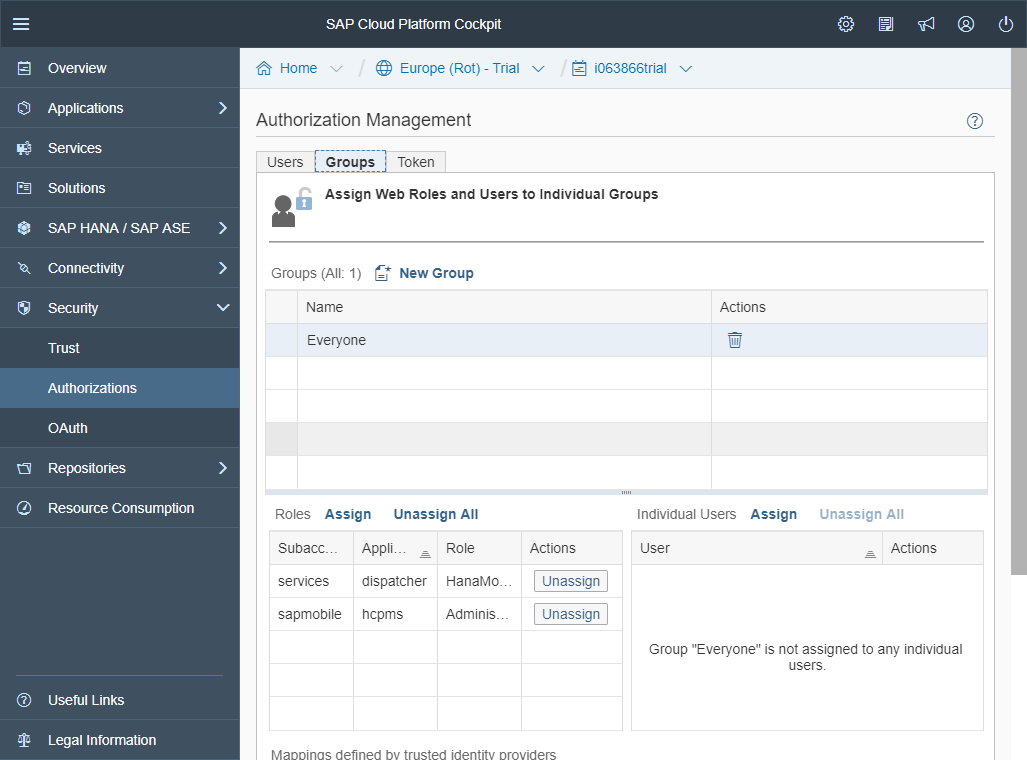
In the SCP Cockpit, go to “Security” ► “Authorizations”
Go to the second tab, “Groups”
Create a new group called “Everyone”
Assign all the roles that are relevant using the Assign link above the grid bellow on the left-hand side.
We still need to be sure that this set of users (groups and users) within the group Everyone has the required permissions for SCPms.
In SCPms permissions cannot be assigned to users and groups directly. A role needs to be defined and the relevant users and groups will get this specific role. Then we can attribute to the role a set of permissions.
In SCP Cockpit, go to Services
Type in the search bar "development" to limit the amount of services displayed and select "development & Operations".
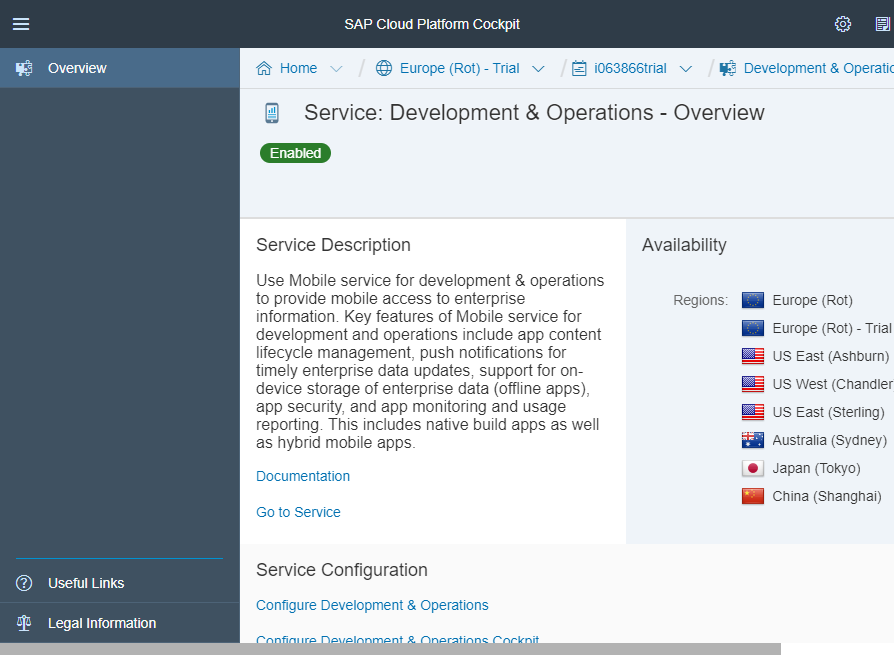
At the bottom of the screen click on the link "Configure Development & Operations Cockpit"
Click on Roles in the left-hand side.
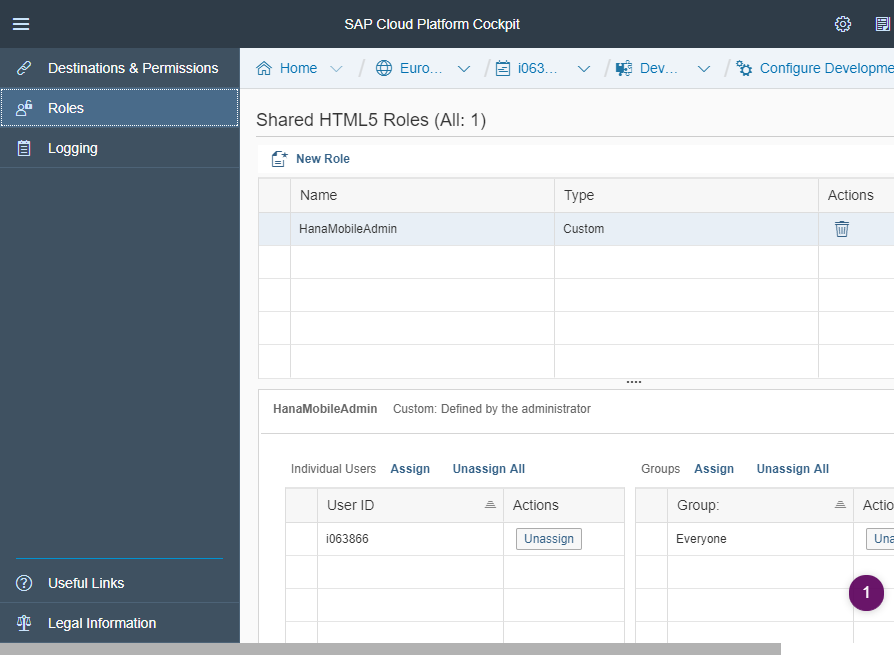
If not there yet, click on "New Role" at the bottom and type in "HanaMobileAdmin"
Then click on Assign on the lower right part of the screen to assign a group to the selected role above.
Select the group "Everyone".
Now we have a role with users/groups associated to it but this role has no permissions yet!
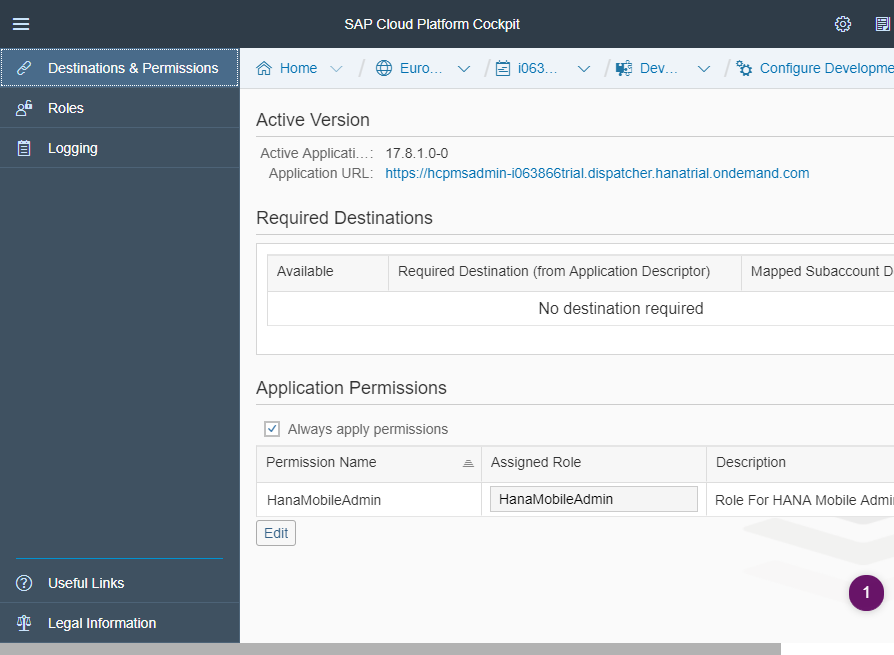
Click on "destinations & Permissions" in the left-hand side.

Click on the Edit button at the bottom to assign the role you have created in the previous screen to the permission "HanaMobileAdmin". We have given the name of the permission to the role which could be a bit confusing but the principal to:
- link users and groups to a role
- link a role to permissions
Press the Save button to finish this step
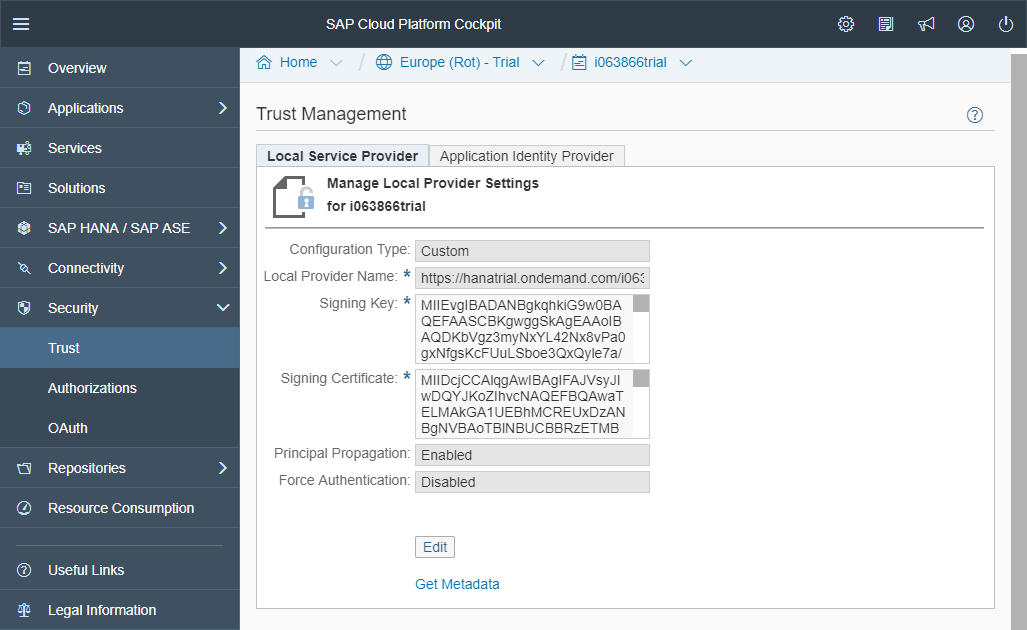
Configuring the Local Service Provider
Go to Security ► Trust.
Select the first tab “Local Service Provider”.
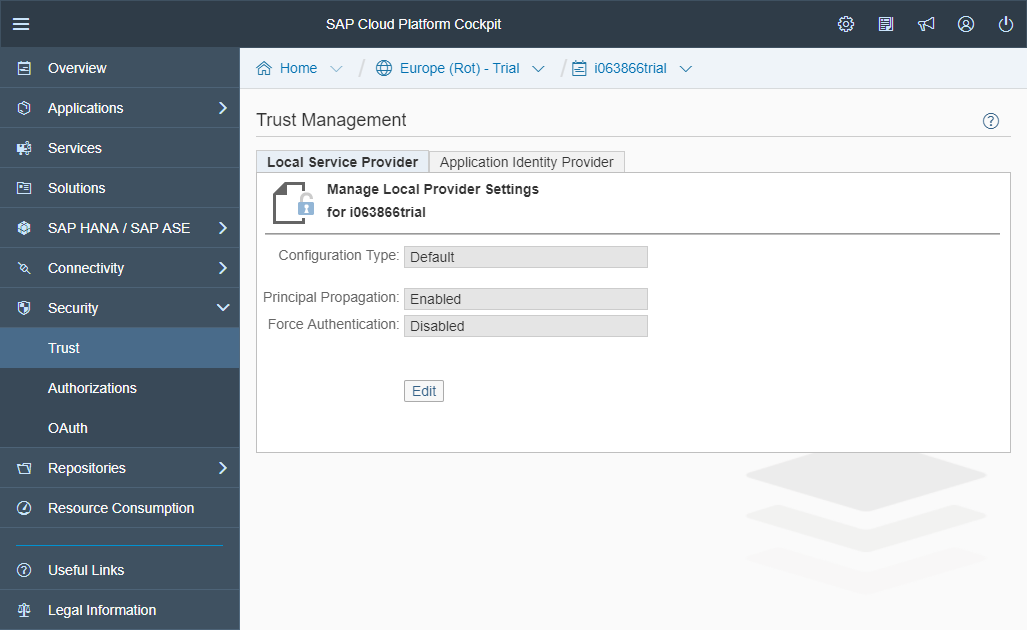
Press Edit

Select Custom
A new page appears with some key information:
Local Provider Name: the current SCP instance is the local service provider. In the context of the setup of a trust, it is important to name properly the different parties involved.
The signing key and certificate correspond to a public and private key (aka Asymmetric Keys, while one can be used to cipher data the other one can be used to decipher those data and the other way around). Those two pieces of information are “key” in the setup of trust (aka SSL handshake). While one will be used to sign the message, the other one will be required to verify the signed message. In this context, the private key, the signing key, will be kept secret to the SCP instance and the other one, the public key, the certificate or the signing certificate, will be given to the other party to allow it to validate the message signed using the private key.
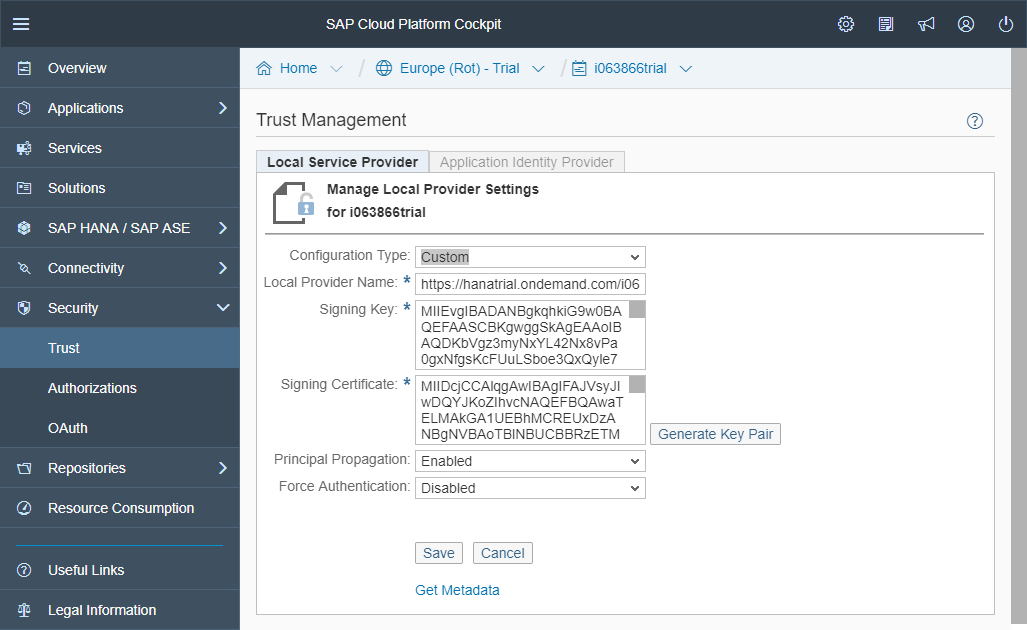
Press Save
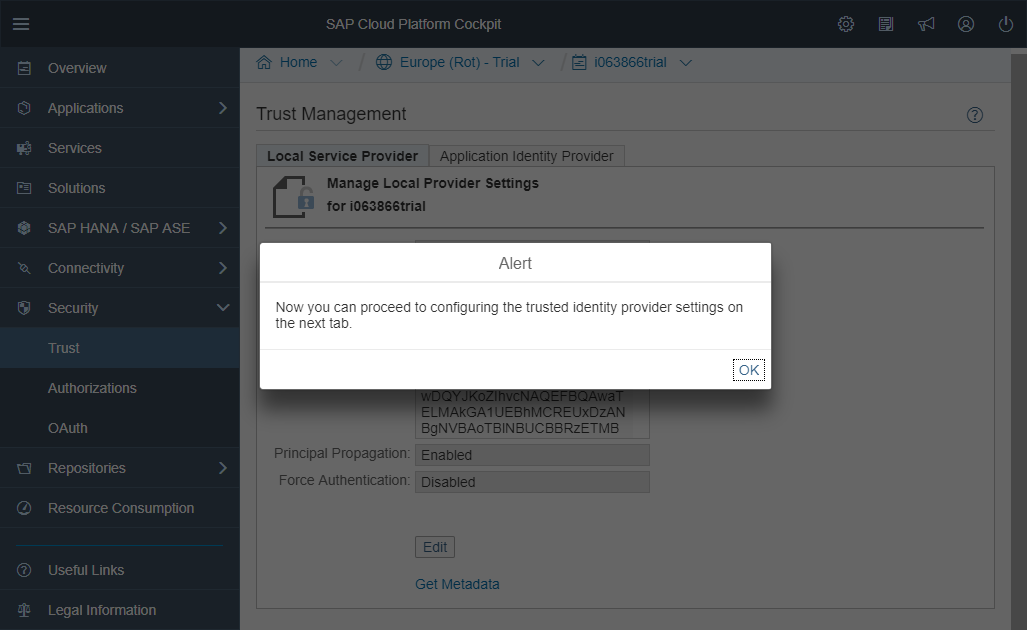
Press OK.
The configuration of the Local Service Provider is done.
Getting the metadata file from the Local Service Provider
To establish the trust between the two parties we will need to exchange information between them. This configuration is mostly done through the exchange of metadata files.
In the Local Service Provider tab, press on Get Metadata

The metadata file has been downloaded to your computer, most probably in the default location which is “C:\Users\<your_user_ID>\Downloads”. The content of that metadata file is given here bellow.
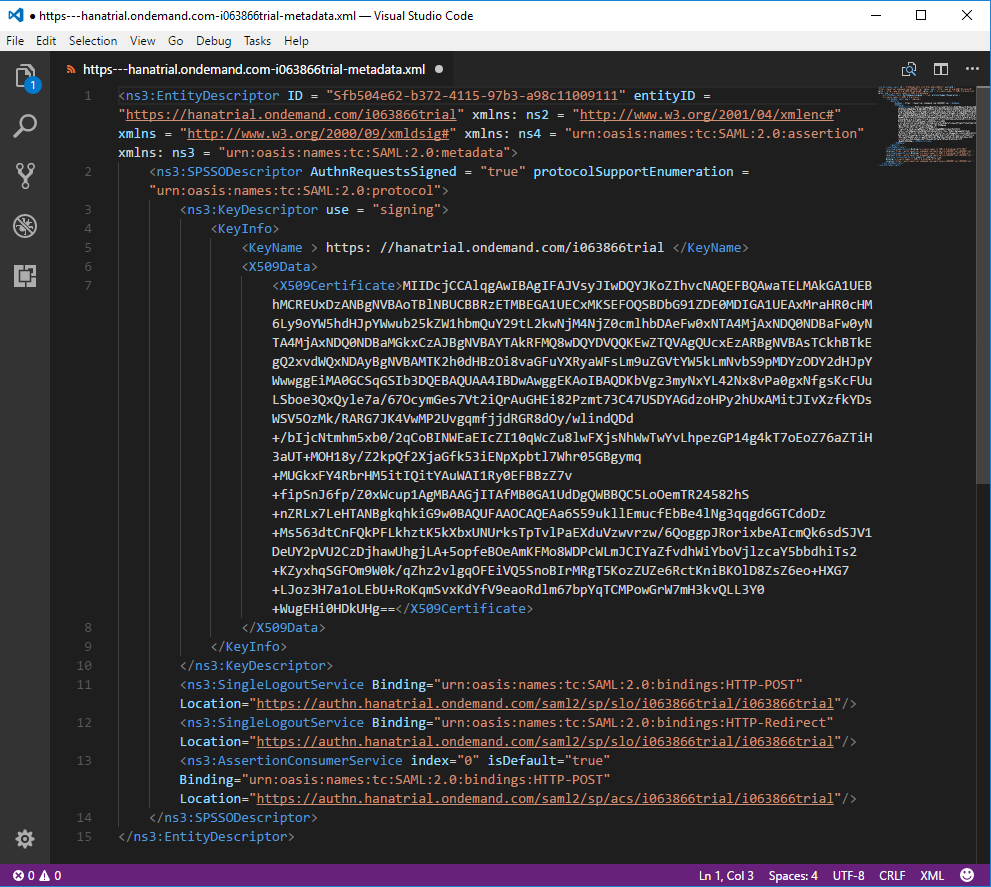
This metadata file contains information that will be required for the configuration of Microsoft ADFS.
Create a Third Party Trust in Microsoft ADFS
Log into the host of the IdP
Press windows key on your keyboard
Type in "mmc" and press enter.
Go to "File" ► "Add-Remove Snap in" and select "AD FS"
Expand the AD FS node on the tree view and drill down to "Trust Relationships". If you don’t see these sub-nodes you may have to install the correct version of ADFS. For example, ADFS v.1.0 will not provide you those sub-nodes. The version 2.0 is required.

Select Add Relying Party Trust on the right pane
Click Start

Select the second option: “Import data about the relying party from file” and reference the metadata file obtained from SAP CPms

Press Next and Provide a name

Press Next
Depending on the version you could also have the following screen

In that case just press Next as well

Press Next

Press Next
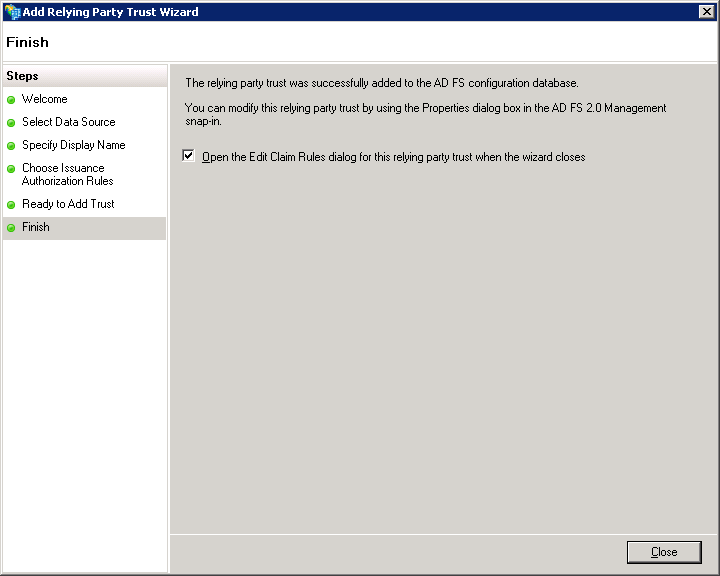
Press Close
Adding a Claim Rule will be covered in the next section. Let’s just Press Ok for the moment.

The basic configuration is done.

Modify the configuration and maintain parameters
In the previous section, we stopped at the point where we had to configure the claim rules. In addition to Claim rules, some additional parameters also should be maintained. Let’s do it one by one.
Secure Hash Algorithm configuration
Select your relying party trust and click properties
Go to the Advanced tab
And select SHA-256 for the Secure hash algorithm

Press OK
Claim rules configuration
Select your relying party trust and click “Edit Claim Rules…” on the right pane

Click on Add Rule
Ensure that the option "Send LDAP Attributes as Claims" is selected

Press Next
Provide a name; Select Active Directory for the Attribute Store and map the
| SAM Account Name | Name ID |
| Surname | Surname |
| Given-Name | Given Name |
| User-Principal-Name | E-Mail Address |

Press Finish

Press OK
Endpoints configuration
Select your relying party trust and click properties
Go to the Endpoints tab

You need to add an endpoint to the configuration to get access to SCPms. If you omit this step the authentication will be successful but you will get an error and did not succeed to enter the service.
NOTE: The URL’s are unique. Please ensure you add details specific to your instance / account.
In my case I had to add the following endpoint:
| Endpoint type | Binding | Index | Trusted URL |
| SAML Assertion Consumer | POST | 1 | https://hcpmsadmin-i063866trial.dispatcher.hanatrial.ondemand.com |
Press Add and fulfill with the details provided above after having changed the URL to fit to your setup!
The generic URL is the following:
https://hcpmsadmin-<SCP Account Name>.dispatcher.hanatrial.ondemand.com
Where the SCP account name should be your {d/i/s/c}-ID followed by trial if you work with a trial account...

Press OK

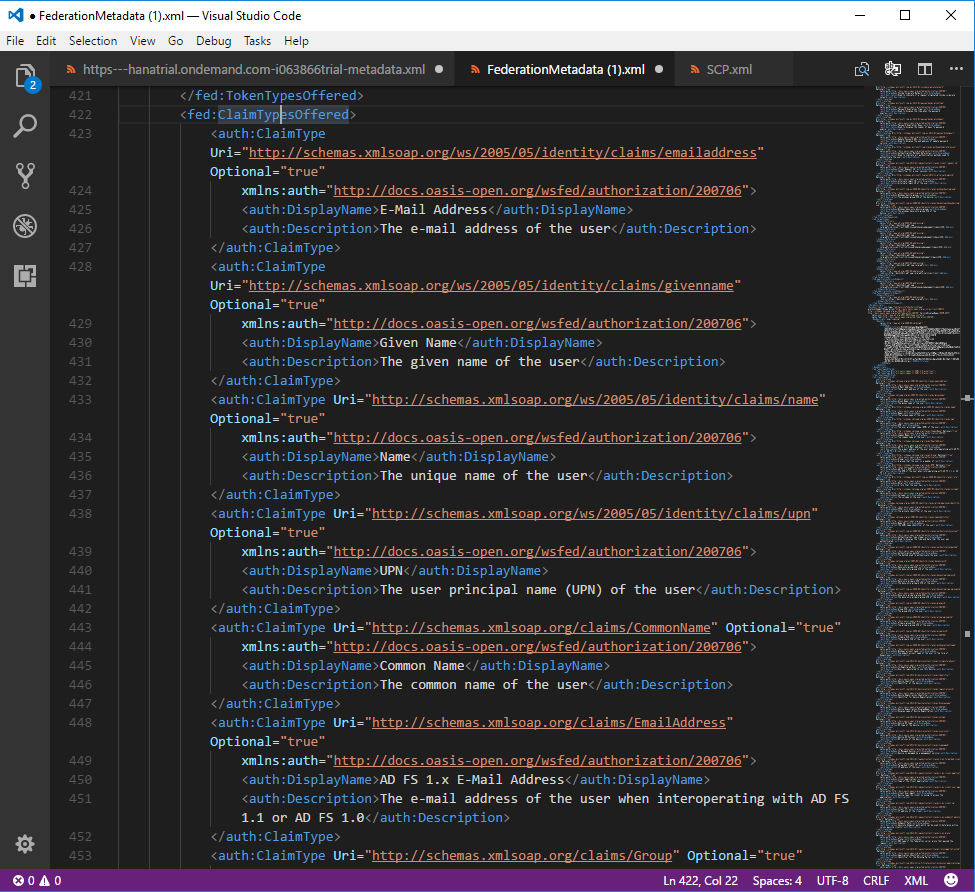
Getting the metadata file from the Microsoft ADFS
Obtaining the metadata file from an ADFS Service is quite straight forward. Navigate to this URL replacing the name of the server where your ADFS is hosted.
https://<your domain>/FederationMetadata/2007-06/FederationMetadata.xml
Save the XML file to your default download directory.
The file partially displayed bellow contains certificates and a list of attributes that can be provided by the service (aka claims).

The screenshot below shows the following claims: emailaddress, givenname, name, upn, commonname, ... We will see later how to work with those claims later.
Configure the Application Identity Provider in SAP Cloud Platform
In SAP Cloud Platform Cockpit, go to Security ► Trust ► Application Identity Provider.
As you can see in the screenshot bellow the SAP ID Service has disappeared and another one is available. The one listed in the screenshot might not exist in your case, something is defined already at this stage in my case since I made multiple tests in the past and you cannot remove the latest entry, one entry should always be there…

Click on Add Trusted Identity Provider
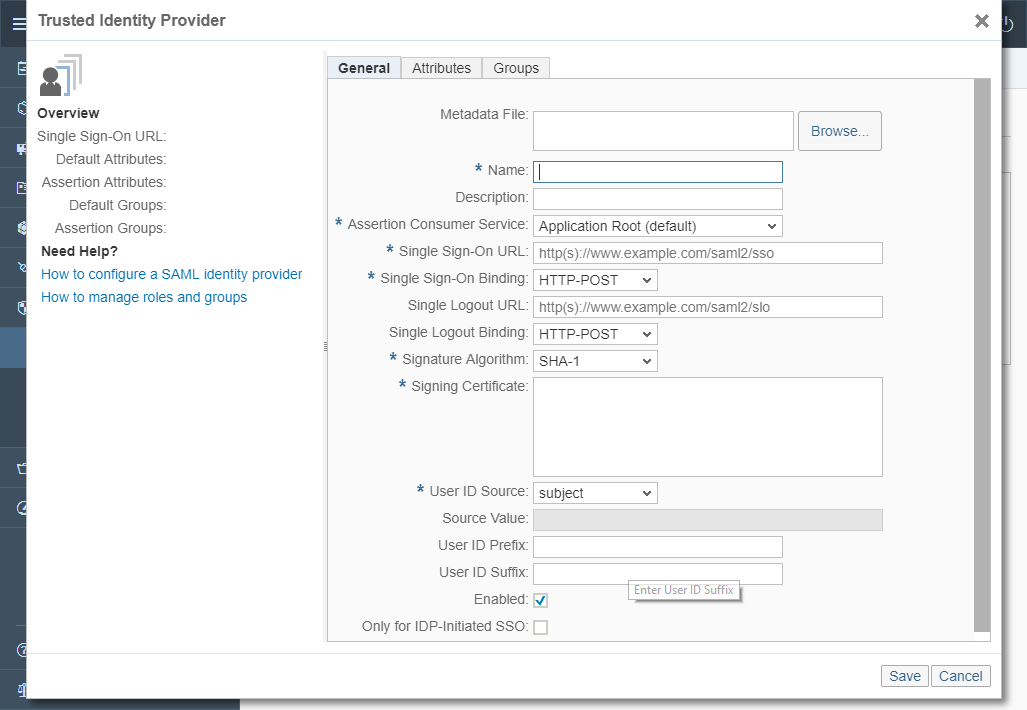
The first field to fulfill ask for a metadata file. Load the metadata file from the ADFS you have downloaded earlier and majority of the fields will be populated automatically.

Change the Signature Algorithm to SHA-256 since SHA-1 has already been cracked and is not secure enough anymore. The rest of the settings can be left as they are.
Additional note from 07 2018:
Many questions comes around how the endpoints should be handled. A key element is located here with the Assertion Consumer Service. Here is what the official documentation says about it:
"The SAP Cloud Platform endpoint type (application root or assertion consumer service). The IdP will send the SAML assertion to that endpoint.
In the common case, select Application Root as value.
If you have an identity provider that would not send the SAML assertion to unknown URLs to them, select the Assertion Consumer Service option. This is the case with Microsoft ADFS, for example." (source)
Go to the second tab “Attributes”

And defined the following assertion-based attributes:

Move to the next tab, “Groups”.

Here you will have to select a default group containing the user that will be granted access to the services inside SCP. For our convenience and the sake of simplicity we will select a group containing all the users. We have seen earlier in this tutorial where this group comes from.

Press Save to complete the configuration.

Select the new entry as default.
The configuration you have just done will delegate the user management for all the services inside the platform. The access to the platform is still done using the {p/s/c/i}-user id and password that was provided by SAP.
Test the overall setup in accessing SAP Cloud Platform Mobile Services
Go to SCPms from the SCP Services.
Provide your MSF ADFS credentials

Press Sign in

In this scenario, the fact that the user comes from a different IdP, MSF ADFS, is not as obvious as in the blog I wrote previously for the integration with MSF AAD. But the user logon name I used to login is definitely different from my corporate one in SAP ID Service.

The integration of MSF ADFS with SCPms is achieved. For any other service you will have to add new endpoint to the Relying Party Trust properties in MSF ADFS.
Acknowledgments
Special thanks to Prakalp Phadnis without whom this How to Guide wouldn’t have been put together.
- SAP Managed Tags:
- SAP Mobile Services,
- SAP Business Technology Platform
6 Comments
You must be a registered user to add a comment. If you've already registered, sign in. Otherwise, register and sign in.
Labels in this area
-
ABAP CDS Views - CDC (Change Data Capture)
2 -
AI
1 -
Analyze Workload Data
1 -
BTP
1 -
Business and IT Integration
2 -
Business application stu
1 -
Business Technology Platform
1 -
Business Trends
1,661 -
Business Trends
88 -
CAP
1 -
cf
1 -
Cloud Foundry
1 -
Confluent
1 -
Customer COE Basics and Fundamentals
1 -
Customer COE Latest and Greatest
3 -
Customer Data Browser app
1 -
Data Analysis Tool
1 -
data migration
1 -
data transfer
1 -
Datasphere
2 -
Event Information
1,400 -
Event Information
65 -
Expert
1 -
Expert Insights
178 -
Expert Insights
280 -
General
1 -
Google cloud
1 -
Google Next'24
1 -
Kafka
1 -
Life at SAP
784 -
Life at SAP
11 -
Migrate your Data App
1 -
MTA
1 -
Network Performance Analysis
1 -
NodeJS
1 -
PDF
1 -
POC
1 -
Product Updates
4,577 -
Product Updates
330 -
Replication Flow
1 -
RisewithSAP
1 -
SAP BTP
1 -
SAP BTP Cloud Foundry
1 -
SAP Cloud ALM
1 -
SAP Cloud Application Programming Model
1 -
SAP Datasphere
2 -
SAP S4HANA Cloud
1 -
SAP S4HANA Migration Cockpit
1 -
Technology Updates
6,886 -
Technology Updates
408 -
Workload Fluctuations
1
Related Content
- Identity Federation: SAP Ariba SSO with SAP Cloud Identity Services - Identity Authentication in Technology Blogs by SAP
- Single Sign On to SAP Cloud Integration (CPI runtime) from an external Identity Provider in Technology Blogs by SAP
- Overview: SAP Ariba SSO with SAP Cloud Identity Services - Identity Authentication in Technology Blogs by SAP
- Configuration: SAP Ariba SSO with SAP Cloud Identity Services - Identity Authentication in Technology Blogs by SAP
- Part 1:- SAP Basis OS support on SUSE Linux for beginners in Technology Blogs by Members
Top kudoed authors
| User | Count |
|---|---|
| 13 | |
| 10 | |
| 10 | |
| 9 | |
| 8 | |
| 7 | |
| 6 | |
| 5 | |
| 5 | |
| 5 |