
- SAP Community
- Products and Technology
- Technology
- Technology Blogs by SAP
- Collaboration in SAP Cloud Platform Portal sites w...
Technology Blogs by SAP
Learn how to extend and personalize SAP applications. Follow the SAP technology blog for insights into SAP BTP, ABAP, SAP Analytics Cloud, SAP HANA, and more.
Turn on suggestions
Auto-suggest helps you quickly narrow down your search results by suggesting possible matches as you type.
Showing results for
former_member19
Active Participant
Options
- Subscribe to RSS Feed
- Mark as New
- Mark as Read
- Bookmark
- Subscribe
- Printer Friendly Page
- Report Inappropriate Content
08-22-2017
11:23 PM
"Note that our public GitHub repository, providing code samples for Cloud Portal on the Neo environment, is not available anymore. If you have further questions, contact us under sapportal@sap.com."
Hi, in the first part of this post we presented the SAP Cloud Platform portal default offering for SAP Jam integration allowing portal admins to add collaboration capabilities to their portal sites.
In this second part I want to focus on building custom integrations with Jam for Portal sites, and more specifically – how to add Jam Embedded Widgets to portal sites. The step-by-step guide requires a certain amount of technical skills.
By the end of this you will have the ability to embed a Jam company feed widget together with web content and business data in your portal page:

Prerequisites
Note:
The Application URL can be found in the application dashboard in your trial account

The response should look like this:
7. You’ve created an AppToAppSSO destination file in your trial account – allowing the custom SAPUI5 app youre going to develop to connect to the Jam Java Servlet you deployed to your account. For more information on how to create destination files read here. For this destination fill in the following values:
Name: jam_servlet
Authentication: AppToAppSSO
URL: The application URL as copied in prerequisite #6. For example:
https://sapjamodatahcp<your account ID>.hanatrial.ondemand.com/SAP_Jam_OData_HCP

Ok, seems like we finally have everything in place… let’s start 🙂
Look at the snippet you. It looks something like this:
Note the following with regards to the snippet:
From these URLs derive the following variable values for the widget configuration as exampled here:
The source code for the Jam Embedded Widget is available under this folder.
To get started with adding the widget to your portal site:
Follow the steps described here under Download and Installation
For the widget to connect to your Jam host and domain and retrieve the desired feed- we need to configure the widget settings.
The flow implemented in the portal widget source code is integrates the jam code snippet in the following flow-
1: Sends an ajax call to the Jam Java Servlet we deployed to our account and get the access token to a Jam UI user session
2: Bootstrap the SAP Jam Feed Widget JavaScript
3: Create the feed widget in a designated div element available in our DOM
4. The widget makes use of 2 destination files which are declared in the application's neo-app.json file:
Hi, in the first part of this post we presented the SAP Cloud Platform portal default offering for SAP Jam integration allowing portal admins to add collaboration capabilities to their portal sites.
In this second part I want to focus on building custom integrations with Jam for Portal sites, and more specifically – how to add Jam Embedded Widgets to portal sites. The step-by-step guide requires a certain amount of technical skills.
By the end of this you will have the ability to embed a Jam company feed widget together with web content and business data in your portal page:
Prerequisites
- You have an SAP Cloud Platform Trial account. (Otherwise register here).
- You’ve enabled the following services in your trial account: SAP Web IDE, Portal and SAP Jam
- You have enabled the Portal plugin for SAP Web IDE as described here.
- Your SAP Jam account has some content in it to display – otherwise create some Jam Groups, upload files, add comment etc.
- You’ve configured the SAP Jam integration with SCP and Portal as described here.
- You’ve deployed the SAP Jam Java Servlet to your trial account as described here.
Note:
- The Java servlet is used to generate a single-use access token allowing the embeddable widget to obtain a valid SAP Jam UI session. For more information on authentication for SAP Jam Embeddable widgets read here.
- The Servlet assumes the OAuth2SAMLBearerAssertion destination file you created in your account for the Jam integration (prerequisite #3) is named sap_jam_odata. As the integration documentation requires the destination to be named – jam – you can change the destination name as it appears in the Java webapp source code.
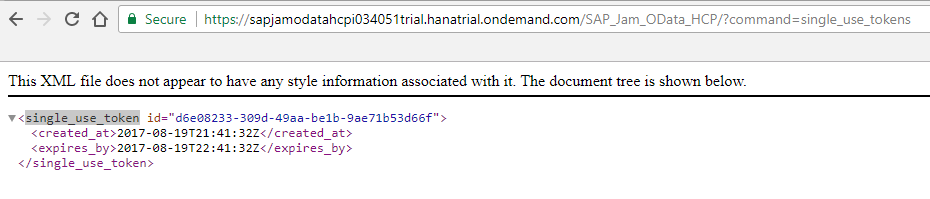
- To validate the servlet is deployed and working properly run the following URL in your browser: https://<Application URL>?command=single_use_tokens
The Application URL can be found in the application dashboard in your trial account
The response should look like this:
7. You’ve created an AppToAppSSO destination file in your trial account – allowing the custom SAPUI5 app youre going to develop to connect to the Jam Java Servlet you deployed to your account. For more information on how to create destination files read here. For this destination fill in the following values:
Name: jam_servlet
Authentication: AppToAppSSO
URL: The application URL as copied in prerequisite #6. For example:
https://sapjamodatahcp<your account ID>.hanatrial.ondemand.com/SAP_Jam_OData_HCP
Ok, seems like we finally have everything in place… let’s start 🙂
Step 1: Get to know the SAP Jam Widget Builder
- Launch SAP Jam from your trial account. Its available under the Collaboration set of services.

- Once SAP Jam is opened click on the cog icon to open the settings and select Admin > Integrations > Widget Builders

- Look at the Feed Widget Builder. Notice that you can use the builder to configure various feed types (Company, Group, My Follows…) and additional properties. After every change the builder generates a JS code snippet at the bottom of the page – this is the code we will embed in our portal widget.

- Select [Authentication Type = Single-use Token] and [Feed Type = Company Feed]
- Copy the code and paste in a text editor.
Look at the snippet you. It looks something like this:
<script type="text/javascript"

src="https://developer.sapjam.com/assets/feed_widget_v1.js"></script>

<script type="text/javascript">


sapjam.feedWidget.init(

"https://developer.sapjam.com/c/i034051trial.hanatrial.ondemand.com.cubetree.biz/widget/v1/feed", "single_use_token");


var w = sapjam.feedWidget.create("myDiv", {type: "company", avatar: false, is_sso: true, post_mode: "inline", reply_mode: "inline"});


</script>
Note the following with regards to the snippet:
- The widget uses 2 URLs:
- https://developer.sapjam.com/assets/feed_widget_v1.js
Used to load the JS code required for the feed widget - "https://developer.sapjam.com/c/i034051trial.hanatrial.ondemand.com.cubetree.biz/widget/v1/feed”, Is the REST endpoint of your Jam account feed
From these URLs derive the following variable values for the widget configuration as exampled here:
JAM Host: https://developer.sapjam.com
Jam Account Domain: i034051trial.hanatrial.ondemand.com.cubetree.biz
- When creating the feed widget, we need to provide the ID of a div element available in the DOM of our applications view ["myDiv”] – this is where the Jam feed will be rendered.
- The widget creation accepts a map of parameters indicating the feed type, widget appearance and the access token we retrieved from Jam through the Java servlet.
Step 2: Get the Sample Code
The source code for the Jam Embedded Widget is available under this folder.
To get started with adding the widget to your portal site:
- Download the Cloud Portal sample GitHub repository,
- Upload the Jam Embedded Widget to your SAP Web IDE
- Deploy the app to your SAP Cloud Platform account
Follow the steps described here under Download and Installation
Step 3: Create a Portal site
- Open the SCP Portal service from your trial account list of Services (its under the User Experience category).
- From your Portal Admin Space select Site Directory from the left side menu
- Click on the + to create a new site instance

- In the Create Site dialog enter your Site Name, select SAP from the list of Template Sources, select the Starter Site template and click Create.

The new site is opened in the Site Designer tool. Now we can start adding content to our site
Step 4: Add the Jam Embedded Widget
- Click on the main section area. This will expose the section’s action menu
- Click on the + to open the Widget Catalog

- In the Widget Catalog search for ‘Jam’. Notice that the 3 widgets provided by SAP are available and can be added to your portal site.
- Select the Jam Embedded Widget you just created.

- Notice that the widget is added to the page.
Step 5: Configure the Jam Embedded Widget
For the widget to connect to your Jam host and domain and retrieve the desired feed- we need to configure the widget settings.
- Click on the widget to expose the widget settings icon
- Click on the Widget Settings icon to open the configuration dialog.

- In the widget settings enter the Jam Host and Jam Account Domain values you derived from the jam widget code snippet

- Select the Feed Type - the widget can display the whole feed on a Company lever or the feed of a specific Jam group available on your Jam account.
- You can configure the widget height under Visual Settings
- Click Save.
- Notice that the widget is rendering the selected feed

- Now you can go ahead and perform additional changes:
- Add Web Content widgets to the same section
- Configure section settings, layout and appearance by clicking on the button in the section action menu.
- Add additional pages, with different layouts.
- Finally – publish the latest version of the site by clicking on the publish icon in the top menu

- The site that you designer is opened in a new browser tab
Code Sample Notes
The flow implemented in the portal widget source code is integrates the jam code snippet in the following flow-
1: Sends an ajax call to the Jam Java Servlet we deployed to our account and get the access token to a Jam UI user session
var URL = this.calculateURL(JAM_SERVLET) + "?command=single_use_tokens";

$.ajax({

	url: URL,

	method: "GET",

	success: function(result, status, xhr) {

		var xmlDoc = $.parseXML(result);

		var tokenNode = $(xmlDoc).find("single_use_token");

		if (tokenNode) {

			var token = tokenNode.attr("id");

			oDeferred.resolve(token);

		} else {

			oDeferred.reject(result);

		}

	}.bind(this),

	error: function(error) {

		oDeferred.reject(error);

	}

});2: Bootstrap the SAP Jam Feed Widget JavaScript
3: Create the feed widget in a designated div element available in our DOM
this.boostrapJam(settings.jamHost).then(function(res) {

	if (sapjam && sapjam.feedWidget) {

		var containerID = this.getView().createId("jamContainer");

		$("#" + containerID).empty();

		var URL = settings.jamHost + "/c/"+ settings.accountDomain + JAM_ACCOUNT_FEED_SUFIX;

		sapjam.feedWidget.init(URL, "single_use_token");

		var w = sapjam.feedWidget.create(containerID, jamWidgetOptions);

	} else {

		MessageToast.show("Failed to bootstrap JAM feed.");

	}

}
4. The widget makes use of 2 destination files which are declared in the application's neo-app.json file:
{

"path": "/destinations/jam_servlet",

"target": {

      "type": "destination",

      "name": "jam_servlet"

  }

},

 {

 "path": "/destinations/jam",

 "target": {

       "type": "destination",

        "name": "sap_jam_odata"

      }

}
Labels:
You must be a registered user to add a comment. If you've already registered, sign in. Otherwise, register and sign in.
Labels in this area
-
ABAP CDS Views - CDC (Change Data Capture)
2 -
AI
1 -
Analyze Workload Data
1 -
BTP
1 -
Business and IT Integration
2 -
Business application stu
1 -
Business Technology Platform
1 -
Business Trends
1,658 -
Business Trends
91 -
CAP
1 -
cf
1 -
Cloud Foundry
1 -
Confluent
1 -
Customer COE Basics and Fundamentals
1 -
Customer COE Latest and Greatest
3 -
Customer Data Browser app
1 -
Data Analysis Tool
1 -
data migration
1 -
data transfer
1 -
Datasphere
2 -
Event Information
1,400 -
Event Information
66 -
Expert
1 -
Expert Insights
177 -
Expert Insights
293 -
General
1 -
Google cloud
1 -
Google Next'24
1 -
Kafka
1 -
Life at SAP
780 -
Life at SAP
13 -
Migrate your Data App
1 -
MTA
1 -
Network Performance Analysis
1 -
NodeJS
1 -
PDF
1 -
POC
1 -
Product Updates
4,577 -
Product Updates
340 -
Replication Flow
1 -
RisewithSAP
1 -
SAP BTP
1 -
SAP BTP Cloud Foundry
1 -
SAP Cloud ALM
1 -
SAP Cloud Application Programming Model
1 -
SAP Datasphere
2 -
SAP S4HANA Cloud
1 -
SAP S4HANA Migration Cockpit
1 -
Technology Updates
6,873 -
Technology Updates
419 -
Workload Fluctuations
1
Related Content
- Onboarding Users in SAP Quality Issue Resolution in Technology Blogs by SAP
- IoT - Ultimate Data Cyber Security - with Enterprise Blockchain and SAP BTP 🚀 in Technology Blogs by Members
- Configure Custom SAP IAS tenant with SAP BTP Kyma runtime environment in Technology Blogs by SAP
- ABAP Cloud Developer Trial 2022 Available Now in Technology Blogs by SAP
- SAP Partners unleash Business AI potential at global Hack2Build in Technology Blogs by SAP
Top kudoed authors
| User | Count |
|---|---|
| 35 | |
| 25 | |
| 14 | |
| 7 | |
| 7 | |
| 6 | |
| 6 | |
| 5 | |
| 4 | |
| 4 |