This is a continuation of Part 1 (
https://blogs.sap.com/2017/07/12/implement-facebook-login-on-sap-api-management-part-1/).
Building the Login Proxy
The Login Proxy will be used to re-direct the user to Facebook where he/she can login and give consent that our newly created App (in part1) can act on its behalf. The authorizations for that app will be determined using the OAuth 2 scopes. For our purposes we are going to request 2 of them. Access to the e-mail address and the basic user profile.
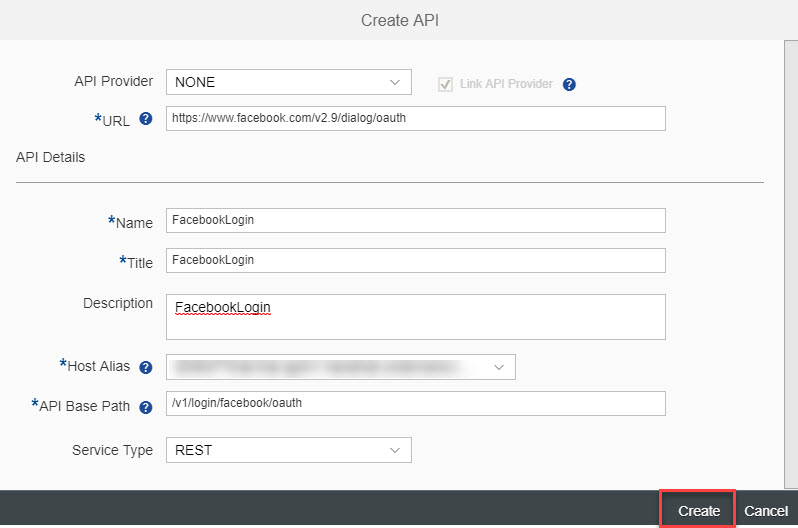
To do this, we open the API Portal. In the Develop Screen we create a new API Proxy. The API Proxy should get the following parameters:
Parameter |
Parameter Value |
|---|
API Provider |
NONE |
URL |
https://www.facebook.com/v2.9/dialog/oauth |
Name |
FacebookLogin |
Title |
FacebookLogin |
Description |
FacebookLogin |
Host Alias |
no preference |
API Base Path |
/v1/login/facebook/oauth (can be changed, but this will be used throughout the blog) |
Service Type |
REST |
Now press "save as draft" and go to policies.
In the policies we check for an API Key as the first step of the PreFlow of the Proxy Endpoint:
<VerifyAPIKey async='true' continueOnError='false' enabled='true' xmlns='http://www.sap.com/apimgmt'>

 <APIKey ref='request.queryparam.apikey'/>

</VerifyAPIKey>
After that, move to the Preflow of the Target Endpoint. Here we need to manipulate the query parameters of the call to Facebook. This is done in an assign message policy.
<AssignMessage async="false" continueOnError="false" enabled="true" xmlns='http://www.sap.com/apimgmt'>

 <Set>

   <QueryParams>

     <QueryParam name="client_id">"Facebook Client ID"</QueryParam>

     <QueryParam name="redirect_uri">"Facebook Redirect URI"</QueryParam>

     <QueryParam name="response_type">code</QueryParam>

     <QueryParam name="state">{request.queryparam.apikey}</QueryParam>

     <QueryParam name="scope">public_profile,email</QueryParam>

   </QueryParams>

 </Set>

 <IgnoreUnresolvedVariables>false</IgnoreUnresolvedVariables>

 <AssignTo createNew="false" type="request">request</AssignTo>

 </AssignMessage>
The client_id and the redirect_uri parameter need to be replaced with the values created in part 1.
Now you can save and deploy your proxy. As we are checking for an API Key it is also mandatory to create a product and register a consuming app. With that the first call can be made from a browser to:
https://<apimanagementruntime>:443/v1/login/facebook/oauth?apikey=<api key from dev portal>
Part 3 (
https://blogs.sap.com/2017/07/24/implement-facebook-login-on-sap-api-management-part-3/) will show how to build the API Proxy representing the redirect uri.
