From SAP BusinessObjects Enterprise Platform version 4.2 SP04 onwards there is a new authentication mechanism supported for web services SDK. It now supports trusted Authentication based on X509 certificate.
In this blog series, I will provide the steps to configure X509 authentication for REST SDK.
I would divide this blog series into two parts:
- Certificate and keystore creation (CA, Server and User)
- Configuration for WACS (wher RESTful SDK is hosted) and browser.
Please note the steps contained in this blog was used by me for my testing purpose. I have used openssl binaries and java keytool utility for my CA, server and user certificate and for keystore creations.
Part 1: Certificate and keystore Creation
Pre-requisite openssl binaries and java keytool utility are already present.
Create a folder C:\cert
Step 1: Generating self-signed CA certificate and key
openssl req -x509 -sha256 -newkey rsa:2048 -keyout C:\cert\TestCAkey.pem -out C:\cert\TestCAcert.pem -days 365
On executing the above command provide the necessary details as shown below.

Self-signed CA certificate and key will be generated something like
 Step 2:
 generating server keystore
keytool -genkey -alias <machine hostname> -keyalg RSA -keystore C:\cert\serverkeystore.jks -keysize 2048
On executing the above command provide the necessary details as shown below.

It generates server keystore file as shown below:
 Step 3:
 Generating CSR for the server certificate
keytool.exe -certreq -alias <machine hostname> -keystore C:\cert\serverkeystore.jks -file C:\cert\<machine hostname>.csr
Above command generates csr file as shown below

Note: here TargetMachine is hostname of my test VM
Step 4: Create CA serial file using below command
Echo 02 >C:\cert\TestCAcert.srl
 Step 5:
 create server certificate
openssl x509 -sha256 -CA C:\cert\TestCAcert.pem -CAkey C:\cert\TestCAkey.pem -req -in C:\cert\<machine hostname>.csr -out C:\cert\<machine hostname>.crt -days 365
On executing the above command it will ask for CA private key as maintained in Step 1
It should generate server certificate as shown below.
 Step 6:
 Import CA certificate into the server keystore:
keytool -import -trustcacerts -alias CA -file C:\cert\TestCAcert.pem -keystore C:\cert\serverkeystore.jks
It should show something like, provide keystore password and yes once ask for confirmation
 Step 7:
 Import server certificate into the server keystore:
keytool -import -alias <machine hostname> -file C:\cert\<machine hostname>.crt -keystore C:\cert\serverkeystore.jks
It should show something like, provide keystore password
 Step 8:
 Generate the Trust keystore and import the Client (user) CA certificate into trust keystore by using below commands.
keytool -import -trustcacerts -alias CA -file C:\cert\TestCAcert.pem -keystore C:\cert\trustkeystore.jks
In this case, the client and server CA are the same. But you can have separate CA as well. Make sure to use the same CA in below steps for client certificate creation
It should show something like, provide keystore password and yes once ask for confirmation

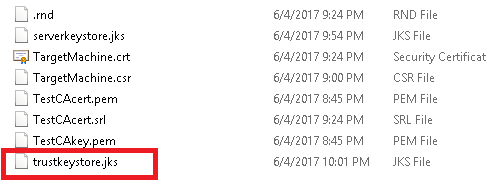
It should generate trust keystore as shown below.
 Step 9:
 Generate Client/ user certificate request:
openssl.exe req -sha256 -newkey rsa:2048 -nodes -out C:\cert\client.req -keyout C:\cert\client.key
On executing the above command provide the necessary details as shown below.

It should generate client key and certficate as shown below.
 Step 10:
 Sign and generate the client/ user certificate
openssl.exe x509 -CA C:\cert\TestCAcert.pem -CAkey C:\cert\TestCAkey.pem -CAserial C:\cert\TestCAcert.srl -req -in C:\cert\client.req -out C:\cert\client.crt -days 365
Provide the details as requested and it should generate client certificate as shown below
 Step 11:
 Export the client certificate with the client private key in PKCS12 format
openssl.exe pkcs12 -export -clcerts -in C:\cert\client.crt -inkey C:\cert\client.key -out C:\cert\client.p12
Provide the details as requested and it should generate client certificate in p12 format as shown below

Note: Steps 9-11 can be followed to create certificates for multiple users.
