
- SAP Community
- Products and Technology
- Human Capital Management
- HCM Blogs by Members
- Adding Documents to Items in Successfactors Learni...
Human Capital Management Blogs by Members
Gain valuable knowledge and tips on SAP SuccessFactors and human capital management from member blog posts. Share your HCM insights with a post of your own.
Turn on suggestions
Auto-suggest helps you quickly narrow down your search results by suggesting possible matches as you type.
Showing results for
VL1
Active Contributor
Options
- Subscribe to RSS Feed
- Mark as New
- Mark as Read
- Bookmark
- Subscribe
- Printer Friendly Page
- Report Inappropriate Content
04-21-2017
1:05 PM
SAP Successfactors Learning Management System (SF LMS):
In this blog, I am going to discuss how LMS administrators can add documents to the learning items in successfactors LMS. I have not seen any reference document available hence thought of posting this information for LMS Administrators. The steps below would help them to understand the procedure of adding the documents/attachments to the Item so that learner can go through the document. This document would be shown as content object along with the main content object to the users when they open the course.
Below are the steps to be followed:
Steps:

Click on Add New and add the document types as below:

2. Creating the Document
Go to Content --> Documents

Click on Add New and fill the fields below:
Document Type – This is the Document Type which you created in the previous step.
File Path:
There are two ways:
2. The other way is storing your document in the iContent Server Space like any other content
which you store however it is not the preferred option to store the documents in the
iContent Server.
Below is the option of adding the document in the iContent Server:
File Path – This is the path where you upload your document.
Here the path is /learning/user/onlineaccess/icontent.do?Course=CUSTOM_eu&url=/self-managed/

Document – Test has been created.

3. Linking Document to Intervention
Go to Content --> Tools --> Import Content --> Add New Content and Click Next.

Click on Browse & add the relevant document

After selecting the document / file.

Configuring intervention & Content settings and importing the file.
Select the Server Location, Enter the Content Package ID and Click on Import Files.
The File will be imported successfully.

4. Linking Document to Intervention
Go to Learning --> Select the Intervention --> Click on More against the Related Area -->Select Documents --> Click on add one or more from list.

Select the relevant one (Select the Test) and click on Add.

5. Go to Learning - User Interface (Login as a User)
Click on the Intervention Title

You can see an attachment icon and says 1 attachment.

When you click on the Attachment Icon, you can see below however you cannot open the document from here.

When you click on the Test, you can see the below error:
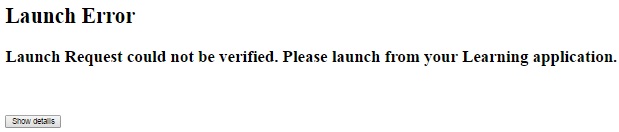
To open the document, you should click on the content page and click on the Review Content which is the relevant document attached for this intervention.

When you click on the content, you can see the attachment downloaded.

For Scheduled Offering, the user has to go to that particular offering by clicking on See Offerings- click on the relevant offering - click on Attached Documents to see the link to the document.
Note: Currently you can assign Documents to Item & Scheduled Offering which can be viewed by the User however User cannot view documents which are linked to Curricula & Tasks. Curricula & Tasks are meant only for Learning Administrators.
Also, the best way to link the document is by placing the document in your internal Sharepoint / Workspace with access to users and give the workspace file path in the document
Please let me know if this blog is of your help.
Regards,
Vinay.
In this blog, I am going to discuss how LMS administrators can add documents to the learning items in successfactors LMS. I have not seen any reference document available hence thought of posting this information for LMS Administrators. The steps below would help them to understand the procedure of adding the documents/attachments to the Item so that learner can go through the document. This document would be shown as content object along with the main content object to the users when they open the course.
Below are the steps to be followed:
Steps:
- Create a Document Type:
- Go to References --> Learning --> Document Types
Click on Add New and add the document types as below:
2. Creating the Document
Go to Content --> Documents
Click on Add New and fill the fields below:
Document Type – This is the Document Type which you created in the previous step.
File Path:
There are two ways:
- Mention the File Path where your document is stored. The Users should have access to this shared space where the document is stored. It can be SharePoint Link as well. This is the preferred option.
2. The other way is storing your document in the iContent Server Space like any other content
which you store however it is not the preferred option to store the documents in the
iContent Server.
Below is the option of adding the document in the iContent Server:
File Path – This is the path where you upload your document.
Here the path is /learning/user/onlineaccess/icontent.do?Course=CUSTOM_eu&url=/self-managed/
Document – Test has been created.
3. Linking Document to Intervention
Go to Content --> Tools --> Import Content --> Add New Content and Click Next.
Click on Browse & add the relevant document
After selecting the document / file.
Configuring intervention & Content settings and importing the file.
Select the Server Location, Enter the Content Package ID and Click on Import Files.
The File will be imported successfully.
4. Linking Document to Intervention
Go to Learning --> Select the Intervention --> Click on More against the Related Area -->Select Documents --> Click on add one or more from list.
Select the relevant one (Select the Test) and click on Add.
5. Go to Learning - User Interface (Login as a User)
Click on the Intervention Title
You can see an attachment icon and says 1 attachment.
When you click on the Attachment Icon, you can see below however you cannot open the document from here.
When you click on the Test, you can see the below error:
To open the document, you should click on the content page and click on the Review Content which is the relevant document attached for this intervention.
When you click on the content, you can see the attachment downloaded.
For Scheduled Offering, the user has to go to that particular offering by clicking on See Offerings- click on the relevant offering - click on Attached Documents to see the link to the document.
Note: Currently you can assign Documents to Item & Scheduled Offering which can be viewed by the User however User cannot view documents which are linked to Curricula & Tasks. Curricula & Tasks are meant only for Learning Administrators.
Also, the best way to link the document is by placing the document in your internal Sharepoint / Workspace with access to users and give the workspace file path in the document
Please let me know if this blog is of your help.
Regards,
Vinay.
- SAP Managed Tags:
- SAP SuccessFactors Learning
8 Comments
You must be a registered user to add a comment. If you've already registered, sign in. Otherwise, register and sign in.
Labels in this area
-
1H 2024 Product Release
1 -
2H 2023 Product Release
1 -
ACCRUAL TRANSFER
1 -
Advanced Workflow
1 -
Anonymization
1 -
BTP
1 -
Business Rules
1 -
Canvas Report
1 -
Career Development
1 -
Certificate-Based Authentication
1 -
Cloud Platform Integration
1 -
Compensation
1 -
Compensation Information Management
1 -
Compensation Management
1 -
Compliance
2 -
Content
1 -
Conversational AI
2 -
Custom Data Collection
1 -
custom portlet
1 -
Data & Analytics
1 -
Data Integration
1 -
Dayforce
1 -
deep link
1 -
deeplink
1 -
Delimiting Pay Components
1 -
Deprecation
1 -
Employee Central
1 -
Employee Central Global Benefits
1 -
Employee Central Payroll
1 -
employee profile
1 -
Employee Rehires
1 -
external terminal
1 -
external time events
1 -
Generative AI
2 -
Getting Started
1 -
Global Benefits
1 -
Guidelines
1 -
H2 2023
1 -
HR
2 -
HR Data Management
1 -
HR Transformation
1 -
ilx
1 -
Incentive Management Setup (Configuration)
1 -
Integration Center
2 -
Integration Suite
1 -
internal mobility
1 -
Introduction
1 -
learning
3 -
LMS
2 -
LXP
1 -
Massively MDF attachments download
1 -
Mentoring
1 -
Metadata Framework
1 -
Middleware Solutions
1 -
OCN
1 -
OData APIs
1 -
ONB USA Compliance
1 -
Onboarding
2 -
Opportunity Marketplace
1 -
Pay Component Management
1 -
Platform
1 -
portlet
1 -
POSTMAN
1 -
Predictive AI
2 -
Recruiting
1 -
recurring payments
1 -
Role Based Permissions (RBP)
2 -
SAP CPI (Cloud Platform Integration)
1 -
SAP HCM (Human Capital Management)
2 -
SAP HR Solutions
2 -
SAP Integrations
1 -
SAP release
1 -
SAP SuccessFactors
5 -
SAP SuccessFactors Customer Community
1 -
SAP SuccessFactors OData API
1 -
SAP Workzone
1 -
SAP-PAYROLL
1 -
skills
1 -
Skills Management
1 -
sso deeplink
1 -
Stories in People Analytics
3 -
Story Report
1 -
SuccessFactors
2 -
SuccessFactors Employee central home page customization.
1 -
successfactors onboarding i9
1 -
Table Report
1 -
talent
1 -
Talent Intelligence Hub
2 -
talents
1 -
Tax
1 -
Tax Integration
1 -
Time Accounts
1 -
Workflows
1 -
XML Rules
1
Related Content
- Standard integration templates in Talent Intelligence Hub in Human Capital Management Blogs by SAP
- The 1H 2024 Release of SAP SuccessFactors Learning – Release Highlights in Human Capital Management Blogs by Members
- Deprecation of SuccessFactors Learning Token Server in Human Capital Management Q&A
- AI shaping the future of HR: Is your organisation ready to embrace the change? in Human Capital Management Blogs by Members
- Stay Current Assessments for SFSF Certifications in Human Capital Management Q&A
Top kudoed authors
| User | Count |
|---|---|
| 4 | |
| 4 | |
| 2 | |
| 2 | |
| 1 | |
| 1 | |
| 1 | |
| 1 | |
| 1 | |
| 1 |