
- SAP Community
- Products and Technology
- Technology
- Technology Blogs by SAP
- Design Studio 1.6 - Execute the sample project
Technology Blogs by SAP
Learn how to extend and personalize SAP applications. Follow the SAP technology blog for insights into SAP BTP, ABAP, SAP Analytics Cloud, SAP HANA, and more.
Turn on suggestions
Auto-suggest helps you quickly narrow down your search results by suggesting possible matches as you type.
Showing results for
Product and Topic Expert
Options
- Subscribe to RSS Feed
- Mark as New
- Mark as Read
- Bookmark
- Subscribe
- Printer Friendly Page
- Report Inappropriate Content
04-18-2017
11:41 PM
Use case
- You would like to execute one of the sample Design Studio 1.6 SDK projects such as “ColoredBox”.
- You are using Design Studio 1.6 to deliver a project and are aware that it has the potential to allow you to develop your own components but don’t know where to start. You are looking for a “step-by-step guide for dummies” which demonstrates how a new component can be added to Design Studio.
Background
I am new to HANA Studio, Eclipse, Design Studio (DS) and JAVA tools and thought it would be quite easy to follow the Design Studio developers guide methodically and careful not to miss any steps to activate one of the sample project plug-in components for Design Studio.
I found myself spending hours researching error codes before I managed to get it right. So although all the information is “out there” it wasn’t quite what I expected, so I am hoping this blog will save you the same effort.
I don’t propose that this information is meant to be comprehensive or cater for all configurations, it is simply my experience in setting up my own system which I hope will contribute to saving some time for you.
The result
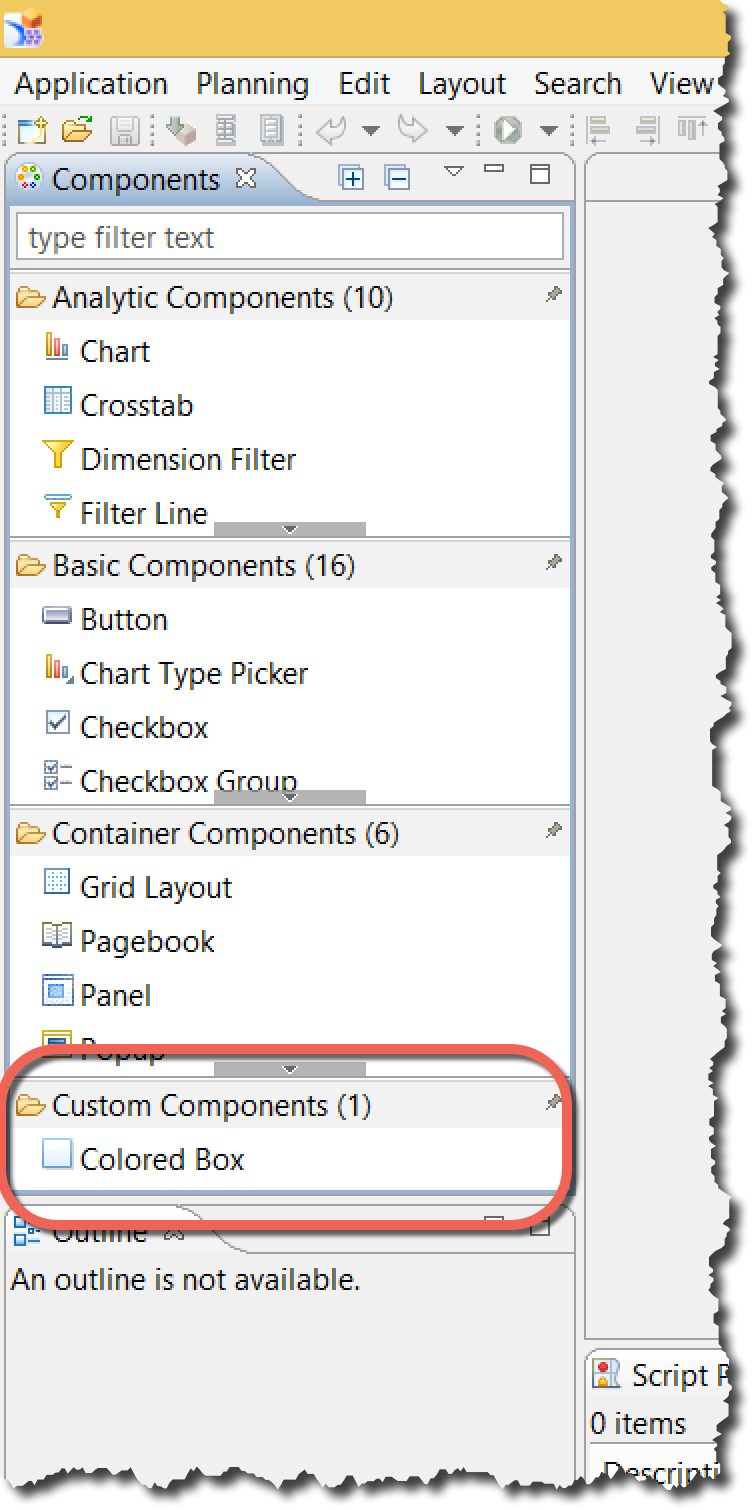
The humble result of importing the “ColoredBox” sample project should look like this when complete:
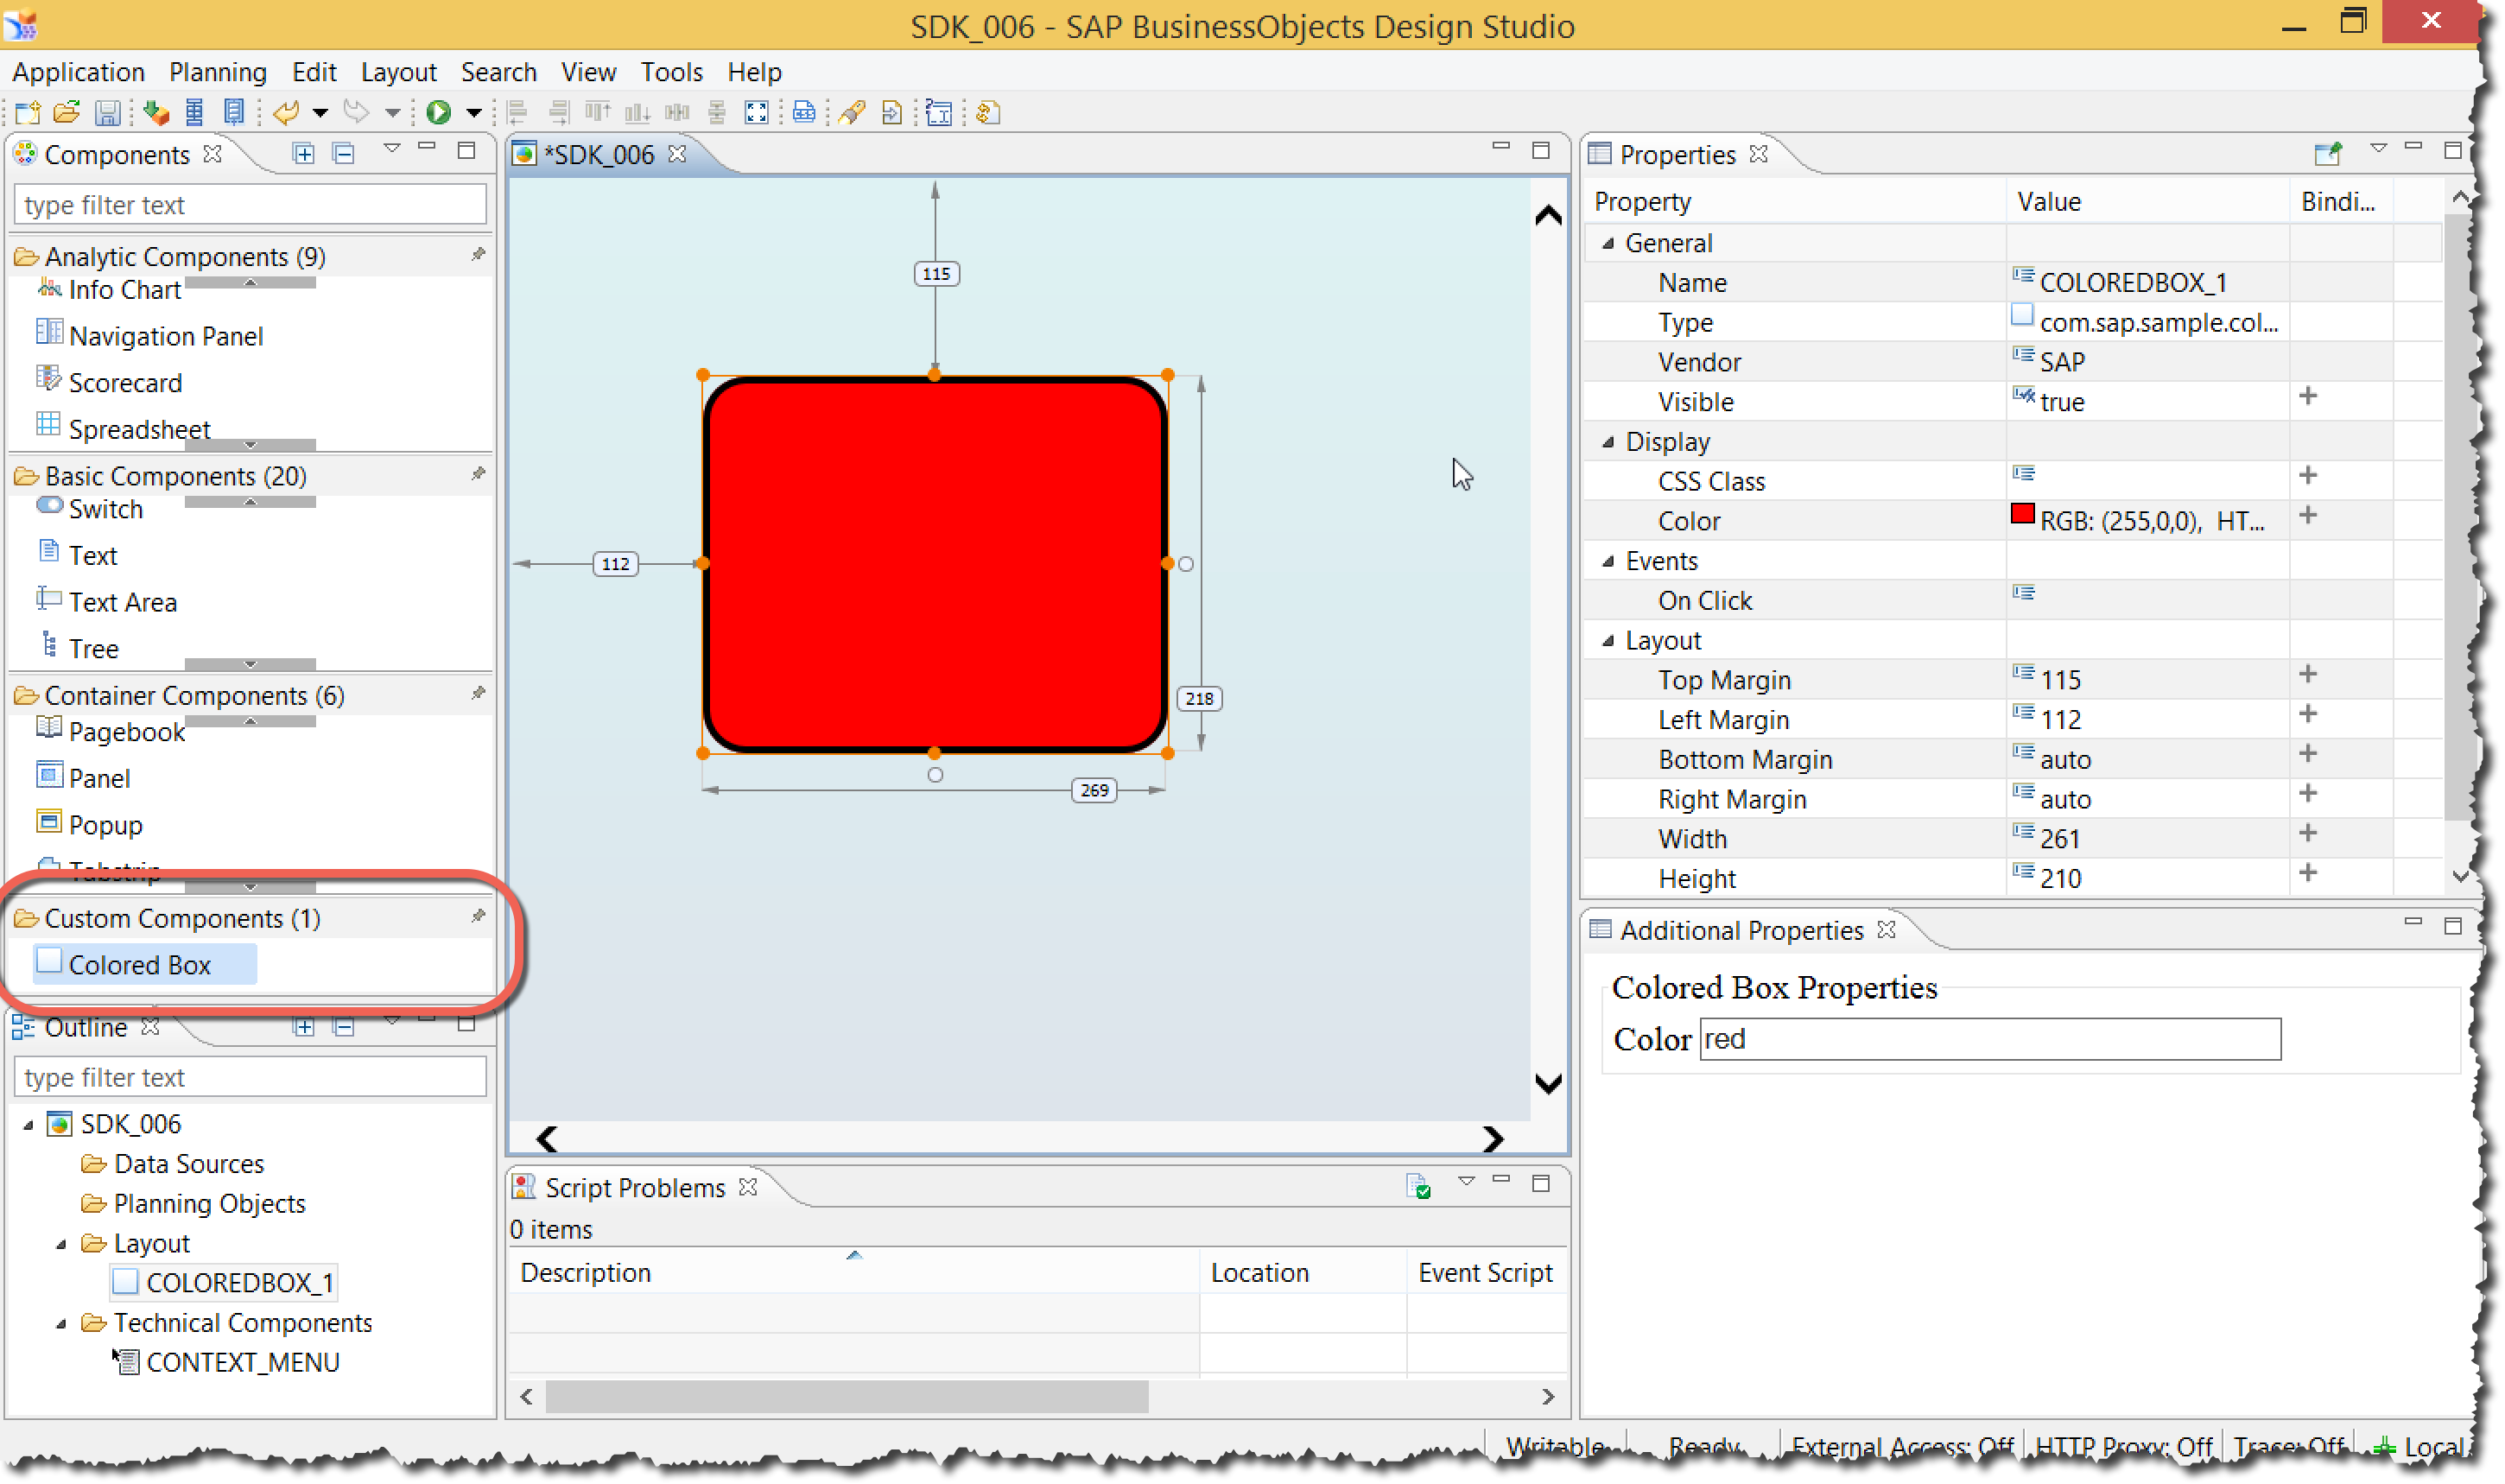
There is a “Custom Component” created in Design Studio called “Colored Box” and when dropped on the canvas displays a….red colored box!
Step-by-step guide
- The official master developers guide is found here: http://help.sap.com/boad
Your browser should open with the SAP BO Design Studio help landing page.

Scroll down to the “development” area and do 2 things:
- Download the samples and templates
- Open the developers guide

After you download the latest version of the samples you should see that this is version DS_16SP04_SDK_SAMPLES and a critical file in this subdirectory is “sdk.xsd”. This file contains the key catalog schemas of the SDK so it’s critical to have the correct version.

The developers guide should open and you can open the chapter titled “Creating an SDK extension”.

- I am running on Windows 8.1 with a 64-bit operating system. We need to install 3 software components:
- Design Studio 64-bit version
- Eclipse Java EE 64-bit version
- Java JDK 64-bit version
- Download and install the DESIGN STUDIO CLIENT 1.6 for your client machine and make sure it is the 64-bit version.


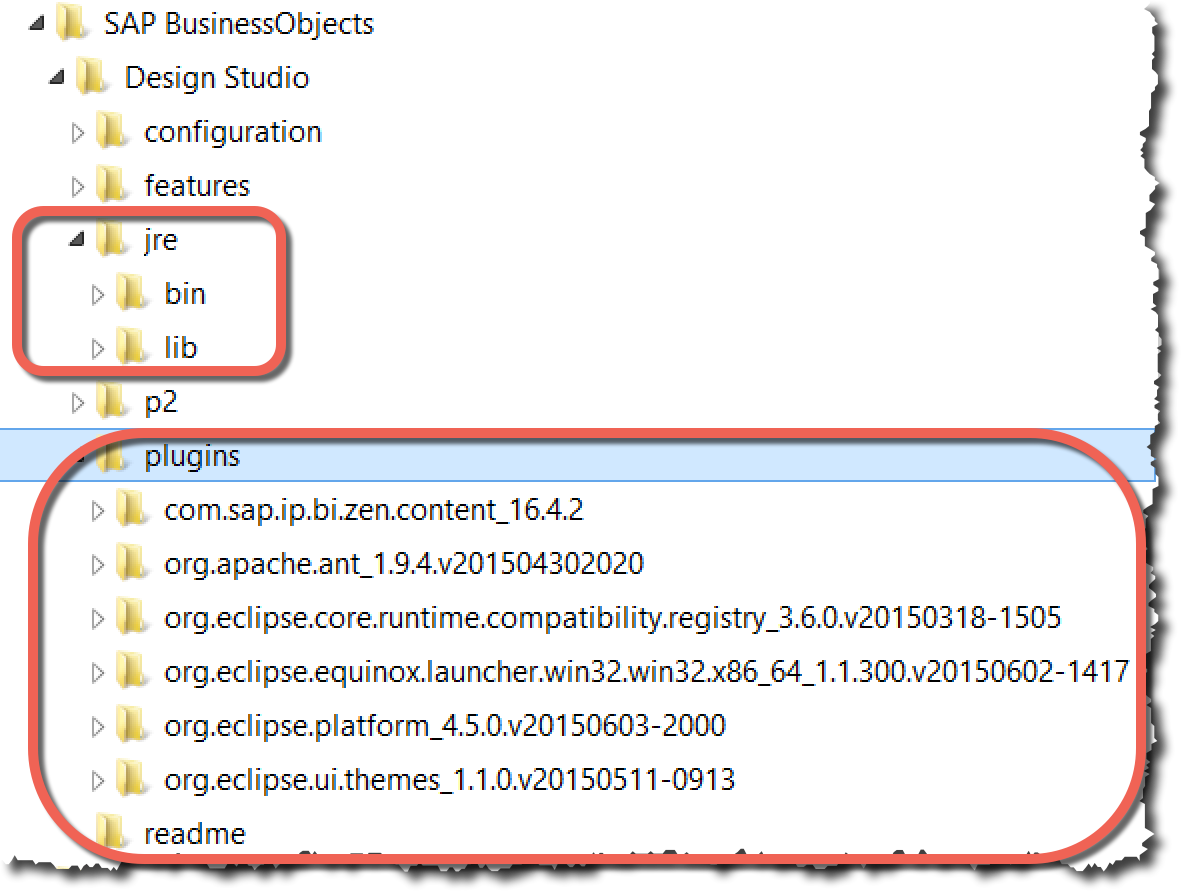
Find the directory that Design Studio installed to. On my computer it is under “Program files > SAP Business Objects > Design Studio”. Notice that it has a “jre” subdirectory as well as a “plugins” subdirectory with “com.sap.ip.bi.zen.content_16.4.2” and “org.eclipse.equinox.launcher”.
- Download Eclipse Java EE 64-bit version from eclipse.org. If you get this version wrong you will really struggle to complete the exercises. There is no real installation process. Once downloaded you simply copy the Eclipse subdirectory to an area on your machine where you want to execute it from. It is recommended NOT to place the eclipse directory in the "Program Files" directory or anywhere else where special authorizations may be required.

I placed the Eclipse directory directly in the root directory on the C:\ drive. Notice that the file “sapjco3.dll” is not in the directory. We will add this in a later step.

If you have downloaded Eclipse correctly then after running the .exe and going to menu item “Help > About” you should see:

- Install JAVA Development Kit (JDK) SE. Key things to remember here is that we are installing the JDK (Java Development Kit which includes the JRE) and not the JRE (Java Runtime Edition) and it is the SE version and not the EE version. It must also be the 64-bit version.

After installation under the “Windows control panel” and “Programs and features” you should see the installed JAVA SE JDK (64-bit) version.

- Now perform a post-implementation step. If, as in my case, you are running Windows 8 then follow the steps in the developers guide for obtaining the sapjco3.dll and copy it to your Eclipse subdirectory.

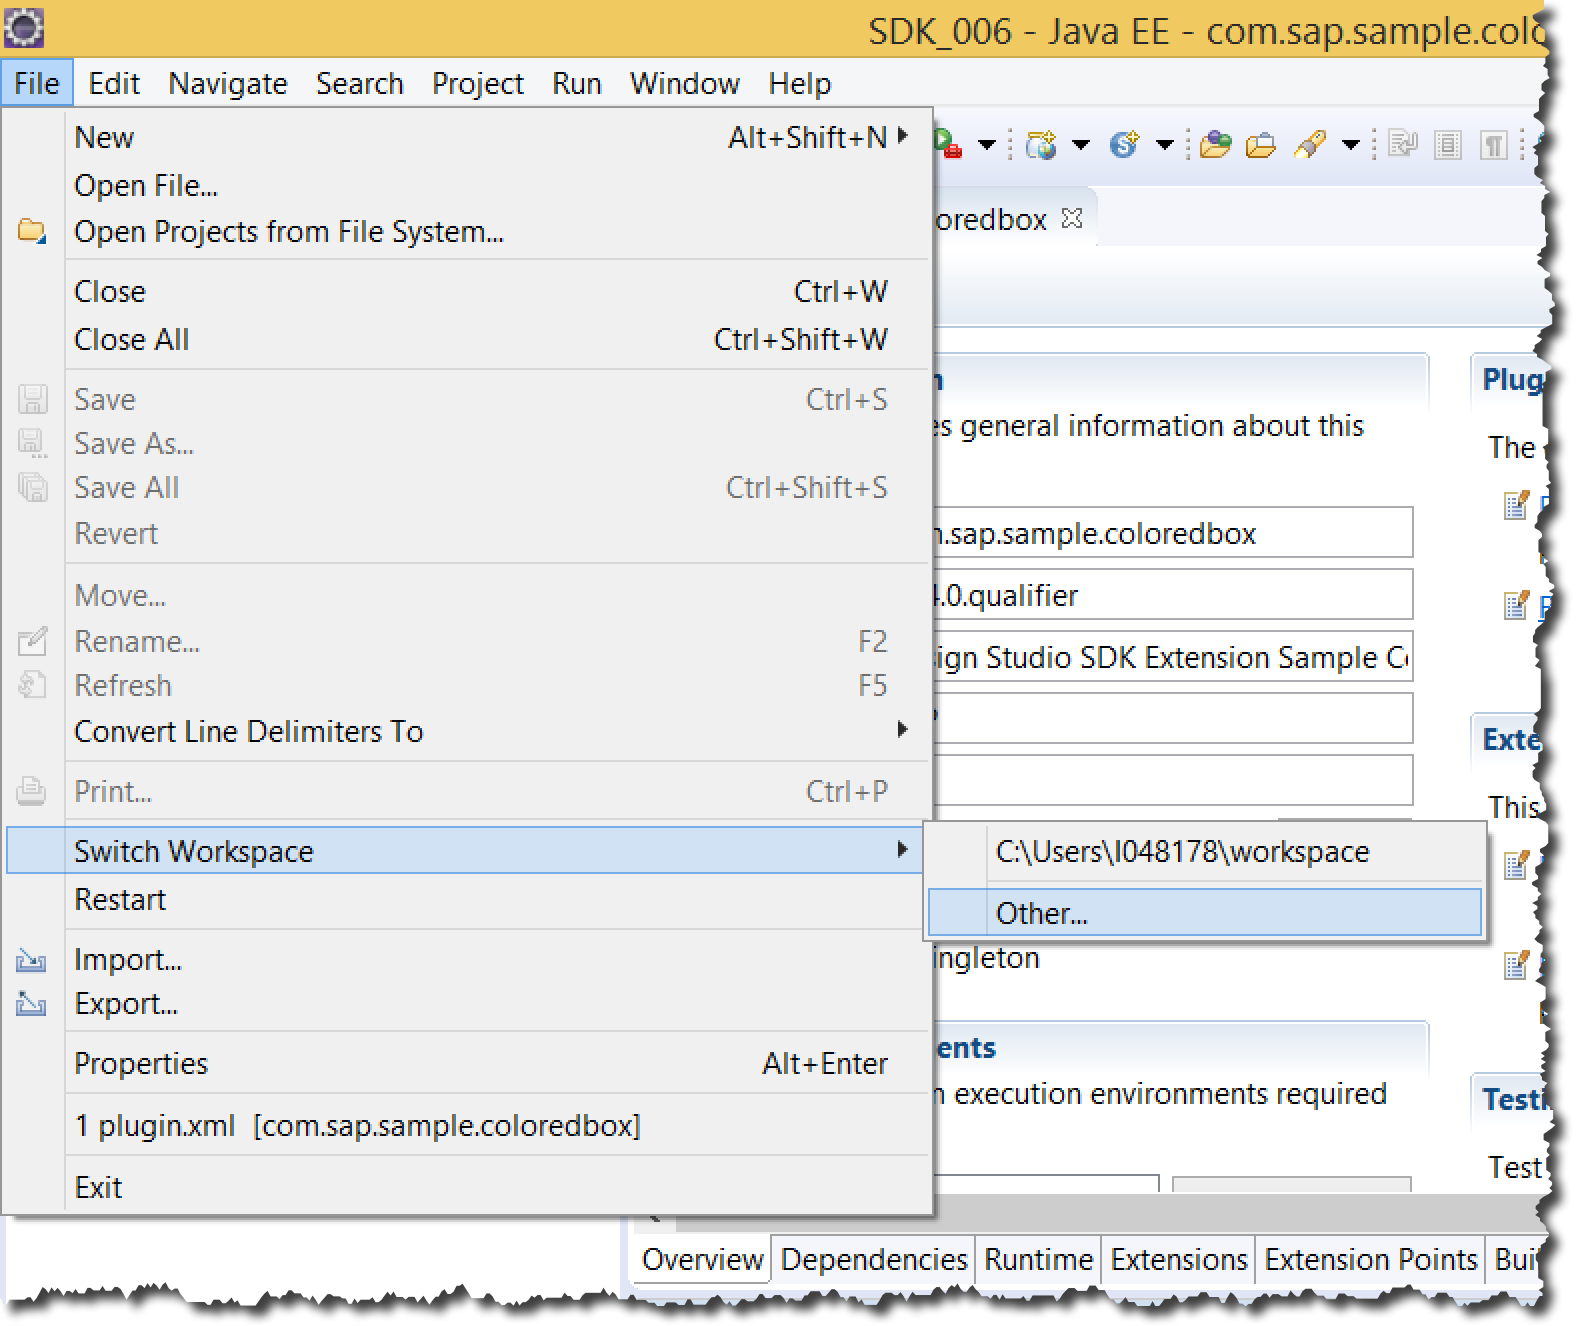
- Start Eclipse and create a “workspace” for the project. If you happen to be reading this guide after taking a few wrong turns you might be where I was. You have the wrong version of SDK samples loaded into the wrong version of Eclipse running on the wrong version of JAVA trying to access the wrong version of Design Studio and even though you’ve tried deleting all the samples from the Eclipse project window and then loading the right version of the SDK sample project you get an error saying “Sample project can’t be loaded into workspace as it is a duplicate”, or something to that effect, but you are staring at a blank project window so this message does not make sense. So you try to delete the entire workspace or create a new one and guess what? …when you go to menu item “File > new” there is no option to create a “workspace”.
So regardless of the mess you feel you are in or what is in the project window follow this menu path “File > Switch Workspace > Other”. Use the file browser to select a new folder on your hard drive to store your projects for this workspace and accept. Eclipse will restart (hopefully) and when it re-opens you should see your new workspace name in the title bar.

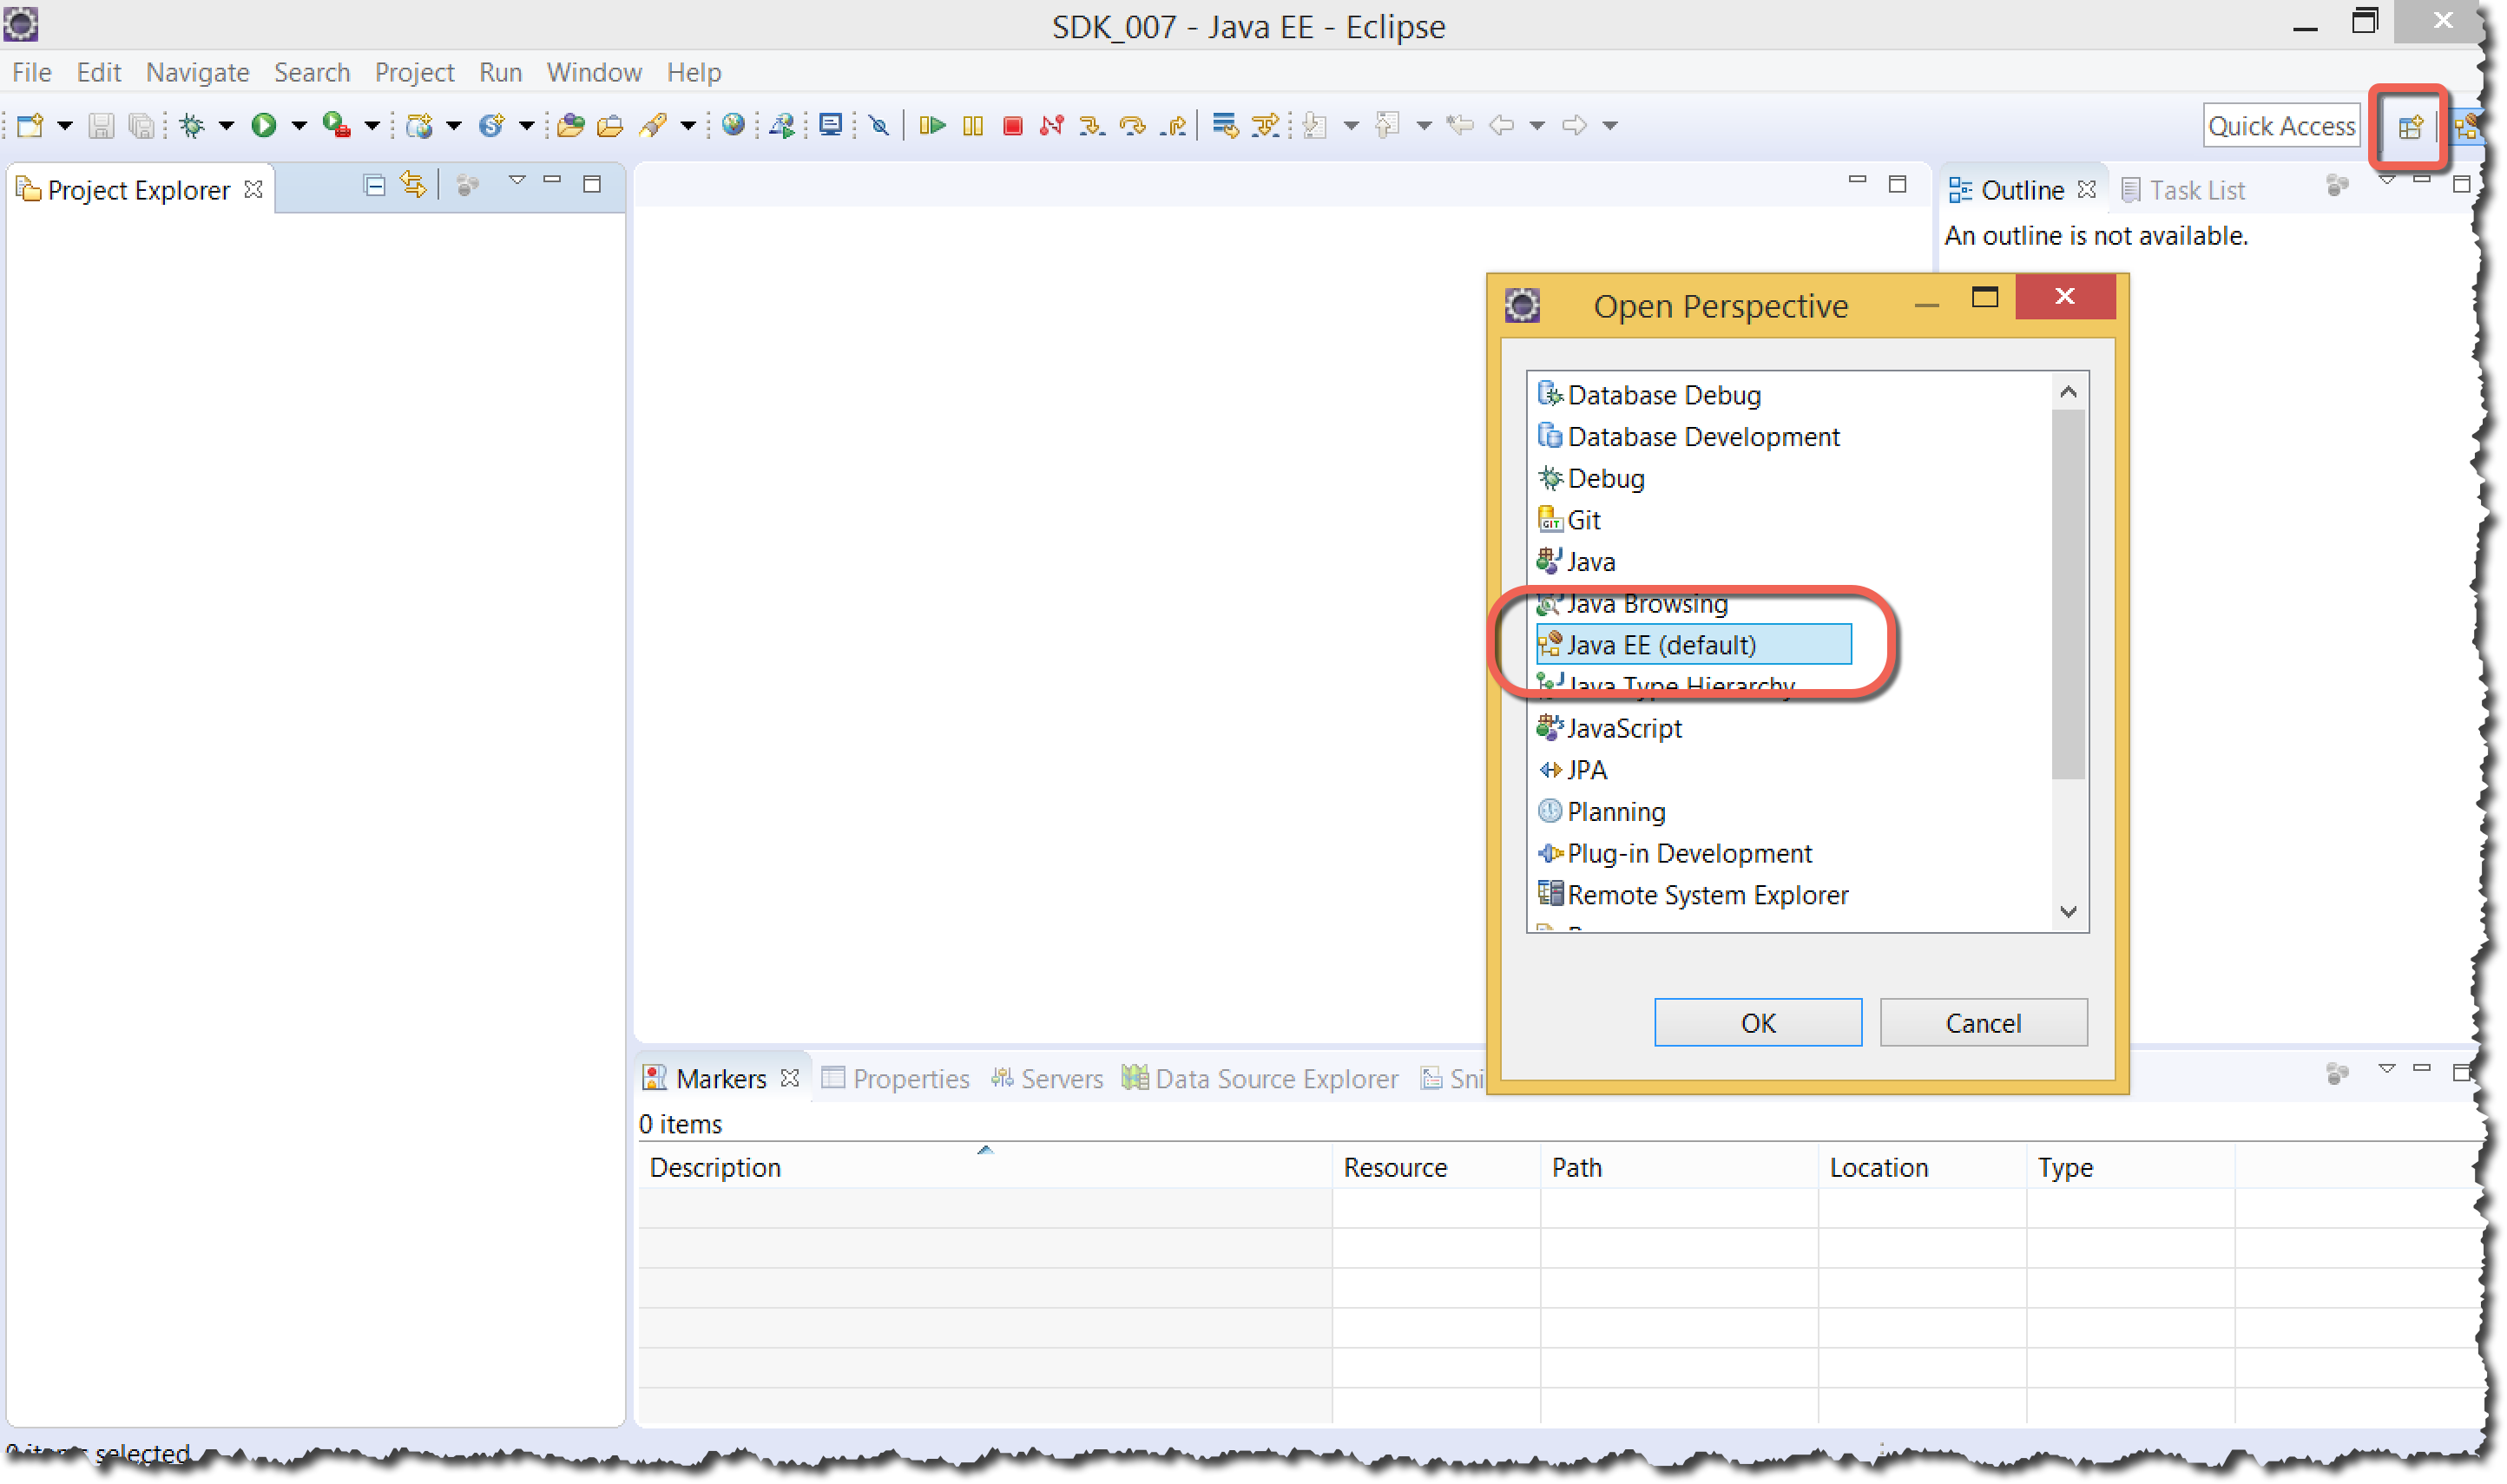
Eclipse may start with the welcome page which you can close and you should be presented with a blank project window. If you have any doubt that your Eclipse screen is looking correct click on the “Open perspective” icon in the top right and select “Java EE” as your perspective. Your screen should be close to something like this:
This should now explain why your previous workspace could not import multiple versions of a sample project because although you have deleted it from the project window it still existed in the workspace folder on your hard drive.
- Now import the sample project from the downloaded SDK folder. Menu path “File > Import”. Select the “General” folder and “Existing Projects into Workspace” option. Use the file browser to navigate to the directory where you downloaded the sample projects and select the “ColoredBox” project. Select the checkbox “Copy projects into workspace”.


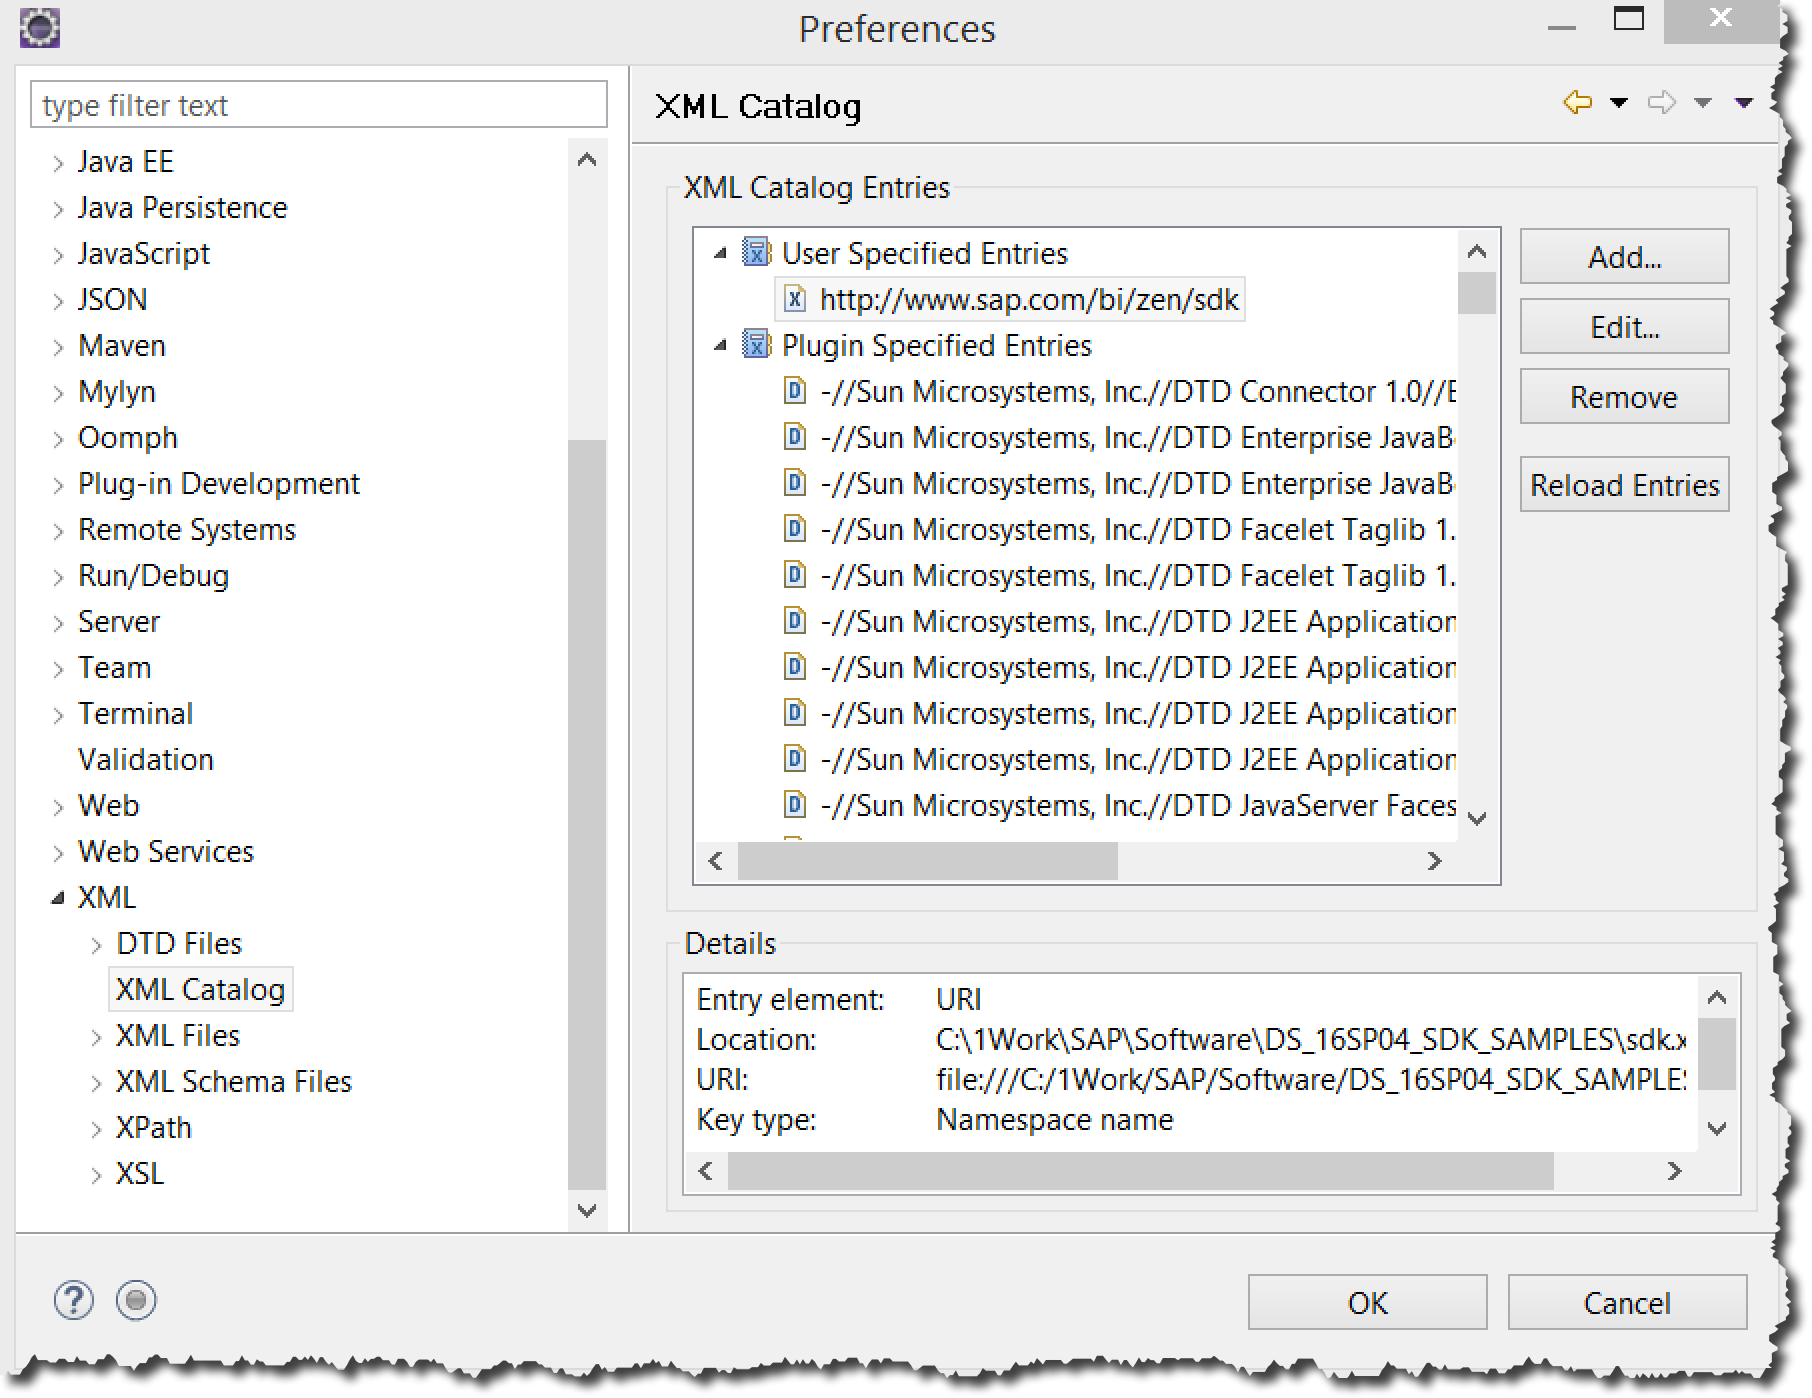
- Next set the XML Catalog. Menu path “Window > Preferences > XML > XML Catalog”. Select “User specified Entries” in the listbox to the right and press the “Add” button. Navigate in your file browser to the SDK samples and templates that you downloaded and select the sdk.xsd file.


- Now set the window preferences for the target plugin. Menu path “Window > Preferences > Plug-in development > Target Platform”. In the listbox on the right select “designstudio”. It’s very important to see the path to your installation of the 64-bit Design Studio appear in the “Locations” text box at the bottom of the screen. If there is any error or the version is incorrect you can press the “Edit” button and set the path to Design Studio.


- Run project clean. Menu path “Project > Clean…”. Then select “Clean all projects”.

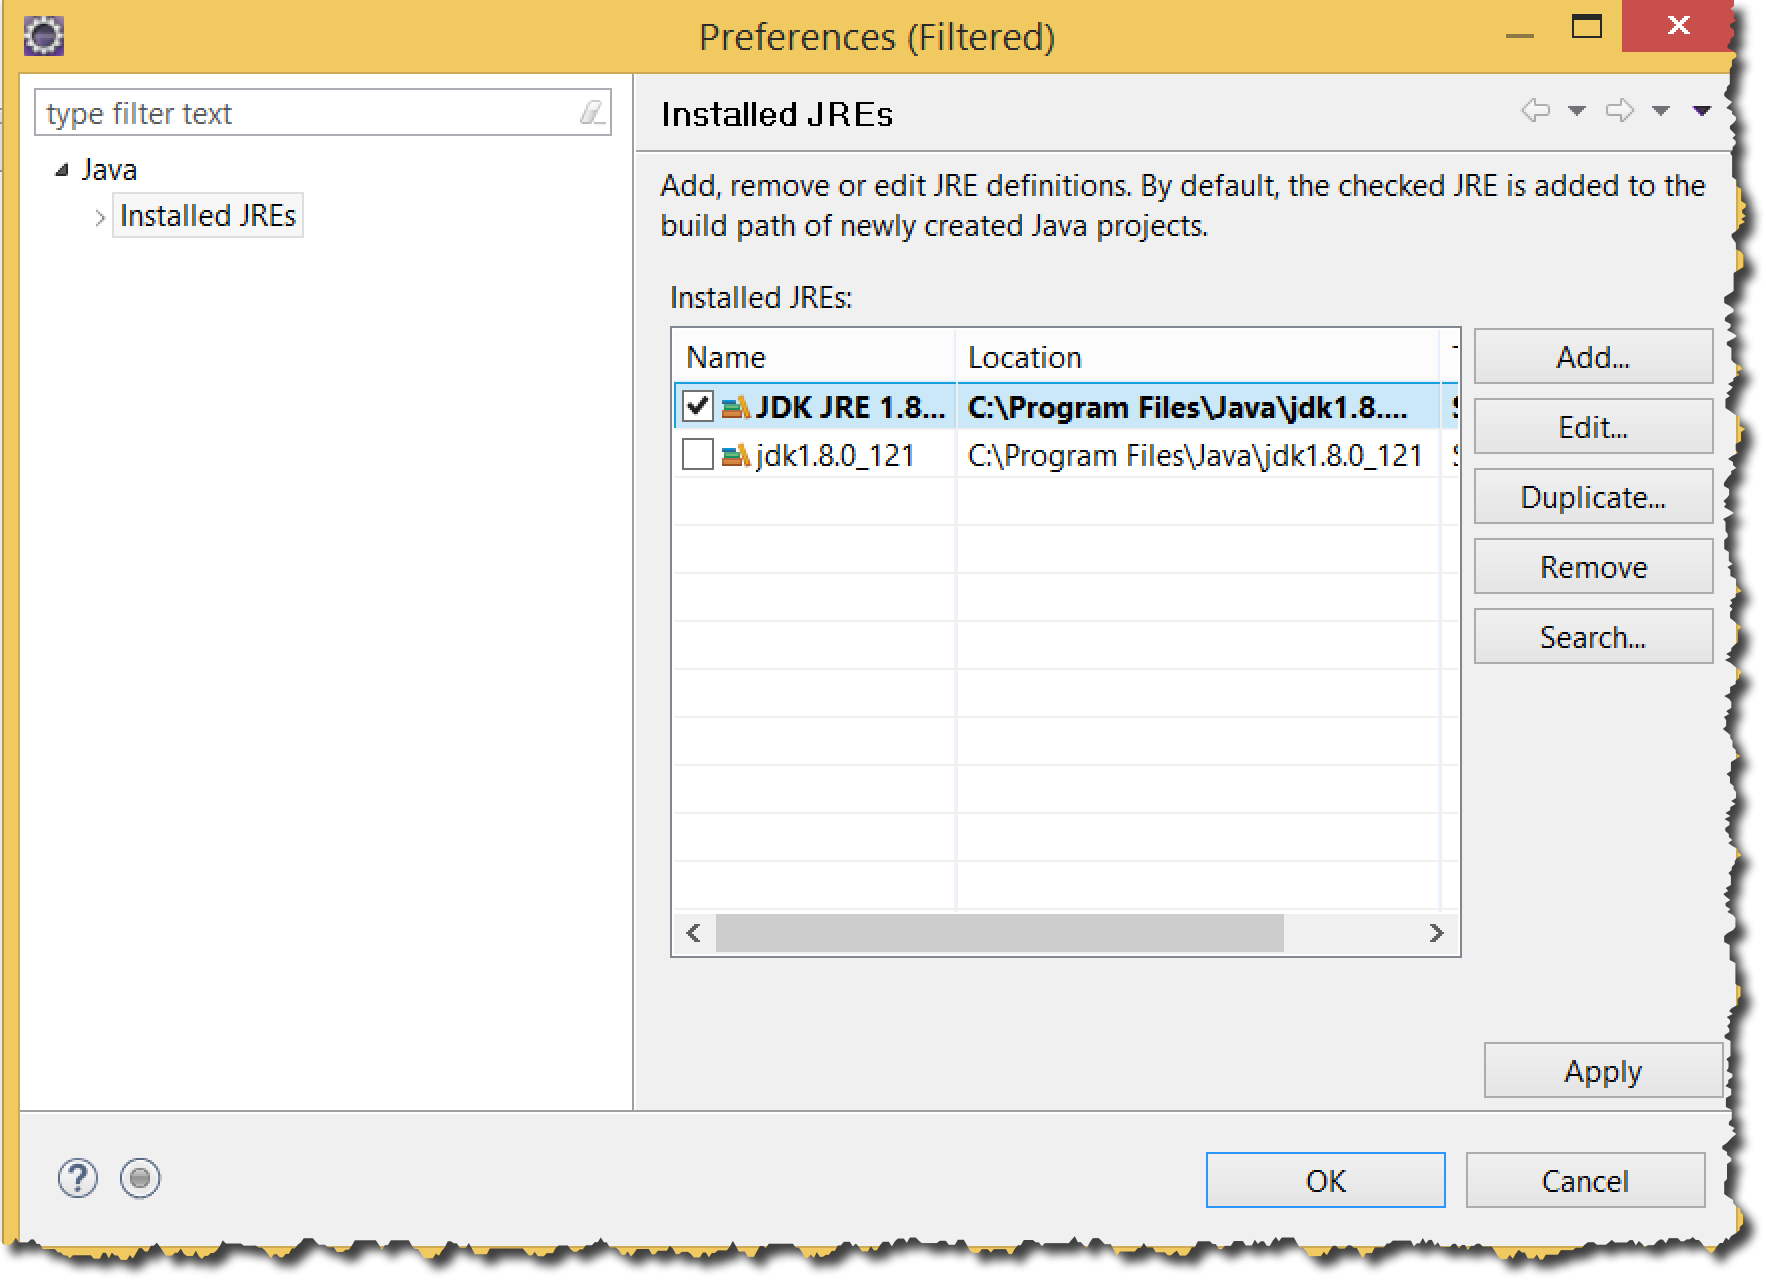
- Run configuration. Menu path “Run > Run Configurations…”. Double-click “Eclipse Applications”. Rename the application to “SDK” and press the “Installed JREs…” button.


The existing path should display the path to your newly installed 64-bit JDK root directory. If not, or you want to double-check, you can press the “Add” button to the right and provide the path to your installed JDK root directory.


You can name the JRE anything you want. In my case I called it “JDK JRE 1.8”.
As soon as you select the correct subdirectory the textbox with the list of “JRE System Libraries:” is populated. Now select this as your JRE runtime in the checkbox.


Now, in my case, I get a “Validation error” dialog box but the system continues to execute.

It then launches and instance of Design Studio which appears and a collapsed window with just the minimize, maximize and cancel buttons showing.

You will notice that the console windows displays some warnings and error messages. According to note 2152667 you can just ignore these messages.

Maximize the window to reveal the Design Studio welcome page which you can close and the Design Studio IDE open revealing the new “ColoredBox” components which you can now use in an application.

- SAP Managed Tags:
- SAP BusinessObjects Design Studio
5 Comments
You must be a registered user to add a comment. If you've already registered, sign in. Otherwise, register and sign in.
Labels in this area
-
ABAP CDS Views - CDC (Change Data Capture)
2 -
AI
1 -
Analyze Workload Data
1 -
BTP
1 -
Business and IT Integration
2 -
Business application stu
1 -
Business Technology Platform
1 -
Business Trends
1,658 -
Business Trends
93 -
CAP
1 -
cf
1 -
Cloud Foundry
1 -
Confluent
1 -
Customer COE Basics and Fundamentals
1 -
Customer COE Latest and Greatest
3 -
Customer Data Browser app
1 -
Data Analysis Tool
1 -
data migration
1 -
data transfer
1 -
Datasphere
2 -
Event Information
1,400 -
Event Information
66 -
Expert
1 -
Expert Insights
177 -
Expert Insights
299 -
General
1 -
Google cloud
1 -
Google Next'24
1 -
Kafka
1 -
Life at SAP
780 -
Life at SAP
13 -
Migrate your Data App
1 -
MTA
1 -
Network Performance Analysis
1 -
NodeJS
1 -
PDF
1 -
POC
1 -
Product Updates
4,577 -
Product Updates
344 -
Replication Flow
1 -
RisewithSAP
1 -
SAP BTP
1 -
SAP BTP Cloud Foundry
1 -
SAP Cloud ALM
1 -
SAP Cloud Application Programming Model
1 -
SAP Datasphere
2 -
SAP S4HANA Cloud
1 -
SAP S4HANA Migration Cockpit
1 -
Technology Updates
6,873 -
Technology Updates
422 -
Workload Fluctuations
1
Related Content
- Support for API Business Hub Enterprise in Actions Project in Technology Blogs by SAP
- How to use AI services to translate Picklists in SAP SuccessFactors - An example in Technology Blogs by SAP
- Developing & Deploying the UI5 App to Cloud Foundry and Accessing from App-router End-to-End Steps in Technology Blogs by Members
- Enabling Support for Existing CAP Projects in SAP Build Code in Technology Blogs by Members
- New Machine Learning features in SAP HANA Cloud in Technology Blogs by SAP
Top kudoed authors
| User | Count |
|---|---|
| 40 | |
| 25 | |
| 17 | |
| 13 | |
| 8 | |
| 7 | |
| 7 | |
| 7 | |
| 6 | |
| 6 |