
- SAP Community
- Products and Technology
- Enterprise Resource Planning
- ERP Blogs by Members
- How to initiate an OAuth connection to SuccessFact...
Enterprise Resource Planning Blogs by Members
Gain new perspectives and knowledge about enterprise resource planning in blog posts from community members. Share your own comments and ERP insights today!
Turn on suggestions
Auto-suggest helps you quickly narrow down your search results by suggesting possible matches as you type.
Showing results for
Product and Topic Expert
Options
- Subscribe to RSS Feed
- Mark as New
- Mark as Read
- Bookmark
- Subscribe
- Printer Friendly Page
- Report Inappropriate Content
03-05-2017
1:09 PM
Intro - What is OAuth?
OAuth 2.0 (or simply put OAuth) is an Authorization framework - when a user requests access to a resource from a Service Provider (without providing their credentials) and is authorized by an Identity Provider (IdP) to access the resource i.e. the user credentials are validated against the IdP - whereby one app acts on behalf of a user to interact with another app.
For example, I would like to subscribe to a news channel - SBS On Demand - using my Google ID - myuser@gmail.com - instead of registering a new profile on SBS. In this instance OAuth lets an IdP - Google - to access a resource from the Service Provider - SBS On Demand. Since I am using my Google ID to access SBS it doesn't have any knowledge of my password, it just sees me as myuser@gmail.com.
Why (and when) to OAuth?
OAuth underlines the concepts of Principal Propagation - where a user who performs a task in the source system is required to perform the same task in the target system (like a user who creates a Purchase Order in app A, that then gets approved and flows into app B, where it gets amended further by the same user who created it in app A in the first instance).
The below diagram helps illustrate how to arrive at a suitable use case for OAuth

How do we implement a basic OAuth scenario?
The below steps serve as a “how to guide” on how to implement OAuth in SuccessFactors EC, and test it using Postman (you can choose to use any other suitable REST client).
It is based on the official SAP document “SAP SuccessFactors HCM Suite OData API: Developer
Guide - About HCM Suite OData APIs”. This document is meant to complement the official guide.
Step 1 Create an interface User ID
We will start off with creating a user in the Provisioning instance. Typically all activities in Provisioning are performed by a SuccessFactors Certified Consultant.
Login to the Provisioning instance, then go to Company Name, click Company Settings, and fill in the below fields (all are required) and click on Create Admin to create an Admin user for our interfaces. We will call ours apiuser (First Name - API, Last Name - User).

Once we have completed this step we can log out of Provisioning and then log into BizX to execute the remainder of the steps.
Step 2 Grant the necessary permissions to the User ID
We will now grant the apiuser with permissions. We will follow the Role Based Permission (RBP) approach to set up the permissions for our apiuser. This involves creating a Permission Role and a Permission Group.
Go to Admin Centre, click on Set User Permissions, then click on Manage Permission Roles. Alternatively you can access Manage Permission Roles by entering it in the Search for actions or people box.
Create a new Role (click Create New), enter a meaningful Role Name - we will call ours API User (but feel free to use a name that is aligned to your Company’s naming standards). Enter a Description for the Role (we have called ours API User). Under Permission settings click Permission… scroll down to the link Manage Integration Tools, and select the following check boxes - Admin access to OData API and Manage OAuth2 Client Applications and click Finished.
As we have used our Role for a wider range of scenarios (that involve the Employee Central API, Integration Center etc.) you will see that we have activated many more permissions as reflected in the picture below.

Click Save Changes.
Now create a Permission Group.
Go to Admin Centre, click on Set User Permissions, then click on Manage Permission Groups. Alternatively you can access Manage Permission Groups by entering it in the Search for actions or people box.
As we did with the Permission Role call your group API User (to keep it simple), go to the People Pool section and select User Name from the drop down, type in apiuser on the next Search Results screen, select the checkbox next to the name, and click Finished. Click Finished once you return to the previous screen.

Now we shall assign our newly created Permission Group API User to Permission Role API User.
Once in the Permission Role, scroll to Grant this role to… section click Add, enter API User as the Permission Group and click Finished.

You can now navigate back to the Permission Group to confirm the assignment. Once you are in the API User group you will see Granted Permission Roles has an entry API User in the list of Permission Roles.
That takes care of our prerequisite set up of User ID and permissions.
Step 3 Register the OAuth2 Client
Go to Admin Centre, click on Company Settings, you will see a link - Manage OAuth2 Client Applications, click on this link. Click on Register Client Application. This is the easiest step and requires little technical knowledge.
Enter an Application Name - give it an arbitrary but meaningful name - we will call it OAuthtest, provide a Description - Client to test OAuth, enter an Application URL - http://OAuthtest
Click on Generate X.509 Certificate button, enter a Common Name(CN) - Oauth, you may leave the rest of the fields empty as they are.
Note: the X.509 certificate is issued by SuccessFactors.

Click Generate, then Download a copy of the X.509 certificate on your machine.
Open the certificate file using notepad (or any such app). The X.509 certificate has 2 parts – the private key and the certificate. We shall copy and paste the characters between -----BEGIN ENCRYPTED PRIVATE KEY----- and -----END ENCRYPTED PRIVATE KEY----- in the next step
Click Register.

Go into the OAuth application now and take note of the API secret key.

Step 4 Generate a SAML assertion
Open a new window in Postman and enter the following details
Operation POST
URL https://api10preview.sapsf.com/oauth/idp - this is the endpoint URL of the data center where this instance of SuccessFactors is hosted. For a complete list of URLs of other data centers please refer to - http://help.sap.com/saphelpiis_cloud4hr/EN/SF_HCMS_OData_API_User_en/frameset.htm?03e1fc3791684367a6...
Authorization No Auth
Headers
Content-Type application/x-www-form-urlencoded
Body raw
Request payload, formulate the payload as such -
client_id - this is the API Key that was generated earlier
user_id - User ID to call the API
token_url - https://api10preview.sapsf.com/outh/token
private_key - this is the private key from the X.509 certificate
Your request payload should now look like -
client_id=Njk2ZjAzNjY5MDVlZGVlMWU3NzFmMWQ3NzgwYg&user_id=apiuser&token_url=https://api10preview.sapsf.com/outh/token&private_key=<enter the private key from the X.509 certificate here>
Click Send.

You should get back a Base64-encoded response that looks like the below. Note the Status of 200 OK.
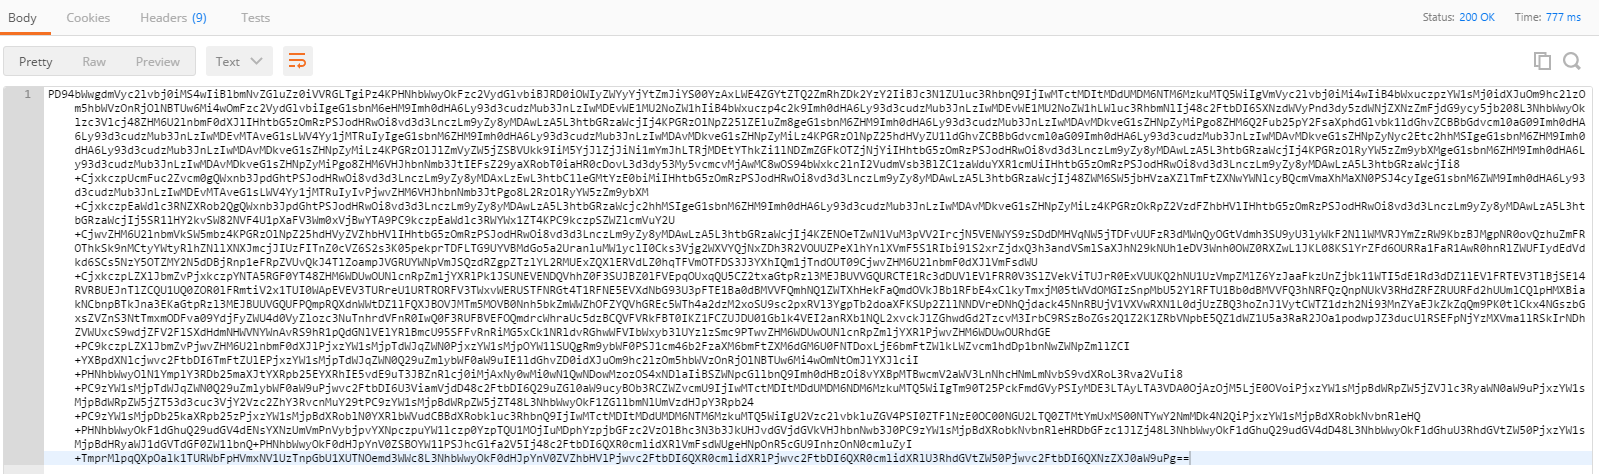
The response you will get will be a Base64 encoded SAML assertion. You can use a free online tool - https://www.base64decode.org to decode the response.
Here you see the User ID apiuser being returned in the response (decoded) -
<saml2:NameID Format="urn:oasis:names:tc:SAML:1.1:nameid-format:unspecified">apiuser</saml2:NameID>
If you want to use an email address instead of an User ID then mark use_email = true and replace the User ID with the Email ID.
This requires the Email ID to be uniquely mapped to a single user in EC.
client_id=Njk2ZjAzNjY5MDVlZGVlMWU3NzFmMWQ3NzgwYg&user_id=<emailid@company.com>&token_url=https://api10preview.sapsf.com/outh/token&private_key=<enter the private key from the X.509 certificate here>
Click Send.
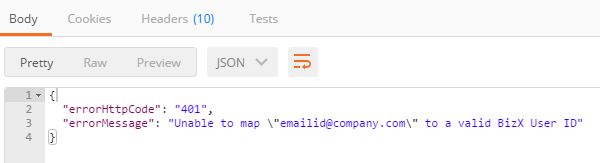
If the Email ID isn’t uniquely mapped to a user in EC then it will error with - Unable to map \"emailid@company.com\" to a valid BizX User ID.
Once you decode the Base64-encoded response you will see an Email ID in the response (as opposed to the User ID earlier)
<saml2:NameID Format="urn:oasis:names:tc:SAML:1.1:nameid-format:unspecified">emailid@company.com</saml2:NameID>
Step 5 Request a User Token using the SAML Assertion
Open a new window in Postman and enter the following details
Operation POST
URL https://api10preview.sapsf.com/oauth/token
Authorization No Auth
Headers
Content-Type application/x-www-form-urlencoded
Body raw
Request payload,
formulate the payload as such -
company_id - SuccessFactors Company ID
client_id - this is the API Key that was generated earlier
grant_type - urn:ietf:params:oauth:grant-type:saml2-bearer
user_id - User ID to call the API
assertion - Base64-coded SAML assertion from the response in the earlier step
Your request payload should now look like -
company_id=MyCompanyDevAu&client_id=AzNjY5MDVlZGVlMWU3NzFmMWQ3NzgwYg&grant_type=urn:ietf:params:oauth:grant-type:saml2-bearer&assertion=<enter the response from the previous step here>
Please note - DO NOT include api_key here in the Request.
Response

This tells us that the token expires in 85114 seconds or close to 24 hours.
Make a note of this Bearer token, we will validate it in the next step.
Step 6 Validate Bearer Token
Open a new session in Postman. We will use the GET operation to validate the Bearer token.
URL https://api10preview.sapsf.com/oauth/validate
Authorization No Auth
Headers
Authorisation Bearer followed by the token string from the earlier step

This ascertains the validity of the token.
Step 7 Use the Bearer Token to Query an OData Entity
Open a new session in Postman.
Authorization No Auth
Headers
Authorisation Bearer followed by the token string from the earlier step
Use the GET operation with the Query -
https://api10preview.sapsf.com:443/odata/v2/Country(code='AUS',effectiveStartDate=datetime'1900-01-0...')?
Response

The OData Query will return you with a list of Countries that are configured in your SuccessFactors instance like in the above screenshot.
Conclusion...
So now that we have seen what OAuth is, what its capabilities are, and how it can be easily implemented we must isolate use cases where OAuth is not suited and hence should not be used.
If your integration doesn't occur in real-time, doesn't require Principal Propagation and Single Sign-On then it is best to persist with Basic Authentication (using a suitable System ID).
Last but not the least - a word of thanks to my dear friends - yashagarwalfor his encouragement to write this blog, neelesh.kamath for his support and 5cea1755d05648198f37ee2c4c14eede for his guidance.
OAuth 2.0 (or simply put OAuth) is an Authorization framework - when a user requests access to a resource from a Service Provider (without providing their credentials) and is authorized by an Identity Provider (IdP) to access the resource i.e. the user credentials are validated against the IdP - whereby one app acts on behalf of a user to interact with another app.
For example, I would like to subscribe to a news channel - SBS On Demand - using my Google ID - myuser@gmail.com - instead of registering a new profile on SBS. In this instance OAuth lets an IdP - Google - to access a resource from the Service Provider - SBS On Demand. Since I am using my Google ID to access SBS it doesn't have any knowledge of my password, it just sees me as myuser@gmail.com.
Why (and when) to OAuth?
OAuth underlines the concepts of Principal Propagation - where a user who performs a task in the source system is required to perform the same task in the target system (like a user who creates a Purchase Order in app A, that then gets approved and flows into app B, where it gets amended further by the same user who created it in app A in the first instance).
The below diagram helps illustrate how to arrive at a suitable use case for OAuth
How do we implement a basic OAuth scenario?
The below steps serve as a “how to guide” on how to implement OAuth in SuccessFactors EC, and test it using Postman (you can choose to use any other suitable REST client).
It is based on the official SAP document “SAP SuccessFactors HCM Suite OData API: Developer
Guide - About HCM Suite OData APIs”. This document is meant to complement the official guide.
Step 1 Create an interface User ID
We will start off with creating a user in the Provisioning instance. Typically all activities in Provisioning are performed by a SuccessFactors Certified Consultant.
Login to the Provisioning instance, then go to Company Name, click Company Settings, and fill in the below fields (all are required) and click on Create Admin to create an Admin user for our interfaces. We will call ours apiuser (First Name - API, Last Name - User).
Once we have completed this step we can log out of Provisioning and then log into BizX to execute the remainder of the steps.
Step 2 Grant the necessary permissions to the User ID
We will now grant the apiuser with permissions. We will follow the Role Based Permission (RBP) approach to set up the permissions for our apiuser. This involves creating a Permission Role and a Permission Group.
Go to Admin Centre, click on Set User Permissions, then click on Manage Permission Roles. Alternatively you can access Manage Permission Roles by entering it in the Search for actions or people box.
Create a new Role (click Create New), enter a meaningful Role Name - we will call ours API User (but feel free to use a name that is aligned to your Company’s naming standards). Enter a Description for the Role (we have called ours API User). Under Permission settings click Permission… scroll down to the link Manage Integration Tools, and select the following check boxes - Admin access to OData API and Manage OAuth2 Client Applications and click Finished.
As we have used our Role for a wider range of scenarios (that involve the Employee Central API, Integration Center etc.) you will see that we have activated many more permissions as reflected in the picture below.
Click Save Changes.
Now create a Permission Group.
Go to Admin Centre, click on Set User Permissions, then click on Manage Permission Groups. Alternatively you can access Manage Permission Groups by entering it in the Search for actions or people box.
As we did with the Permission Role call your group API User (to keep it simple), go to the People Pool section and select User Name from the drop down, type in apiuser on the next Search Results screen, select the checkbox next to the name, and click Finished. Click Finished once you return to the previous screen.
Now we shall assign our newly created Permission Group API User to Permission Role API User.
Once in the Permission Role, scroll to Grant this role to… section click Add, enter API User as the Permission Group and click Finished.
You can now navigate back to the Permission Group to confirm the assignment. Once you are in the API User group you will see Granted Permission Roles has an entry API User in the list of Permission Roles.
That takes care of our prerequisite set up of User ID and permissions.
Step 3 Register the OAuth2 Client
Go to Admin Centre, click on Company Settings, you will see a link - Manage OAuth2 Client Applications, click on this link. Click on Register Client Application. This is the easiest step and requires little technical knowledge.
Enter an Application Name - give it an arbitrary but meaningful name - we will call it OAuthtest, provide a Description - Client to test OAuth, enter an Application URL - http://OAuthtest
Click on Generate X.509 Certificate button, enter a Common Name(CN) - Oauth, you may leave the rest of the fields empty as they are.
Note: the X.509 certificate is issued by SuccessFactors.
Click Generate, then Download a copy of the X.509 certificate on your machine.
Open the certificate file using notepad (or any such app). The X.509 certificate has 2 parts – the private key and the certificate. We shall copy and paste the characters between -----BEGIN ENCRYPTED PRIVATE KEY----- and -----END ENCRYPTED PRIVATE KEY----- in the next step
Click Register.
Go into the OAuth application now and take note of the API secret key.
Step 4 Generate a SAML assertion
Open a new window in Postman and enter the following details
Operation POST
URL https://api10preview.sapsf.com/oauth/idp - this is the endpoint URL of the data center where this instance of SuccessFactors is hosted. For a complete list of URLs of other data centers please refer to - http://help.sap.com/saphelpiis_cloud4hr/EN/SF_HCMS_OData_API_User_en/frameset.htm?03e1fc3791684367a6...
Authorization No Auth
Headers
Content-Type application/x-www-form-urlencoded
Body raw
Request payload, formulate the payload as such -
client_id - this is the API Key that was generated earlier
user_id - User ID to call the API
token_url - https://api10preview.sapsf.com/outh/token
private_key - this is the private key from the X.509 certificate
Your request payload should now look like -
client_id=Njk2ZjAzNjY5MDVlZGVlMWU3NzFmMWQ3NzgwYg&user_id=apiuser&token_url=https://api10preview.sapsf.com/outh/token&private_key=<enter the private key from the X.509 certificate here>
Click Send.
You should get back a Base64-encoded response that looks like the below. Note the Status of 200 OK.
The response you will get will be a Base64 encoded SAML assertion. You can use a free online tool - https://www.base64decode.org to decode the response.
Here you see the User ID apiuser being returned in the response (decoded) -
<saml2:NameID Format="urn:oasis:names:tc:SAML:1.1:nameid-format:unspecified">apiuser</saml2:NameID>
If you want to use an email address instead of an User ID then mark use_email = true and replace the User ID with the Email ID.
This requires the Email ID to be uniquely mapped to a single user in EC.
client_id=Njk2ZjAzNjY5MDVlZGVlMWU3NzFmMWQ3NzgwYg&user_id=<emailid@company.com>&token_url=https://api10preview.sapsf.com/outh/token&private_key=<enter the private key from the X.509 certificate here>
Click Send.
If the Email ID isn’t uniquely mapped to a user in EC then it will error with - Unable to map \"emailid@company.com\" to a valid BizX User ID.
Once you decode the Base64-encoded response you will see an Email ID in the response (as opposed to the User ID earlier)
<saml2:NameID Format="urn:oasis:names:tc:SAML:1.1:nameid-format:unspecified">emailid@company.com</saml2:NameID>
Step 5 Request a User Token using the SAML Assertion
Open a new window in Postman and enter the following details
Operation POST
URL https://api10preview.sapsf.com/oauth/token
Authorization No Auth
Headers
Content-Type application/x-www-form-urlencoded
Body raw
Request payload,
formulate the payload as such -
company_id - SuccessFactors Company ID
client_id - this is the API Key that was generated earlier
grant_type - urn:ietf:params:oauth:grant-type:saml2-bearer
user_id - User ID to call the API
assertion - Base64-coded SAML assertion from the response in the earlier step
Your request payload should now look like -
company_id=MyCompanyDevAu&client_id=AzNjY5MDVlZGVlMWU3NzFmMWQ3NzgwYg&grant_type=urn:ietf:params:oauth:grant-type:saml2-bearer&assertion=<enter the response from the previous step here>
Please note - DO NOT include api_key here in the Request.
Response
This tells us that the token expires in 85114 seconds or close to 24 hours.
Make a note of this Bearer token, we will validate it in the next step.
Step 6 Validate Bearer Token
Open a new session in Postman. We will use the GET operation to validate the Bearer token.
URL https://api10preview.sapsf.com/oauth/validate
Authorization No Auth
Headers
Authorisation Bearer followed by the token string from the earlier step
This ascertains the validity of the token.
Step 7 Use the Bearer Token to Query an OData Entity
Open a new session in Postman.
Authorization No Auth
Headers
Authorisation Bearer followed by the token string from the earlier step
Use the GET operation with the Query -
https://api10preview.sapsf.com:443/odata/v2/Country(code='AUS',effectiveStartDate=datetime'1900-01-0...')?
Response
The OData Query will return you with a list of Countries that are configured in your SuccessFactors instance like in the above screenshot.
Conclusion...
So now that we have seen what OAuth is, what its capabilities are, and how it can be easily implemented we must isolate use cases where OAuth is not suited and hence should not be used.
If your integration doesn't occur in real-time, doesn't require Principal Propagation and Single Sign-On then it is best to persist with Basic Authentication (using a suitable System ID).
Last but not the least - a word of thanks to my dear friends - yashagarwalfor his encouragement to write this blog, neelesh.kamath for his support and 5cea1755d05648198f37ee2c4c14eede for his guidance.
33 Comments
You must be a registered user to add a comment. If you've already registered, sign in. Otherwise, register and sign in.
Labels in this area
-
"mm02"
1 -
A_PurchaseOrderItem additional fields
1 -
ABAP
1 -
ABAP Extensibility
1 -
ACCOSTRATE
1 -
ACDOCP
1 -
Adding your country in SPRO - Project Administration
1 -
Advance Return Management
1 -
AI and RPA in SAP Upgrades
1 -
Approval Workflows
1 -
Ariba
1 -
ARM
1 -
ASN
1 -
Asset Management
1 -
Associations in CDS Views
1 -
auditlog
1 -
Authorization
1 -
Availability date
1 -
Azure Center for SAP Solutions
1 -
AzureSentinel
2 -
Bank
1 -
BAPI_SALESORDER_CREATEFROMDAT2
1 -
BRF+
1 -
BRFPLUS
1 -
Bundled Cloud Services
1 -
business participation
1 -
Business Processes
1 -
CAPM
1 -
Carbon
1 -
Cental Finance
1 -
CFIN
1 -
CFIN Document Splitting
1 -
Cloud ALM
1 -
Cloud Integration
1 -
condition contract management
1 -
Connection - The default connection string cannot be used.
1 -
Custom Table Creation
1 -
Customer Screen in Production Order
1 -
Data Quality Management
1 -
Date required
1 -
Decisions
1 -
desafios4hana
1 -
Developing with SAP Integration Suite
1 -
Direct Outbound Delivery
1 -
DMOVE2S4
1 -
EAM
1 -
EDI
3 -
EDI 850
1 -
EDI 856
1 -
edocument
1 -
EHS Product Structure
1 -
Emergency Access Management
1 -
Energy
1 -
EPC
1 -
Financial Operations
1 -
Find
1 -
FINSSKF
1 -
Fiori
1 -
Flexible Workflow
1 -
Gas
1 -
Gen AI enabled SAP Upgrades
1 -
General
1 -
generate_xlsx_file
1 -
Getting Started
1 -
HomogeneousDMO
1 -
IDOC
2 -
Integration
1 -
Learning Content
2 -
LogicApps
2 -
low touchproject
1 -
Maintenance
1 -
management
1 -
Material creation
1 -
Material Management
1 -
MD04
1 -
MD61
1 -
methodology
1 -
Microsoft
2 -
MicrosoftSentinel
2 -
Migration
1 -
mm purchasing
1 -
MRP
1 -
MS Teams
2 -
MT940
1 -
Newcomer
1 -
Notifications
1 -
Oil
1 -
open connectors
1 -
Order Change Log
1 -
ORDERS
2 -
OSS Note 390635
1 -
outbound delivery
1 -
outsourcing
1 -
PCE
1 -
Permit to Work
1 -
PIR Consumption Mode
1 -
PIR's
1 -
PIRs
1 -
PIRs Consumption
1 -
PIRs Reduction
1 -
Plan Independent Requirement
1 -
Premium Plus
1 -
pricing
1 -
Primavera P6
1 -
Process Excellence
1 -
Process Management
1 -
Process Order Change Log
1 -
Process purchase requisitions
1 -
Product Information
1 -
Production Order Change Log
1 -
purchase order
1 -
Purchase requisition
1 -
Purchasing Lead Time
1 -
Redwood for SAP Job execution Setup
1 -
RISE with SAP
1 -
RisewithSAP
1 -
Rizing
1 -
S4 Cost Center Planning
1 -
S4 HANA
1 -
S4HANA
3 -
Sales and Distribution
1 -
Sales Commission
1 -
sales order
1 -
SAP
2 -
SAP Best Practices
1 -
SAP Build
1 -
SAP Build apps
1 -
SAP Cloud ALM
1 -
SAP Data Quality Management
1 -
SAP Maintenance resource scheduling
2 -
SAP Note 390635
1 -
SAP S4HANA
2 -
SAP S4HANA Cloud private edition
1 -
SAP Upgrade Automation
1 -
SAP WCM
1 -
SAP Work Clearance Management
1 -
Schedule Agreement
1 -
SDM
1 -
security
2 -
Settlement Management
1 -
soar
2 -
Sourcing and Procurement
1 -
SSIS
1 -
SU01
1 -
SUM2.0SP17
1 -
SUMDMO
1 -
Teams
2 -
User Administration
1 -
User Participation
1 -
Utilities
1 -
va01
1 -
vendor
1 -
vl01n
1 -
vl02n
1 -
WCM
1 -
X12 850
1 -
xlsx_file_abap
1 -
YTD|MTD|QTD in CDs views using Date Function
1
- « Previous
- Next »
Related Content
- Introducing the GROW with SAP, core HR add-on in Enterprise Resource Planning Blogs by SAP
- SAP Enterprise Support Academy Newsletter April 2024 in Enterprise Resource Planning Blogs by SAP
- Terminated employees visible in Worker App in Enterprise Resource Planning Q&A
- Asset Management for Resource Scheduling - External availabilities (Rostering) in Enterprise Resource Planning Blogs by SAP
- Speeding up your SAP HCM move to the cloud in 2024 in Enterprise Resource Planning Blogs by SAP
Top kudoed authors
| User | Count |
|---|---|
| 5 | |
| 2 | |
| 2 | |
| 2 | |
| 2 | |
| 2 | |
| 1 | |
| 1 | |
| 1 | |
| 1 |