
- SAP Community
- Products and Technology
- Technology
- Technology Blogs by SAP
- SAP HANA Cloud Platform. Use case of Virtual Machi...
Technology Blogs by SAP
Learn how to extend and personalize SAP applications. Follow the SAP technology blog for insights into SAP BTP, ABAP, SAP Analytics Cloud, SAP HANA, and more.
Turn on suggestions
Auto-suggest helps you quickly narrow down your search results by suggesting possible matches as you type.
Showing results for
Employee
Options
- Subscribe to RSS Feed
- Mark as New
- Mark as Read
- Bookmark
- Subscribe
- Printer Friendly Page
- Report Inappropriate Content
01-19-2017
11:26 AM
In this blog we will be enabling communication from SAP HANA system on SAP HANA Cloud Platform to the Virtual Machine and then enable R server for HANA.
Before we proceed some pointers that has to be taken into account:
Exercise 1: Install and Configure R
In this exercise we will install R.
1. Execute:
zypper addrepo -f https://slesrepo.hana.ondemand.com/repo/SUSE/Products/SLE-SERVER/12/x86_64/product/ SUSE12

2. Execute
zypper addrepo -f https://slesrepo.hana.ondemand.com/repo/SUSE/Products/SLE-SDK/12/x86_64/product/ SUSE12SDK

Note: The steps 1-2 are performed so that we can have the repositories required to install R.
3. Execute: zypper repos
Note: This command will list all the added repositories.

4. Execute: zypper install gcc gcc-c++ gcc-fortran
Note: This command will install the dependencies required for compiling R.

5. Press “1” and enter.
Note: When you execute the above step there are some versioning issue with gcc-fortran, to continue the installation you are provided with some solution.
This step is done to downgrade the version by pressing the number of the solution as shown in the figure. (Order might change)

6. Press “y” and enter.
Note: This will retrieve the packages and install them.

7. Execute the command to download R source package.
wget http://ftp.iitm.ac.in/cran/src/base/R-2/R-2.15.0.tar.gz
Note: For information about supported versions of R and Rserve, see SAP HANA and R compatibility and support.
8. Execute: tar zxf R-2.15.0.tar.gz
Note: This is done to extract the tar.gz file

9. Execute: ls
Note: This step is done to list the contents of the directory.
10. Execute: cd R-2.15.0/
Note: This will change the directory to R-2.15.0
11. Execute: ./configure --enable-R-shlib --with-readline=no --with-x=no

12. Execute: make clean
Note: This step is done to compile R.
13. Execute: make
Note: This step might take some time.
14. Execute: make install
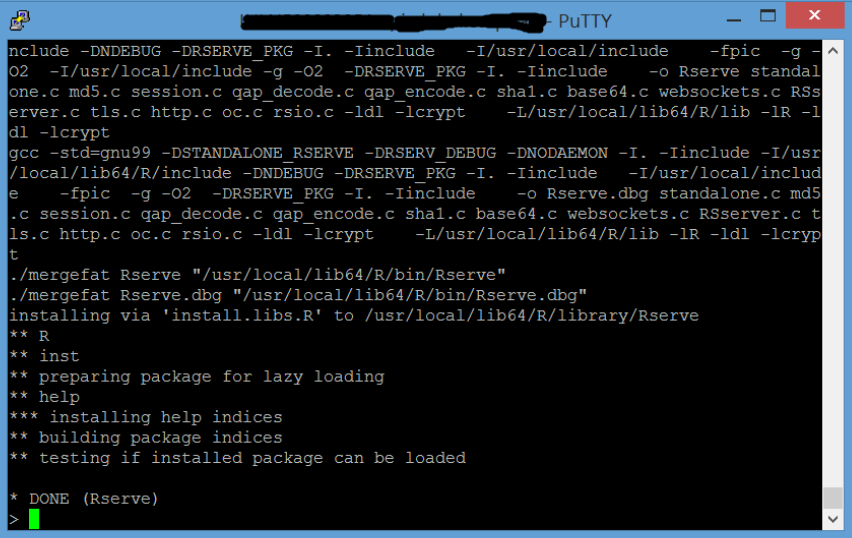
15. Execute: R
Note: This step is done to check if R has been installed. You should see the following output.

16. Execute: q()
Note: This step is done to exit from R. Note: When prompted to Save workspace image: Press “n” and Enter.
Summary: You have built R from source and installed it on the virtual machine.
Exercise 2: Install and Configure R server
In this step we will install and configure R server.
1. Execute command to download the Rserve package:
wget http://cran.rstudio.com/src/contrib/Rserve_1.7-3.tar.gz
2. Execute R and then execute:
install.packages("Rserve_1.7-3.tar.gz", repos = NULL)
Note: This command will install the package.
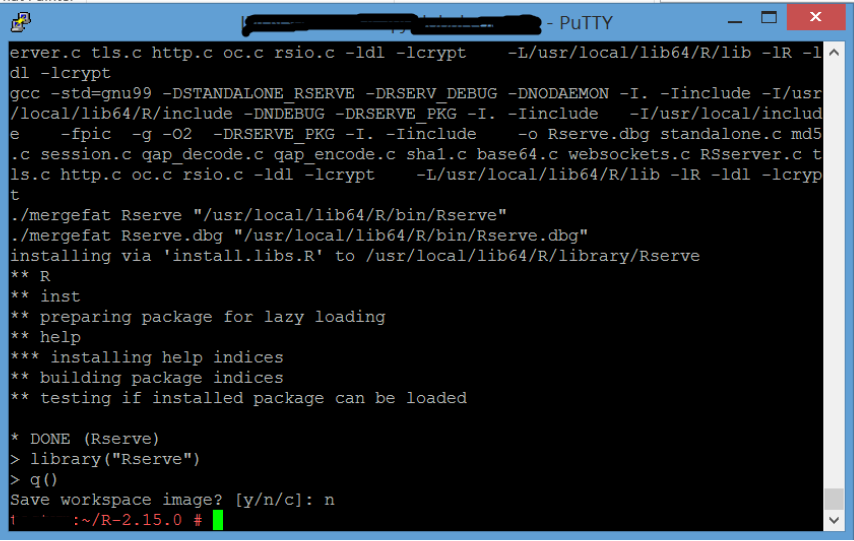
3. Execute: library("Rserve")
Note: Successful installation should return no output.
4. Execute: q()
5. When prompted to Save Workspace image. Press “n”.
6. Press Enter.
7. Execute: vi /etc/Rserv.conf
Follow the steps below to insert and save the entry.
Press I
Type remote enable
Press the keys in the following order Esc<space>:wq!
8. Execute: useradd ruser
Note: This step is done to create a user.
9. Execute: passwd ruser
Note: This step is done to add password to ruser.
10. Execute: su –l ruser
Note: This step is done to login as ruser.
11. Execute: R CMD Rserve --RS-port <port_number> --no-save --RS-encoding “utf8”
R server has started in daemon mode.
Note: The port that you will provide here is the one that you will create in next exercise “Enabling Communication to Virtual Machine”.

Summary: You have installed R server on your VM and successfully started it in daemon mode.
Exercise 3: Enabling Communication to Virtual Machine.
By default, outbound communication from the virtual machines to the Internet and other systems is allowed, but inbound communication has to be enabled.
In this exercise we will be enabling communication from SAP HANA system to the virtual machine.
1. Login to your cockpit.
2. Click on “Databases & Schemas”. Copy the ID of the HANA system.
3. Execute:
neo create-security-rule --account <your_hcp_account_name> --host hana.ondemand.com --user <s/p/i user id> --name <your_vm_name> --source-id <id of HANA system> --source-type HANA --from-port 4000 --to-port 4000
Note: This step is to create the security rule to specify the ports allowed for inbound communication.
Also use this port number in Exercise 2 Step 11.
Summary: You have enabled communication on the virtual machine by creating security rule, now the HANA system can connect to this VM.
Exercise 4: Configure SAP HANA
Depending on your system landscape and your R requirements, you may need to modify some of the SAP HANA database configurations, from the Administration editor in the SAP HANA studio.
To enable calling R procedures from the index server, the configuration parameters are under indexserver.inicalcEngine.
1. Open Eclipse.
2. Click on “Open Perspective”

3. Scroll down and select “SAP HANA Administration Console”.
4. On the left pane “Right click” and click on “Add Cloud System”
5. Enter the details as follows:
Landscape host: eu1.hana.ondemand.com
Account name: Your hcp account name
Username: your s/p/i userid.
Password: your s/p/i password. Click Next.

6. Enter the details as:
Databases: your database id
Database user: your database user
Database password: Your HANA db password. Click Finish.
7. You can now see the SAP HANA Cloud system that you have added on the left pane.
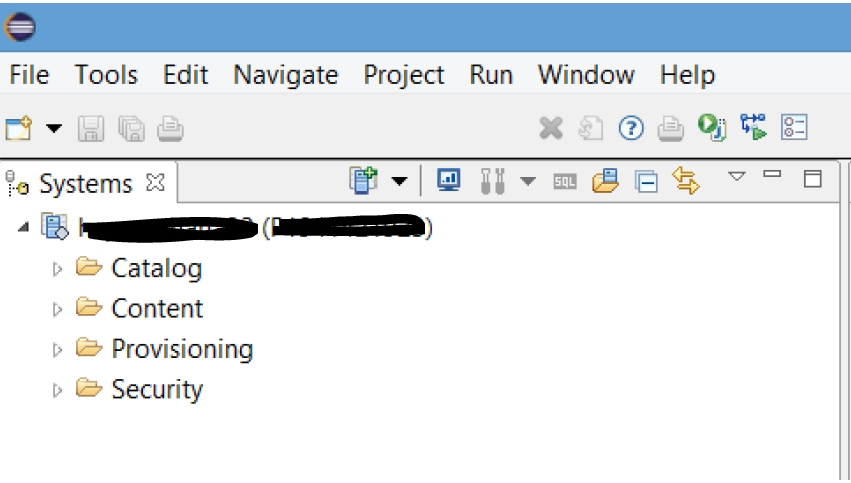
8. Right click on the cloud system and then on “Configuration and Monitoring” and then “Open Administration”
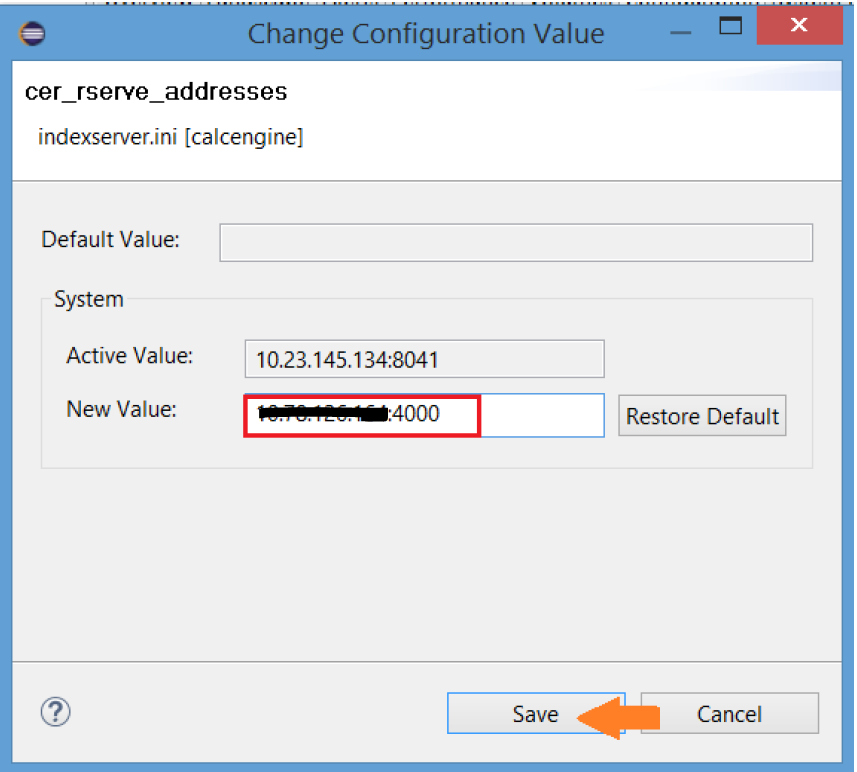
9. Click on “Configuration” then click on “indexserver.ini” and click on “calcengine”.
Note: This step is done to change some of the configuration properties required to run R specifically ip address .
10. Copy the IP address of VM from cockpit and the port number that you created in Exercise 3 Step 3 and put it in the new value as shown below: Click Save.
Exercise 5: Using R with SAP HANA
In this exercise we will test the connection between SAP HANA and R Server installed on the virtual machine
To create some initial data for our example, we use the dataset ‘spam’ provided by R and upload it to the SAP HANA database.
Note: To execute the R procedure successfully you have to download kernlab package and install it.
Note: You are logged in to VM as ruser.
1. Execute:
wget https://cran.r-project.org/src/contrib/kernlab_0.9-24.tar.gz
Note: This command will download Kernlab package
2. Execute R.
Execute:
install.packages("kernlab_0.9-24.tar.gz", repos = NULL)
3. Execute: library("kernlab")
Note: Successful installation should return no output.
4. Execute q(). Press “n” when prompted to save workspace. Press Enter
5. In Eclipse on your cloud system that you have added open the "SQL Console"
6. Copy the below script and paste on the SQL console and execute:
After executing the R procedure, your SAP HANA database instance should contain the following two new tables: spamTraining and spamEval.
The log from R server call:
Statement 'CALL DIVIDE_SPAMDATA()'
Successfully executed in 1.292 seconds (server processing time: 1.256 seconds) - Rows Affected: 4601
Congratulations! You have successfully used R with SAP HANA.
Whats Next?
You can manage volumes for your Virtual Machines.
What are volumes ?
Volumes are persistent storage that is created automatically when a virtual machine is created. It stores the file system and all software installed on it. Using the volume a new VM can be created.
Try these commands:
List the volumes:
neo list-volumes --account <your_account_name> --host hana.ondemand.com --user <s/p/i userid>
Create a new VM from the volume:
neo create-vm --volume-id myvolumeid --size x-small --name myvm --account myaccount --host hana.ondemand.com --user <s/p/i userid>
Delete a volume:
neo delete-volume --volume-id myvolumeid --account myaccount --host hana.ondemand.com --user <s/p/i userid>
Before we proceed some pointers that has to be taken into account:
- You have created a Virtual Machine and have key to connect.
- You have opened tunnel for communicating to the virtual machine.
- You have logged in to the virtual machine as a root user.
- You have Java installed.
- Environment variable JAVA_HOME is set to the Java installation folder.
- You have set up your development environment in Eclipse IDE with SAP HANA Tools.
- You have a user in HANA having system privilege “CREATE R SCRIPT”. If you do not have permissions to do so, request permissions by reporting an incident in component BC-NEO-PERS.
- You have downloaded and installed SAP HANA Cloud Paltform SDK.
- You have basic understanding of Eclipse, Linux, HANA and SAP HANA Cloud Platform Cockpit.
- When you execute the commands try to use the latest version.
Exercise 1: Install and Configure R
In this exercise we will install R.
1. Execute:
zypper addrepo -f https://slesrepo.hana.ondemand.com/repo/SUSE/Products/SLE-SERVER/12/x86_64/product/ SUSE12
2. Execute
zypper addrepo -f https://slesrepo.hana.ondemand.com/repo/SUSE/Products/SLE-SDK/12/x86_64/product/ SUSE12SDK
Note: The steps 1-2 are performed so that we can have the repositories required to install R.
3. Execute: zypper repos
Note: This command will list all the added repositories.
4. Execute: zypper install gcc gcc-c++ gcc-fortran
Note: This command will install the dependencies required for compiling R.
5. Press “1” and enter.
Note: When you execute the above step there are some versioning issue with gcc-fortran, to continue the installation you are provided with some solution.
This step is done to downgrade the version by pressing the number of the solution as shown in the figure. (Order might change)
6. Press “y” and enter.
Note: This will retrieve the packages and install them.
7. Execute the command to download R source package.
wget http://ftp.iitm.ac.in/cran/src/base/R-2/R-2.15.0.tar.gz
Note: For information about supported versions of R and Rserve, see SAP HANA and R compatibility and support.
8. Execute: tar zxf R-2.15.0.tar.gz
Note: This is done to extract the tar.gz file
9. Execute: ls
Note: This step is done to list the contents of the directory.
10. Execute: cd R-2.15.0/
Note: This will change the directory to R-2.15.0
11. Execute: ./configure --enable-R-shlib --with-readline=no --with-x=no
12. Execute: make clean
Note: This step is done to compile R.
13. Execute: make
Note: This step might take some time.
14. Execute: make install
15. Execute: R
Note: This step is done to check if R has been installed. You should see the following output.
16. Execute: q()
Note: This step is done to exit from R. Note: When prompted to Save workspace image: Press “n” and Enter.
Summary: You have built R from source and installed it on the virtual machine.
Exercise 2: Install and Configure R server
In this step we will install and configure R server.
1. Execute command to download the Rserve package:
wget http://cran.rstudio.com/src/contrib/Rserve_1.7-3.tar.gz
2. Execute R and then execute:
install.packages("Rserve_1.7-3.tar.gz", repos = NULL)
Note: This command will install the package.
3. Execute: library("Rserve")
Note: Successful installation should return no output.
4. Execute: q()
5. When prompted to Save Workspace image. Press “n”.
6. Press Enter.
7. Execute: vi /etc/Rserv.conf
Follow the steps below to insert and save the entry.
Press I
Type remote enable
Press the keys in the following order Esc<space>:wq!
8. Execute: useradd ruser
Note: This step is done to create a user.
9. Execute: passwd ruser
Note: This step is done to add password to ruser.
10. Execute: su –l ruser
Note: This step is done to login as ruser.
11. Execute: R CMD Rserve --RS-port <port_number> --no-save --RS-encoding “utf8”
R server has started in daemon mode.
Note: The port that you will provide here is the one that you will create in next exercise “Enabling Communication to Virtual Machine”.
Summary: You have installed R server on your VM and successfully started it in daemon mode.
Exercise 3: Enabling Communication to Virtual Machine.
By default, outbound communication from the virtual machines to the Internet and other systems is allowed, but inbound communication has to be enabled.
In this exercise we will be enabling communication from SAP HANA system to the virtual machine.
1. Login to your cockpit.
2. Click on “Databases & Schemas”. Copy the ID of the HANA system.
3. Execute:
neo create-security-rule --account <your_hcp_account_name> --host hana.ondemand.com --user <s/p/i user id> --name <your_vm_name> --source-id <id of HANA system> --source-type HANA --from-port 4000 --to-port 4000
Note: This step is to create the security rule to specify the ports allowed for inbound communication.
Also use this port number in Exercise 2 Step 11.
Summary: You have enabled communication on the virtual machine by creating security rule, now the HANA system can connect to this VM.
Exercise 4: Configure SAP HANA
Depending on your system landscape and your R requirements, you may need to modify some of the SAP HANA database configurations, from the Administration editor in the SAP HANA studio.
To enable calling R procedures from the index server, the configuration parameters are under indexserver.inicalcEngine.
1. Open Eclipse.
2. Click on “Open Perspective”
3. Scroll down and select “SAP HANA Administration Console”.
4. On the left pane “Right click” and click on “Add Cloud System”
5. Enter the details as follows:
Landscape host: eu1.hana.ondemand.com
Account name: Your hcp account name
Username: your s/p/i userid.
Password: your s/p/i password. Click Next.
6. Enter the details as:
Databases: your database id
Database user: your database user
Database password: Your HANA db password. Click Finish.
7. You can now see the SAP HANA Cloud system that you have added on the left pane.
8. Right click on the cloud system and then on “Configuration and Monitoring” and then “Open Administration”
9. Click on “Configuration” then click on “indexserver.ini” and click on “calcengine”.
Note: This step is done to change some of the configuration properties required to run R specifically ip address .
10. Copy the IP address of VM from cockpit and the port number that you created in Exercise 3 Step 3 and put it in the new value as shown below: Click Save.
Exercise 5: Using R with SAP HANA
In this exercise we will test the connection between SAP HANA and R Server installed on the virtual machine
To create some initial data for our example, we use the dataset ‘spam’ provided by R and upload it to the SAP HANA database.
Note: To execute the R procedure successfully you have to download kernlab package and install it.
Note: You are logged in to VM as ruser.
1. Execute:
wget https://cran.r-project.org/src/contrib/kernlab_0.9-24.tar.gz
Note: This command will download Kernlab package
2. Execute R.
Execute:
install.packages("kernlab_0.9-24.tar.gz", repos = NULL)
3. Execute: library("kernlab")
Note: Successful installation should return no output.
4. Execute q(). Press “n” when prompted to save workspace. Press Enter
5. In Eclipse on your cloud system that you have added open the "SQL Console"
6. Copy the below script and paste on the SQL console and execute:
DROP TABLE "spam";

CREATE COLUMN TABLE "spam"(

"make" DOUBLE, "address" DOUBLE, "all" DOUBLE, "num3d" DOUBLE, "our" DOUBLE,

"over" DOUBLE, "remove" DOUBLE, "internet" DOUBLE, "order" DOUBLE, "mail" DOUBLE, "receive" DOUBLE, "will" DOUBLE, "people" DOUBLE, "report" DOUBLE,

"addresses" DOUBLE, "free" DOUBLE, "business" DOUBLE, "email" DOUBLE, "you" DOUBLE, "credit" DOUBLE, "your" DOUBLE, "font" DOUBLE, "num000" DOUBLE, "money" DOUBLE, "hp" DOUBLE, "hpl" DOUBLE, "george" DOUBLE, "num650" DOUBLE, "lab" DOUBLE,

"labs" DOUBLE, "telnet" DOUBLE, "num857" DOUBLE, "data" DOUBLE, "num415" DOUBLE,

"num85" DOUBLE, "technology" DOUBLE, "num1999" DOUBLE, "parts" DOUBLE,

"pm" DOUBLE, "direct" DOUBLE, "cs" DOUBLE,"meeting" DOUBLE, "original" DOUBLE, "project" DOUBLE, "re" DOUBLE, "edu" DOUBLE, "table" DOUBLE, "conference" DOUBLE, "charSemicolon" DOUBLE, "charRoundbracket" DOUBLE, "charSquarebracket" DOUBLE, "charExclamation" DOUBLE, "charDollar" DOUBLE, "charHash" DOUBLE,

"capitalAve" DOUBLE, "capitalLong" DOUBLE, "capitalTotal" DOUBLE,

"type" VARCHAR(5000), "group" INTEGER);

DROP PROCEDURE LOAD_SPAMDATA;

CREATE PROCEDURE LOAD_SPAMDATA(OUT spam "spam")

LANGUAGE RLANG AS

BEGIN

##--if the kernlab package is missing see Requirements

library(kernlab)

data(spam)

ind <- sample(1:dim(spam)[1],2500)

group <- as.integer(c(1:dim(spam)[1]) %in% ind)

spam <- cbind(spam, group)

END;

DROP TABLE "spamTraining";

DROP TABLE "spamEval";

CREATE COLUMN TABLE "spamTraining" like "spam";

CREATE COLUMN TABLE "spamEval" like "spam";

DROP PROCEDURE DIVIDE_SPAMDATA;

CREATE PROCEDURE DIVIDE_SPAMDATA()

AS BEGIN

CALL LOAD_SPAMDATA(spam);

Insert into "spamTraining" select * from :spam where "group"=1;

Insert into "spamEval" select * from :spam where "group"=0;

END;

CALL DIVIDE_SPAMDATA();

Alter Table "spamTraining" DROP ("group");

Alter Table "spamEval" DROP ("group");
After executing the R procedure, your SAP HANA database instance should contain the following two new tables: spamTraining and spamEval.
The log from R server call:
Statement 'CALL DIVIDE_SPAMDATA()'
Successfully executed in 1.292 seconds (server processing time: 1.256 seconds) - Rows Affected: 4601
Congratulations! You have successfully used R with SAP HANA.
Whats Next?
You can manage volumes for your Virtual Machines.
What are volumes ?
Volumes are persistent storage that is created automatically when a virtual machine is created. It stores the file system and all software installed on it. Using the volume a new VM can be created.
Try these commands:
List the volumes:
neo list-volumes --account <your_account_name> --host hana.ondemand.com --user <s/p/i userid>
Create a new VM from the volume:
neo create-vm --volume-id myvolumeid --size x-small --name myvm --account myaccount --host hana.ondemand.com --user <s/p/i userid>
Delete a volume:
neo delete-volume --volume-id myvolumeid --account myaccount --host hana.ondemand.com --user <s/p/i userid>
- SAP Managed Tags:
- development tools for SAP BTP, Neo environment,
- SAP Business Technology Platform
9 Comments
You must be a registered user to add a comment. If you've already registered, sign in. Otherwise, register and sign in.
Labels in this area
-
ABAP CDS Views - CDC (Change Data Capture)
2 -
AI
1 -
Analyze Workload Data
1 -
BTP
1 -
Business and IT Integration
2 -
Business application stu
1 -
Business Technology Platform
1 -
Business Trends
1,658 -
Business Trends
91 -
CAP
1 -
cf
1 -
Cloud Foundry
1 -
Confluent
1 -
Customer COE Basics and Fundamentals
1 -
Customer COE Latest and Greatest
3 -
Customer Data Browser app
1 -
Data Analysis Tool
1 -
data migration
1 -
data transfer
1 -
Datasphere
2 -
Event Information
1,400 -
Event Information
66 -
Expert
1 -
Expert Insights
177 -
Expert Insights
293 -
General
1 -
Google cloud
1 -
Google Next'24
1 -
Kafka
1 -
Life at SAP
780 -
Life at SAP
12 -
Migrate your Data App
1 -
MTA
1 -
Network Performance Analysis
1 -
NodeJS
1 -
PDF
1 -
POC
1 -
Product Updates
4,577 -
Product Updates
340 -
Replication Flow
1 -
RisewithSAP
1 -
SAP BTP
1 -
SAP BTP Cloud Foundry
1 -
SAP Cloud ALM
1 -
SAP Cloud Application Programming Model
1 -
SAP Datasphere
2 -
SAP S4HANA Cloud
1 -
SAP S4HANA Migration Cockpit
1 -
Technology Updates
6,873 -
Technology Updates
416 -
Workload Fluctuations
1
Related Content
- SAP Signavio is the highest ranked Leader in the SPARK Matrix™ Digital Twin of an Organization (DTO) in Technology Blogs by SAP
- SAP HANA Cloud Vector Engine: Quick FAQ Reference in Technology Blogs by SAP
- 10+ ways to reshape your SAP landscape with SAP Business Technology Platform - Blog 7 in Technology Blogs by SAP
- 10+ ways to reshape your SAP landscape with SAP Business Technology Platform – Blog 4 in Technology Blogs by SAP
- Top Picks: Innovations Highlights from SAP Business Technology Platform (Q1/2024) in Technology Blogs by SAP
Top kudoed authors
| User | Count |
|---|---|
| 31 | |
| 24 | |
| 10 | |
| 7 | |
| 6 | |
| 6 | |
| 5 | |
| 5 | |
| 5 | |
| 4 |