
- SAP Community
- Products and Technology
- Technology
- Technology Blogs by SAP
- Extending SAP Fiori My Inbox 2.0 in SAP Web IDE
Technology Blogs by SAP
Learn how to extend and personalize SAP applications. Follow the SAP technology blog for insights into SAP BTP, ABAP, SAP Analytics Cloud, SAP HANA, and more.
Turn on suggestions
Auto-suggest helps you quickly narrow down your search results by suggesting possible matches as you type.
Showing results for
former_member23
Discoverer
Options
- Subscribe to RSS Feed
- Mark as New
- Mark as Read
- Bookmark
- Subscribe
- Printer Friendly Page
- Report Inappropriate Content
10-19-2016
12:47 PM
Prerequisites:
You must have a working implementation of My Inbox on your Fiori Frontend Server (FES). This document assumes My Inbox is deployed on your ABAP system.
The entire flow is performed in SAP Web IDE, therefore most of it also applies if the application is deployed on HCP.
For detailed information on My Inbox in general visit the Fiori Apps Library.
Creating an Extension Project
The first thing you need to do is to create an extension project. This project references My Inbox and therefore must be deployed to the same system your original application resides on.
- Open SAP Web IDE and select File > New > Extension Project.

- In the wizard, click Select Application and choose SAPUI5 ABAP Repository from the dropdown list.
- Select the ABAP system containing My Inbox from the System Wait for the applications to load and then search for My Inbox.
- Select the application from the list and click OK.
The fields in the wizard should be populated with the original application name and a suggestion for the new extension project name. You may rename it if needed.
- Click Next. The confirmation step is displayed. It contains a confirmation message and a checkbox. Leaving the checkbox selected will cause the extensibility pane to open once the project is generated. For the purpose of this guide, leave it on.
- Click Finish. Your extension project is generated and you may start customizing your application.
Using the Extensibility Pane
Most of the extensions available can be easily performed in the extensibility pane tool.
To open it, choose an extension project and from the menu bar, choose Tools > Extensibility Pane.
Using the Extensibility pane allows you to see which UI extensions are available and how they will impact your application. The outline on the right shows the structure of the parent application and visual ques to indicate extensions, while the preview on the left allows you to extend the UI in an intuitive way and provides a real-time preview of the extensions made. The extensibility pane also allows you to remove most extensions. Finally, it is possible to use this tool in conjunction with mock data if you have no OData service to work with or if it isn't available.
In this example, we will extend the list of items and change the its format.
- Click the arrow next to the Preview Mode text and select Extensibility Mode.
Now the application UI is locked. If you hover over a control it is highlighted in blue, and if you click on one, it is selected both in the application and in the Outline.

- In the Outline, from the dropdown list, choose Show extension points.
This will filter the Outline to show extension points while maintaining the structure, so you can see where each extension point is located.
Note: There are more filtering options to make searching for specific elements easier. - Expand the elements under S2 until you reach the node named CustomerExtensionForObjectListItem with a wrench icon next to it.
- Right-click on the node and choose Extend.

- In the popup that appears choose Open Extension Code. The Extensibility pane closes and the code editor opens with the fragment that will replace the extension point. The fragment contains the XML written inside the extension point in the original application or, if no content is available, a commented code snippet as an example of a valid XML that you can add to the application.
To view your changes, simply run the application by clicking
 or right click the project folder and select Run > Run as > Web Application.
You can repeat the process and perform other UI extensions such as hiding controls and extending a controller.
Using the Layout Editor
To speed things up we will modify the fragment created in the last step using the Layout Editor. This is a visual tool for building UI based on SAPUI5, allowing fast UI composition and also assistance with data binding and event handling. It is divided into three major areas:
- The Outline and the Controls tabs: The left-most part of the editor. The control pallet enables you to drag and drop controls into the UI and the Outline view shows the UI structure.
- The Canvas: At the center of the editor, this is where the UI is rendered. It allows you to see the changes you are making as they happen, to focus on different elements, to move them around, and more.
- The Properties pane: The right side of the editor, listing all the properties of the currently selected control and also the event bindings when dealing with views.
For more information on the layout editor, see here.

Right now we will focus on the Canvas and the Properties pane:
- Right-click on the new fragment created in the extension project folder and go to Open With > Layout Editor. Make sure the Properties pane title is Xml View. If not, click on the gray background of the list item template.
- From the Data Set dropdown list, choose TaskCollection. This will enable the editors' data binding feature. When prompted, click OK to confirm your action.
- In the canvas, select the "{CustomAttributeData, taskDefinitionsModel>/}" attribute. The Properties pane is populated with the relevant data.
- Click the Binding icon next to the input field of the Text

This will bring up the data binding dialog. In it, you can see the data structure on the left and the binding expression on the right. You can search for data fields, labels or strings for binding.
- Enter the following binding expression:
{ parts: [{path: 'SAP__Origin'}, {path: 'Status'}], formatter: 'cross.fnd.fiori.inbox.Conversions.formatterStatus'}
This expression will replace the previous data to show the status of the item (for example, "Ready", "In Progress").
- Click OK and you will notice the canvas has been updated with the bound properties.
- Choose the "{CompletionDeadLine}" attribute from the left column of the control and open the Binding dialog box of the Text
- Delete the current expression, and search for "processor". Double click on the "ProcessorName" data field and it will be added to the binding expression. Click OK.
- Save the changes to the file and run the application to see that the list items on the left of the applications have changed.

Next we will modify the application logic. To do this we will use the Extension Wizard to extend the controller of a view and implement an extension hook. These hooks are placed in key flows of applications and are documented in the SAP Help Portal.
Using the Extension Wizard
The extension wizard supports all the extensions available from the extensibility pane, but is mainly used for non-UI extensions such as service replacements.
- Right-click on the extension project folder and choose New > Extension.

- In the first wizard step, verify you are extending the correct project, if not change the path to the relevant extension project folder. Click Next.
- Choose the Implement UI Controller Hook tile and click Next.
- From the Controller dropdown list, choose S2.
- From the UI Controller Hooks dropdown list, choose extHookChangeFilterItems.
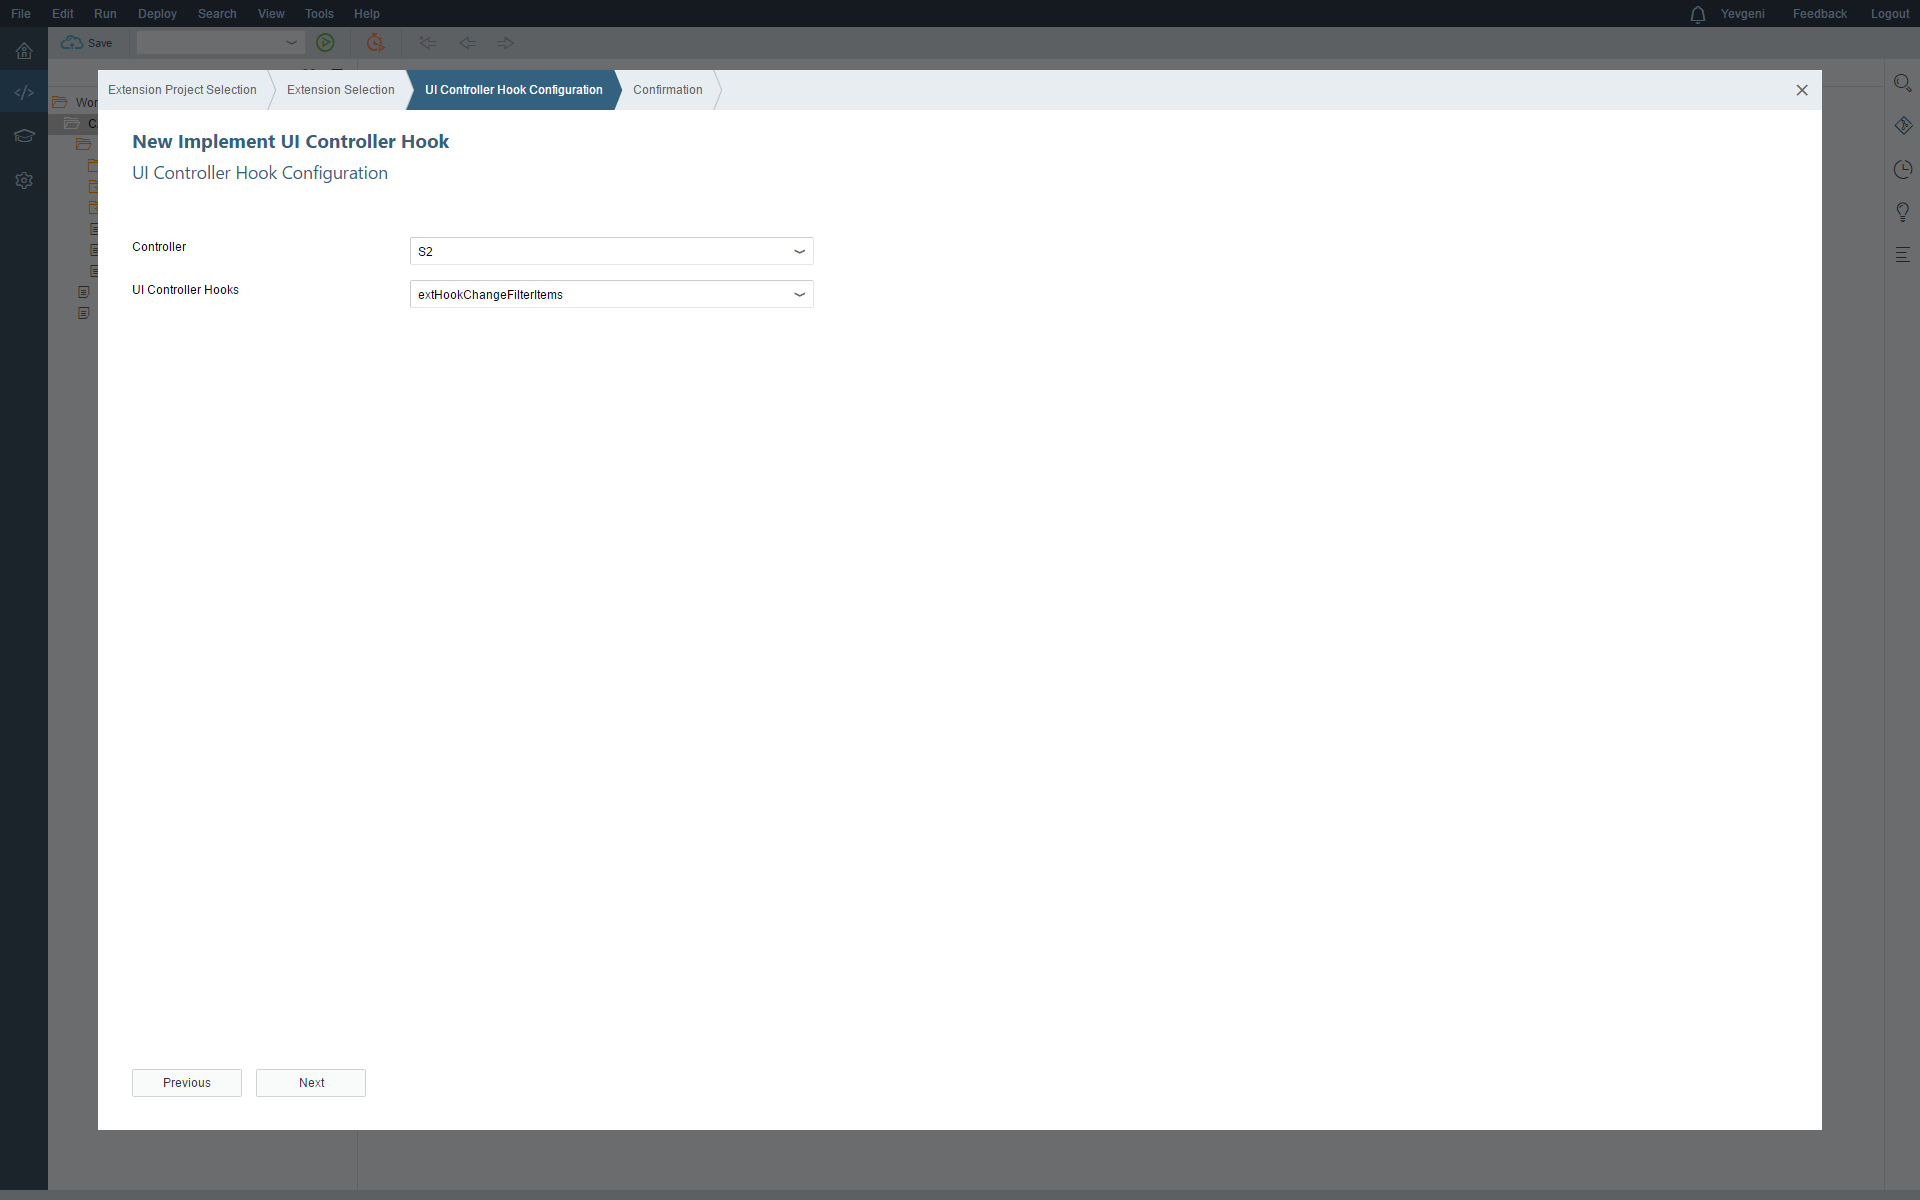
- Click Next and then Finish.
SAP Web IDE will display the extended controller in the code editor with the extension hook ready for you to enter your code. This particular extension hook allows you to add custom categories and items to the filter selection dialog.
Now repeat the same process with the extHookGetCustomFilter hook also found in S2. This extension hook allows you to implement custom hooks based on the filters the user has chosen in the filter dialog and to modify existing filters. To demonstrate, replace the empty hooks with the following snippet:
extHookGetCustomFilter: function(oFilterOptions) {

   for (var key in oFilterOptions.selectedFilterOptions) {

      if (oFilterOptions.selectedFilterOptions.hasOwnProperty(key) && key) {

         var aKeyParts = key.split(":");

         if (aKeyParts[0] === this._SORT_HASATTACHMENTS) {

            var oAttachmentsFilter = new sap.ui.model.Filter(aKeyParts[0], sap.ui.model.FilterOperator.EQ, aKeyParts[1] === "true");

            oFilterOptions.additionalFilters.push(oAttachmentsFilter);

         }

      }

   }

},


extHookChangeFilterItems: function(aFilters) {

   var oi18n = this.getView().getModel("i18n").getResourceBundle();

   var oCustomCategory = this._createFilterCategory("Additional");

   var sHasAttachments = this._SORT_HASATTACHMENTS + ":true";

   var oCustomFilter = this._createFilterItem(sHasAttachments, oi18n.getText("sort.hasAttachments"));

   oCustomCategory.addItem(oCustomFilter);

   aFilters.push(oCustomCategory);

}
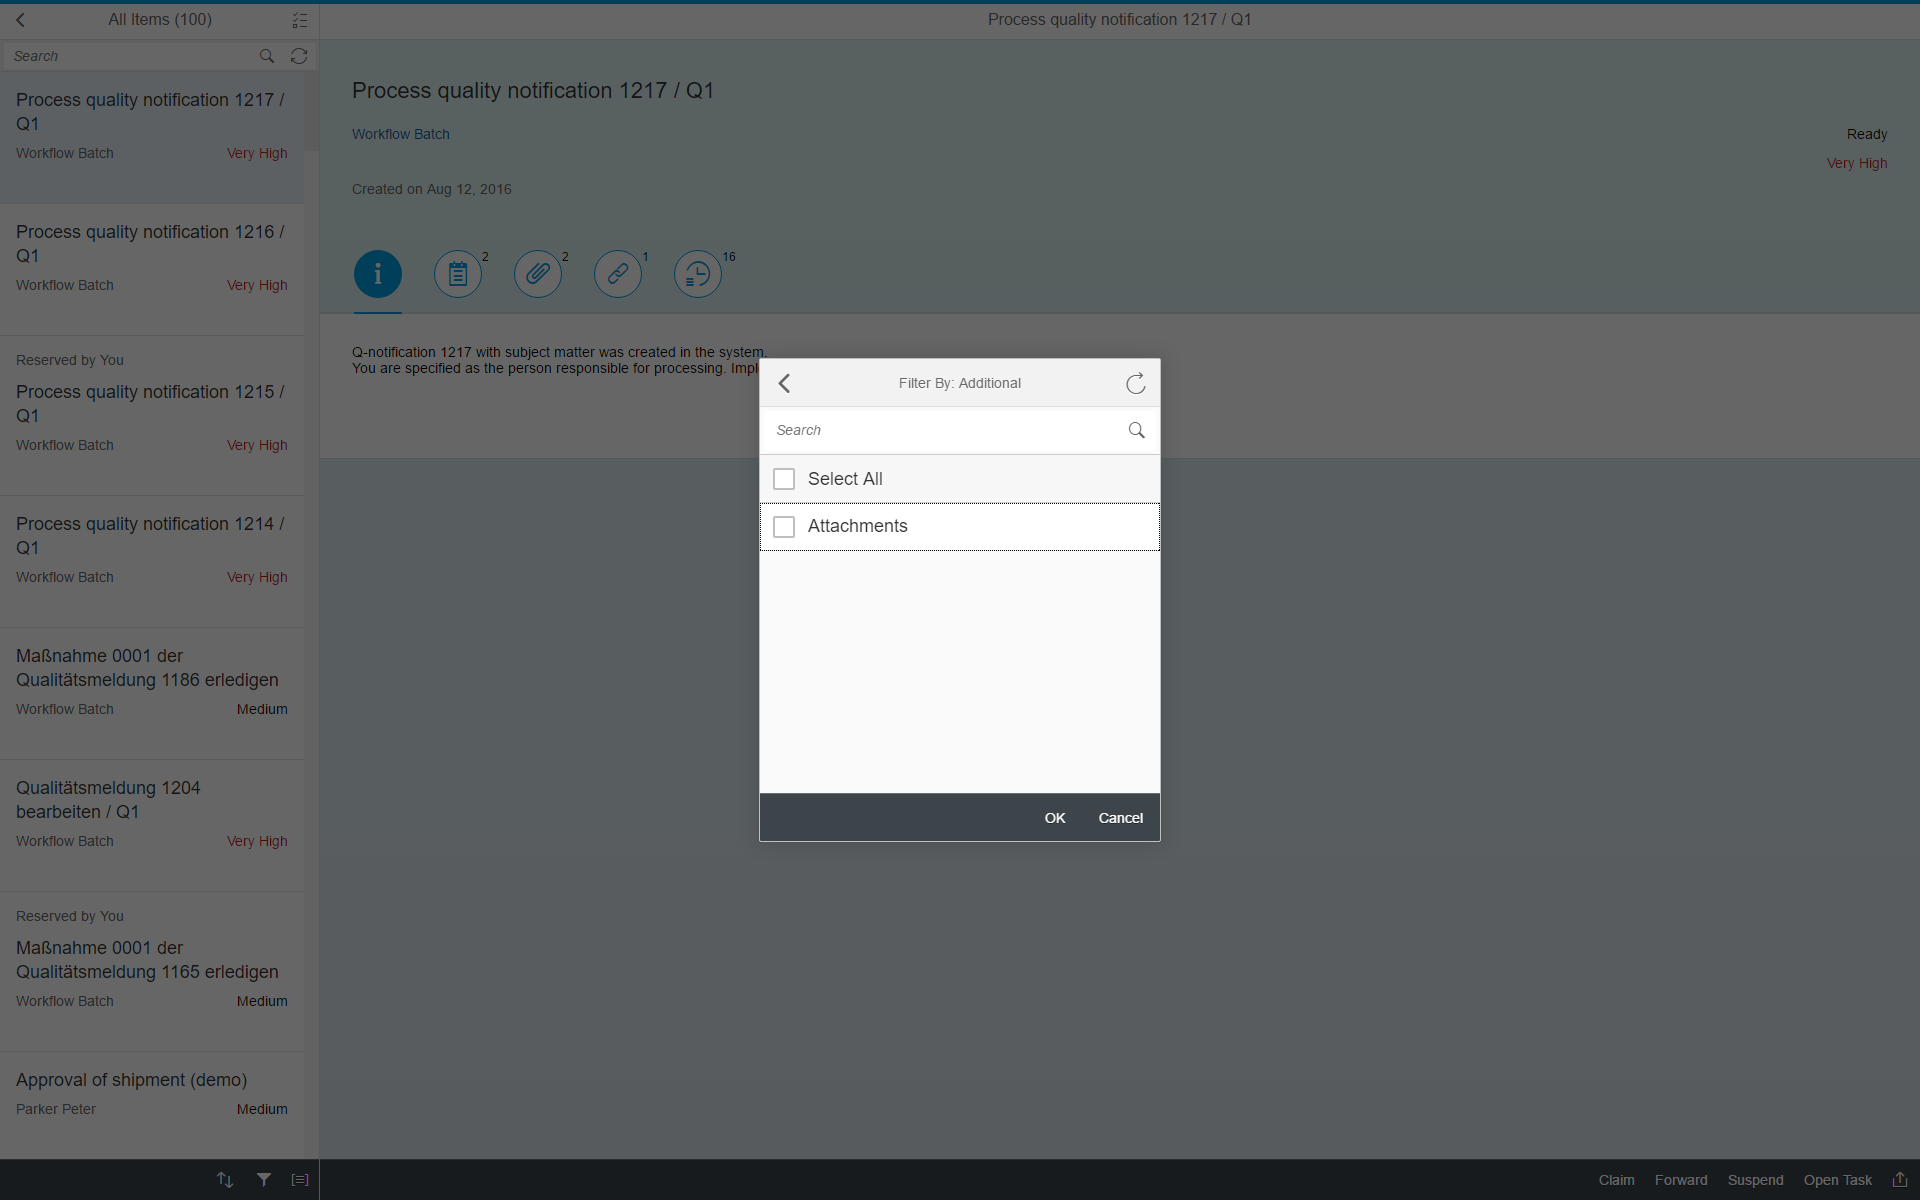
This will create a new filter category and list item in the filter dialog box and a model filter showing only items with attachments.
To see it in action, save the change and run the application preview, then click on the funnel icon at the bottom of the list. A new category called Additional appears in the dialog box. In it you will find the Attachments filter.
Deploying the Extension Project
Once the extension project is customized according to your needs, deploy it to the same system where the original application is stored.
If you aren't sure whether it was already deployed in the past or you wish to get an update on its status, open the extension project’s context menu and select Deploy > Application Status.
For detailed information on how to deploy applications from within SAP Web IDE to an ABAP system see here.
This guide assumes this is the first time the project is deployed:
- Select the extension project and the extension project’s context menu select Deploy > Deploy to SAPUI5 ABAP Repository.

- In the wizard, choose the system which contains the original My Inbox
If an application with the same namespace already exists on the system you will get a warning. We recommend you change the namespace of the application before proceeding. - Make sure the Deploy a new application radio button is selected and click Next.
- Provide a name for the deployed application along with a description.
- Click Browse to search for a package to assign it to and then click Next.
NOTE: If your ABAP system does not support transports for any reason, or you chose a local package, the wizard will forward you to the confirmation page. - Select the transport for your package. The wizard lets you either create a new one, input an existing request number, or choose from a list of transports related to you.
- Click Next and then confirm by clicking Finish.
You can follow the deployment process in the SAP Web IDE console.
Deploying an application also performs a build process on it and saves the result into a "dist" folder inside the project. The content of this folder is the actual deployed artifact and is overwritten with each deployment. You can delete this folder once deployment has finished.
Registering to SAP Fiori Launchpad
To enable access to your extended My Inbox application, add a tile for it in the relevant SAP Fiori Launchpad. For more information on how to do this on ABAP see:
14 Comments
You must be a registered user to add a comment. If you've already registered, sign in. Otherwise, register and sign in.
Labels in this area
-
ABAP CDS Views - CDC (Change Data Capture)
2 -
AI
1 -
Analyze Workload Data
1 -
BTP
1 -
Business and IT Integration
2 -
Business application stu
1 -
Business Technology Platform
1 -
Business Trends
1,658 -
Business Trends
93 -
CAP
1 -
cf
1 -
Cloud Foundry
1 -
Confluent
1 -
Customer COE Basics and Fundamentals
1 -
Customer COE Latest and Greatest
3 -
Customer Data Browser app
1 -
Data Analysis Tool
1 -
data migration
1 -
data transfer
1 -
Datasphere
2 -
Event Information
1,400 -
Event Information
66 -
Expert
1 -
Expert Insights
177 -
Expert Insights
299 -
General
1 -
Google cloud
1 -
Google Next'24
1 -
Kafka
1 -
Life at SAP
780 -
Life at SAP
13 -
Migrate your Data App
1 -
MTA
1 -
Network Performance Analysis
1 -
NodeJS
1 -
PDF
1 -
POC
1 -
Product Updates
4,577 -
Product Updates
344 -
Replication Flow
1 -
RisewithSAP
1 -
SAP BTP
1 -
SAP BTP Cloud Foundry
1 -
SAP Cloud ALM
1 -
SAP Cloud Application Programming Model
1 -
SAP Datasphere
2 -
SAP S4HANA Cloud
1 -
SAP S4HANA Migration Cockpit
1 -
Technology Updates
6,873 -
Technology Updates
423 -
Workload Fluctuations
1
Related Content
- MYINBOX: Issue with user decision task link from MYINBOX in Technology Q&A
- ABAP Cloud Developer Trial 2022 Available Now in Technology Blogs by SAP
- SAP S/4HANA Structure for Developer in Technology Q&A
- SAP FIORI My Inbox - QM in Technology Q&A
- Is it possible to Import and use a custom fiori/sapui5 application in Build Process Automation(BTP)? in Technology Q&A
Top kudoed authors
| User | Count |
|---|---|
| 40 | |
| 25 | |
| 17 | |
| 14 | |
| 8 | |
| 7 | |
| 7 | |
| 7 | |
| 6 | |
| 6 |