
- SAP Community
- Groups
- Interest Groups
- Application Development
- Blog Posts
- Custom Data Archiving - As a Background Job (witho...
Application Development Blog Posts
Learn and share on deeper, cross technology development topics such as integration and connectivity, automation, cloud extensibility, developing at scale, and security.
Turn on suggestions
Auto-suggest helps you quickly narrow down your search results by suggesting possible matches as you type.
Showing results for
Former Member
Options
- Subscribe to RSS Feed
- Mark as New
- Mark as Read
- Bookmark
- Subscribe
- Printer Friendly Page
- Report Inappropriate Content
05-19-2016
9:54 AM
1.0 Introduction
Data Archiving is the process of storing Database Records into a file on the Application Server or any Third Party storage system and then removing the Archived records from the Database Table. This process is generally performed in order to avoid having huge volumes of data in the table. Data which is obsolete or is not required for future use is generally archived.
All Standard SAP tables have a corresponding Archiving Objects that can be configured to perform archiving based on the required conditions and at specific time periods.
Since development of SAP objects generally involves creation of Custom Z-Tables there may arise a need for creation of Custom Archiving objects for the newly created Tables.
All Archiving objects have the following reports linked to them to achieve end to end Archiving.
Write Program – To create an Archive File and write the database table entries into it based on the selection criteria specified in the variant.
Delete Program – The Delete program is used to delete the records that are successfully archived and stored.
Reload Program - The Reload program is used to retrieve the data stored in the selected archive file and update the records back into the table.
Pre-Processing Program – This program may contain some functionality to be carried out before Data is Archived and Deleted from the Database.
Post-Processing Program – This program may contain some functionality to be carried out after Data is Archived and Deleted from the Database.
2.0 Step By Step Procedure for Creation of Custom Archiving Object
Step 1: Go to the Transaction “AOBJ” and add a New Entry.
Step 2: Add all the details including the Custom Object name and the names of the Custom Reports for Write, Delete and Reload. The names of Reports for Preprocessing and Post processing can also be added if applicable.

Step 3: The Structure Definition is updated next. The Parent Child relationships of all the associated tables with the Custom Z-Table are specified. This is used to ensure data consistency during Archiving. (In the given example below the Z-Table ZTJIS_DLSPLIT is updated or modified based on the entries in the JITIT table. Hence JITIT is specified as the parent segment and the Z-Table is the sub-Segment)

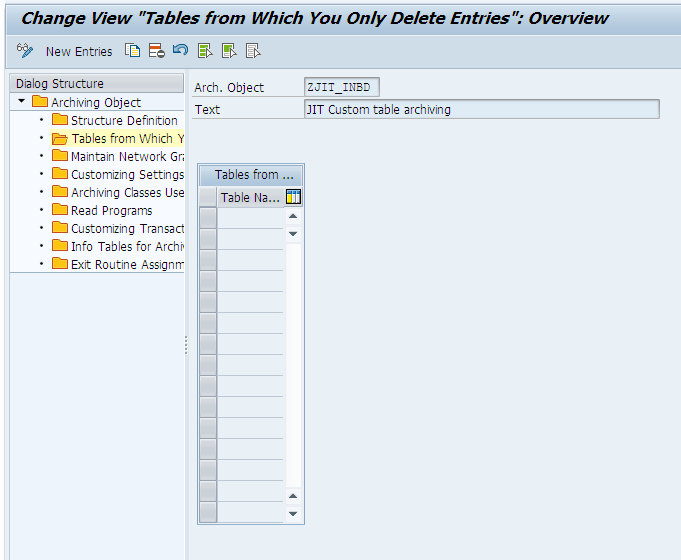
Step 4: The next section is optional and it is used to specify the tables from which the entries are to be only deleted from the database. The list is used to indicate all related tables to the Custom table where data does not have to be archived but only deleted. The code to delete the same has to be provide in the Delete Program explicitly.
Step 5: The next step involves maintaining the network graphic. This tab is usually updated when the Custom Archiving process is carried on in sequence with any other Archiving Object. (In the example below the Object ZJIT_INBD is generally followed by the Standard Archiving process for JIT Inbound Archiving. Therefore the JIT Inbound Archiving object, JIT_SJCALL is listed in the Network Graphic tab as Predecessor)

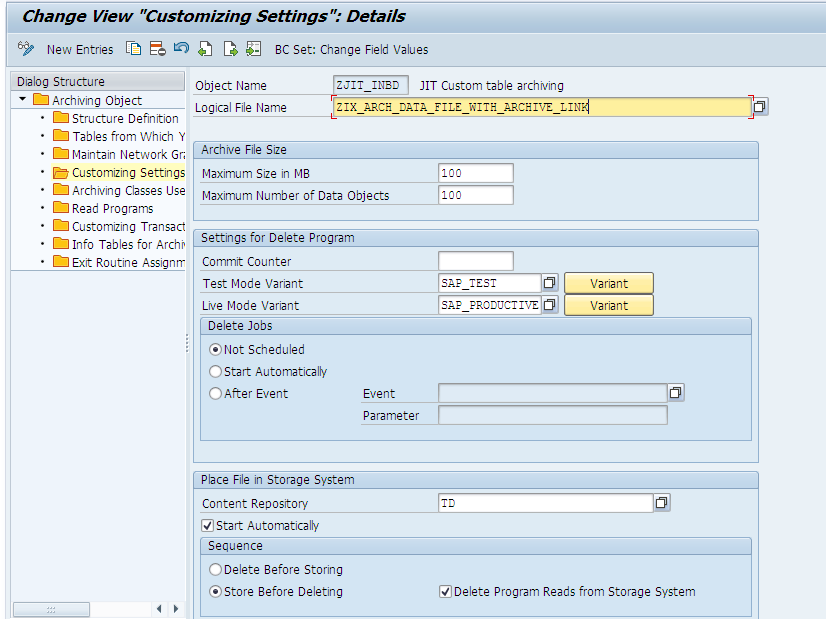
Step 6: The Customizing Settings for the Archiving object are then specified. The Logical File Name desired should be mentioned. Specifications like the Maximum Size and limit on the number of Data objects are entered. Besides this the Delete Program variant is specified and the settings that control the execution of the delete program as well as the Storage of the file are specified.
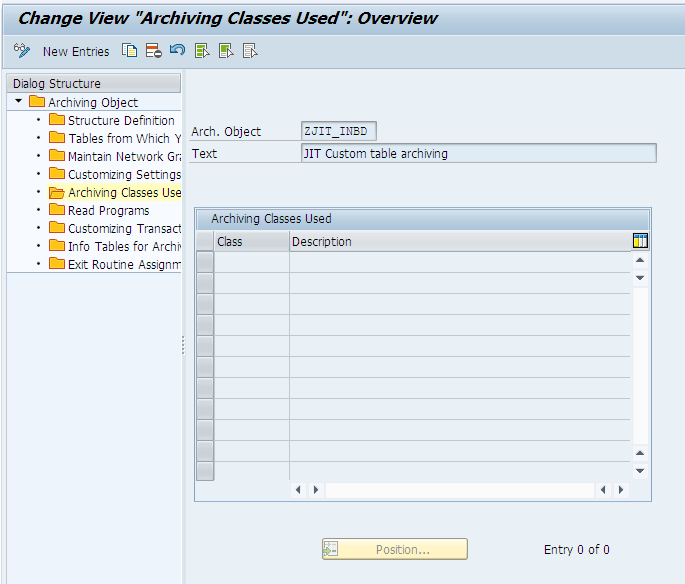
Step 7: The succeeding tab is used to specify the Archiving Classes associated with the Archiving Object.
Step 8: The next tab is used to specify the Read Program associated with the Archiving Object. This is used to read data from the Archive File and it is optional.

Step 9: The next tab is used to specify the Customizing Transactions associated with the Archiving Object. This is used to maintain Z Transaction Codes that may be associated with the Read/Write/Delete Programs.

Step 10: The Info Tables for Archiving tab is used to specify the information tables or structures that are updated when an Archiving File is Read using the Read Program.

Step 11: This Tab is used to specify any Exit Functions that may be required to be implemnted during the process of Archiving.

3.0 Coding required in ABAP end
Step 1: Code to be written in SE38 for Write Program.
- Specify the Selection Screen parameters. For Archiving the options to run in test and archive mode should be provided
- The Archive file is created and opened in Write Mode by using the Function Module ARCHIVE_OPEN_FOR_WRITE. The Archiving object name and mode variant are passed as import parameters to the Function Module.
- Based on the Variant values and the conditions of related tables select the data from the database table into an internal table.
- The Archive object is created using the Function Module ARCHIVE_NEW_OBJECT by passing the object ID.
- The data to be archived is saved into a single internal table it is written into the Archive File using the Function Module ARCHIVE_PUT_TABLE and passing the internal table to it.
- The Archive object is saved by using the Function Module ARCHIVE_SAVE_OBJECT.
- The data can also be archived record wise by looping on the records and using the Function Modules ARCHIVE_NEW_OBJECT, ARCHIVE_PUT_RECORD and ARCHIVE_SAVE_OBJECT in that order.
- The Details of the Number of Records written from the respective tables and the details of any Erroneous Records is obtained by using the Function Module ARCHIVE_WRITE_STATISTICS.
- The Archive File is finally closed and saved using the Function Module ARCHIVE_CLOSE_FILE.
Step 2: Code to be written in SE38 for Delete Program.
- The Selection Screen has options for test mode and update mode.
- Firstly the commit counter is obtained for the Archiving Object using the Function Module ARCHIVE_GET_CUSTOMIZING_DATA.
- The Archive file is opened in Delete Mode by using the Function Module ARCHIVE_OPEN_FOR_DELETE. The Archiving object name is passed as import parameter to the Function Module.
- The Archiving Object is read from the file using the Function Module ARCHIVE_GET_NEXT_OBJECT.
- The data obtained is checked based on the structure of the table and each individual record is obtained by using the Function Module ARCHIVE_GET_NEXT_RECORD.
- The records are stored into the internal table of the type same as the Custom Table by looping on all the entries present in the File.
- The records are deleted from the database table based on all the records obtained from the file.
- The Details of the Number of Records deleted from the respective tables and the details of any Erroneous Records which could not be deleted is obtained by using the Function Module ARCHIVE_WRITE_STATISTICS.
- The Final Step is to close the Archive file using the Function Module ARCHIVE_CLOSE_FILE.
4.0 Implementation of Archiving as a Background Process
To automate the Archiving Process and to ensure that Custom Archiving started after the Standard Archiving Process was completed for JIT the following design was implemented.
- The Custom Archiving Object was designed for the Z-Table.
- The Write Program of the Standard Archiving would be processed using a specific variant.
- The Write program of the Custom Object would run with the same variant to ensure data consistency. (The process was carried out for JIT Archiving where there was a provision to set the Archiving flag in the JIT Header table (JITHD) Thus an additional check for the archiving flag can be introduced if such a provision is provided in the Standard Table).
- If the Write Jobs were successfully executed the Delete Jobs were processed using the standard report RSARCHD. The Archiving process was aborted in the case of a Write Job failure.
- The Delete Job for the Standard Tables was first run to ensure that the successfully stored data in the Archive File was removed from the database tables.
- If all the Write and Delete Jobs were successfully executed the Delete Job of the Custom Archiving Object was scheduled so that the Z-Table entries were successfully deleted.
- The sample variant used for deleting the content using RSARCHD is as below. The maximum number of files would be as required.

8. The Storage Process was automated to take place before the delete job by selecting the Store automatically option in the Technical Settings of the Customizing Menu for each archiving object in SARA transactio
9. All the jobs would be Scheduled one after the other in sequence as shown below.

- SAP Managed Tags:
- ABAP Development
2 Comments
You must be a registered user to add a comment. If you've already registered, sign in. Otherwise, register and sign in.
Labels in this area
-
A Dynamic Memory Allocation Tool
1 -
ABAP
8 -
abap cds
1 -
ABAP CDS Views
14 -
ABAP class
1 -
ABAP Cloud
1 -
ABAP Development
4 -
ABAP in Eclipse
1 -
ABAP Keyword Documentation
2 -
ABAP OOABAP
2 -
ABAP Programming
1 -
abap technical
1 -
ABAP test cockpit
7 -
ABAP test cokpit
1 -
ADT
1 -
Advanced Event Mesh
1 -
AEM
1 -
AI
1 -
API and Integration
1 -
APIs
8 -
APIs ABAP
1 -
App Dev and Integration
1 -
Application Development
2 -
application job
1 -
archivelinks
1 -
Automation
4 -
BTP
1 -
CAP
1 -
CAPM
1 -
Career Development
3 -
CL_GUI_FRONTEND_SERVICES
1 -
CL_SALV_TABLE
1 -
Cloud Extensibility
8 -
Cloud Native
7 -
Cloud Platform Integration
1 -
CloudEvents
2 -
CMIS
1 -
Connection
1 -
container
1 -
Debugging
2 -
Developer extensibility
1 -
Developing at Scale
4 -
DMS
1 -
dynamic logpoints
1 -
Eclipse ADT ABAP Development Tools
1 -
EDA
1 -
Event Mesh
1 -
Expert
1 -
Field Symbols in ABAP
1 -
Fiori
1 -
Fiori App Extension
1 -
Forms & Templates
1 -
General
1 -
Getting Started
1 -
IBM watsonx
1 -
Integration & Connectivity
10 -
Introduction
1 -
JavaScripts used by Adobe Forms
1 -
joule
1 -
NodeJS
1 -
ODATA
3 -
OOABAP
3 -
Outbound queue
1 -
Product Updates
1 -
Programming Models
13 -
Restful webservices Using POST MAN
1 -
RFC
1 -
RFFOEDI1
1 -
SAP BAS
1 -
SAP BTP
1 -
SAP Build
1 -
SAP Build apps
1 -
SAP Build CodeJam
1 -
SAP CodeTalk
1 -
SAP Odata
1 -
SAP UI5
1 -
SAP UI5 Custom Library
1 -
SAPEnhancements
1 -
SapMachine
1 -
security
3 -
text editor
1 -
Tools
17 -
User Experience
5
Top kudoed authors
| User | Count |
|---|---|
| 3 | |
| 3 | |
| 3 | |
| 2 | |
| 2 | |
| 2 | |
| 2 | |
| 1 | |
| 1 | |
| 1 |