This document covers how to create BO with the help of Key User Tool i.e. Custom Object Builder to extend the C4C application via the browser without any coding.This feature is available only in the Silverlight mode for the PDI developer in the Administration tab with the name Custom Object Builder.
Thanks to my colleague vaibhav.kwatrawho helped and contributed in preparation of this document.
Let us create a BO with the name of SalesContracts.
Below are the steps:
1.Login the test system with PDI role in Silverlight Mode.
2.Open the Administrator tab-> Custom Object Builder.

3.Click on the New Button to create BO.

4.A new BO is added in the Custom Object Builder with default status as Not Published.

5.Click on the created BO .
6.Click on Add button to add elements in the BO under the FIELDS tab.

7.Check the With Attachments CheckBox if you want to add the attachment node in your BO under OPTIONS.

8. Check the With Multiple Nodes CheckBox if you want to add the multiple node in your BO under ADVANCED.
9. Adding a node to BO.
10.Adding elements to Node created in above step.


11.Check the With Actions CheckBox if you want to add the action in your BO under ADVANCED.But this action will be added in every node also.
12. Adding a Action in the BO.


13.Check other various options under Advanced like approval process, notification rule, web service, data source, assign to other work center,etc if you want to add them in your BO.These option will be seen with their action elements only in the studio.

14.You need to publish your solution before transporting it to the partner tenant or production tenant.

15.Marking the BO for transport under the Action column.

16. Download the BO clicking on the Download Button for uploading it to the partner tenant or production tenant.
17. After downloading the BO the version will be updated and the delete option will be removed from the Action column.


Optional steps for transporting the KUT BO to Test or Production system.
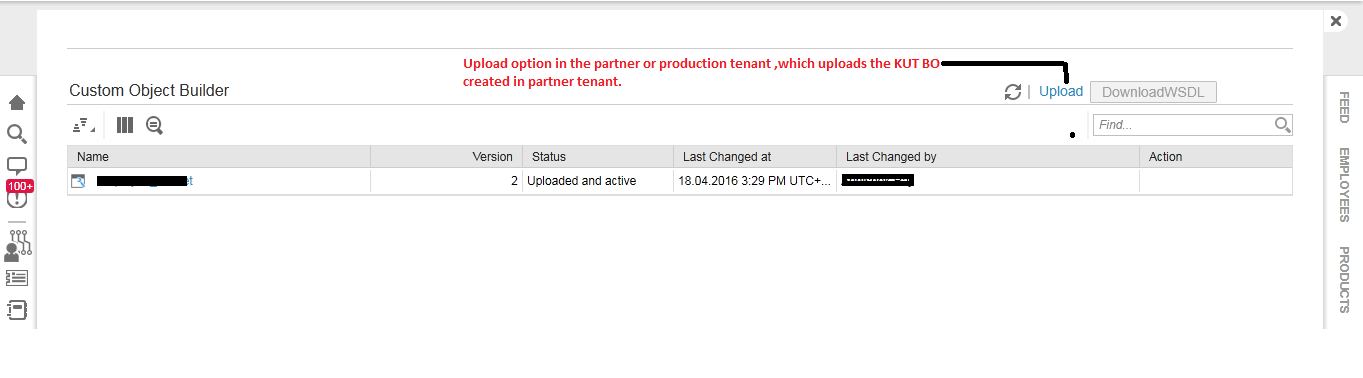
18. Login the partner or production system with PDI role in Silverlight Mode.
19. Open the Administrator tab-> Custom Object Builder.
20. Click on the Upload Button to upload the KUT BO created in the test or production tenant and the activate it by clicking on the Active Button which changes the status to Uploaded and active.
21. Finally, you can see your BO on both the system test and partner without any coding.

