TinyWorld - Part 8
Source Control

Welcome back!
In Introduction to the TinyWorld application we introduced the TinyWorld muti-part tutorial, describing how to develop applications for SAP HANA and XS Advanced, using the SAP Web IDE for SAP HANA (Web IDE). Here we continue with our "advanced" topics.
Source control is used to manage multiple versions of your application, and is also the most common way to collaborate with other team developers on the same project. Improved source control was one of the most common requirements from SAP HANA developers in the past.
The SAP Web IDE for SAP ANA integrates with Git, the most popular source control system today, via a graphical user interface. With this interface, you can perform all the common Git operations (clone, commit, etc.).
To collaborate with other team members, you can use a corporate Git server or a public repository service, like GitHub. In fact, this tutorial will use a GitHub repository to demonstrate the use of source control.
Note: The current release of the Web IDE does not yet support the creation and initialization of a Git repository directly from the Web IDE. The instructions here therefore perform a small detour. In a future release you will be able to perform actions that correspond to "git init" and "git remote add" Git commands, directly from the Web IDE.
This blog assumes that you have performed the steps in the "Basic TinyWorld tutorial". If not, go back to the Introduction to the TinyWorld application for more information.
Create a repository
Start by navigating to https://github.com. There, create a new Git repository, call it tinyworld, and remember its URL. Make sure the new repository has at least one commit. On GitHub you can achieve it by selecting the "Initialize this repository with a README" option in the repository creation page:

Then, from the Web IDE, download and save your project code as a zip file to your workstation, as follows: right click on the tinyworld project folder " > Export":

Once safely exported, right click, and delete the entire project folder in the Web IDE. Not to worry: we are going to recreate it by "cloning" it from the Git repository we just created. From the top menu, click "File > Git > Clone Repository". The wizard requires the repository URL and the authentication of the Github repository we just created.

This operation results in a new tinyworld project folder, but of course it is empty. So next, right-click on the new tinyworld folder and "> Import -> From File System". In the dialog box browse for the project zip file you exported and saved before. Make sure that the "Import to" field contains only the top most folder (/tinyworld), and click OK.

Then click OK in the Import Form and then OK again to confirm the overriding of existing files. After the import operation is completed, you will see your tinyworld project in your workspace again:
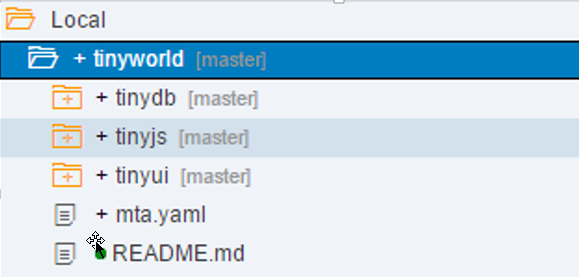
Note the "decoration" icons displayed next to each file/folder. These provide their Git status. For instance, a green dot indicates a committed file. A red asterisk marks a modified file that has not yet been staged. See the reference manual for more detail.
You can also see the Git status project in the Git pane on the right of your window:

To complete the process we will push the changes to the remote repository on Github. For that:
- Select the "Stage All" checkbox in the Git pane
- Add a "Commit Description"
- Click on "Commit and Push"

Note: Never discard the special system files and always include the changes in these files in your commits.
Now your team members can also clone the project to their Web IDE and you can share your work by pushing and fetching the changes from the Git repository. You can activate the relevant Git commands either from context menu (right click on project folder "> Git") or from the Git pane:

Summary of part 8
This part of the TinyWorld tutorial described how to share your code with other members of your team, using the Git source control solution. More information on Git can be found in the Web IDE developer documentation, as well as on the Internet.
You can continue to explore additional advanced parts of this TinyWorld tutorial, covering things like adding authentication and authorization control to our application, and how to manage the life cycle of our application, from development to deployment:
Part 9: Application life cycle
Part 10: Add authentication
Part 11: Add authorization
