This is the sixth and last blog in a blog series about new capabilities in ESR in Eclipse. If you want to get an overview of all features that have been shipped with SAP Process Orchestration 7.5 SP02, check out the blog
Best practices ESR in Eclipse - Part 1: Overview of new capabilities with 7.5 SP02. In the current blog, I will cover new capabilities that were built into the mapping tool in ESR in Eclipse.
Expand and collapse
When the source or target structures used in a message mapping has deep nested structures, navigating through this is easier with Expand All and Collapse All options. In the message mapping editor, select the respective node in your structure, and select Expand All from the context menu.

This expands the whole structure.

Default matcher
Default matcher allows you to automatically map fields with same structures. This helps you to accelerate the creation of mappings where structures resemble each others. This is actually not a new feature, however I like to show this here since this is somehow hidden and hence not known to many. If you like to map similar structures, select the respective node in the source structure via right mouse click, and drag&drop it to the respective node in the target structure. Important here, you need to click on the right mouse and not the left.

When dropping, select Execute Default Matcher from the context menu.

Fields with same names are automatically mapped.

Easier connection
So far, connecting the mapping bricks in a field mapping was a bit hard since the connection dots were too small. Now, when you hover over a connection dot, it enlarges a bit so that you can better grab it.

Error markers
In message monitor, error marks on each target field are shown, if the field is mandatory but not mapped, or if the mapping for this field is incomplete. In the Problems view, you get all errors displayed. From there you can fix the errors in the message mapping by navigating to the respective field which is in error.

Copy mapping expressions
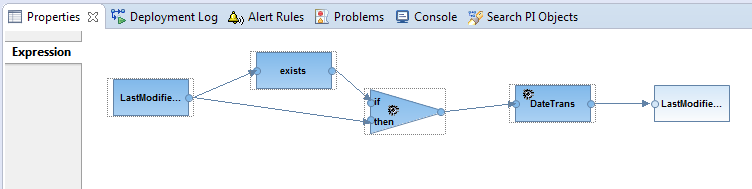
When creating a new field mapping in the message mapping you may re-use complex expressions that you have already modeled in another field mapping, and hence saving effort and time. In the graphical expression editor of your message mapping, select the last brick of your mapping expression that you like to re-use, and select Copy from the context menu.

As you can see below, the highlighted expression is taken into the clip board.
Open the other field mapping, and select Paste from the context menu.

The copied expression is pasted into the expression editor.

Show value of constant function
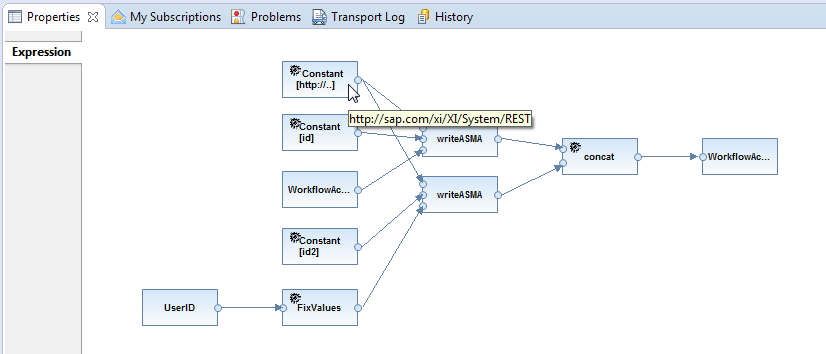
For the standard Constant mapping function, so far you have to open each Constant brick to display the actual constant value. Now, the actual value is displayed without need of opening the bricks; if the value is too long to fit into the width of the brick, you can hover over the brick, and the value is displayed in the tool tip.
Display queue
When developing new mappings tracking the input and output queue of each mapping brick in your field mapping helps to test whether your mapping functions correctly. This can be done via the display queue capability. This feature is already supported from releases 7.31 SP16 on. As a prerequisite, you need to create a new configuration where you store the input sample file. Select the message mapping, and select Run As --> Run Configurations from the context menu.

In the upcoming dialog, create a new configuration. Here, maintain message mapping and sample input file.

In the message mapping editor, select a mapping brick and select Display Queue from the context menu.
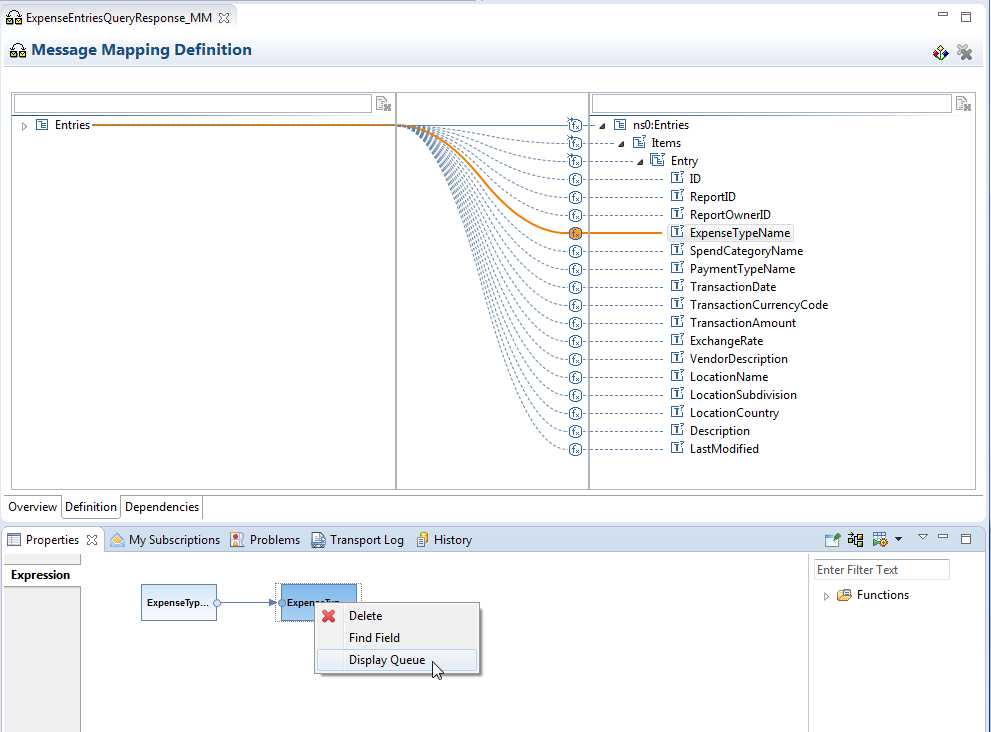
This opens a new Display Queue tab where the mapping queue including context changes are displayed based on values from the input field.

This closes the blog series. Hope the information provided in the blog series is useful for you in your daily work, and helps you to find your way in the ESR tooling in NWDS. A list of all blogs in the blog series can be accessed from here
Best practices ESR in Eclipse - Part 1: Overview of new capabilities with 7.5 SP02.
