Skip to Content
Author's profile photo Former Member

SAP API Management – Enabling URL masking

Now that SAP API Management is available you probably also have seen the fantastic blog from Bhanu Pratap Sharan about policies and how to use them. It explains what policies in SAP API Management are, which ones are available and how you can use them.

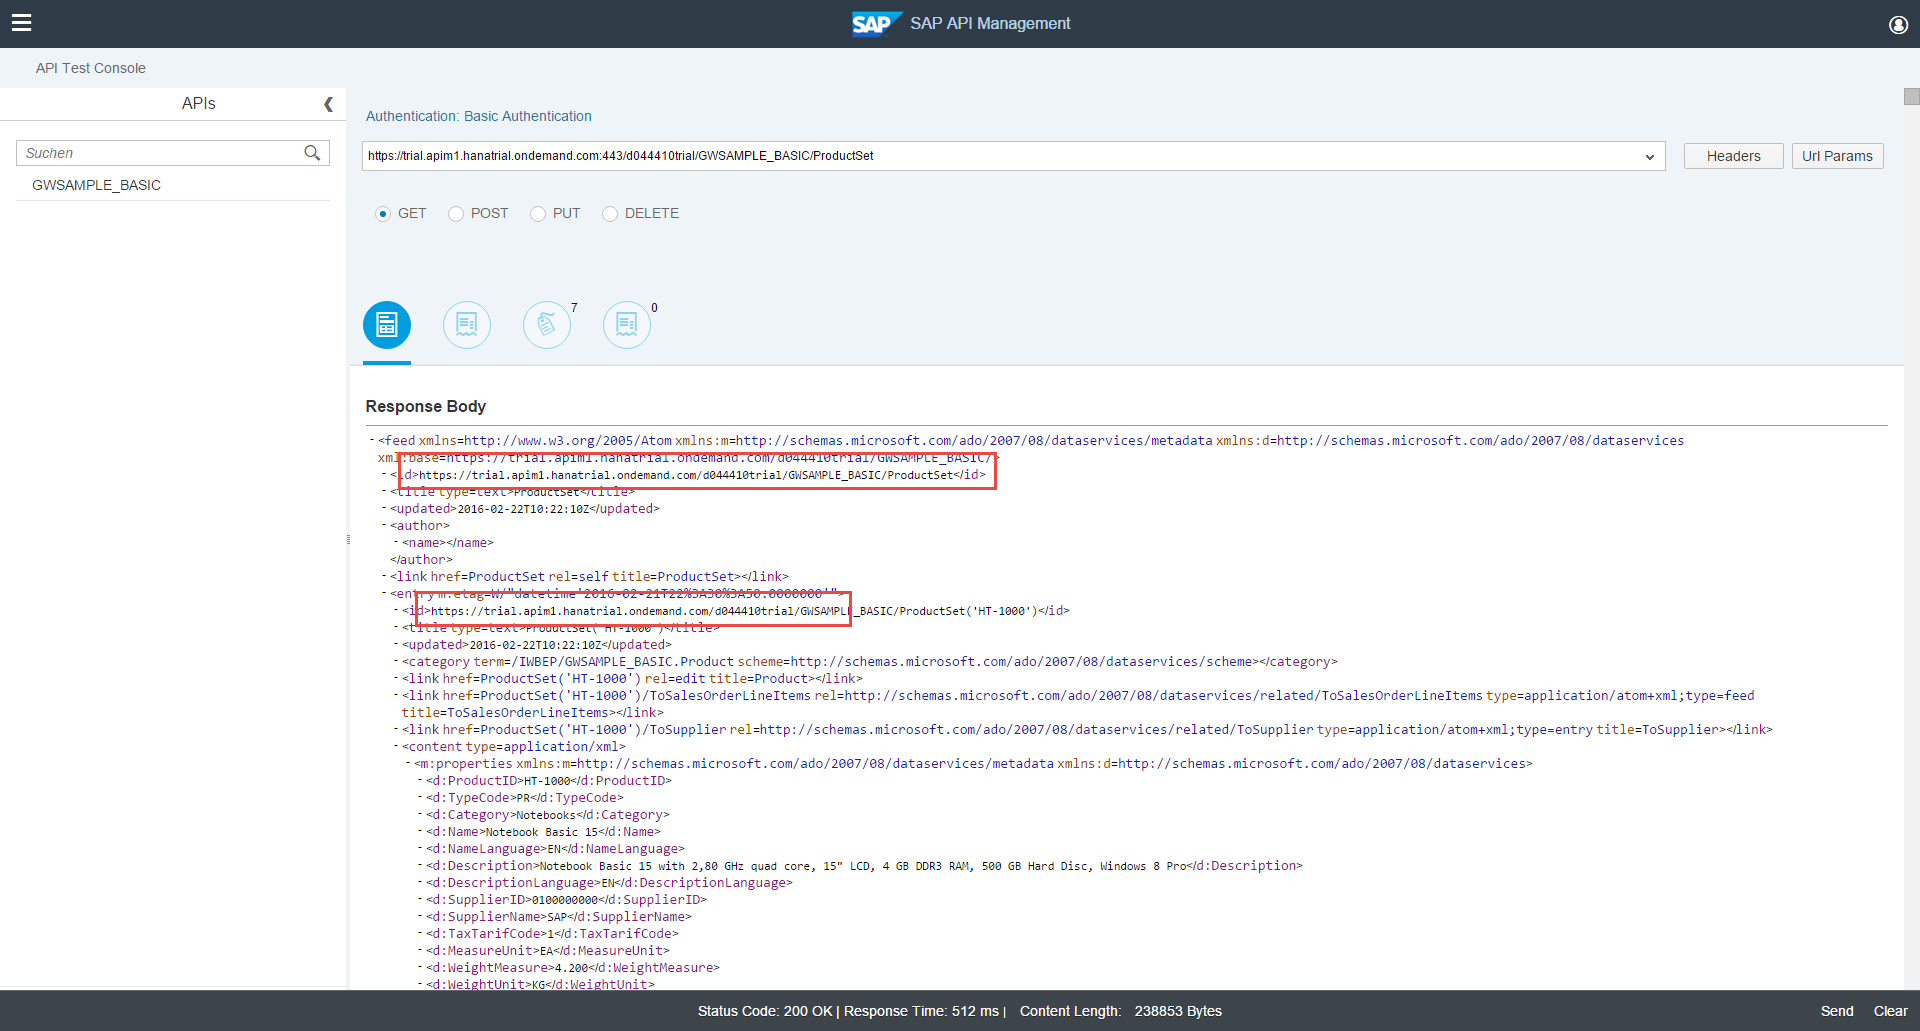
When following my first blog on How to use SAP API Management on HCP Trial you might have noticed that when calling the “proxified” URL to the ES4 system (e.g. https://trial.apim1.hanatrial.ondemand.com:443/<account>trial/GWSAMPLE_BASIC)  yxou can still see URLs like https://sapes4.sapdevcenter.com/sap/opu/odata/iwbep/GWSAMPLE_BASIC/ in the response.


Obviously that doesn’t make a lot of sense. So we have to tell the API proxy, that it should hide / “mask” the real URL. There are plenty of ways how this can be done. In this blog I want to show the power of one of the policies that we have: the JavaScript policy.

Although you can make this policy very generic, I will keep to the very basic and actually tell the script what the target server is and what the SAP API Management Proxy URL is.


Lets pick-up where we left in the How to use SAP API Management on HCP Trial


I had created a plain API proxy that would just connect to the ES4 system. Lets take another look at this API Proxy and go to the “Launch Policy Designer” in the API Artifacts section (for more details, take a look at the blog SAP API Management – Policy Management)


01 - Go to Policy Designer.png


Once you launch the Policy Designer you can see an empty policy screen. In this screen, enable the Edit mode, by clicking on Edit and then add a script (by clicking on the “+” sign which will appear once you are in Edit mode)


02 - Edit Policy.png


Once you click on the “+” sign you can give the new script a name like “urlrewrite”


03 - urlrewrite.png


This will be the script that reads the actual URL and replaces it with the URL from our SAP API Management proxy. So once you click on Add in the pop-up above you can select the script name (“urlrewrite”) that we just created and add the content:
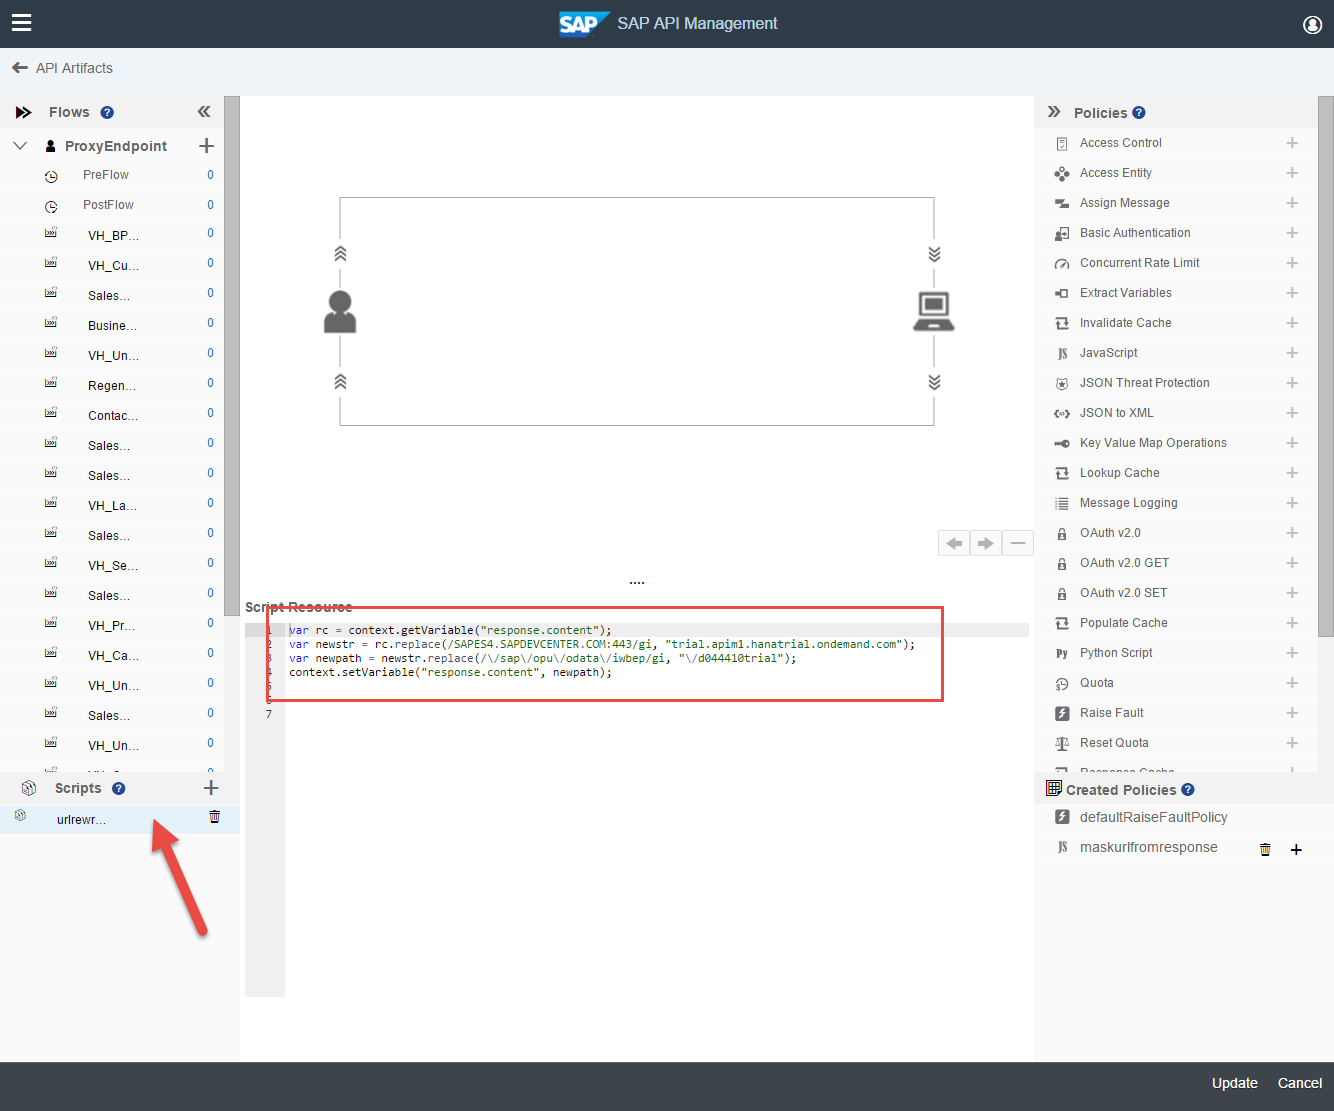

04 - add content to script b.png


var rc = context.getVariable(“response.content”);

var newstr = rc.replace(/SAPES4.SAPDEVCENTER.COM:443/gi, “trial.apim1.hanatrial.ondemand.com”);

var newpath = newstr.replace(/\/sap\/opu\/odata\/iwbep/gi, “\/d044410trial”);

context.setVariable(“response.content”, newpath);

In these four lines (of course it could have been less :-)) we retrieve the content from the response, replace the targetserverhost and targetserverport (in my case the SAP Developer System) with the information from the api proxy, changes the path and put this new information back in the context. Quite straight forward.


Now we only have to tell the flow that and when we want to call this script.


So on the left hand side, scroll down to TargetEndpoint and select the PostFlow (after all we want to replace the results from the server response). Then on the right hand side click on the “+” sign for the JavaScript policy


05 - Add JavaScript Policy.png


A new pop-up will open where we can specify the name of this policy. Enter something like “maskurlfromresponse” and make sure that you select “Outgoing Response” from Stream. Then click on Add


06 - maskurlfromresponse.png


This policy now allows us to call / do whatever we want in JavaScript. In our case, we will just call the script that we had previously created: the urlrewrite script. In order to do that just replace/add the name of the script with the urlrewrite script so that the content looks like this:

(since we won’t use a helper.js file, you can also remove the lines:


  <!– contains reference to any library scripts that help the main code file –>

  <IncludeURL>jsc://helper.js</IncludeURL>

07 - updated script.png

<!– this policy allows us to execute java script code during execution of an API Proxy –>

<Javascript async=”false” continueOnError=”false” enabled=”true” timeLimit=”200″ xmlns=’http://www.sap.com/apimgmt‘>

  <!– contains the name of the main code file –>

  <ResourceURL>jsc://urlrewrite.js</ResourceURL>

</Javascript>

And that’s it! Now you can click on Update

08 - Update.png

and then on Save

09 - Save.png

… from now on your API calls to a backend systems should really mask the URL.

10 - UpdatedURL a.png

I hope this small example not only showed you how you can mask the URL, but also gave you a glimpse of the power of these policies. With the JavaScript policy you can actually do whatever you want in your flow. You can filter traffic, redirect URLs, change content, check or validate content, … The possibilities are endless.

In future blogs we will go in more detail and talk about some other things you can do with the JavaScript policy. We could for example make this script more dynamic so that it first retrieves the target URl and uses the API Proxy name — so that you do not have to hardcode this information.

Feel free to add your comments & feedback.

Update: for more information see SAP API Management – Overview & Getting started

Assigned Tags

      7 Comments
      You must be Logged on to comment or reply to a post.
      Author's profile photo Matthias Heiler
      Matthias Heiler

      Holger,

      is there a simple way to copy an API?

      I tried to export and import an API. At import, after selecting the corresponding (exported) zip file, it says API already exists. So what am I missing to get an API copied? Instead of starting from scratch I could take an existing one and adjust it to my requirements?

      BR
      Matthias

      Author's profile photo Elijah Martinez
      Elijah Martinez

      Hi Matthias,

      When you export an API, you are saving all the relevant data including the name and path for that API. This is relevant as the standard use of export/import is across API Management systems (say for example when moving an API from Dev -> Test landscape).

      Currently there is no "Clone" feature, so you will have to manually edit the API details before you import it back into the system.

      After you export the API, open the created zipfile (e.g. for "API" it will generate "API.zip") with your favorite zip-handler.

      Fortunately, due to the way the API Proxies are structured, you will not need to edit too many items or fields, unfortunately, you will need to dig through the XML.

      The Folder will be "APIProxy" - Under that will be a root XML file describing the API, with name like "API.xml" from example above. Edit this file, and change the value for the name,  and title, e.g. change <name>API</name> to <name>API-2</name>, and <title>API</title> to <title>API-2</title>, then save and close.

      Next you will need to enter folder "APIProxyEndPoint" and edit "default.xml". In here you need to locate and change the base path, e.g. <base_path>/p#trial/API</base_path> to <base_path>/p#trial/API-2</base_path>

      With just those minor edits, if you keep the zip file structure the same, you should be able to import your API proxy back into the API Management platform, under the new name/title/base path and retain all your other work such as Policies and scripts, assuming those were left without specific references to a static path/name.

      This can also be done for more advanced modifications to an API Proxy if desired, though obviously it is more difficult and error-prone this way.

      I hope that helps answer your question.

      Regards,

      Elijah

      Author's profile photo Matthias Heiler
      Matthias Heiler

      Hi Elijah,

      sound not too complicated. I'll give it a try. I'm rather sure it will work.

      BR and tx for the  quick response

      Matthias

      Author's profile photo Matthias Heiler
      Matthias Heiler

      Hi Elijah,

      yes it worked out perfect. And that two little tiny changes are not worth to mention. Little effort great result.

      Tx a lot.

      Matthias

      Author's profile photo Sebastian Seiler
      Sebastian Seiler

      Hi Matthias Heiler & Elijah Martinez ,

      according to the blog author this mechanism should be handled dynamically:

      In future blogs we will go in more detail and talk about some other things you can do with the JavaScript policy. We could for example make this script more dynamic so that it first retrieves the target URl and uses the API Proxy name — so that you do not have to hardcode this information.

      In order to build the API Proxy URL we can use virtualhost.aliases and proxy.basepath. However, we're currently struggling in retrieving the virtual host of the Cloud Connector destination. Right now we only can access OPProxy URL via proxy.url.

      Do you know, which attribute delivers this? In the Variable References we couldn't find any helpful attributes.

      Best regards,
      Sebastian

      Author's profile photo Elijah Martinez
      Elijah Martinez

      Hi Sebastian,

      I believe it is not possible to get access to Destinations within BTP from API Management, this is true for cloud connector as well as other destinations. This is one of the reasons for the OPProxy workaround, as a native BTP endpoint for API Management. Dynamic Target URI would be for Cloud API endpoints only. However the difference would be that the URI for multiple cloud systems would vary while the URI for cloud connector would or should be fairly static.

      I believe the intention of Author was to templatize the URL masking policy, so that you can apply it quickly and easily to many API proxies. Here it would make sense to have a Cloud masking template, and an OnPrem masking template, based on whether you're proxying Cloud or OnPrem.

      Hope this makes sense!

      Regards,
      Elijah

      Author's profile photo Sebastian Seiler
      Sebastian Seiler

      Hi Elijah Martinez,

      if the virtual target host is not accessable, the only helpful value I can think of is the host of the configured API Provider the API proxy is targeting to. With this, we would be able to do a dynamic masking.

      Any hints, how to retrieve this? The variable reference doesn‘t list anything like this.

      Best regards,
      Sebastian