
- SAP Community
- Products and Technology
- Technology
- Technology Blogs by SAP
- Use SAP Web IDE Templates for Rapid Fiori App Deve...
Technology Blogs by SAP
Learn how to extend and personalize SAP applications. Follow the SAP technology blog for insights into SAP BTP, ABAP, SAP Analytics Cloud, SAP HANA, and more.
Turn on suggestions
Auto-suggest helps you quickly narrow down your search results by suggesting possible matches as you type.
Showing results for
Employee
Options
- Subscribe to RSS Feed
- Mark as New
- Mark as Read
- Bookmark
- Subscribe
- Printer Friendly Page
- Report Inappropriate Content
02-03-2016
7:08 AM
One of the unique features of SAP Web IDE is its collection of project templates. Sure, any IDE has project templates which allow you to generate pre-defined projects as a starting point. But, SAP Web IDE project templates are a bit different and allow you to achieve a lot more, using the same concept. You can even create your own templates if needed.
In this blog post, I would like to introduce you to each one of the different templates SAP Web IDE has to offer.
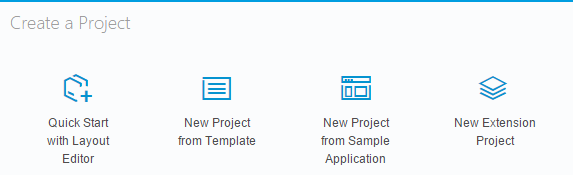
There are four main entry points to use the templates. All of them are accessible via the Welcome Page or the menu entry File>New.
Welcome Page:
File>New:

Project from Template
This is the most used entry point. These templates generate full-blown SAP Fiori applications based on the OData service you select. You can customize the binding of the data fields from the service to the UI controls before generating the application. The selected service should be compliant with OData version 2.0.
There are also additional templates such as the SAPUI5 Application (an empty SAPUI5 project) and even SAP Web IDE plugin project.
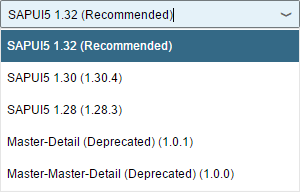
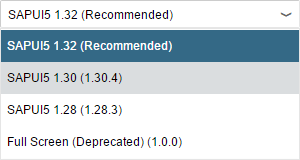
Note that in some of the templates there are multiple versions available. These templates have an Available Versions drop down list for selecting the version you need. By default, the recommended version is selected. More information about the steps required to create a project from a template is available here.
Project from Sample Application
You can create a project based on a collection of Fiori sample applications, developed using Fiori and SAPUI5 best practices. These apps use mock data at runtime so they work out-of-the-box without an existing OData service and do not require any further customization. It’s recommended to use these sample applications to learn the best practices and guidelines of a Fiori application. You would need to read and agree to the license agreement displayed on the Confirmation wizard step.
Quick Start with Layout Editor
Want to quickly use the Layout Editor for a new project or just for testing? This entry point creates an empty Fiori project with a single view (already bound to mock data) and automatically opens the Layout Editor for editing this view. No further customization is needed. More information can be found here.
Extension Project
This template allows you to create your own extension of an existing Fiori application and include any customization you might want to add. You can extend applications hosted on SAP ABAP UI5 Repository, SAP HANA Cloud Platform or even your SAP Web IDE workspace. Once generated, you can use the Extensibility Pane to extend the application.
In this post, I will share with you details for the templates available in the Project from Template entry point (except for the Empty Plugin template which probably belongs to another blog post).
SAP Fiori Master-Detail Application
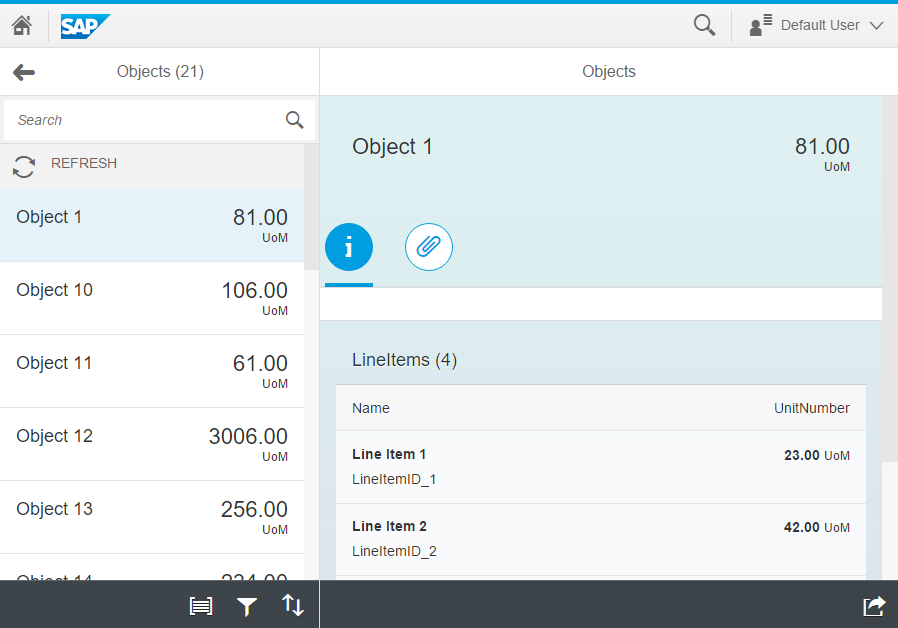
Previously called SAPUI5 Master-Detail Application. This is a full-blown project template for the split-screen layout application pattern based on Fiori guidelines and best practices. A working example of such an application can be found on SAPUI5 demo apps page.
On the left pane, you get a list of items. When you select an item from this list, its details are displayed on the right pane. There, you can also trigger related actions and review additional related items, if they exist.
There are several versions available for this template. If you want to work with older SAPUI5 versions, select the appropriate version from the Available Versions drop down list. The last two versions are deprecated. They work with SAPUI5 1.26 and are delivered for backwards compatibility (they were previously available as separate templates). If you deploy your apps to SAP HANA Cloud Platform, most of the time you will be using the latest version (which is the recommended one).
After selecting the template, move on to the next wizard step where you will enter a name for your project.
Data Connection Step
The Data Connection step is common to all templates which require an OData service and allows you to customize the binding of data fields to the UI controls on the next step.

You have 4 options:
- Service Catalog
For OData services exposed via the SAP Gateway service catalog. Each system is defined by your account administrator as an SAP HANA Cloud Platform destination. You can search for services and select the one you would like to use. - Workspace
You can use an existing metadata.xml file (metadata file of an OData service) from your SAP Web IDE workspace. You don’t need a real service connection in order to generate the application but you would need to work with mock data when running the application (or define a real service URL). - File System
Instead of selecting the metadata.xml from your workspace (see Workspace section above), you can upload an existing metadata.xml from your file system to SAP Web IDE. - Service URL
You can type in the URL to your OData service (the system should be defined by the administrator of your account as an SAP HANA Cloud Platform destination).
Template Customization Step
The Template Customization step is common to all templates which allow additional customization before generation, including data binding for the OData service. Some fields are required and some are optional. In order to understand the customization options, click on the thumbnail on the right to enlarge the sample application screenshot.
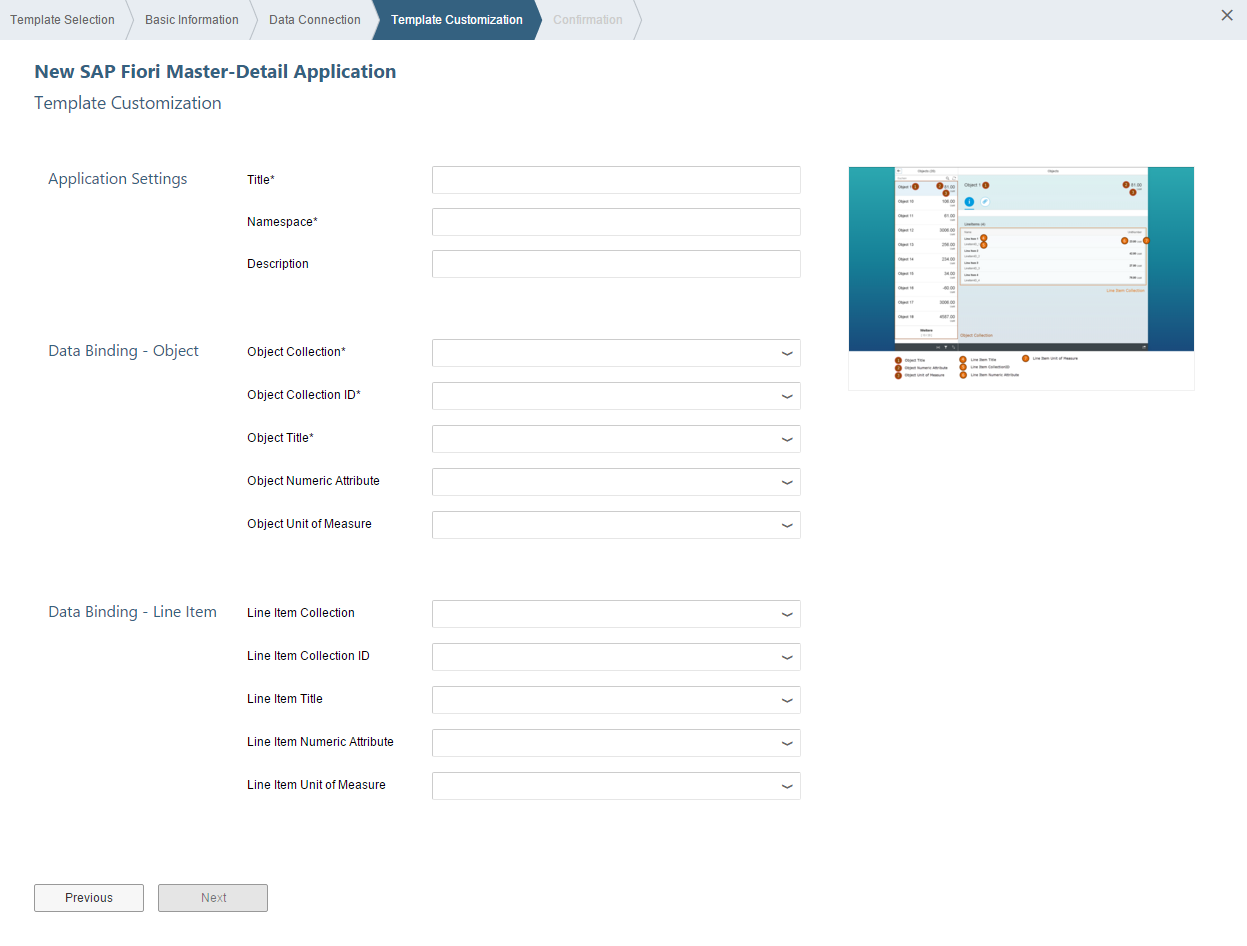
When selecting the data binding values, the options provided are based on your previous selections. For example, if you selected FlightCollection as the Object Collection, you will only get fields from Flight Collection for the Object Collection ID, Object Title etc.
More detailed information of the template and its generated code can be found here.
CRUD Master-Detail Application
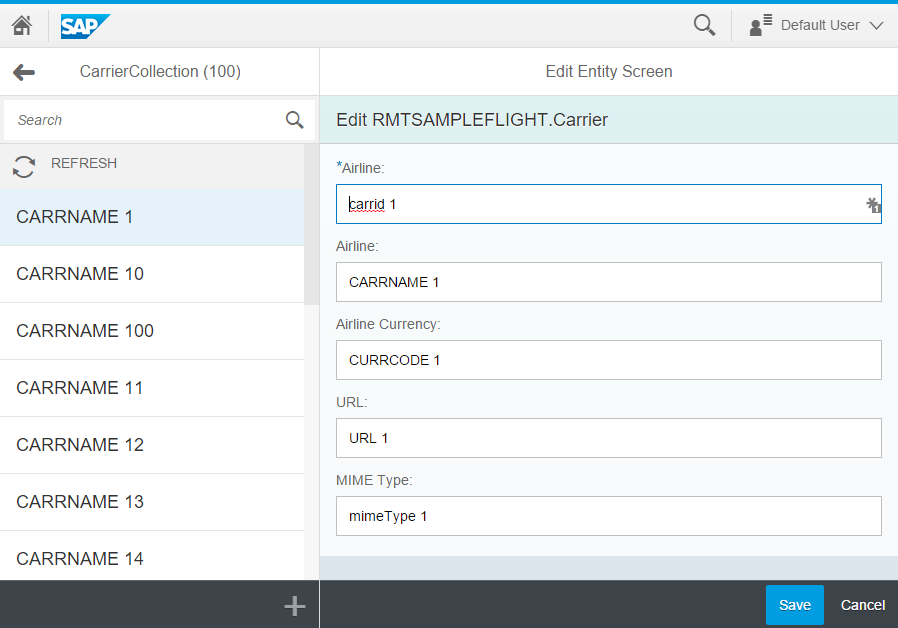
This template is based on the SAP Fiori Master-Detail Application template (see above) and adds create/update/delete capabilities to the generated application (if supported by the selected OData service). The applications contains an Add button, Edit form (to create or update an item), Save, and Delete buttons.
The generated form includes client-side input validation and formatting based on the metadata of the OData service (for example, type check, length, mandatory fields etc.). You can freely modify the form based on your requirements.
For more information about this template, refer to SAP Fiori Master-Detail Application template section above.
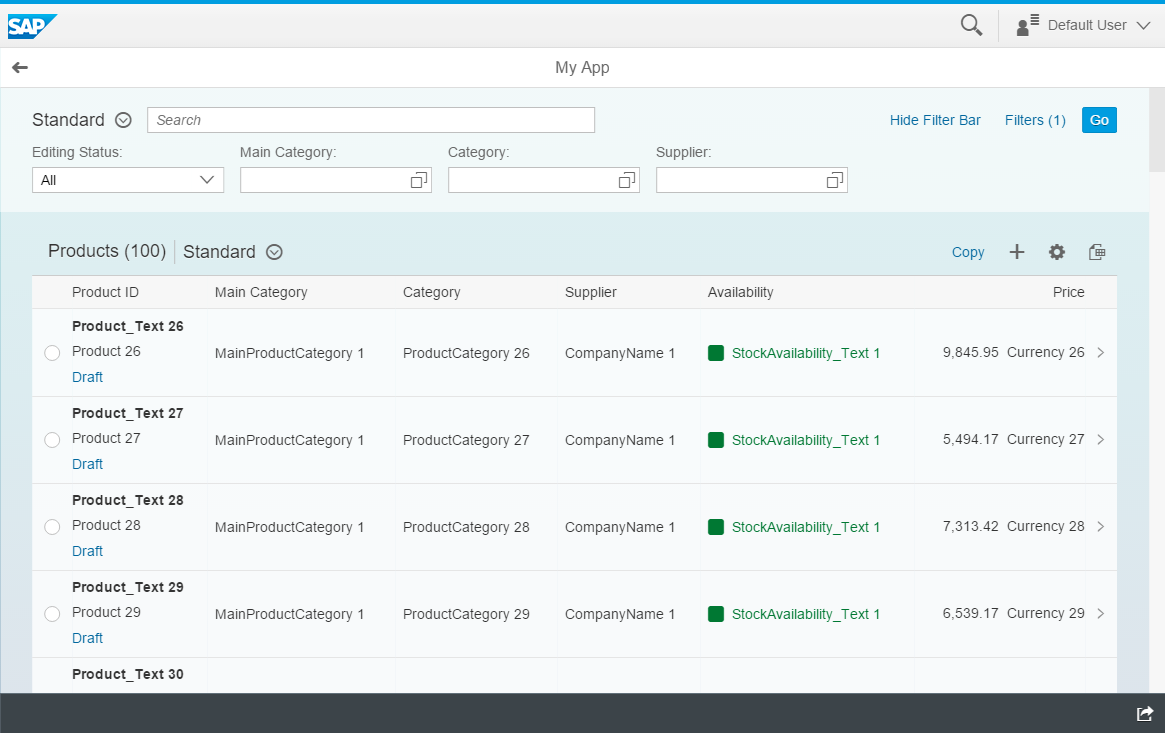
SAP Fiori Worklist Application
Previously called SAPUI5 Worklist Application. This is a full-blown project template for the worklist pattern based on Fiori guidelines and best practices. A working example of such an application can be found on the SAPUI5 demo apps page.
The application displays a list of items to be processed by the user and usually involves reviewing details of a list item and taking action.
There are several versions available for this template. If you want to work with older versions of SAPUI5, select the appropriate version in the Available Versions drop down list. The last version displayed has been deprecated. It works with SAPUI5 1.26 and is delivered for backwards compatibility (it was previously available as a separate template). If you deploy your apps to SAP HANA Cloud Platform, most of the time you will be using the latest version (which is the recommended one).
The steps required to create an application from this template are similar to the other templates described above.
More detailed information of the template and its generated code can be found here.
Smart Template Application
This is a unique template. It’s based on a new paradigm by SAPUI5 where most of the logic and UI patterns are already defined by SAPUI5 Smart Template components. The application code contains a minimal set of files for configuration and definition of the components needed, including the OData service. These components act as runtime templates which get rendered (generated) when the app is running. The input at runtime is the OData service metadata, its annotations, and the data itself.
You won’t be able to use this template without proper metadata and annotations.
This project template uses 2 types of Smart Template views: List Report and Object Page. They are both based on the Fiori Design guidelines. The generated application will use the List Report as the first page and the Object Page as the second. Based on the OData service being used, the second page might contain also a navigation to an additional Object Page.

The steps required to create an application from this template are similar to the other templates described above except from an additional Annotation Selection step. This steps shows the annotations which exist for the selected service. You can add additional annotations files and change the order they will be loaded.
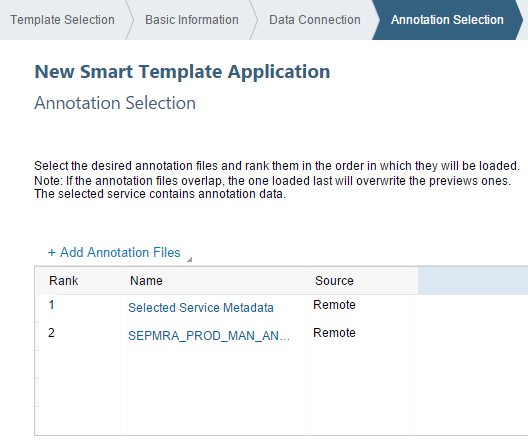
Note that the Template Customization step only asks for an OData collection and OData navigation attribute as most of the customization is derived from the annotations.
More detailed information of the template and its generated code can be found here.
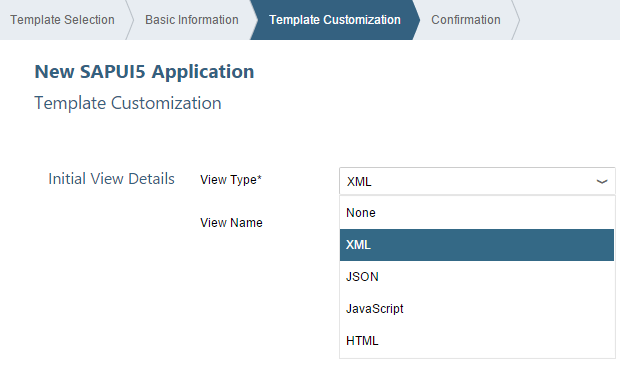
SAPUI5 Application
This is a simple template which allows you to create a new SAPUI5 project with an optional first view. The generated application doesn’t have any data binding so you don’t need an OData service or a metadata.xml file for generation.
You can select any type of SAPUI5 view. Note that you will be able to use the Layout Editor only for XML views.
Master-Detail with Photos
This master-detail template is intended for a very specific scenario and probably won’t be suitable for other scenarios. In addition, the OData service must expose a specific schema which is required by the application. The result is a hybrid mobile application with offline support.
For more advanced development of hybrid mobile applications using SAP Web IDE, it is highly recommended to enable the external Hybrid App Toolkit plugin and use it instead.
Using SAP Mobile Secure, you can package the project as a native application and deploy it to mobile devices.
More information about hybrid application can be found here.
This completes the list of templates I wanted to show you!
Note that activating optional plugins can add additional templates to your arsenal. Make sure you check them as well. I hope you now have more understanding of the different project templates SAP Web IDE has to offer. Good luck with your next Fiori application development!
Feel free to comment and ask questions.
- SAP Managed Tags:
- SAPUI5,
- SAP Enterprise Portal,
- Mobile,
- User Interface
29 Comments
You must be a registered user to add a comment. If you've already registered, sign in. Otherwise, register and sign in.
Labels in this area
-
ABAP CDS Views - CDC (Change Data Capture)
2 -
AI
1 -
Analyze Workload Data
1 -
BTP
1 -
Business and IT Integration
2 -
Business application stu
1 -
Business Technology Platform
1 -
Business Trends
1,658 -
Business Trends
93 -
CAP
1 -
cf
1 -
Cloud Foundry
1 -
Confluent
1 -
Customer COE Basics and Fundamentals
1 -
Customer COE Latest and Greatest
3 -
Customer Data Browser app
1 -
Data Analysis Tool
1 -
data migration
1 -
data transfer
1 -
Datasphere
2 -
Event Information
1,400 -
Event Information
66 -
Expert
1 -
Expert Insights
177 -
Expert Insights
299 -
General
1 -
Google cloud
1 -
Google Next'24
1 -
Kafka
1 -
Life at SAP
780 -
Life at SAP
13 -
Migrate your Data App
1 -
MTA
1 -
Network Performance Analysis
1 -
NodeJS
1 -
PDF
1 -
POC
1 -
Product Updates
4,577 -
Product Updates
344 -
Replication Flow
1 -
RisewithSAP
1 -
SAP BTP
1 -
SAP BTP Cloud Foundry
1 -
SAP Cloud ALM
1 -
SAP Cloud Application Programming Model
1 -
SAP Datasphere
2 -
SAP S4HANA Cloud
1 -
SAP S4HANA Migration Cockpit
1 -
Technology Updates
6,873 -
Technology Updates
422 -
Workload Fluctuations
1
Related Content
- Recommended approach for Fiori Adapt UI in S/4H On-Premise system (Customizing client) with no data in Technology Q&A
- What’s new in Mobile development kit client 24.4 in Technology Blogs by SAP
- Embracing TypeScript in SAPUI5 Development in Technology Blogs by Members
- Accelerate Business Process Development with SAP Build Process Automation Pre-Built Content in Technology Blogs by SAP
- ABAP Cloud Developer Trial 2022 Available Now in Technology Blogs by SAP
Top kudoed authors
| User | Count |
|---|---|
| 40 | |
| 25 | |
| 17 | |
| 13 | |
| 8 | |
| 7 | |
| 7 | |
| 7 | |
| 6 | |
| 6 |