Hi,
in this blog, I would like to share some experience on how easily you can extend a view of an application with the WYSIWYG editor of SAP Web IDE.
Here is what I did to extend the Approve Purchase Orders app in my SAP Fiori demo cloud edition account:
1. In SAP Web IDE, I first went to Extensibility Pane and decided to redesign the Details view on the right side of the app. So, I selected this view (S3) in the Outline panel and extended it by replacing it with a copy of the original view, so I did not have to start from scratch.

2. I went back to Code Editor and there, right-clicked my new extended view (S3Custom.view.xml) and selected Open with Layout Editor.
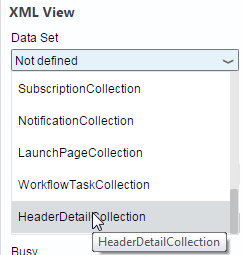
3. First of all, I had to connect the new xml view to the right data set, so I could later bind my controls on the screen to real data from the backend system. So in the properies of the xml view I selected data set HeaderDetailCollection.
4. As first change to my view, I decided to created a new tab and added the items list to that tab. This was quite easy. From the controls panel on the right, I chose the right control (Icon Tab Filter from the Container section) and dragged and dropped it to between the information and the notifications tab.

I changed its colors to blue like the others by setting the icon color to default, the title to items and of course I wanted to display the number of items next to the icon, so I used the link icon to bind the property Count to {NumberofItems}. Then I had to fill my new tab with content which I did by just dragging the item list on the bottom of the page to the white area for the content of your new tab.

Here it is important to select the complete table. You can do that by clicking several times into the list, first you just select a list element, but each time you click in the same location, the selection changes one level up in the hierarchy of the xml. In the header of the properties panel and in the outline panel, you can always see which element is currently selected.
5. As a second change, I decided to change the header area and replace the name of the supplier with the name of the person who created the purchase order. Instead, I wanted to add the name of the supplier to the list on the information tab. So, I just clicked on {Supplier Name} to select the Object Header and set Title to {CreatedbyName} in its properties. Then I right-click the second, smaller {CreatedbyName} entry and select Delete, as you do not need this entry twice.

I switched to the first tab to add the supplier name to the list. There, I just clicked {PONumber} in the list twice to select the complete Form Element. Then right-clicked my selection and chose Copy. Finally, I right-clicked my selection again and chose Paste After. Now I just had to adapt the properties of the new label {i18n…} and text. You can replace the label with an expression like before, so your label can be displayed in different languages, or just with a plain text. For finding the right expression, you need to take a look at the file i18n > i18n.properties of the original Approve Purchase Orders application.
I also tried using the Outline for adding the new list item - by either copying it there (which worked fine as well) or creating it "manually" using the + sign. This second option turned out to be a bit lengthy and complicated, so I would recommend using copy-paste wherever possible.
6. Then I took a look at my new app in the preview. If you DO NOT see your changes, don't worry, but just think about deleting the browser cache. If you do not see any purchase orders, it seems that all of them have just been approved or rejected by other demo users. So, either wait or run your preview with mock data.
7. Now I just deplayed my application to SAP HANA Cloud Platform and registered it to SAP Fiori launchpad.
And that's it: Now I can launch it from my launchpad.

Have fun exploring it,
Sibylle
