Does your company use Concur to manage its travel and expenses? Are you a developer who is eager to make a cool and useful application for your company so that your colleagues can see their expenses and travel itineraries? If the answer to both these questions is yes, then stick to the end of the post to learn not only how you can almost do that -- yeah, it's only the basics, but also how you can use SAP HANA Cloud Platform’s Services.
In the end...
You'll have a project of one simple servlet which will be deployed on the SAP HANA Cloud Platform. Its purpose is to serve you the content - in this case, a user's expenses. How do you get these expenses? SAP HANA Cloud Connectivity Service (Internet Connectivity) and the Concur API come to the rescue.
Using the SAP HANA Cloud Platform
Before you start, you need:
- sign up for an SAP HANA Cloud Platform account
- download the Eclipse IDE for Java EE Developers
- set up the SAP HANA Tools for Eclipse.
You can find more information in the SAP HANA Cloud Documentation Center.
Extending Concur
Before reading the rest of the blog, we recommend you to examine the Extending Concur guide to get more details and become familiar with the process flow.
Importing and running the application
1. Import the application
You can get the source code from the Github repository After cloning the project, open Eclipse and import it as an existing Maven project. Choose File → Import, and then Maven → Existing Maven Projects.
Create a new server - either local or on the Cloud. Make sure you select the Java Web Tomcat 7 as a runtime environment.
2. Run the application
Well, not yet... Before you get to that you have to configure a thing or two.
For both local and Cloud scenario first you have to create two destinations for consuming the Connectivity Service. Double click on the server, switch to the Connectivity tab and create two destinations named concur-api and concur-auth respectively.
The concur-api destination is used to get the information you need, such as travel itineraries, trips, expenses, etc. It should look like this:
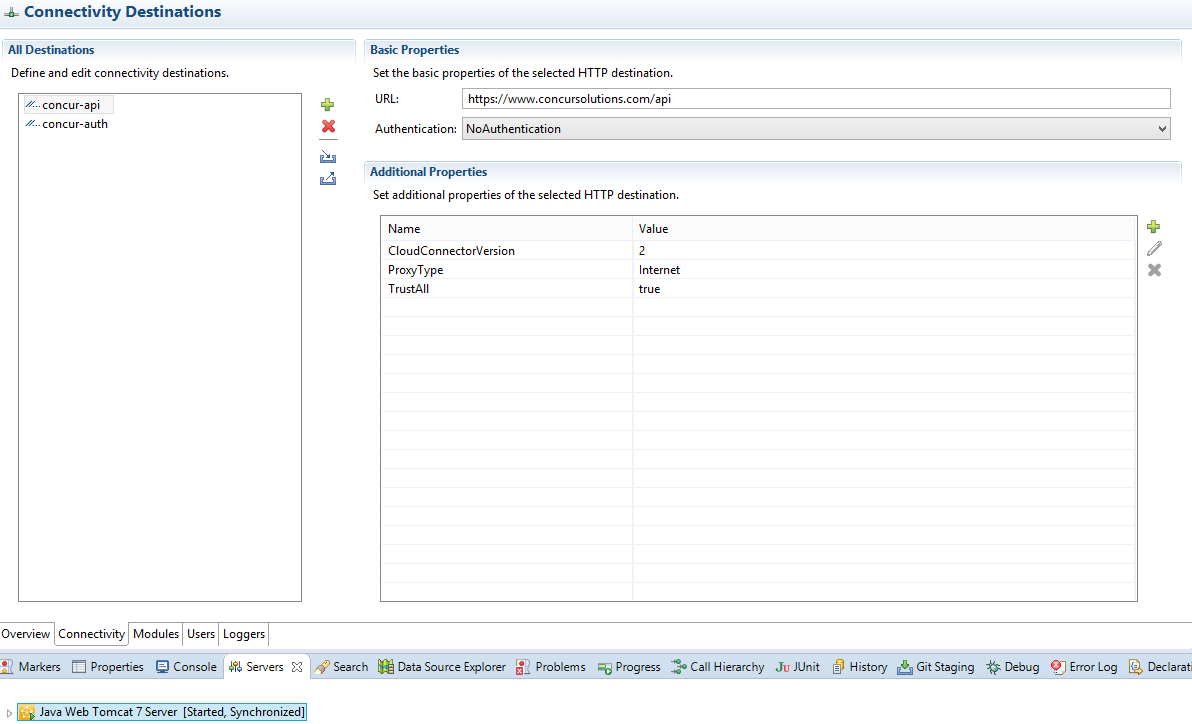
The concur-auth destination is the one that upon authentication gives you an access token which you use for authorization when accessing the API. It should look like this:

Register a partner application in Concur to obtain a Key and Secret to use with your extension application and enable the Concur Web Service APIs that this application will interface with. You can register a sandbox company to test sample applications. The response you get after authenticating looks like this:
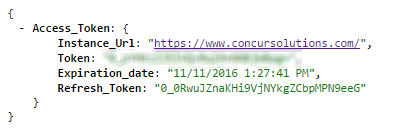
This token is then inserted as an Authorization header when accessing the Concur API.
3. Run the application for real
Run the application (finally), right-click on the project and choose Run As → Run on Server and select the previously created server.
Note: If the option Run on Server is not in the menu then right-click on the project, choose Properties → Project Facets and make sure the Dynamic Web Module is checked and its version is 3.0.
If you did everything right, open your browser and head over to the application URL (e.g. http://localhost:8080/com.sap.hana.cloud.samples.concur.expenses/expenses/). You'll see a json-formatted response containing the expenses of the people in your company.

Now you've got the basics on how to get user's expenses. If you want a real life example on how you can put these new skills to use, check this out - a map with circles on the places where an expense has been made, each circle in different color depending on the amount of money spent.
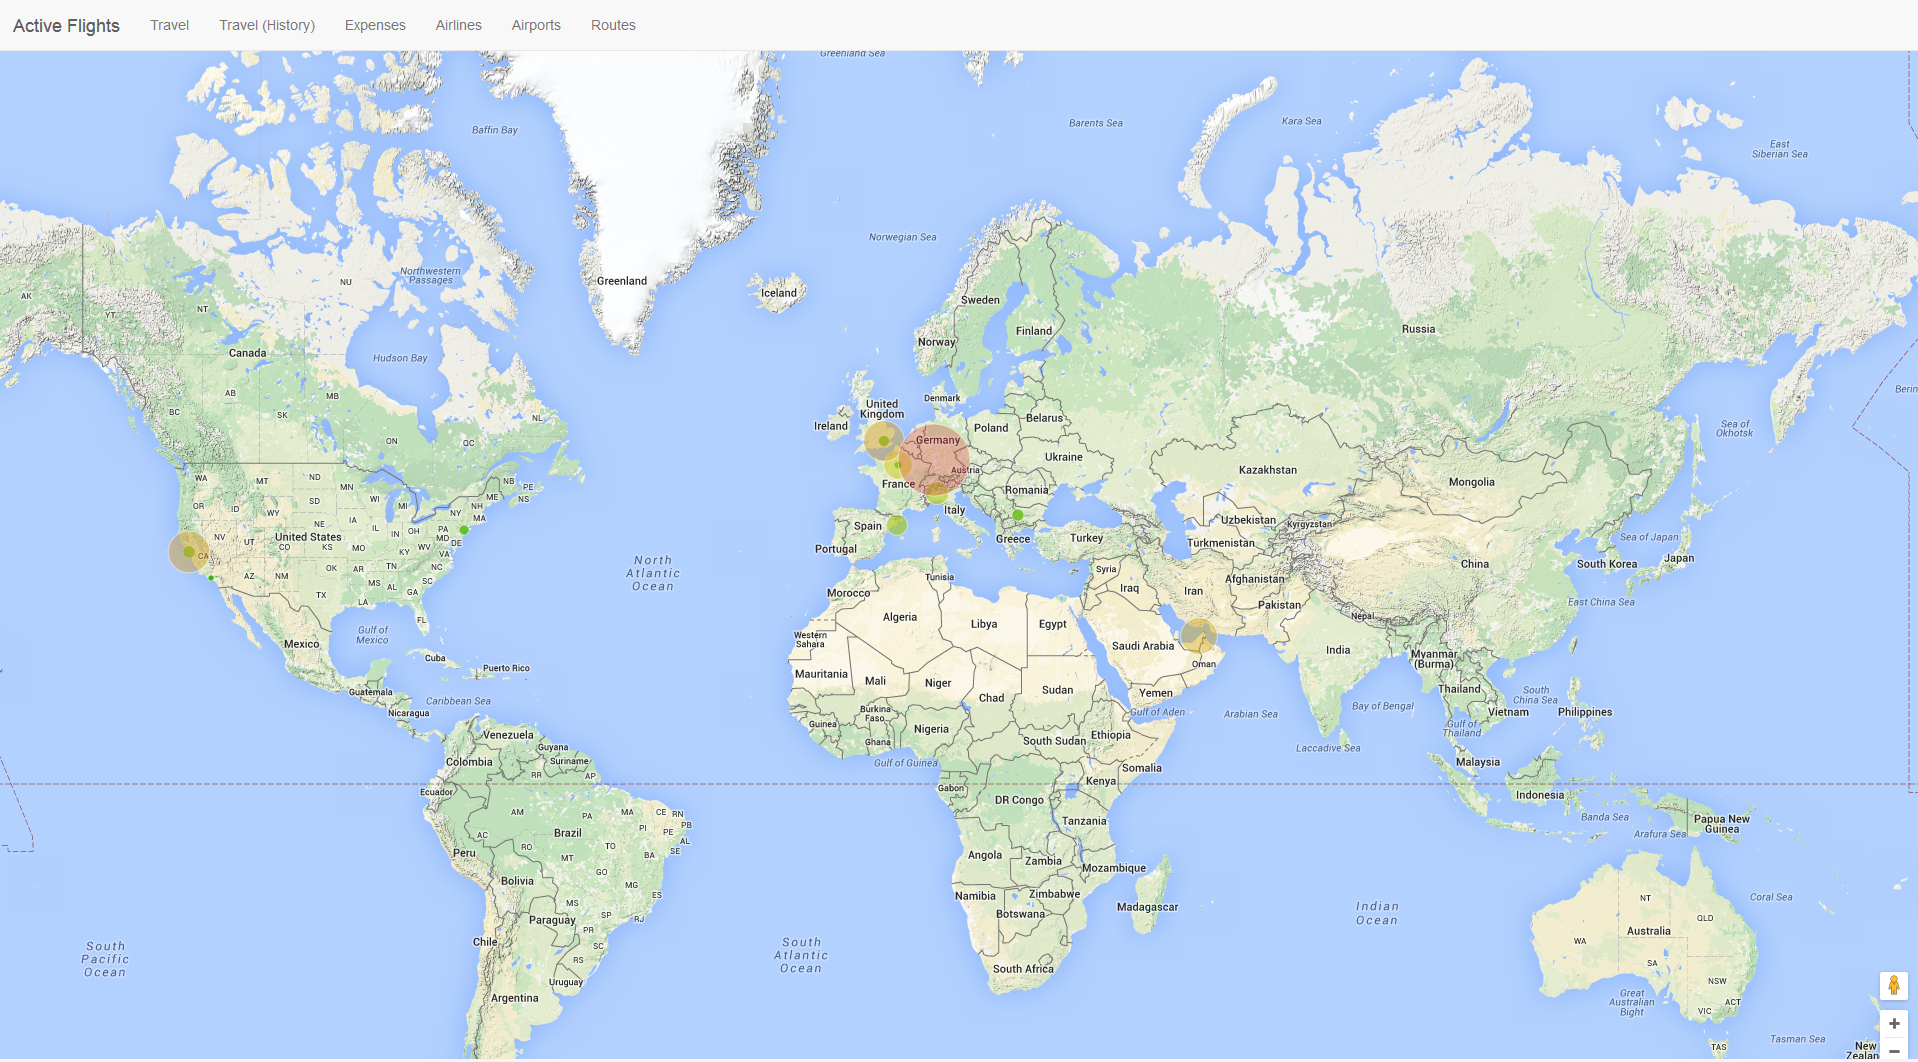
And to do that you don't even need to install anything! The example above is powered by Dirigible. Go and try it for yourself - it kicks a**!
So now that you know how to get a user's expenses you might want to see how to get one's travel itineraries. It's pretty straight forward - just go to this Github Repo and follow the same steps.
